This site is supported by our readers. We may earn a commission, at no cost to you, if you purchase through links. This content is for general informational and educational purposes only and is not a substitute for professional medical, dermatological, or nutritional advice.
Your flat iron doesn’t ruin your hair in one pass. The damage builds quietly, one hot session after another, until your ends feel like straw and your curls stop bouncing back.
Heat on dry hair cracks the outer cuticle, and every repeat makes that crack worse. That’s why breakage can seem to show up overnight when it’s really been weeks in the making.
Here’s the good news: you can learn how to prevent heat damage without giving up your favorite styles. A few small changes to your prep, products, and temperature settings protect every strand, starting with how you get your hair ready.
Table Of Contents
- Key Takeaways
- How Can You Prevent Hair Heat Damage?
- Prepare Your Hair Before Heat Styling
- Choose and Apply Heat Protectant Correctly
- Match Styling Tools and Temperatures to Hair
- Use Styling Techniques That Minimize Heat Damage
- Prevent Heat Damage Between Styling Sessions
- Frequently Asked Questions (FAQs)
- Conclusion
Key Takeaways
- Heat damage builds up slowly over weeks of hot styling, so protect your hair every time with a light mist of heat protectant on hair that’s about 90% dry, and style only two or three times a week.
- Use the lowest temperature that works for your hair: 250°F or below for fine or damaged hair, 300°F to 350°F for medium hair, and no higher than 300°F for color-treated hair.
- Work in small sections, keep the tool gliding in one smooth pull, and let each section cool completely before you touch it.
- Give your strands recovery time between sessions with heatless styles, a weekly deep conditioning mask, a trim every 8 to 12 weeks, and a satin bonnet or silk pillowcase at night.
How Can You Prevent Hair Heat Damage?
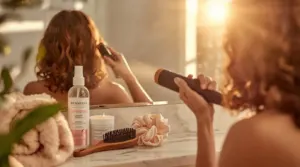
Why does heat damage sneak up on so many of us? Because it builds slowly. One flat iron pass won’t wreck your hair, but weeks of hot tools add up, and you notice it as dullness, snags, and split ends.
Once the damage has built up, this step-by-step guide to repairing damaged hair can help you restore softness and shine over time.
I learned this the hard way after cranking my curling iron to its top setting every morning. My ends turned rough within a month.
The good news is that you control most of the damage. Use a heat protectant every time, keep each temperature setting matched to your hair, and style two or three times a week. Add heat-free styling days and daily care for hair moisture retention, and you’ll get hair breakage prevention.
Heat on already dry hair can crack the cuticle, which is why heat protectant barriers that reduce moisture loss matter so much, especially on coiled textures where natural oils struggle to reach the ends.
Prepare Your Hair Before Heat Styling

Good results start before the hot tool even warms up. Think of it as prep work.
Wash with a sulfate-free shampoo to clear away buildup and oils that can bake onto your strands. Follow with a damage-fighting conditioner, and add a deep conditioning treatment once a week. A bond-building treatment helps repair past damage too.
Next, get your hair dry. Damp strands turn moisture into steam, and that stresses the cuticle. Blot gently with a microfiber towel, then air dry until you’re about 90% dry.
Detangle gently with a wide-tooth comb, then clip hair into small sections. Smaller sections mean less time under heat, and you’ll get a smoother, more even finish every time.
Choose and Apply Heat Protectant Correctly
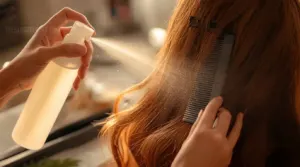
Your hair is about 90% dry and sectioned, so it’s ready for protection. I once skipped it in a rush and heard a faint sizzle. Never again.
Pick a formula for your hair type, then follow these steps:
If you’re unsure where to start, this guide to hair oils for damaged hair repair can help you compare formulas and find the one that suits your strands.
- Choose a lightweight spray for fine hair, a shea butter cream for curls, or an antioxidant formula for color-treated hair.
- Spray from 6 to 8 inches away, one section at a time.
- Comb the product through from roots to ends.
- Wait 30 to 90 seconds so it can settle.
- Use only a light mist, since extra won’t protect you better.
No product protects hair above 450°F (230°C), so don’t count on it to excuse hot settings.
Match Styling Tools and Temperatures to Hair

Heat damage often comes down to one thing: using more heat than your hair needs. Two things put you in control, so you’ll look at the right temperature for your hair first. Then you’ll see which tool features help you hold that number steady.
On days you skip styling altogether, a healthy hair treatment plan can help repair existing damage while your strands recover from heat.
Temperature Guidelines by Hair Condition
Hotter doesn’t mean better. Your hair needs the lowest heat that works, not the highest your tool offers.
Your hair doesn’t need the most heat your styling tool can deliver, only the gentlest setting that still gets the job done
Match the setting to your hair type: fine, thin, or damaged hair stays at 250°F or below, medium hair works with 300°F to 350°F, and thick, coarse hair starts at 350°F. Color-treated hair shouldn’t pass 300°F. Always add heat protectant first, every time.
Tool Features That Improve Heat Control
I always check for digital temperature control first, because it lets you pick an exact heat instead of guessing. Look for a tool that shows real-time readings and adjusts in small steps.
Ceramic plates and tourmaline plates spread heat evenly, so you avoid hot spots. Flexing plates help too, since they adapt to your hair’s thickness. Choose lower heat settings whenever the tool allows.
Use Styling Techniques That Minimize Heat Damage
I always tell friends to start with smaller sections, because that’s where good technique begins. Clip up most of your hair and work with a slice about an inch wide. Thin sections heat through quickly, so you won’t need extra passes.
Keep the tool moving. Glide it down the strand in one smooth pull instead of clamping and pausing. I once held a curling iron still while answering a text, and the scorched smell taught me fast.
Let each section cool completely before you touch it or brush it out. That cooling time sets the style and gives the strand a rest. Then move on to the next section. This protects your hair health.
Prevent Heat Damage Between Styling Sessions

Your hair doesn’t stop needing care when the hot tools are off. What you do in the days between styling sessions decides how well your strands bounce back. Here are the two areas I’d focus on, starting with heatless styles and moving on to your daily care habits.
Heatless Styles and Longer-Lasting Hairstyles
Your hot tools need a day off, and your hair will thank you for it.
I like to give mine a break by switching to heatless curls. Wrap damp hair around a ribbon rod before bed, then leave it for at least six hours.
Try these easy swaps:
- Twisted knot buns
- Braided low ponies
- Space buns
- Braid-outs
- French twist ponytails
You’ll protect your hair and keep your style going longer.
Conditioning, Trims, and Nighttime Protection
Condition weekly, trim regularly, and protect your hair every night. That’s the routine that keeps heat damage from piling up.
Use a deep mask once a week to restore moisture. Book a trim every 8 to 12 weeks so split ends can’t travel upward.
Before bed, smooth a little oil through your ends. Then slip on a satin bonnet or sleep on silk.
Frequently Asked Questions (FAQs)
How to repair heat damaged hair?
Think of damaged hair as a frayed rope: you can’t re-weave it, but you can strengthen the strands. Trim split ends first, then use a bond-building treatment weekly, add a protein treatment, and follow with moisture.
How do you spot early signs of heat damage?
Check your strands for dry, rough texture and extra tangles. Look for short broken hairs, split ends, and frizz where you style most. Curls that loosen or look uneven are another clue. Changes that stick around matter most.
How long does heat damage take to occur?
Hair cuticles can start lifting after just six hours at 60°C, and damage grows with longer exposure. Heat damage builds up over time, so one session won’t ruin your hair, but repeated passes will.
Does hair porosity influence heat damage susceptibility?
Yes, it does. High porosity hair has raised cuticles that let heat slip in fast, so it burns out quicker. Low porosity hair holds up better. Know your type and set your tools accordingly.
Does heat damage affect hair growth or thickness?
Picture a rope fraying halfway down while the anchor stays firm. That’s heat damage. It doesn’t touch your follicle or slow growth. It breaks the strand, so hair looks shorter and thinner even though it grows normally.
Does hard water make heat damage worse?
Yes, it does. Hard water leaves a mineral film on your strands, and that film heats unevenly under a flat iron. Hot spots form even on moderate settings, and your heat protectant can’t coat evenly.
Conclusion
Hair starts to weaken at around 300°F, yet many flat irons climb past 400°F. That gap is where most damage happens, and it’s one you control.
Knowing how to prevent heat damage comes down to a few habits. Start with clean, fully dry hair. Apply protectant evenly. Lower your dial and keep the tool moving. Give your strands a break between sessions.
Do that, and your hair stays strong and shiny. Keep it that way.