This site is supported by our readers. We may earn a commission, at no cost to you, if you purchase through links. This content is for general informational and educational purposes only and is not a substitute for professional medical, dermatological, or nutritional advice.
A dull film on the blade, a faint tang of rust near the pivot: that’s what happens when a straight razor gets wiped down instead of properly cleaned. Shaving cream residue traps moisture, and moisture invites corrosion, even on high-carbon steel that’s held an edge for decades. Barbers know this. It’s why every proper shave starts and ends with care, not just a swipe of a towel.
Learning how to clean a straight razor the right way protects your investment and your client’s skin. Get the process down, from rinse to strop, and you’ll keep that edge sharp for years.
Table Of Contents
- Key Takeaways
- Prepare Your Straight Razor for Cleaning
- Clean The Straight Razor Blade
- Disinfect The Straight Razor Safely
- Dry The Blade and Handle Completely
- Oil, Store, and Maintain The Razor
- Frequently Asked Questions (FAQs)
- How do I shave my pennis properly?
- How do you maintain a straight razor?
- How do I deep clean my razor?
- How do barbers sanitize straight razors?
- How to clean a straight razor?
- Should you shave a straight razor?
- How often should you clean a straight razor?
- Should you lubricate a straight razor?
- How to clean up a straight razor?
- Do you wash a straight razor?
- Conclusion
Key Takeaways
- Rinse your blade after every shave, wash it weekly with mild soap, and disinfect with 70% isopropyl alcohol for 5-10 minutes to keep bacteria and residue from building up.
- Dry your razor completely, especially around the pivot, since damp carbon steel can start rusting within hours.
- Apply a thin coat of mineral or camellia oil after drying to create a barrier against moisture and oxygen, the two main causes of corrosion.
- Store your razor in a dry, ventilated spot with humidity kept between 40-50%, and strop it daily to keep the edge sharp between honings.
Prepare Your Straight Razor for Cleaning

Before you touch that blade, set the stage right. A few minutes of setup now saves you from rust, cuts, or a ruined edge later. Here’s what you need to get in place first.
Start by checking your blade’s condition, since swapping in a fresh razor blade regularly keeps corrosion and irritation from ever becoming a problem.
Choose a Safe Workspace
A messy counter breeds mistakes, so start smart. Pick a spot with strong workspace lighting, a stable, non-slip surface, and easy water access nearby.
Set up a dedicated hygiene zone, away from busy foot traffic:
- Clear, dry countertop
- Ventilated space near warm water
- Nothing stacked or cluttered
Keep it clean before you begin. A steady station keeps your blade, and your fingers, safer.
Gather Cleaning Supplies
With your station set, gather your gear before touching the blade.
| Supply | Purpose | Notes |
|---|---|---|
| Razor brush, mild soap | Loosen residue | Use hot soapy water |
| Microfiber cloths | Dry without scratching | Keep several on hand |
| 70 isopropyl alcohol | Disinfect blade | Save for later step |
Nitrile gloves and cleaning cloths round out the kit. Organize everything within reach, it saves you scrambling mid-clean.
Protect Your Hands
Before touching the blade, slip on your nitrile gloves. They protect against soap, alcohol, and stray skin debris.
Ditch the rings first, jewelry snags on scales and edges alike. Keep hands positioned away from the bevel, gripping the handle firmly since wet grips slip.
Never touch your face mid-clean. That’s how contamination spreads.
Inspect Blade and Scales
Gloves on, now give the blade a hard look before any water touches it.
- Check the blade edge for nicks or dull patches
- Run a Scale Material Check for cracks near the tang
- Test the Pivot Mechanism Review for smooth rotation
- Confirm Tang Alignment Verification against the handle’s rear edge
- Complete a Blade Exposure Assessment against the safety bar
If you spot dull patches or nicks, a proper razor honing technique can restore the edge before you move on to cleaning.
Catch problems now, and your razor handle stays reliable for years.
A quick monthly check for rust or dull blades pairs perfectly with a gentle, natural beard grooming routine for a soft beard that protects both your tools and your skin.
Clean The Straight Razor Blade
Once your workspace is set and your hands are protected, it’s time for the real work. A clean blade isn’t just about looks, it’s about safety and shave quality. Follow these five steps in order, and you’ll clear every trace of residue without risking the edge.
Rinse Away Shaving Residue
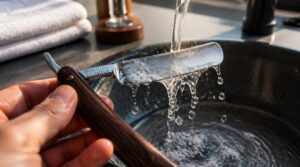
Rinse right after every stroke, don’t let residue dry and set. Hold the blade under warm water, 85-95°F, for 20-30 seconds, angled downward so flow clears debris fast. This washes away hair, cream, and skin cells before they harden.
Keep water moving, keep strokes frequent, and your edge stays cleaner, safer, and ready for soap.
Wash With Mild Soap

Grab a mild dish soap, Dial or Palm Olive work fine, and mix a few drops into 4 ounces of warm water. Keep that 1:10 ratio so the solution stays clear, not cloudy.
Soak your blade 5-10 minutes, never past 30. Skip anything abrasive or scented, it’ll strip the steel or irritate skin.
Brush Around The Pivot
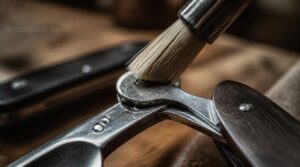
Water hides where you can’t see it, right in the pivot. Grab a soft natural-hair brush, 15-25mm bristles, and work it at a 15-degree angle against the tang.
Circle clockwise, then counter, light pressure, about 50 grams. Do this every shave, right after rinsing, before soap touches the joint.
Remove Stubborn Blade Debris
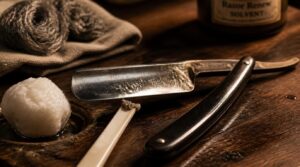
Dried soap and skin oils turn stubborn fast, clinging like glue to steel. Try these razor cleaning tools:
- Plastic scraper for hardened residue
- Cotton ball dipped in solvent, circular motion
- Razor brush bristles for shallow grooves
Solvent soak breaks the bond, then wipe clean. For heavy buildup, fine steel wool works, light pressure only, never scrub the edge itself.
Avoid Touching The Edge
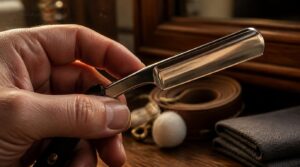
Your fingers are the biggest threat to that edge, not the grime. Handle the blade by the spine only, keeping your grip on the flat surface away from the cutting line.
Your fingers threaten the edge more than grime ever will, so grip the spine and stay clear of the cutting line
Cotton balls, cloths, and brushes go where fingers can’t. This edge contact prevention habit protects you and preserves the steel’s sharpness for years of clean shaves.
Disinfect The Straight Razor Safely

Cleaning gets rid of the visible gunk, but germs are a different fight entirely. Disinfecting your razor takes the right products, timing, and technique to work safely. Here’s exactly what you need to know before you start.
Pairing a clean technique with the right tools matters too—a quality shaving brush for beginners can reduce bacteria transfer compared to hands alone.
Use 70 Percent Isopropyl Alcohol
Why 70 percent instead of full-strength? Because water matters here.
- 70% isopropyl alcohol kills bacteria, fungi, and viruses effectively
- Water content slows evaporation, letting alcohol penetrate microbes fully
- Concentrations above 90% actually lose disinfecting power
- Avoid anything below 60%, it won’t sanitize properly
- Always work in a ventilated area, alcohol is flammable
Skip the 91% bottle. Your blade doesn’t need speed, it needs a thorough kill.
Follow Proper Contact Time
Timing makes or breaks razor disinfection. Full immersion for 5 to 10 minutes kills 90% of bacteria within the first two minutes, but don’t rush it.
Room temp (20-22°C) needs the full window. Below 15°C? Stretch to 12-15 minutes. Warmer solutions around 40°C cut that down to just 3-5 minutes, same kill rate.
Avoid Damaging Handle Materials
Getting the timing right protects the blade, but your razor handle needs its own rules. Alcohol and vinegar ruin wood, horn, or bone in minutes.
Skip harsh chemicals and abrasive cleaners entirely on natural finishes. Instead:
- Wipe the handle with a soft cloth
- Keep alcohol on the blade only
- Watch for UV exposure and humidity swings
Handle material protection starts with restraint, not stronger products.
Rinse Approved Disinfectants
Once your handle’s protected, rinse the blade under room temp water, never hot, which can reactivate leftover chemicals. This applies whether you used rubbing alcohol, hydrogen peroxide, or vinegar.
Rinsing removes residue safely and prevents chemical reactions between disinfectants and steel. Pat dry immediately with microfiber. Skip tea tree oil or lemon as rinse aids, they’re not disinfectants.
Disinfect Without Cross-Contamination
One clean razor, one dedicated container, no exceptions. Split your station into three zones: clean, working, and used, keeping three feet between them.
- Wear fresh gloves per client
- Store disinfected razors in labeled, sealed containers
- Toss disposable blades straight into a sharps container
Never let tools mingle. That’s how cross-contamination sneaks in.
Dry The Blade and Handle Completely
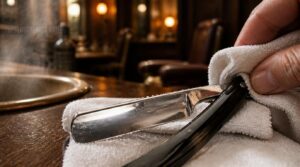
Water and alcohol got the blade clean, but moisture left behind is where trouble starts. A damp razor invites rust faster than you’d think, especially around tight spots like the pivot. Here’s how to dry every part of it properly, step by step.
Pat Dry With Microfiber
Water left behind is rust waiting to happen. Grab a microfiber towel and pat, don’t rub, moving with the edge’s direction.
This lint-free cloth use lifts moisture fast, microfiber holds seven times its weight in liquid, without scratching steel. Gentle surface wiping protects the blade edge while drying stays quick and thorough. Skip cotton rags; they smear instead of absorbing.
Dry Around Pivot Pins
Here’s where most razors go wrong: that pivot cavity hides water cloth can’t reach. Open the razor fully and hit the hinge with compressed air for 10-15 seconds, angled at 45 degrees.
No compressor? A toothpick or microfiber swab works for pivot pin access. Brass pins need gentler handling than stainless steel, so skip harsh scrubbing there.
Air-Dry in Ventilated Space
Once the pivot’s clear, give the blade real airflow, not a damp towel wrap. Stand it upright on a rack, away from walls, and let a low fan speed pull moisture off both sides.
Skip the bathroom. Humidity slows evaporation, so a dry room beats a steamy one. Keep drying until no cool, damp feeling remains near your nose.
Prevent Carbon Steel Rust
Carbon steel rusts fast, sometimes within hours, so treat drying as rust prevention, not just cleanup. Keep humidity below 40%, and toss a desiccant packet in your storage case for backup moisture control.
Once bone dry, apply a rust inhibitor or light oil film immediately. This corrosion protection step matters more for carbon steel than stainless, every single time.
Remove Minor Rust Safely
Spot a faint orange bloom on the spine? Don’t panic, minor surface rust responds well to gentle rust removal.
Dab white vinegar or a citric acid paste on the spot, let it sit briefly, then buff lightly with a soft cloth. These natural rust solutions lift corrosion without scratching hardened steel, protecting your blade edge while restoring shine.
Oil, Store, and Maintain The Razor

Your blade is clean, disinfected, and bone dry. Now it’s time to lock in that work and keep rust from ever showing up. Here’s how you oil, store, and maintain your razor for the long haul.
Apply a Thin Oil Coat
Bare steel rusts fast, so oil goes on the moment the blade is dry. Put 2-3 drops of mineral or camellia oil on a microfiber cloth, then spread it edge to edge in gentle circles. Wipe off the excess, this isn’t a marinade. Let it sit 30 seconds. That thin barrier is your best defense against corrosion between shaves.
Protect Handle and Scales
The blade isn’t the only part that needs attention. Wipe synthetic scales with your razor cleaning solution, they resist alcohol and won’t crack or warp.
Bone or horn? Condition after cleaning to stop drying out.
Check monthly for micro cracks, moisture hides there and causes trouble later. Keep gloves on throughout.
Choose Dry Razor Storage
Scales protected, now find the blade a proper home. Skip the bathroom, steam and splashes invite rust fast.
Pick a dry cabinet or wall mount with airflow around the spine.
- an open mesh stand catching morning light
- a matte metal holder, edge tucked safely away
- shelving lifted clear of sink splashes
Avoid wood, it drinks moisture. Keep dust low too.
Control Long-Term Storage Humidity
A good stand only goes so far. Humidity control is what actually protects your investment long term.
Keep RH between 40 and 50 percent. Above 60, corrosion accelerates fast.
| Tool | Purpose |
|---|---|
| Hygrometer | Monitor RH |
| Silica packs | Absorb moisture |
| Sealed cabinet | Block ingress |
| Desiccant | Replace every 3-6 months |
| Alert system | Flag 55%+ RH |
Strop and Inspect Regularly
Humidity control protects the steel, but daily stropping keeps the edge itself alive. Strop before every shave: 20 canvas strokes, then 20 leather, to realign micro-teeth and cut nicks. This habit stretches honing intervals to 6-8 weeks.
Once a month, sight down the edge, checking for even light and uniform bar gaps.
Frequently Asked Questions (FAQs)
How do I shave my pennis properly?
Think of it as prepping a fine blade for its finest work: trim to a quarter inch, exfoliate, then a warm shower. Apply shaving cream, then shave in the directional shaving technique, always going with hair growth, using a clean, well-maintained razor blade.
How do you maintain a straight razor?
Maintain a straight razor through consistent blade cleaning, thorough drying, and light oiling after each use. Add edge alignment checks, regular stropping, pivot lubrication, handle conditioning, and dry storage with humidity control to keep it rust-free and razor-sharp.
How do I deep clean my razor?
Give it more than a quick rinse. Wash with mild soap, brush the pivot, soak in 70% isopropyl alcohol for 5-10 minutes, then pat dry, oil the blade, and store it properly.
How do barbers sanitize straight razors?
Barbers wash the blade with soap and water first, then soak it in disinfectant, often Barbicide or 70% alcohol, for the manufacturer’s set time. They rinse, pat dry, and store it clean and protected.
How to clean a straight razor?
Rinse under hot water, wash with mild soap, and brush the pivot for trapped debris. Disinfect with 70% isopropyl alcohol, pat dry with microfiber, then apply a thin oil coat before storing upright in dry, ventilated conditions.
Should you shave a straight razor?
Funny question, you shave with a straight razor, not the razor itself. What matters is blade sharpness and cleanliness. Regular honing, stropping, and proper sanitation deliver the smoothest, safest shave every single time.
How often should you clean a straight razor?
Thirty seconds of rinsing versus months of rust: that’s the trade-off. Wash your blade after every shave, deep clean weekly with alcohol, do a monthly thorough check, and follow a seasonal storage cleaning routine before long breaks.
Should you lubricate a straight razor?
Yes, always lubricate after drying. A thin oil coat blocks moisture and oxygen, the main causes of rust. Mineral or camellia oil works best, resisting buildup while guarding blade edges against corrosion between shaves.
How to clean up a straight razor?
Warm water rinses debris, mild soap lifts residue, and alcohol disinfects the blade. Pat dry with a lint-free cloth, apply a thin oil coat, then store somewhere dry to block rust.
Do you wash a straight razor?
Washing matters as much as rinsing. After flushing debris under hot water, add a mild soap cleaning technique to lift residue rinsing skips. Avoid the edge, then dry immediately, since damp steel invites rust within hours.
Conclusion
Like a knight polishing armor before battle, you now hold the ritual that keeps steel honorable. Knowing how to clean a straight razor isn’t a chore, it’s craftsmanship.
Rinse, disinfect, dry, oil, repeat. That rhythm builds trust between blade and skin. Skip a step, and rust creeps in quietly, patient as ever. Follow it, and your razor rewards you with decades of clean, confident shaves. Master the routine once, and it becomes second nature.