This site is supported by our readers. We may earn a commission, at no cost to you, if you purchase through links.

Most people rinse their razor under water and call it clean. A dermatologist would call that optimistic.
Within hours of your last shave, bacteria start forming a protective biofilm between the blade edges—a microscopic fortress that a quick rinse can’t touch.
Meanwhile, every pass of the blade leaves micro-cuts too small to see but large enough for those bacteria to enter directly into hair follicles.
The result: folliculitis, razor burn, and infections that feel random but aren’t. Cleaning your razor the right way takes under two minutes and cuts that risk dramatically.
Table Of Contents
- Key Takeaways
- Why Dirty Razors Cause Infection
- Cleaning Vs Sanitizing a Razor
- Rinse Debris Off The Blade
- Wash The Razor The Right Way
- Sanitize With Alcohol or Peroxide
- Use Bleach or Barbicide Safely
- Boil Metal Razors Safely
- Dry Razors to Stop Bacteria
- Store Razors Outside The Shower
- Replace Blades Before Problems Start
- Frequently Asked Questions (FAQs)
- How to clean a razor blade to not give infections?
- How likely is it to get HPV from a razor?
- How to prevent infections when shaving?
- Can you get a fungal infection from a dirty razor?
- Can electric razors harbor the same bacteria?
- Does shaving frequency affect how fast blades dull?
- Are travel razors harder to keep clean?
- Should you clean a brand-new razor before first use?
- Does skin type affect how often you should sanitize?
- Conclusion
Key Takeaways
- Rinsing alone won’t protect you — bacteria form a biofilm between blade edges within hours of your last shave, and only alcohol or hydrogen peroxide actually kill it.
- Cleaning and sanitizing are two different steps: cleaning removes debris, while sanitizing kills the pathogens left behind — skip either one and you’re only halfway protected.
- Where you store your razor matters as much as how you clean it — shower humidity feeds bacterial growth, so dry storage in a ventilated holder outside the shower is non‑negotiable.
- Replace your blade every 5–7 shaves, because a dull edge causes micro‑cuts, increases friction, and lets bacteria enter your skin directly — no cleaning routine can fix a worn‑out blade.
Why Dirty Razors Cause Infection

Your razor touches broken skin every single shave — that’s not something to leave to chance. blade that looks clean can still carry bacteria, biofilm, and trapped debris that cause real skin problems.
A full shave routine that protects broken skin starts with keeping your razor free of the buildup you can’t always see.
Here’s what’s actually happening when a dirty razor meets your face.
Bacteria, Biofilm, and Trapped Residue
Every shave leaves more than stubble behind.
Hair fragments, oils, and dead skin cells bind to your blade, forming a sticky biofilm — a polysaccharide shield reinforced by extracellular DNA and persister cells that survive most rinses. This matrix composition traps bacterial buildup deep between edges where water rarely reaches.
Without proper cleaning and sanitizing, that biofilm accumulation quietly thrives, shave after shave.
How Micro-cuts Let Germs Enter Skin
That biofilm isn’t just sitting there — it’s looking for a way in.
Shaving creates micro-cuts so small you won’t feel them. But each one is an open Infection Pathway straight past your skin’s Barrier Breach point. Follicle Penetration happens fast when Micro-cut Dynamics meet microbial contamination from a dirty blade.
Watch for these entry risks:
- tiny cuts expose living tissue instantly
- hair follicles become direct tunnels for germs
- immune activation triggers redness and swelling nearby
- repeated strokes over one spot multiply openings
- warm, moist skin delays barrier recovery after shaving
Understanding bacterial folliculitis risk helps you recognize how contaminated blades can trigger infection.
Why Damp Blades Grow More Microbes
A wet blade is basically a petri dish.
Warm humidity and moisture retention keep a thin water film on edges long after you’ve finished shaving.
That heat‑moisture synergy accelerates bacterial buildup fast.
| Condition | Effect |
|---|---|
| Damp storage | Biofilm accumulation within hours |
| Edge corrosion | Traps microbial contamination deeper |
| High humidity | Humidity accelerates rust formation |
| Poor airflow | Prevents dry storage benefits |
How Dirty Blades Trigger Folliculitis and Bumps
Surface roughness and edge microabrasion from a dull, dirty blade don’t just irritate — they break the follicular barrier.
Keratin build-up trapped in blade gaps drags across skin, triggering an inflammatory response at each follicle.
Bacterial buildup then seeds those micro-injuries.
The result? Folliculitis, razor bumps, and hair reingrowth that curls back into skin.
Blade sanitization methods stop this cycle before it starts.
Cleaning Vs Sanitizing a Razor

Most people treat these as the same thing — they’re not.
Cleaning and sanitizing do completely different jobs on your blade, and skipping one leaves you halfway protected.
Here’s exactly what each step does and why you need both.
What Cleaning Removes From The Blade
Think of your razor blade like a filter — it catches everything.
Each shave deposits sebum film, keratin build-up, soap scum, micro‑cut debris, and lime scale directly onto the metal.
Cleaning strips all of that away physically.
| What Gets Left Behind | Where It Collects | Why It’s a Problem |
|---|---|---|
| Trapped hair fragments | Blade gaps | Block rinsing, dull edges |
| Skin oil + bacterial buildup | Cutting edge | Feeds biofilm removal failure |
| Lime scale + blade rust | Metal surface | Pits the blade, traps more debris |
What Sanitizing Kills on The Surface
Cleaning clears the surface — sanitizing finishes the job. debris is gone, your disinfectant can actually reach the metal.
70% isopropyl alcohol or hydrogen peroxide soak treats bacterial buildup and promotes biofilm removal by targeting the microbes cleaning leaves behind.
| Pathogen Type | What Works |
|---|---|
| Gram-positive and Gram-negative bacteria | Alcohol-based disinfectant, hydrogen peroxide |
| Enveloped viruses | 70% isopropyl alcohol |
| Fungal spores and non-enveloped viruses | Hydrogen peroxide (longer contact time needed) |
Why Hot Water Alone is Not Enough
Hot water feels like enough — but it’s not. It clears visible foam and hair, yet it can’t cross the Disinfection Gap. Trapped oils and skin flakes form an Organic Shield inside the Blade Microstructure, protecting bacteria from heat and Surface Tension alone. No Temperature Threshold exists where plain water reliably kills pathogens.
That risk compounds when razors are shared, since bacteria and skin cells transfer directly onto already-compromised blades — a problem explored further in this guide to common shaving problems and hygiene risks for women.
| What Hot Water Does | What It Misses |
|---|---|
| Flushes loose debris | Kills bacterial buildup |
| Softens dried residue | Breaks down biofilm |
That’s why alcohol disinfectant for razors matters — hot water rinsing benefits stop at cleaning, not sanitizing.
Why Both Steps Matter After Shaving
Skip one step, and you’re only halfway protected. Cleaning removes bacterial buildup — hair, oil, skin flakes — but germs stay behind. Sanitizing manages the microbial load reduction that cleaning can’t. Together, they form the backbone of razor hygiene best practices.
| Step | What It Does | Why It Matters |
|---|---|---|
| Cleaning | Removes debris and residue | Stops bacterial buildup from sheltering germs |
| Sanitizing | Kills remaining pathogens | Provides skin barrier protection after shaving |
| Both Combined | Full decontamination | Infection prevention and extending blade life |
Don’t skip either — postshave skin irritation and preventing cross‑contamination depend on both.
Rinse Debris Off The Blade

Rinsing your razor sounds simple, but most people do it wrong — and that’s where buildup starts. The right approach takes less than a minute and makes every step that follows more effective.
Here’s exactly how to do it.
Use Lukewarm Water After Every Shave
Right after your last stroke, hold the blade under lukewarm water — around 85–95°F is the ideal water temperature for postshave skin care.
Hot water rinsing benefits are mostly a myth; water that’s too hot can cause thermal shock to the blade edge and irritate freshly shaved skin.
Warm water loosens cream and debris gently, supporting quick moisture evaporation and razor hygiene best practices that prevent infection.
How to Flush Out Cream and Hair
Trapped shaving cream residue is the main reason blades dull faster than they should. Flush it out the right way:
- Use Backside Water Flow — direct warm running water over the razor’s back to push debris forward
- Try Rotational Rinsing — rotate the blade while rinsing to hit every angle
- Apply the Tap‑Shake Technique — tap the head gently against the sink to dislodge stubborn clumps
- Use Blade Angle Tilt — tilt the razor so water channels through the gaps naturally
- Run a High‑Pressure Pulse — briefly increase water pressure, then submerge the razor head for a final rinse
How Often to Rinse During Shaving
Flushing out cream and hair mid-shave matters just as much as the technique itself. Rinse frequency isn’t about being obsessive — it’s about shaving smarter.
Aim for a stroke-by-stroke rinse every two to three passes. Rinsing the razor under warm running water clears buildup before it hardens inside the gaps.
| Shave Rhythm | Rinse Interval | Why It Helps |
|---|---|---|
| Fine/thin hair | Every 3–4 strokes | Prevents mild buildup |
| Normal hair | Every 2–3 strokes | Maintains blade moisture management |
| Thick/dense hair | Every 1–2 strokes | Stops clogging fast |
Water flow control makes the difference. Use a steady stream — don’t just splash. Submerge the razor head briefly for a thorough flush, especially if you notice a warm damp film of lather clinging to the edges.
How to Check if Buildup is Gone
Rinsing clears the path — but how do you know it worked? Run through these four quick checks before you put the razor down:
- Visual Inspection: No soap scum, shaving cream residue, or cloudy film on the blade.
- Tactile Feel: Smooth edges, no gritty coating suggesting bacterial buildup or blade rust.
- Water Flow Test: Water runs freely through blade gaps without pooling.
- Odor Check: No stale smell indicating trapped residue.
Wash The Razor The Right Way
Rinsing gets the visible stuff off, but it doesn’t touch the oily film and skin flakes still clinging to the blade.
That’s where a proper wash comes in — and yes, technique matters here. Here’s how to do it without wrecking your blade in the process.
Use Mild Soap and Gentle Agitation

A little soap goes a long way here. Mix a small drop of mild soap with warm water — no precise soap dilution ratio needed, just enough to lift foam.
Use a gentle swirl motion under the tap to break up foam residue and reduce blade surface tension buildup.
Minimal contact time is key; don’t soak it.
Rinse immediately so soap scum doesn’t dry onto the metal.
Clean Between Blade Edges and Undersides

Soap covers the surface, but where things get tricky. Use a soft toothbrush for narrow gap brushing — small circular strokes dislodge packed stubble without damaging edges.
A silicone scrub pad works on undersides. Try a reverse blade tilt to flush hidden debris.
These steps are the difference between cleaning vs sanitizing razors, and actually achieving real blade sanitation.
Remove Oil, Skin Flakes, and Mineral Deposits

Three culprits slow your blade down fast:
- Sebum (skin oil) — surfactant chemistry in mild soap breaks it loose
- Dead skin flakes — pre-shave exfoliation reduces buildup before it starts
- Mineral deposits — an anti-scale rinse or diluted vinegar dissolves chalky hard-water film
Scrub between the blade gaps using micro‑brush detailing. Hydrogen peroxide or isopropyl alcohol takes care of what soap misses. Dry storage finishes the job.
Avoid Harsh Scrubbing That Damages Edges

Your blade’s edge is thinner than you think — and one aggressive scrub can blunt it permanently.
| Mistake | Better Alternative |
|---|---|
| Stiff brush or abrasive pad | Soft toothbrush or nonabrasive pad |
| Heavy pressure cleaning | Light pressure cleaning with short strokes |
| Circular scrubbing motion | Gentle, parallel wipes along flat surfaces |
Gentle tool choice protects edge coating protection and prevents blade gap narrowing consequences.
Scrub between the blade gaps lightly, pat drying technique after isopropyl alcohol, then air dry completely.
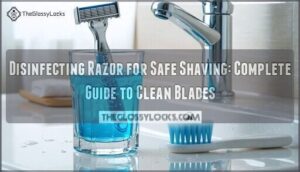
Sanitize With Alcohol or Peroxide

Rinsing removes the visible debris, but it doesn’t touch the bacteria still clinging to your blade.
That’s where alcohol and hydrogen peroxide come in — two options that actually kill pathogens on contact.
Here’s what you need to know about using each one correctly.
70% Isopropyl Alcohol Soak Times
Soaking your razor in 70% isopropyl alcohol is one of the most reliable alcohol disinfectants for razors you can use at home.
Pour enough into a small cup for full blade coverage, then let it sit for five to ten minutes. That contact time matters — a quick dip won’t cut it.
Alcohol concentration stability drops if the container stays open, so seal it between uses. After soaking, air-dry completely before storage.
3% Hydrogen Peroxide Soak Times
Hydrogen peroxide works — but only if you use it correctly. For best contact duration, soak your blade in fresh 3% hydrogen peroxide for about 10 minutes.
Fresh solution strength matters here; old bottles lose their fizz and their killing power. Keep these three steps in mind:
- Submerge the blade fully
- Time the soak — don’t guess
- Rinse thoroughly after
Material compatibility is worth noting: repeated soaking can dull coatings on cartridge heads. Post-soak drying reduces skin irritation risk from residual oxidizer carrying over to your next shave.
Why Full Blade Coverage Matters
Think of your blade like a map — every untreated corner is a hiding spot for bacteria. Full surface treatment means all area disinfection, not just the visible edge.
Complete blade immersion ensures chemical disinfection with isopropyl alcohol reaching those micro reservoirs tucked in crevices. Without full coverage, contact time for disinfectants becomes meaningless in the spots that matter most.
Rinsing After Chemical Sanitizing
Once your contact time ends — 30 seconds for isopropyl alcohol, 10–15 minutes for hydrogen peroxide — rinse immediately. Don’t let residual sanitizer dry on the metal.
Use warm water, not hot; hot water bakes soils back on.
Rinse Technique matters: tilt and rotate the razor so water clears every gap.
After rinsing, a-dry fully.
Dry storage starts here.
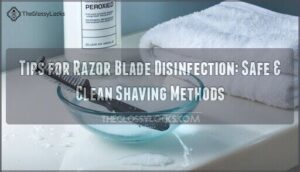
Use Bleach or Barbicide Safely

Alcohol and peroxide aren’t your only options — bleach and Barbicide can do the job just as well when used correctly.
The catch is that both are stronger chemicals, so the details matter more here.
Here’s what you need to know to use them safely and protect your blade in the process.
Proper Dilution for Bleach Disinfection
Bleach works — but only if you mix it right. For razor hygiene, combine one part bleach with nine parts water. That ratio hits the bleach concentration sweet spot: roughly 0.5% sodium hypochlorite.
Measure by volume, not guesswork. Use a clean, labeled container and fresh solution every time, since solution stability drops fast.
Always wear gloves — chemical disinfectant effectiveness means nothing if it’s irritating your skin.
Barbicide Mixing and Soak Times
Barbicide is another solid option for razor disinfection. Mix 2 ounces of concentrate per gallon of water — that’s your 1:16 dilution ratio calculation.
Add water to the container first, then pour in the concentrate to avoid excessive bubbling. Full immersion requirement matters here: every blade surface must stay submerged for the minimum soak duration of 10 minutes.
Then rinse and dry thoroughly.
When White Vinegar is an Alternative
White vinegar is a budget cleaning option when nothing else is available. A 1:4 white vinegar mixture helps with light grime removal — loosening mineral deposits and soap film.
But acidity matching and metal compatibility matter here.
Vinegar isn’t a true disinfectant, so it won’t reliably handle infection prevention or natural alternatives for razor sanitization, the way alcohol does.
Use it only for surface safety maintenance between proper sanitizing sessions.
How to Prevent Corrosion After Soaking
Soaking pulls chemical residue into every crevice. Rinse thoroughly under running water, then pat dry immediately with a lint‑free towel — moisture barrier starts here.
Shake out blade gaps, then store upright in ventilated storage for razors. Airflow in razor drying matters more than most people think.
Add silica gel packs nearby for humidity control. Check edges regularly — corrosion monitoring catches early spotting before rust wins.
Boil Metal Razors Safely

Boiling is one of the most effective ways to disinfect an all-metal razor — no chemicals, no residue, just heat doing the work.
But there’s a right way to do it, and a few things that can go wrong if you skip the details. Here’s what you need to know before you put anything near boiling water.
When Heat Disinfection Works Best
Heat disinfection works best on plain metal razors — no plastic, no adhesives. Full immersion in boiling water gives you moist heat advantage: water transfers heat faster than air, reaching every edge evenly.
That uniform heating across the blade surface is what pushes you past the temperature threshold needed to kill microbes. Material compatibility is non-negotiable here — thermal disinfection using boiling water is only for all-metal designs.
Safe Boil Time for Metal Razors
Twenty minutes is your target — start the timer only when you hit a full, rolling boil. Water Level Depth matters: full submersion ensures Heat Transfer Uniformity across every edge. Boil Timer Accuracy protects against short dips that leave microbes behind.
Always do a Material Compatibility Check first. Proper thermal disinfection using boiling water prevents metal corrosion, controls rust formation, and extends blade lifespan substantially.
Why Cartridge Razors Should Not Boil
Cartridge razors aren’t built for a full boil — and putting them through one causes real damage.
Plastic warping shifts blade angles. Lubrication strip degradation increases friction and nicks. Sealant breakdown lets moisture into protected areas, accelerating blade rust and handle corrosion. Coating alteration makes edges feel rough faster.
Stick to alcohol or peroxide for cartridge razor maintenance instead.
Cooling and Handling After Boiling
After boiling, don’t rush it. Let your razor cool completely before touching it — thermal stress can stress metal joints.
- Set it on a drying rack, airflow surface for full air circulation
- Never seal it in a shallow container — ventilated storage for razors only
- Once cool, air-dry fully before storing
Temperature monitoring takes seconds. costs you a blade.
Dry Razors to Stop Bacteria

Most people stop after rinsing, but that leftover moisture is where bacteria clock in for their next shift. A wet blade rusts faster, grows more microbes, and cuts worse — so drying isn’t optional.
Here’s exactly how to do it right.
Pat Dry With a Lint-free Towel
After every shave, grab a clean, lint-free towel and pat the blade dry — don’t rub.
Lint-free drying keeps fiber residue off the edges, and gentle patting technique lifts moisture without pushing it around.
Moisture extraction benefits are real: damp blades rust faster and harbor more bacteria.
Towel cleanliness protocol matters too — a fresh, dry towel only.
Then let it air dry completely.
Shake Out Water From Blade Gaps
After patting, don’t skip the shake. Use firm shake force to dislodge trapped droplets, then shift your angle position so gravity drain pulls water out of each blade gap naturally.
A rapid tap against the sink breaks surface tension quickly.
Blade gap vibration from shaking helps shake off the excess liquid that towels can’t reach.
This keeps airflow in razor drying working in your favor.
Why Moisture Leads to Rust and Buildup
Trapped water is the real troublemaker. Moisture forms an electrolyte film on steel, and once oxygen oxidation kicks in, rust spreads fast. Mineral deposits from tap water roughen the surface, creating tiny crevices where bacterial buildup hides.
Trapped moisture turns your razor into a rust factory, pitting the blade and sheltering bacterial buildup with every passing hour
- Humidity control matters — damp air keeps blades wet longer
- Ventilated storage for razors breaks the moisture cycle
- Dry storage solutions cut rust risk substantially
When Blade Oil Helps Long-term Storage
Once the blade is dry, a light coat of mineral oil adds real protection for long-term storage. That oil film displaces residual moisture and blocks oxygen from starting the oxidation process.
Cover the faces and edges — corrosion often starts at tiny exposed patches.
For proper razor storage techniques, reapply every few weeks. Dry storage solutions plus oil coverage genuinely extend blade lifespan.
Store Razors Outside The Shower

Where you park your razor matters more than most people think. The shower feels convenient, but it’s basically a Petri dish for your blade.
Here’s what actually works for keeping it dry, clean, and safe between shaves.
Ventilated Holders and Upright Storage
Your razor holder does more work than you think. Look for ventilated storage for razors with an airflow design — open slots, drainage channels, and a stable upright base that keeps the blade vertical while water drains away.
Corrosion-resistant materials like stainless steel won’t trap moisture. Proper razor storage techniques and ideal placement on a dry countertop, combined with drying rack airflow, actively work toward preventing razor rust.
Why Shower Storage Increases Contamination
That ventilated holder only works if you move the razor out of the shower entirely.
Shower humidity stays high for hours after you turn off the water, feeding biofilm accumulation on the blade. Hard water deposits and aerosol contamination from splash mist add more layers. Surface contact transfer from your shower caddy makes it worse.
High humidity accelerates the impact of humidity on razor corrosion, undermining every drying rack airflow advantage you’ve built.
How Airflow Reduces Microbial Survival
Once you move your razor out of the shower, airflow does the heavy lifting. Evaporation Acceleration kicks in fast — moving air pulls moisture off blade edges, cutting microbial load substantially.
Oxygen Enrichment disrupts the stable films microbes hide in, delivering real Biofilm Disruption. Drying rack airflow also promotes Temperature Equalization, eliminating the damp microclimates bacteria love.
Ventilated storage for razors simply keeps your blade drier longer.
Keeping Razors Separate to Avoid Sharing
Sharing a razor isn’t just unhygienic — it’s a direct transfer of bacteria, skin cells, and potential MRSA onto your face. Keep each person’s razor strictly their own.
- Use personal labeling or ownership tags on grips
- Store in dedicated containers per person
- Try color-coded storage for quick identification
- Install individual razor hooks in the bathroom
- Never loan yours — no exceptions
Simple cross‑contamination risks, serious consequences.
Replace Blades Before Problems Start

Even the cleanest razor becomes a liability once the blade dulls past its limit. Most people wait too long to swap it out, and that’s when skin problems quietly begin.
Here’s what to watch for so you can replace yours at the right time.
Signs a Blade is Too Dull
Your blade is telling you something — you just have to listen. draggy feel and hair snagging mid-stroke are the clearest signals.
Razor burn that stings more than usual, uneven stubble after a full pass, or that pulling sensation instead of clean cutting? Those are signs of blade dullness.
Micro nicks on the edge make every stroke rougher.
Replace blades before irritation wins.
Rust, Pitting, and Discoloration Warnings
Rust doesn’t ask permission — it just shows up. Surface Rust Detection starts with spotting reddish-brown or orange-brown corrosion spot patterns near the edge.
Toss the blade if you notice:
- Color Change Alerts: dull, faded, or blotchy discoloration
- Pitting Depth Indicators: tiny rough craters you can feel
- Edge Integrity Monitoring: uneven texture along the cutting line
- Rust spots spreading from moisture trapped in gaps
Oxidation that causes rust permanently damages metal. No amount of blade rust prevention fixes lost material.
How Old Blades Worsen Irritation
dull blade doesn’t just shave poorly — it punishes your skin. Micro-Edge Damage increases friction, forcing you to press harder and make extra passes.
That repeated scraping causes Skin Barrier Compromise and triggers an Inflammatory Response. Hair Curling from blade dullness drives ingrown hairs deeper.
Bacterial buildup on old edges worsens razor burn fast. Don’t underestimate what blade replacement frequency does for your skin.
Recommended Replacement After 5–7 Shaves
Five to seven uses — that’s your replacement window, and it’s not arbitrary. Dermatologists and Gillette both land on this range for good reason.
Track your Shave Count mentally or with a simple app alert using Replacement Schedule Alerts.
- Hair Type Influence shortens that window for coarse or thick hair
- Sensitive skin benefits from Cost-Benefit Timing closer to five uses
- Skin Sensitivity Timing matters more than calendar weeks
- blade lifespan drops quickly in humid, damp storage
- razor hygiene fails when blade dullness is ignored too long
Replace on schedule. Your skin will thank you.
Frequently Asked Questions (FAQs)
How to clean a razor blade to not give infections?
Rinse, clean, and sanitize after every shave. A quick dip in 70% isopropyl alcohol kills bacterial buildup fast.
Consistent cleaning and sanitizing protect your skin — because razor hygiene isn’t optional, it’s basic self-care.
How likely is it to get HPV from a razor?
HPV transmission via razor is possible but uncommon. Microabrasion risk rises when a contaminated blade causes tiny cuts.
Fomite transmission is real — don’t share razors.
Vaccination impact remains your strongest defense overall.
How to prevent infections when shaving?
Wash your hands before shaving—hand hygiene alone cuts contamination risk substantially. Use pre-shave skin prep, keep a personal razor labeling system, and follow a consistent post-shave aftercare routine.
Can you get a fungal infection from a dirty razor?
Yes, you can. Dermatophyte Transmission happens when fungal spores from infected skin hitch a ride on your blade. Tinea Barbae Symptoms — scaling, broken hairs, tender patches — are your warning sign.
Can electric razors harbor the same bacteria?
Electric razors absolutely can. Foil crevice contamination, moisture retention zones, and skin flora transfer make bacterial buildup just as real.
Head design impact matters too — trapped debris near the battery compartment, where microbes thrive, creates genuine crosscontamination risks.
Does shaving frequency affect how fast blades dull?
Shaving frequency does speed up blade dullness. Daily shaving increases cutting strokes, moisture exposure, and corrosion buildup.
Coarse hair, sharp cutting angle, and shave pressure also drive edge microchipping faster than occasional use does.
Are travel razors harder to keep clean?
Old saying: "A poor workman blames his tools" — but a smart traveler maintains them. Yes, travel razors are harder to keep clean.
Compact case airflow is limited, hard water deposits build fast, and condensation in bags keeps blades damp longer.
Should you clean a brand-new razor before first use?
A brand-new razor isn’t as clean as it looks. Factory residue removal matters — blade coating oils and machining lubricants linger on edges.
A quick pre-use rinse delivers real pre-use rinse benefits before your first stroke.
Does skin type affect how often you should sanitize?
Yes. Oily skin needs weekly sanitizing; dry skin does better with less. Sensitive skin tolerates hydrogen peroxide over alcohol. Your skin type sets the pace — don’t follow a one-size-fits-all routine.
Conclusion
Studies show that up to 90% of razor infections stem from preventable contamination—not dull blades, not shaving technique. That single number reframes everything.
Razor cleaning to prevent infection isn’t optional maintenance; it’s the difference between a clean shave and a skin problem that lingers for weeks.
Rinse, wash, sanitize, dry, store properly.
Replace the blade before it fights back.
Two minutes of care protects every inch of skin you trust that blade to touch.
- https://onlinelibrary.wiley.com/doi/10.1002/smll.202505823
- https://linkinghub.elsevier.com/retrieve/pii/S0927776523004617
- https://www.semanticscholar.org/paper/024d226d82dba7cbe36deb272f0c5c253db0ef1d
- https://www.frontiersin.org/articles/10.3389/fimmu.2021.765377/full
- https://www.mayoclinic.org/diseases-conditions/folliculitis/symptoms-causes/syc-20361634