This site is supported by our readers. We may earn a commission, at no cost to you, if you purchase through links. This content is for general informational and educational purposes only and is not a substitute for professional medical, dermatological, or nutritional advice.
That razor sitting in your shower caddy isn’t just collecting soap scum. It’s hosting bacteria colonies that thrive in warm, wet environments, including staph strains that can turn a tiny nick into a real infection. Most people rinse their blade and call it clean. It’s not.
Studies on shared grooming tools have linked improperly cleaned blades to MRSA transmission, and your bathroom’s humidity practically rolls out the welcome mat for microbial growth. The good news: proper tips for razor blade disinfection methods take minutes, not hours, and don’t require anything fancier than rubbing alcohol from your medicine cabinet.
Get the timing, the products, and the storage habits right, and that blade stops being a liability.
Table Of Contents
- Key Takeaways
- How to Clean Razor Blades Before Disinfecting
- Best Razor Blade Disinfection Methods at Home
- How to Disinfect Different Razor Types
- How Often Should You Disinfect Razor Blades?
- Razor Disinfection Safety and Storage Mistakes
- Frequently Asked Questions (FAQs)
- What can I use to disinfect razor blades?
- How do barbers sterilize razors?
- How to clean a razor blade to not give infections?
- Does hydrogen peroxide disinfect razor blades?
- How to properly disinfect a razor blade?
- Does rubbing alcohol sterilize razors?
- What do barbers use to disinfect razors?
- How long do bacteria live on razors?
- How do you disinfect razor blades?
- What is the best way to disinfect a shaver?
- Conclusion
Key Takeaways
- Always clean your razor before disinfecting it, since leftover hair, soap scum, and skin cells block the disinfectant from reaching bacteria hiding underneath.
- Soak your blade in 70% isopropyl alcohol for 5-10 minutes (not 99%, since the water content helps it penetrate bacterial cells better), then air-dry it fully before storing.
- Skip vinegar and tea tree oil as your main disinfectant—they’re too weak and inconsistent to reliably kill bacteria compared to alcohol, hydrogen peroxide, or Barbicide.
- Always dry your razor completely and store it outside the bathroom, since humidity above 40% can cause rust and bacterial growth within hours.
How to Clean Razor Blades Before Disinfecting
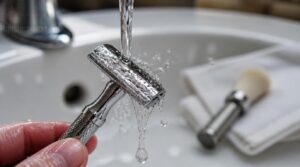
Disinfectant only works if it actually touches the blade—hair, soap scum, and skin cells block contact and let bacteria hide. Skipping this step means your soak is basically wasted effort. Here’s exactly how to get your razor clean before it ever touches alcohol or peroxide.
Give the blade a quick rinse and gentle brush under warm water first, since these step-by-step razor blade cleaning methods show exactly how to clear away buildup before the alcohol soak even begins.
Rinse Away Hair and Residue
Grab warm running water, around 150°F, and flush the blade before any disinfectant touches it. Heat dissolves oils fast.
Rinse after every two strokes: it stops hair and soap residue from compacting between edges.
Finish with a thorough final rinse, clearing dead skin cells and shaving cream residue. Skip this, and disinfectants can’t reach trapped bacteria underneath.
Beyond rinsing, drying the blade properly is just as important, since preventing corrosion after use helps maintain sharpness and extends the blade’s lifespan.
Disassemble Removable Razor Parts
A clean rinse only reaches what water can touch. Pop the head off first: most cartridges release with a simple button or latch, separating blade assembly from handle entirely.
- Cartridge heads: press-release button
- Electric foils: hinged cover lift
- Snap-fit housings: no tools needed
- Screw-secured models: small screwdriver
- Note alignment marks for reassembly
Disassembly exposes trapped residue disinfectant alone won’t reach.
Brush Between Blade Edges
An old, soft-bristled toothbrush is your best tool here: stiff new bristles bend fine steel edges. Hold it at a 30-degree angle, work back-to-front with short perpendicular strokes, ≤15 g-force.
| Zone | Technique | Time |
|---|---|---|
| Pivot joint | Light scrub | 5 sec |
| Blade gaps | Perpendicular strokes | 10 sec |
| Base | Rinse | 5 sec |
Do this after every shave, 20 seconds total, to stop microbial biofilm before it forms.
Inspect for Rust or Damage
Once the blade’s brushed clean, tilt it toward the light and check for reddish-orange streaks, oxidation’s calling card, visible within 24-48 hours of moisture exposure. Any speck means immediate replacement.
Magnetic response reveals material: carbon steel sticks, stainless doesn’t (72-hour rust resistance). Cracks over 0.5mm or nicks past 0.05mm? Toss it, corrosion risk jumps 60%.
Check Manufacturer Cleaning Instructions
Before you improvise a soak, flip the packaging over. Label compliance isn’t optional: manufacturer cleaning instructions specify agent concentration, contact time, water temperature, and approved additives for a reason.
If you’d rather skip commercial disinfectants altogether, this guide to soaking razor blades in white vinegar safely walks through the gentler at-home approach step by step.
- Confirm concentration matches the label
- Time contact precisely
- Check water temp range
- Verify approved additives only
- Note revision dates for audits
Skip this, and razor hygiene, plus infection prevention, take the hit.
Best Razor Blade Disinfection Methods at Home
Clean blades still harbor bacteria until you disinfect them properly. Not every method on the internet actually works—some just waste your time. Here are five options worth your attention, ranked by what the data actually shows.
70% Isopropyl Alcohol Soak
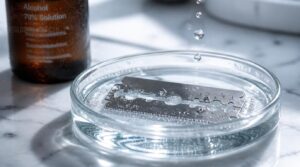
Grab 70% isopropyl alcohol, not the 99% bottle. That extra water helps it penetrate bacterial cells instead of evaporating too fast.
Soak blades fully submerged for 5-10 minutes, this contact time matters. Rinse, then air-dry completely. Skip the towel-wipe shortcut; incomplete drying invites rust and undercuts your disinfectant solution’s work.
Hydrogen Peroxide Disinfection
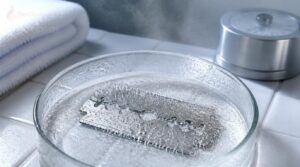
When alcohol isn’t handy, 3% hydrogen peroxide works as your backup oxidizer, breaking down bacterial cell walls on contact.
Submerge the razor head 10-15 minutes; dwell time drives effectiveness here. Keep concentration at 3%, higher isn’t safer for skin or hands.
- Peroxide bubbles as it oxidizes debris
- Works on most blade surfaces
- Rinse thoroughly after soaking
- Ventilate to limit vapor exposure
Properly Diluted Barbicide Solution
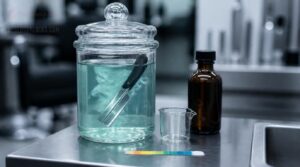
Barbers trust Barbicide for good reason: it’s the industry standard for blade sanitation. Mix 2 oz concentrate with 32 oz water, always concentrate into water, never reversed.
Submerge blades exactly 10 minutes; longer risks damage. Test pH (10-12) with strips. Mix fresh daily, label containers, and store sealed concentrate away from heat.
White Vinegar’s Limited Effectiveness
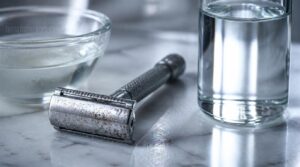
Pinterest hacks love vinegar, but your razor deserves better. White vinegar sits at 4-7% acetic acid: acidic enough to loosen grime, too weak for real blade sanitation. Diluting it drops the pH further, cutting antimicrobial punch.
Contact time matters too; a quick splash won’t match alcohol’s kill rate. Left wet, vinegar invites corrosion risk, undermining razor hygiene instead of protecting it.
Tea Tree Oil Limitations
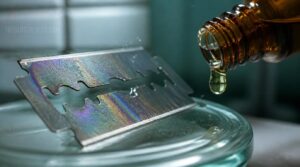
Tea tree oil sounds natural and safe, but it’s a shaky pick for razor blade disinfection. Irritation risk is real even diluted, and blade compatibility concerns vary by metal. Oil residue can film blades, attracting hair and dulling glide.
Worse: inconsistent disinfection efficacy stems from batch-to-batch dilution standardization issues. Stick with proven antimicrobial solutions to guard against skin infections.
How to Disinfect Different Razor Types
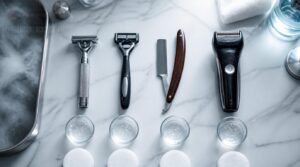
Not every razor plays by the same rules. Cartridges, safety razors, straight blades, and electric foils each demand their own disinfection approach—soak times and solutions that work for one can wreck another. Here’s how to handle each type without guessing.
Cartridge and Disposable Razors
Cartridges pack 3–5 blades tight together, which means debris hides fast. Rinse under warm water, then soak in 70% isopropyl alcohol for 5–10 minutes. Check cartridge compatibility before reattaching.
Wipe the handle separately. Replace cartridges every 5–10 shaves, and store dry, away from bathroom humidity, to stop rust and bacterial buildup cold.
Double-Edge Safety Razors
A double-edge blade is sharpened on both sides of one thin steel strip, held by a top cap and base plate. That single-blade simplicity means no cartridge crevices trapping debris.
Disassemble fully, then soak in 70% isopropyl alcohol for 5–10 minutes. Air dry completely; moisture invites rust.
Replace blades every 5–10 shaves for consistent sharpness.
Straight Razors and Shavettes
Straight razors and shavettes split into two disinfection tasks: the fixed blade and the loading mechanism. Shavettes using MISAKI or DOVO-style holders need the clamp disassembled before soaking. Wipe blades with 70% isopropyl alcohol, never submerge folding inserts.
- Check blade width (5/8" suits most shaves)
- Inspect point shape for nicks
- Replace blades every 5-10 shaves
- Air-dry fully to prevent rust
Electric Shaver Heads and Foils
Foils play by different rules than blades. Never soak the head: use an ultrasonic cleaner or alcohol-based sanitizing wipe, then air-dry completely for dry storage.
Check blade alignment monthly, and inspect for stretched perforations. Stainless steel and titanium-coated foils resist corrosion best.
Replace foils every 12-18 months, following manufacturer intervals for your specific head geometry.
How Often Should You Disinfect Razor Blades?
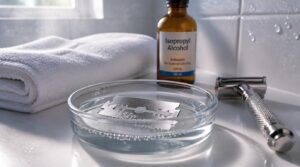
Timing matters as much as technique for killing bacteria on your blade. Disinfect too rarely, and you’re basically hosting a bacteria party on your skin. Here’s exactly when you should reach for that alcohol or peroxide.
Cleaning After Every Shave
Every single shave, no exceptions. Rinse under hot water for 30 seconds, tap gently to dislodge debris, then brush with a soft-bristle toothbrush before drying completely.
- Skipped rinses breed bacteria fast
- Trapped hair dulls blades early
- Damp storage invites rust overnight
Full alcohol soaks come later, but daily debris removal keeps your razor shave-ready and your skin protected.
Disinfecting After Nicks or Cuts
A nick changes the rules. Stop, press a cold cloth for 30 seconds to control bleeding, then wash with mild soap.
Dip the blade in 70% isopropyl alcohol for 5-10 minutes. Cuts open doors for Staphylococcus aureus and MRSA, so disinfecting razor blades at home matters. Apply antiseptic, soothe skin, and consider blade replacement if edges look compromised.
Deep Cleaning Visible Buildup
Gunk hiding between blades isn’t just gross, it’s a shield for bacteria. Once a week, disassemble the razor head and inspect for residue you’d otherwise miss.
Brush between blades with soft bristles, rinse loosened debris, then check for rust spots. This deep cleaning step catches buildup daily rinsing skips, protecting your blade maintenance routine and the razor assembly underneath.
Checking Blades Before Each Use
Thirty seconds, that’s all a pre-shave check takes. Run a fingertip lightly over the blade edge, feeling for burrs. Scan for rust spots or leftover hair residue trapped in the guard.
Confirm assembly fit is snug, no rocking. Skip this and you’re gambling on blade edge integrity every single pass.
Replacing Dull or Rusty Blades
Rust doesn’t negotiate. Once you spot orange or brown specks along the edge, that blade’s done, corrosion can’t be sharpened away. Feel dragging or tugging instead of a clean slice? That’s your blade wear indicator telling you to stop.
Rust doesn’t negotiate—once corrosion appears on a blade, it’s done for good
Safety razors: replace every five to seven shaves. Cartridges: every four to eight weeks. Skip the guesswork, protect your skin, and save money long-term.
Razor Disinfection Safety and Storage Mistakes
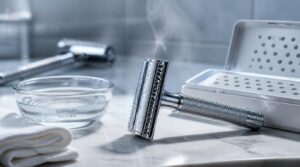
Disinfecting your razor right doesn’t mean much if you botch the storage afterward. One wrong move—mixing solutions, skipping the dry time, sharing a blade—can undo all that hard work fast. Here are five mistakes to steer clear of.
Never Mix Cleaning Chemicals
Mixing cleaners feels efficient. It’s actually how you end up gasping in your bathroom.
Never combine bleach with acid, including vinegar, when disinfecting razor blades at home. That pairing releases toxic fumes fast.
- Keep 70% isopropyl alcohol, hydrogen peroxide, and vinegar separate
- Read labels before mixing anything
- Ventilate the room, and call 911 if fumes hit
Store chemicals properly, always.
Avoid Soaking Electronic Components
Chemical safety isn’t your only worry. Electric shaver heads with digital displays or sensors can’t handle a soak.
Air-Dry Every Part Completely
That electronics warning applies to wet blades too, just differently. Air drying completely is non-negotiable: skipped drying invites rust within hours.
Disassemble first. Component separation lets water escape trapped joints. Use gravity drying: angle parts in a dry open area with real airflow, not a closed drawer. Skip the towel; residual moisture on cloth undermines the purpose.
Store Outside Humid Bathrooms
Once dry, don’t put your razor back in the bathroom. Steam builds fast, and humidity above 40% invites rust within hours.
- Fog creeping over a mirror after a hot shower
- A blade quietly rusting in a damp drawer
- A bedroom storage tray, dry and breathable
- A hallway closet shelf away from steam
- A travel case zipped shut on a dry cabinet shelf
Kitchen drawer works too. Anywhere but the bathroom.
Never Share Personal Razors
That dry storage spot means nothing if you’re handing your razor to a roommate. Never share personal razors, even with a partner. Skin contact spreads microbes fast, dermatologists call it a major no-no.
| Scenario | Risk | Fix |
|---|---|---|
| Partner borrows razor | Cross-contamination | Label grip |
| Roommate grabs blade | MRSA, hepatitis exposure | Separate storage
| Guest uses shower razor | Skin residue transfer | Disposable option
Frequently Asked Questions (FAQs)
What can I use to disinfect razor blades?
Picture blade metal gleaming clean, no film, no funk. A 70% isopropyl alcohol soak works fastest. Alternatives: diluted hydrogen peroxide, Barbicide dilution, or vinegar water mix. Tea tree oil offers mild backup, not a standalone disinfectant solution.
How do barbers sterilize razors?
Shops rely on Barbicide at a strict 10-minute soak, UV light cabinets, or autoclave steam sterilization at 121°C for surgical-grade infection control. Some still trust the boiling water technique or alcohol evaporation method for quick, reliable razor sanitizing between clients.
How to clean a razor blade to not give infections?
Funny how a tool meant to prevent nicks becomes a bacteria taxi. Rinse debris, soak in 70% isopropyl alcohol for 10 minutes, then air dry fully. Proper disinfectant contact time and dry storage stop cross-contamination cold.
Does hydrogen peroxide disinfect razor blades?
Yes. A 3% hydrogen peroxide soak breaks down microbial cell walls, cutting bacteria fast. Give it 10-15 minutes for real disinfecting power, then rinse and dry blades completely, no residue, no rust, just clean steel ready for skin protection.
How to properly disinfect a razor blade?
Slow and steady wins the race here: rinse first, then soak in 70% isopropyl alcohol for 5–10 minutes, or try a properly diluted Barbicide or 3% hydrogen peroxide method. Rinse again, air-dry fully before storing.
Does rubbing alcohol sterilize razors?
Not quite. Rubbing alcohol disinfects, it doesn’t sterilize. A 70% isopropyl soak for 5-10 minutes kills most bacteria on contact, but crevices and organic debris can still hide germs, so pre-cleaning matters just as much.
What do barbers use to disinfect razors?
Want the pro secret? Barbers rely on Barbicide immersion, dunking blades 10 minutes for full disinfection. Backups include isopropyl alcohol swabs, hydrogen peroxide soaks, and EPA approved clipper sprays for quick, salon-grade results between clients.
How long do bacteria live on razors?
Damp stainless steel can harbor bacteria for 24 to 72 hours, while fully dry blades die off within hours. Humidity and leftover debris fuel microbial growth, so drying and proper storage after every shave matter more than you’d think.
How do you disinfect razor blades?
Rinse, disassemble, and brush blades clean first. Then soak in 70% isopropyl alcohol for 5-10 minutes, or 3% hydrogen peroxide for Rinse residue, air dry completely, and store dry before reassembling.
What is the best way to disinfect a shaver?
Bacteria multiply within 48 hours in damp bathrooms. For electric shaver heads, wipe with 70% isopropyl alcohol on a cloth, never submerge, then air dry completely before storing outside the bathroom.
Conclusion
Bacteria doesn’t book vacations, and neither should your vigilance.
These tips for razor blade disinfection methods aren’t complicated: alcohol, timing, and dry storage do the heavy lifting. Skip a step, and you’re rolling dice with staph. Follow the routine, and that blade becomes a tool you trust, not a risk you tolerate.
Ninety seconds of soaking beats weeks of treating an infection. Clean blades, confident shaves. That’s the whole deal.