This site is supported by our readers. We may earn a commission, at no cost to you, if you purchase through links. This content is for general informational and educational purposes only and is not a substitute for professional medical, dermatological, or nutritional advice.

That razor sitting on your shower shelf? It’s covered in soap scum, stray hairs, and bacteria from your skin, all packed into gaps smaller than a grain of rice. Rinsing it under hot water for a few seconds doesn’t cut it.
Razor blades create a perfect breeding ground: warm, damp, and coated in dead skin cells after every shave. Skip proper cleaning and you’re looking at razor bumps, irritation, or worse, an infected nick that won’t heal right.
Here’s the good news: learning how to sanitize razor blades at home takes less than five minutes and just a few supplies you probably already own. Grab your alcohol and brush, because your razor’s about to get its spa day.
Table Of Contents
- Key Takeaways
- What You Need to Sanitize Razor Blades
- How to Sanitize Razor Blades at Home
- Safe Razor Blade Disinfectants Compared
- Razor Sanitizing Mistakes to Avoid
- How to Store and Replace Razor Blades
- Frequently Asked Questions (FAQs)
- Is white vinegar enough to disinfect a razor?
- Does hydrogen peroxide disinfect razor blades?
- What do barbers use to disinfect razors?
- Can I use rubbing alcohol to disinfect a razor?
- Does rubbing alcohol sterilize razors?
- Does hydrogen peroxide sterilize razors?
- Does hot water disinfect razors?
- How do you disinfect a razor blade?
- How to make a blade sterile?
- Can you disinfect razors with vinegar?
- Conclusion
Key Takeaways
- Soak your razor in 70% isopropyl alcohol for 30-60 seconds since that concentration kills germs fast, while stronger alcohol actually works slower.
- Rinsing with hot water only loosens hair and lather; it won’t disinfect, so you still need alcohol, peroxide, or vinegar to actually kill bacteria.
- Dry your blade the right way by shaking it 10-15 seconds, then air-drying for 5-10 minutes before you cap it, since trapped moisture invites rust and bacteria.
- Store your razor upright outside the bathroom and swap the blade every five to seven shaves to keep your shave safe and your skin happy.
What You Need to Sanitize Razor Blades

Before you start sanitizing, gather a few basics from around your house. You probably already own most of these items, so there’s no need for a shopping spree. Here’s exactly what you’ll want on hand.
Think measuring cups, a mixing bowl, and a double boiler—the same setup you’d use for this homemade beard balm recipe works just as well for whipping up your own sanitizing blends.
70% Isopropyl Alcohol
Grab a bottle of 70% isopropyl alcohol, your razor’s new best friend. That water content actually helps kill bacteria, not hinder it. In fact, 70% concentration achieves bactericidal effects in mere seconds, while higher concentrations can take hours to work as effectively.
- Kills 99.9% of germs on contact
- Dries fast, no rinse needed
- Works within 60-90% range
- Skips certain coatings, so check first
- Ventilate the room while using it
Soft Razor Cleaning Brush
Alcohol kills germs, but hair and dried lather need a soft razor cleaning brush with synthetic, densely packed bristles for gentle blade debris removal.
Look for an ergonomic handle and a protective cap for travel.
Rinse after each use, air-dry fully, and swap the brush every 6 to 12 months to keep your blade sanitation routine sharp.
Clean Water and Small Cup
Your brush experiences debris, but rinsing needs its own setup: clean water and a small cup.
- Use water at 100–105°F (comfortably warm, not hot)
- Pick a cup at least 4 inches wide
- Swirl the razor 10 seconds per rinse
- Choose metal or glass for better heat retention
Warm water dissolves lather fast and cuts bacteria before drying.
Lint-Free Drying Cloth
Once you’ve rinsed, don’t reach for a bath towel. You need a lint-free drying cloth, built with tightly woven microfibers for real fiber shedding reduction.
Sealed or laser cut edges stop fraying, so you get low lint surface contact every wipe. This absorbent towel gets your blade bone dry fast, and proper blade drying techniques mean solid moisture control before storage.
Blade-Safe Storage Container
A dry blade still needs a real home, not a bathroom drawer full of moisture.
Look for a child lock safety container built from impact resistant design plastic, ideally with a ventilated drying feature and stackable container system. Bonus points for color coded blades and a snug protective guard. Puncture resistant containers beat foil pouches for daily blade storage.
How to Sanitize Razor Blades at Home
Now that your supplies are ready, it’s time to put them to work. This process only takes a few minutes, but the order matters if you want your blades truly clean. Follow these five steps every time you shave, and sanitizing will feel like second nature.
And once your grooming routine is sparkling clean, you can extend that same care to your hair with this step-by-step hair spa at home guide.
If your blade routine is part of a broader grooming setup, pairing it with a reliable stubble trimmer guide can help keep your whole toolkit in top shape.
Rinse Away Hair and Lather

Think of rinsing as your razor’s warm-up lap, not an afterthought. Use warm water, rinse every few strokes, and open the head so water flows between blade and housing. Swish in a cup if you’re at a sink with no flow.
- Rinse before shaving too
- Warm water fights buildup
- Open-head rinsing beats surface wiping
- Fresh hair rinses easier than dried lather
Brush Between Blade Gaps
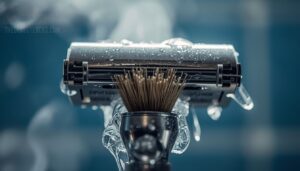
Once the lather’s gone, grab your brush, the real debris hides deeper than water can reach. Glide bristles vertically between blades using gentle strokes, not scrubbing. This gap penetration works because bristle drag loosens trapped hair and skin cells stuck in those tiny 0.2-0.5mm crevices. Twenty to thirty seconds, tip-only pressure, done. It’s small effort, big payoff for razor hygiene.
Disinfect With Isopropyl Alcohol
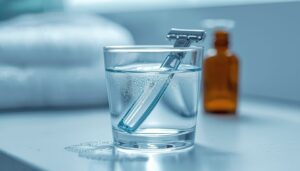
Now for the real germ killer. Pour 70% isopropyl alcohol into your cup and submerge the blade fully for 30 to 60 seconds of contact time, that’s how long it needs to stay wet to actually work.
This concentration eliminates bacteria without corroding metal or plastic housings. Keep the cup away from flames and work somewhere with decent ventilation, alcohol fumes aren’t something to breathe in deeply.
Shake Off Excess Liquid
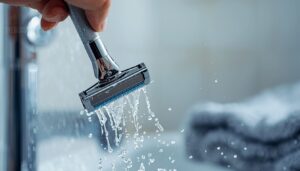
Water hiding in blade gaps invites rust, so shake it out before drying.
Hold the razor with cartridge facing down and snap your wrist at a 45-degree angle for 10-15 seconds.
- Feel warm water (100-110°F)
- Count 3-5 shake cycles
- Listen for a "tink" sound
- Watch droplets separate
- Keep blades pointed downward
That’s gravity-assisted drying doing real work before your microfiber towel touches anything.
Air-Dry The Razor Completely

Patience beats a towel here. Set your razor on a stand outside the bathroom, blade edge up, and let it sit 5 to 10 minutes minimum, ideally 15 to 30. Humid bathrooms slow things down, so ventilation matters. A quick blot with microfiber before drying helps. Skip this step and you’re basically rolling out the welcome mat for rust.
Safe Razor Blade Disinfectants Compared

Not every disinfectant works the same way, and picking the right one matters more than you’d think. Some kill germs fast, some tackle buildup, and some just clean without actually disinfecting anything. Here’s how the most common options stack up.
Alcohol for Routine Disinfection
For your daily razor sanitizing routine, 70% isopropyl alcohol is your MVP. This concentration hits the sweet spot for killing bacteria, stronger isn’t better here.
Wipe or soak your blade until visibly wet, hold for 30 seconds minimum. Let it air-dry fully before storing.
Keep bottles sealed and away from flames since alcohol’s flammable, and store it safely out of reach.
Hydrogen Peroxide With Caution
Alcohol’s your daily go-to, but hydrogen peroxide earns a spot for occasional deep disinfection. Stick to 3% concentration, never anything stronger.
Quick peroxide checklist:
- Soak blade 5-10 minutes only
- Rinse thoroughly after (skin gets irritated fast)
- Never mix with vinegar or alcohol
- Store bottles capped, away from heat
Peroxide decomposes quickly once opened, so check expiration dates before trusting it.
Vinegar for Mineral Buildup
Peroxide experiences bacteria, but hard water leaves its own mess behind. That’s where distilled white vinegar comes in.
| Step | Detail |
|---|---|
| Dilute | 1 part vinegar, 3 parts water |
| Soak | 10-20 minutes contact time |
| Rinse | Distilled water, then dry |
| Avoid | Chrome, aluminum, prolonged soaks |
Acetic acid dissolves mineral deposits. Skip the rinse and residue invites rebuilding fast.
Hot Water Cleans, Not Disinfects
Vinegar dissolves buildup, but don’t mistake your hot water rinse for real disinfection. Tap water tops out around 120-140°F, and killing bacteria takes 170°F sustained. That’s just physical rinsing, flushing away hair and lather. Skin bacteria survive easily below that mark.
Hot water preps the blade. Alcohol actually disinfects it. Skip that step and bacterial load stays high.
Ultrasonic Cleaning Removes Trapped Debris
Tiny bubbles do the heavy lifting here. An ultrasonic jewelry cleaner uses cavitation, sound waves forming and collapsing bubbles, to blast debris from spots your brush can’t reach.
Why it wins:
- Hits tight blade gaps
- Works at 40 kHz frequencies
- Skips harsh scrubbing
- Finishes in 5 minutes
No line-of-sight needed. The liquid does the work.
Razor Sanitizing Mistakes to Avoid
Good intentions don’t always mean good technique, and razor sanitizing has a few sneaky traps. Some habits feel logical but actually damage your blade or skimp on real disinfection. Here’s what to watch out for before your next cleaning session.
Confusing Sanitizing With Sterilizing
Here’s a myth worth busting: soaking your razor longer doesn’t turn sanitizing into sterilizing.
Sanitize vs sterilize are different goals. Sanitizing just reduces bacteria; sterilizing wipes out everything, and that’s reserved for surgical tools, not your bathroom razor.
Sanitizing reduces bacteria, but sterilizing—reserved for surgical tools—wipes it out completely
Skip cleaning first, ignore label dwell time, and you’re not disinfecting, you’re guessing.
Mixing Household Cleaning Chemicals
Ever think a little bleach plus vinegar might boost your soak? Don’t. That combo releases chlorine gas.
Never combine cleaning chemicals, including hydrogen peroxide, isopropyl alcohol, or bleach and water solutions. Reactions form toxic fumes fast.
- Ventilate the room first
- Never reuse original containers
- Dilute and dispose within 24 hours
Boiling or Baking Razor Heads
Boiling sounds hardcore, but it’s overkill for most razors. Plastic grips melt, and metal edges can rust if not dried fast.
| Method | Risk |
|---|---|
| Boiling | Warping, rust |
| Baking | Melted plastic |
If you try heat sanitizing, use metal-only razor heads, dry them completely within 5-10 minutes, and skip anything with plastic parts.
Scrubbing Across Blade Edges
Your brushing motion matters more than you’d think. Scrubbing across blade edges instead of along them wrecks edge geometry and speeds up dulling.
- Use a stiff-bristled brush lengthwise, not side to side
- Keep pressure light and consistent
- Rinse between passes for real debris removal
- Skip aggressive back-and-forth motions near the cutting edge
Proper blade maintenance means gentle, directional strokes only.
Reusing Rusty or Damaged Blades
See rust? That blade’s done. Rust won’t give you tetanus, but a corroded edge holding onto moisture often means bacteria too, and shaving over it invites infection through tiny nicks.
Chips, dents, or jagged spots cause the same problem: more pressure, more cuts. Once corrosion sets in, sharpening won’t save it.
Toss damaged blades in a sharps container. Fresh blades protect your skin and your health.
How to Store and Replace Razor Blades
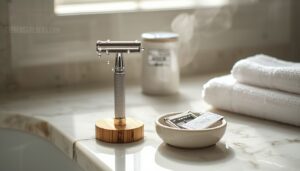
Cleaning your razor is only half the job. What you do after matters just as much, from where you set it down to when you finally toss the blade. Here’s how to keep it safe, sharp, and ready for its next use.
Store Upright Outside Bathrooms
Where you park your razor matters as much as how you clean it. Bathroom humidity spikes to 70-80% during showers, so move storage outside the bathroom entirely.
A dry, ventilated spot also protects that shea butter and hyaluronic acid strip from breaking down early, which is why picking razor blades designed to prevent nicks and cuts pairs so well with smarter storage habits.
A dry linen closet or bedroom drawer keeps blades sharper longer, and this guide to preventing razor burn covers other easy storage fixes that extend blade life.
Keep blades vertical, not flat. Gravity pulls water off the edges, drying blades 40% faster while cutting rust risk. A bedroom shelf or hall closet works great for open, breathable razor storage.
Attach Guards After Drying
Once your blade sits upright and fully air-dried, give it a few extra minutes before capping it. Guards trap moisture if attached too soon, turning your protective guard into a bacteria hotel.
Press the guard on until you hear that satisfying click, the release tab locks it in place. Store guards separately, washed weekly in soapy water.
Check for Rust and Damage
Grab a flashlight and hold it at an angle to the edge. Orange-brown spots mean rust, dark lines mean cracks.
Quick checks:
- Fingernail glide test for nicks
- Flex tip gently, watch for cracks
- Check for pitting or discoloration
- Confirm the edge still glides smooth
Catching damage early protects blade sharpness and stretches blade life before your next swap.
Replace Dull or Tugging Blades
Even a spotless blade won’t shave forever. Once you’re tugging instead of gliding, that’s your cue.
| Sign | What It Means | Action |
|---|---|---|
| Tugging/pulling | Blade dulling | Replace now |
| Razor burn | Skin irritation risk | Swap blade |
| Faded strip | End of blade life | Replace immediately |
Dispose in a Blade Bank
Once you’ve pulled the trigger on a blade replacement, don’t just toss it in the trash. Drop it into a blade bank, a sealed container built for blade disposal safety. The one-way slot locks blades in permanently, no lid, no risk.
Most hold 300+ blades, lasting 2-3 years. When full, recycle the whole thing, metal casing and all.
Frequently Asked Questions (FAQs)
Is white vinegar enough to disinfect a razor?
Vinegar is a good scrub, not a good shield. Short answer: no. It grips mineral buildup, but real disinfection needs 70% isopropyl alcohol, since vinegar’s germ-killing power is too limited and inconsistent for razor blade sanitation.
Does hydrogen peroxide disinfect razor blades?
Yes, 3% hydrogen peroxide works as an antimicrobial soak for 10 to 15 minutes, but oxidation can dull metal. Rinse fully and dry completely afterward to prevent corrosion and keep your razor blade sanitation routine safe and effective.
For a deeper look at what triggers blade deterioration over time, understanding razor rust causes and prevention can help you build a longer-lasting care routine.
What do barbers use to disinfect razors?
Ever wonder why barbershops smell like that? Pros rely on Barbicide immersion, soaking clean tools for 10 minutes. They also use disinfectant sprays with 10-minute contact time, always cleaning first to prevent cross contamination.
Can I use rubbing alcohol to disinfect a razor?
Rubbing alcohol works great, as long as it’s 70% isopropyl. Soak the blade 5-10 minutes, then air-dry fully before storing. Skip daily overuse though, since it can dry out plastic parts over time.
Does rubbing alcohol sterilize razors?
Funny how a "sterile" label makes you feel invincible. Truth is, 70% isopropyl only disinfects, killing surface bacteria after a 5-10 minute soak. It won’t reach hidden debris, so true sterilization stays out of reach at home.
Does hydrogen peroxide sterilize razors?
Not quite. Hydrogen peroxide disinfects rather than sterilizes, killing many pathogens but not guaranteeing total elimination. Soak 3% peroxide for 5-10 minutes, rinse thoroughly, and dry completely since repeated exposure risks corroding metal blades over time.
Does hot water disinfect razors?
Hot water is basically a razor’s bubble bath, relaxing but not exactly a germ-killer. It’s a pre-clean step only, loosening debris before disinfecting razors with alcohol, peroxide, or genuine blade sterilization techniques actually takes care of bacteria elimination.
How do you disinfect a razor blade?
Rinse first, brush the gaps, then soak in 70% rubbing alcohol for 5 to 10 minutes. Rinse again, shake off excess, and air-dry fully before storage. Skip harsh scrubbing.
How to make a blade sterile?
Like a medieval blacksmith tempering steel, true sterility takes real heat. Skip the boiling water myth, it damages blades. Instead, try hydrogen peroxide soak, autoclave steam, or UV sterilization for genuine pathogen elimination, not just surface-level antimicrobial cleaning.
Can you disinfect razors with vinegar?
Yes. Distilled white vinegar disinfects through acetic acid, though it works best diluted 1:4 for stainless steel compatibility. Soak 15-20 minutes for mineral removal, then rinse fully. It’s gentler but slower than alcohol-based disinfection methods.
Conclusion
Ready to give your razor the respect it deserves? Ninety seconds with alcohol and a brush beats a week of angry red bumps.
Once you know how to sanitize razor blades at home, it becomes second nature, like locking the door or rinsing your toothbrush.
Store it dry, check for rust, and swap dull blades every five to seven shaves.
If you shave sensitive areas, this guide to razor blade care for sensitive-area shaving explains how to keep edges clean and sharp for smoother, irritation-free results.
Your skin will thank you, one clean, confident stroke at a time.