This site is supported by our readers. We may earn a commission, at no cost to you, if you purchase through links. This content is for general informational and educational purposes only and is not a substitute for professional medical, dermatological, or nutritional advice.

Pull a dull chef’s knife through a pullthrough sharpener and it’ll cut tomatoes again tonight. It’ll also lose a noticeable layer of steel every time, which is why that knife won’t last the decade it should.
Honing stones fix the problem without the damage. Used two or three times a year, they rebuild the edge instead of chewing it away, and a good 1000/6000 stone costs less than a replacement knife. Honing stones for beginners feel intimidating, but the skill comes down to one thing: holding a steady angle.
Here are five kits worth buying, plus the exact technique to use them.
Table Of Contents
- Key Takeaways
- Honing Stones Vs. Other Sharpening Tools
- Choose Beginner-Friendly Stone Materials and Grits
- Top 5 Honing Stone Kits for Beginners
- Choose Sharpening Angles for Your Knife
- How to Use Honing Stones Step-by-Step
- Clean, Flatten, and Store Your Honing Stones
- Frequently Asked Questions (FAQs)
- What is the best sharpening stone for a beginner?
- What is the difference between a honing stone and a sharpening stone?
- Can you use WD-40 as a honing oil?
- Should you hone or sharpen first?
- How often should beginners sharpen their knives?
- Can serrated knives be sharpened on whetstones?
- How long does a whetstone typically last?
- Should I use water or oil on stones?
- What mistakes do beginners most commonly make sharpening?
- Conclusion
Key Takeaways
- Pullthrough and electric sharpeners strip steel fast with fixed steep slots, while a stone gives you control over angle, pressure, and finish, so your knife lasts longer.
- A water-based 1000/6000 combination stone is your best first pick, since the 1000 side sets the bevel and the 6000 side polishes it.
- Holding a steady angle matters more than expensive gear or grit choice, so use an angle guide, check your contact with a marker, and keep pressure light.
- Hone with a rod every week or two, sharpen on a stone two or three times a year, and keep the stone flat so your edge stays true.
Honing Stones Vs. Other Sharpening Tools
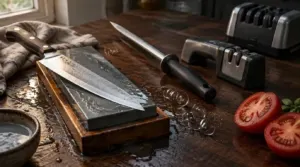
Honing rods and whetstones do two different jobs, and mixing them up is the most common beginner mistake. A honing rod realigns a bent edge without removing metal. A whetstone grinds steel away to create a new edge.
If an edge just feels dull, try stropping first, and these DIY razor blade sharpening methods cover when a stone is actually worth it.
A pullthrough sharpener or electric sharpener feels easier. It isn’t kinder. Most use fixed carbide slots that cut one steep angle and strip metal fast, so your knife wears out sooner.
A honing stone gives you control. You pick the angle, the pressure, and the finish. Hone with a rod every week or two, then sharpen on a stone two or three times a year. That routine preserves your blade’s geometry and stretches the time between full sharpenings. Sharpening on a whetstone also removes minimal steel, which extends the life of your knife. You keep more steel.
Choose Beginner-Friendly Stone Materials and Grits
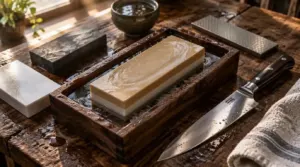
Once you’ve picked a stone over a pullthrough, choose beginner-friendly stone materials and grits. Get this right and knife sharpening gets easier fast.
Start with these four rules:
- Choose a water stone for the best balance of speed and feel. Soak it 5 to 20 minutes first.
- Buy a 1000/6000 combination stone. It covers bevel setting and polishing in one block.
- Skip grits below 1000 unless you’re repairing chips. Routine edge maintenance doesn’t need them.
- Consider ceramic if soaking annoys you. It only needs a splash of water.
That’s the whole whetstone grit progression for a beginner: 1000 sets the bevel, 6000 refines it. Oil stones cost less, and diamond stones stay flat, but neither is the best first pick.
Top 5 Honing Stone Kits for Beginners
You now know which stone materials and grits suit a beginner. Here are five kits that put those choices into practice, each one built around a dual grit stone you can learn on. Read through them, match one to your budget and your knives, and you’ll be sharpening with confidence.
1. Intelitopia Dual Grit Knife Sharpening Set
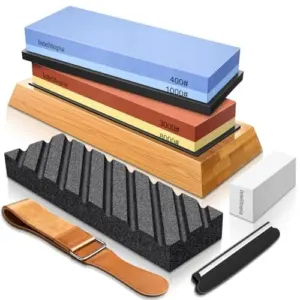
Say you’ve just bought your first decent chef’s knife, and it’s already dull from a month of cutting tomatoes. This kit fixes that without a learning curve.
You get dual-sided 400/1000 and 3000/8000 stones, a leather strop, a flattening stone, a bamboo base and an angle guide. The corundum stones need only water, no honing oil. Use the guide every time, and you’ll hold a steady bevel.
It works on kitchen knives, pocket knives, scissors and razors. Condition the strop now and then.
Verdict: a solid starter kit.
| Best For | Home cooks and beginners who want a complete, easy-to-use sharpening kit for kitchen knives, pocket knives, scissors, and razors. |
|---|---|
| Grit Levels | 400/1000 and 3000/8000 |
| Stone Material | Aluminum oxide corundum |
| Angle Guide | Included |
| Non-Slip Base | Bamboo base |
| Lubrication | Water only |
| Flattening Stone | Included |
| Additional Features |
|
- Includes everything needed in one set: dual-sided 400/1000 and 3000/8000 grit whetstones, a leather strop, a flattening stone, a bamboo base, and an angle guide.
- Works with water only, so no honing oil is needed.
- Sharpens a wide range of tools, from kitchen knives and pocket knives to scissors and razors, and suits both high and lower quality blades.
- Needs water lubrication every time you sharpen.
- The angle guide must be used consistently to keep a proper bevel.
- The leather strop needs conditioning from time to time to keep performing well.
2. Sharp Pebble Whetstone Sharpener Kit
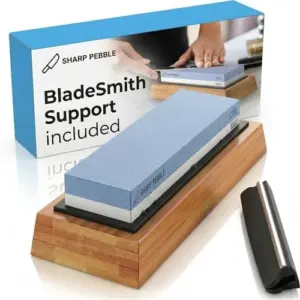
If the last kit felt like a lot of gear, this one keeps things simple. You get one dual-grit 1000/6000 whetstone, an angle guide and a non-slip bamboo base. Repair with the 1000 side, polish with the 6000.
Once your stone is soaked and the angle is steady, this step-by-step guide to sharpening a straight razor shows how the same 1000-to-6000 progression works on a much finer edge.
Soak the stone in water. No honing oil needed. Most beginners reach a razor-sharp edge in about 10 minutes.
It works on kitchen knives, chisels, scissors and razors. Skip ceramic blades, and check the guide fits wide bolsters.
Verdict: a smart first stone.
| Best For | Beginners and home cooks who want a simple, affordable way to get razor-sharp edges on kitchen knives, scissors, chisels, and razors without extra gear or honing oil. |
|---|---|
| Grit Levels | 1000/6000 |
| Stone Material | Corundum |
| Angle Guide | Included |
| Non-Slip Base | Bamboo base |
| Lubrication | Water only |
| Flattening Stone | N/A |
| Additional Features |
|
- Dual-grit 1000/6000 stone handles both repair and polishing in one piece
- Included angle guide and non-slip bamboo base help beginners hold a steady angle and keep the stone secure
- Water-based sharpening means no honing oil, and most beginners get a razor-sharp edge in about 10 minutes
- Needs to be soaked in water before each use
- Not suitable for ceramic knives or extremely hard alloys
- Angle guide may not fit blades with very wide bolsters or unusual profiles
3. HMPLL Dual Grit Whetstone Set
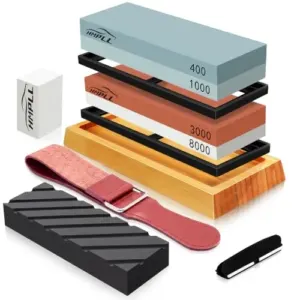
The HMPLL set gives you four grits on two dual-sided stones: 400/1000 and 3000/8000. Use the coarse side to repair chips and revive dull edges. Use the fine side to polish.
The stones are white corundum, so they’re hard and durable. Soak them in water for 10 to 15 minutes before each session. Skip the oil. It’s not recommended.
You also get a bamboo base with rubber backing, a leather strop, a flattening stone, and an angle guide. It’s complete.
| Best For | Home cooks and hobbyists who want one complete kit for repairing chipped knives, sharpening dull blades, and polishing them to a fine finish. |
|---|---|
| Grit Levels | 400/1000 and 3000/8000 |
| Stone Material | White corundum |
| Angle Guide | Included |
| Non-Slip Base | Bamboo base with rubber |
| Lubrication | Water only |
| Flattening Stone | Included |
| Additional Features |
|
- Four grits (400/1000 and 3000/8000) on two dual-sided stones cover everything from chip repair to final polish
- Hard, durable white corundum stones that work on stainless and carbon steel knives, plus scissors, razors, shears, and chisels
- Comes with a bamboo base with rubber backing, a leather strop, a flattening stone, and an angle guide, so nothing extra is needed
- The stones must be soaked in water for 10 to 15 minutes before every session
- Oil can’t be used, so the stones need water for lubrication
- The stones need regular flattening with the included flattening stone to stay even over time
4. Goodjob Dual Grit Sharpening Stone Kit
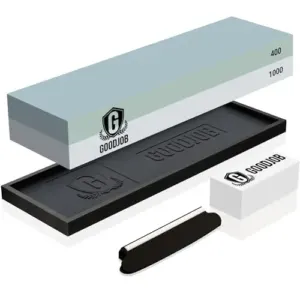
The Goodjob kit gives you double-sided 400/1000 grit whetstones, a fixed-angle guide, a non-slip silicone base, and a white flattening stone. That’s everything a beginner needs to start. The stone measures 7.1 by 2.4 by 1.2 inches, and the kit weighs 16 ounces. Use water only, which keeps cleanup food-safe.
The catch is wear. The stone wears out quickly with regular use, and some customers say the advertising oversold it. Verdict: buy it for practice, not for the long haul.
| Best For | Beginners and home cooks who want an affordable kit to practice sharpening kitchen knives and learn the basics. |
|---|---|
| Grit Levels | 400/1000 |
| Stone Material | Carborundum |
| Angle Guide | Fixed-angle guide |
| Non-Slip Base | Silicone base |
| Lubrication | Water only |
| Flattening Stone | Included |
| Additional Features |
|
- Includes double-sided 400/1000 grit whetstones, plus a fixed-angle guide to help beginners hold a steady angle
- Comes with a non-slip silicone base and a white flattening stone, so it’s ready to use out of the box
- Needs only water for lubrication, which keeps cleanup food-safe
- The stone wears out quickly with regular use
- Some customers say the advertising claims were misleading
- Users have raised durability concerns, so it’s better for practice than long-term use
5. Sharp Pebble 1000/6000 Whetstone Knife Sharpener Kit
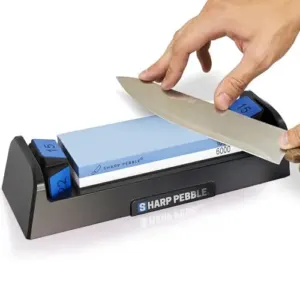
Say you’ve got a dull German chef’s knife and a Japanese santoku in the same drawer. This kit works for both. The angle guide locks in 15°, 17°, 20°, or 22°, so you stop guessing.
Use the 1000 grit side to sharpen, then the 6000 side to polish. Soak the stone 10 to 15 minutes first. Water is the only lubricant you need.
One catch: the guide offers four fixed angles, not continuously adjustable. Flattening stone is sold separately. Buy it.
| Best For | Home cooks and beginners who want to keep both German and Japanese style knives sharp without having to guess at the right sharpening angle. |
|---|---|
| Grit Levels | 1000/6000 |
| Stone Material | N/A |
| Angle Guide | Built-in 15°/17°/20°/22° |
| Non-Slip Base | Non-slip base |
| Lubrication | Water only |
| Flattening Stone | Not included |
| Additional Features |
|
- Built-in angle guides (15°, 17°, 20°, 22°) take the guesswork out of holding a consistent angle
- Dual-grit stones (1000 for sharpening, 6000 for refining) restore dull blades and polish the edge in minutes
- Works with both Western and Eastern knife styles, and needs only water for lubrication
- The angle guides are limited to four fixed angles and can’t be adjusted continuously
- The stones must be soaked in water for about 10 to 15 minutes before each use
- A flattening stone isn’t included and has to be bought separately
Choose Sharpening Angles for Your Knife
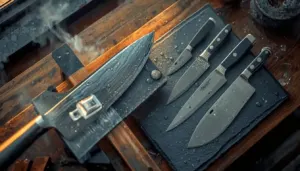
Think of your sharpening angle as the slope of a roof. Steep slopes shed weight and last longer. Shallow ones cut cleaner but wear faster.
Your sharpening angle is like a roof’s slope: steep edges endure longer, while shallow ones cut cleaner but wear out faster
Pick the angle by knife type and steel:
- Japanese kitchen knives: 10 to 16 degrees per side.
- Western kitchen knives: 15 to 20 degrees.
- Fillet and boning knives: 12 to 18 degrees.
- Pocket knives: 18 to 20 degrees.
- Outdoor and hunting knives: 20 to 25 degrees.
Harder steel holds a lower angle. Softer steel needs a wider one. Lower angles cut sharper but need frequent upkeep. Higher angles resist chipping.
Most beginner sharpening kits include an angle guide. Consistency beats exact numbers. Grit selection won’t fix a wandering angle. Always verify with edge testing methods.
How to Use Honing Stones Step-by-Step
You’ve picked your angle, so now it’s time to put the stone to work. The six steps below take you from a dry stone to a sharp, tested edge. Follow them in order, and you’ll know exactly what each pass is doing.
Prepare Your Stone and Workspace
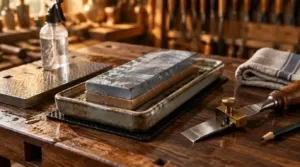
Your stone is only as good as your setup. Start with the soak. Check the maker’s instructions, then wet your water stones until the bubbles mostly stop. Skip it if they’re splash-and-go.
Set the stone on a nonslip base in a level spot with good light. Clip on your angle guide. Keep the surface wet, and flatten the stone whenever it dishes.
Check Your Angle With Marker
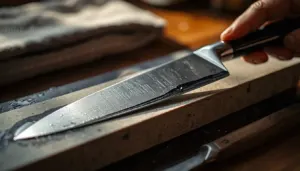
Your eyes can lie about angle. A marker won’t.
Color the bevel near the edge with a permanent marker. Make a few light strokes on your honing stone, then look. Ink gone across the whole bevel means good contact. Ink left at the edge means you’re too shallow. Ink left at the shoulder means you’re too steep.
Adjust in small steps. Repeat with fresh ink.
Sharpen Evenly and Form a Burr
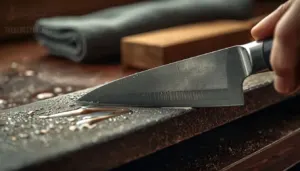
Once the marker confirms your angle, keep it. Wet the honing stone and start with edgeleading strokes, heel to tip, using light pressure. Sharpening technique consistency matters most:
- Slurry gathering under the blade
- Steady wrist, fixed angle
- Ink-free bevel
- Metal curling into a thin wire
- A burr check revealing one continuous line
Don’t flip yet; edge refinement process comes later.
Detect The Burr Safely
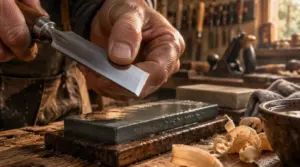
Now run a burr check. Slide your thumb across the edge, perpendicular to the blade, never along it. Feel the side opposite the bevel you just ground. Touch lightly, always.
Try the fingernail catch test too. Your nail should snag evenly along the full length. A smooth gap means edge point creation isn’t finished there, so keep stroking that spot.
Refine The Edge and Remove Burrs
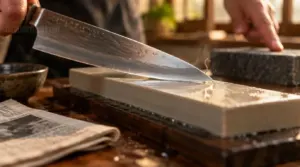
Once you find the burr, remove it. Move to your fine stone, around 3000 grit. Use light, alternating strokes, one per side. Cut pressure each pass.
"Pressure is the enemy here," most instructors say. Heavy force just re-forms the burr.
Finish with edge-leading strokes on your finest stone, then strop on newspaper. A honing rod won’t replace this final step.
Test Sharpness Without Touching The Edge
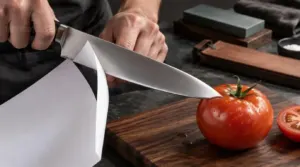
Your edge is done, so check it without touching it. Start with the paper test. Slice a sheet from heel to tip. Clean cuts mean your edge tip creation worked.
Then try the tomato test. A sharp knife pierces the skin under its own weight. Inspect blade edge geometry under bright light. An evenly reflective edge shows sharpening angle consistency.
Clean, Flatten, and Store Your Honing Stones
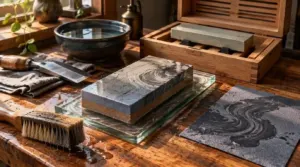
Rinse your stone after every session. Scrub it with a soft brush and plain water to lift swarf from the pores. Check stone lubricant compatibility first: water stones want water, and oil stones want oil. Never switch.
Flatten the stone when the center dishes. Draw a pencil grid across the face, then rub it on wet silicon carbide sandpaper over glass until the marks vanish. Regular stone flattening maintenance takes two minutes and keeps your angle true.
- Test stone surface flatness before every session.
- Dry the stone completely, never wrap it in a towel.
- Keep it in a ventilated stone storage case, away from furnaces and cold garages.
That’s the routine. Keep it up and a water stone lasts years.
Frequently Asked Questions (FAQs)
What is the best sharpening stone for a beginner?
Don’t worry, you don’t need an expensive setup. A 1000/6000 combo stone is the best pick: a synthetic water stone whetstone with an angle guide. Skip the coin method until your hands learn the angle.
What is the difference between a honing stone and a sharpening stone?
Think of a sharpening stone as a sculptor’s chisel and a honing stone as a polishing cloth. One reshapes. The other keeps things true.
A sharpening stone grinds metal away to rebuild a dull bevel. A honing stone realigns the edge for edge maintenance.
Can you use WD-40 as a honing oil?
No, don’t use WD-40 as a honing oil. It’s a thin water displacer, not a true honing oil. It clogs pores, adds friction, and ruins water stones. Use mineral oil on your oil stone instead.
Should you hone or sharpen first?
Sharpen first, then hone. Sharpening on a whetstone builds the edge. Honing only realigns it. If your knife still cuts but feels less keen, hone it. If it’s dull or chipped, sharpen it.
How often should beginners sharpen their knives?
Sharpen on a honing stone every two to three months if you cook daily. Don’t follow a calendar, though. Sharpen when your knife stops slicing a ripe tomato cleanly, even after honing.
Can serrated knives be sharpened on whetstones?
Most bread knife gullets are under 3 mm wide.
A whetstone’s grit progression helps only flat sides. Use a ceramic rod for serrations, gullet by gullet.
Use gentle sharpening technique; check your blade compatibility guide.
How long does a whetstone typically last?
A whetstone wears like a riverbed, slowly and with every pass.
Expect 3–6 years of stone durability with regular use. Your stone wear rate depends on sharpening frequency, pressure, and flattening frequency. Light pressure helps.
Should I use water or oil on stones?
Mixing them up will ruin a perfectly good honing stone. Use the lubricant your stone specifies. A water stone takes water. An oil stone takes oil. Never switch, because oil repels water for good.
What mistakes do beginners most commonly make sharpening?
Most beginners wobble their sharpening angle. Pick 15° for Japanese knives or 20° for Western ones, then use an angle guide. Press lightly, because heavy pressure ruins control. Always raise a burr, then progress through grits.
Conclusion
Worried you’ll ruin a good knife? You won’t. Mistakes on a stone are slow and fixable, and a steady angle matters far more than expensive gear.
Pick one of the five kits, color your bevel with a marker, and practice on a cheap knife first. Honing stones for beginners reward patience, not talent. Within three sessions, your hands will remember the angle.
Keep your stone flat and your angle steady, and every knife stays sharp.