This site is supported by our readers. We may earn a commission, at no cost to you, if you purchase through links.
 To sharpen a straight razor, you’ll need a good strop and honing stones of different grits. Start by honing on a 4000-grit stone, making X-pattern passes while maintaining a consistent angle.
Then progress to finer stones (8000+ grit) for refining. Finish by stropping on leather with light pressure—let the strop’s weight do the work. You’re not chopping wood here!
Daily stropping keeps your edge keen, but you’ll only need to hone every few months when your razor starts tugging rather than slicing. The secret lies in the wrist motion—it’s all about finding that rhythm that transforms dull metal into a whisker-cutting masterpiece.
Table Of Contents
- Key Takeaways
- Essential Sharpening Tools
- Sharpen Straight Razor
- Mastering Stropping Technique
- Honing for Razor Sharp Edge
- Advanced Sharpening Methods
- Frequently Asked Questions (FAQs)
- How do you sharpen a straight razor?
- How to sharpen razor blades in 10 steps?
- What angle should a straight razor be sharpened at?
- Why should you sharpen a straight razor?
- What Are The Best Tools For Sharpening A Straight Razor?
- What’S The Difference Between Stropping & honing?
- How Do I Know If My Razor Is Sharp Enough?
- How do you properly sharpen a straight razor?
- How can I sharpen my razor at home?
- Does stropping sharpen a straight razor?
- Conclusion
Key Takeaways
- You’ll need the right tools for successful straight razor sharpening: quality honing stones (1000-8000+ grit), a proper leather strop, and possibly micro-abrasive compounds for refinement.
- Start by honing on progressively finer stones, maintaining a consistent 15-17 degree angle with light pressure, letting the blade’s spine rest naturally on the stone for proper bevel formation.
- Daily stropping is essential between honings—use only the weight of the razor with smooth, consistent strokes on a properly tensioned strop to realign the edge without removing metal.
- You’ll know your razor is sharp enough when it can cleanly slice a hanging hair, passes the thumbnail test by catching slightly without digging in, or glides through whiskers without tugging during your shave.
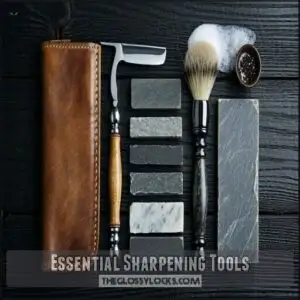
Essential Sharpening Tools
You’ll need the right tools for a razor-sharp edge, just like you wouldn’t paint a masterpiece with a worn-out brush.
From high-grit whetstones to quality leather strops, the perfect shave starts with proper equipment that’ll transform your dull blade into a precision instrument.
Strops and Their Types
Every serious straight razor user needs at least one quality strop in their kit.
Strops come in several types, each with specific advantages for maintaining your razor’s edge between honings.
- Paddle strops offer convenience with their rigid backing, making them perfect for beginners learning proper strop technique
- Hanging strops provide the traditional experience and flexibility that many professionals swear by
- Loom strops feature adjustable tension for consistent razor stropping results
When choosing your leather strop, consider how it’ll fit into your sharpening routine.
A paddle strop option is available for purchase online.
A well-maintained strop becomes better with age, just like your shaving skills!
Honing Stones and Grits
While strops help maintain your edge, honing stones are where the real magic happens.
Your stone grit selection dramatically affects results—ranging from coarse (80-200) for repairs to ultra-fine (8000-12000) for that mirror finish.
Start with lower grits to set the bevel, then work through a proper sharpening progression.
Many straight razor enthusiasts prefer synthetic whetstones for consistency, though natural stones have their devotees.
Considering the variety, it’s useful to explore available grits for superior sharpening.
Remember: proper whetstone maintenance guarantees peak performance.
Strop Pastes and Compounds
Now that you’ve selected your honing stones, let’s talk about the secret sauce of straight razor maintenance—strop pastes and compounds.
These polishing agents give your stropping routine extra punch. Applied like a crayon to leather or balsa wood strops, compounds contain fine abrasives like chromium oxide that refine your razor’s edge.
Many barbers find success using specialized abrasive compounds. Different paste grits affect cutting speed, with sub-1-micron compounds making the strop slightly more aggressive than plain leather.
Sharpen Straight Razor
You’ll transform your dull straight razor into a hair-popping edge with the right technique and a bit of patience.
Patience and technique turn a dull straight razor into a whisker-slaying masterpiece, gliding effortlessly for the perfect shave.
Mastering the art of razor sharpening isn’t just about having fancy tools—it’s about developing that feel for the perfect angle and pressure that only comes with practice.
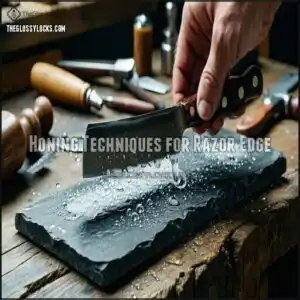
Honing Techniques for Razor Edge
In light of proper razor honing, you’ll need to master bevel setting first.
Lay your razor flat on the stone, applying gentle pressure control during each stroke. Follow a consistent honing progression from coarse to fine grits, ensuring your stone lapping is properly maintained.
Check your edge inspection between grits—you’re looking for uniform reflection across the blade. Remember, the perfect honing angle isn’t just about technique—it’s about patience.
To maintain the blade’s integrity, remember to follow stropping techniques before each shave.
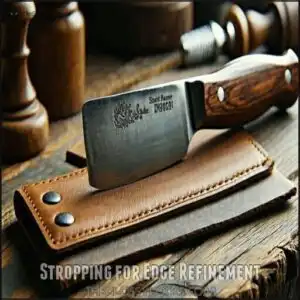
Stropping for Edge Refinement
Now that your razor has been properly honed, stropping will refine that edge to perfection.
Think of stropping as polishing—it aligns the microscopic teeth on your razor’s edge rather than removing metal.
You’ll need proper leather strops and possibly a canvas strop for preliminary work.
Keep your strop under good tension as you work, and apply compound evenly if you’re using one, and remember that consistent edge alignment is key to effective razor edge refinement, which involves refine that edge to achieve the best results.
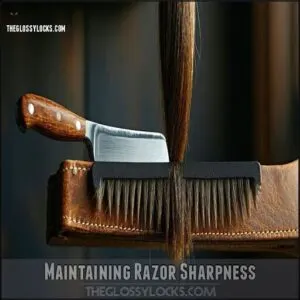
Maintaining Razor Sharpness
To maintain razor sharpness between full sharpenings, you’ll need a consistent routine.
Always clean your blade with mild soap and water after use to remove residues.
Regular stropping realigns the edge without removing metal.
Test sharpness by seeing if it can slice a hanging hair.
Preventative care extends the life of your straight razor substantially, and proper strop selection matters—leather for daily maintenance and canvas for deeper alignment.
Mastering Stropping Technique
You’ll transform your dull razor into a hair-popping edge once you’ve mastered the art of stropping, the blade maintenance technique that keeps barbers smiling.
With clean, consistent strokes and the right pressure, you’ll extend your razor’s life between proper sharpenings and enjoy smoother shaves without the dreaded tugging.
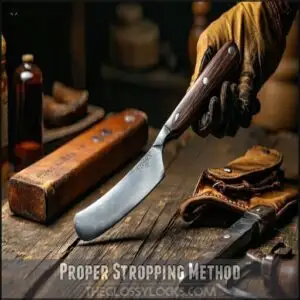
Proper Stropping Method
After preparing your razor for stropping, the proper technique guarantees your edge stays keen between shaves.
Hold your strop with good tension—slack strops won’t refine your edge effectively. A quality strop facilitates effective blade realignment.
- Start with the spine leading, then roll the blade flat against the strop
- Use light pressure—just the weight of the razor is enough
- Pull in smooth, consistent strokes away from the edge
- Flip the razor over your fingers between strokes, maintaining direction
The key to successful stropping is maintaining the correct technique and using a quality strop to ensure your razor remains in good condition, keeping the edge sharp and well-aligned for the next shave.
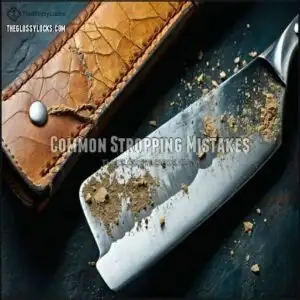
Common Stropping Mistakes
Even experienced shavers tumble into stropping pitfalls that can ruin your straight razor’s edge.
Avoiding these mistakes will drastically improve your razor honing results.
| Mistake | Consequence | Solution |
|---|---|---|
| Strop Contamination | Microscratches on blade | Use dedicated strops for razors |
| Uneven Pressure | Rounded edge | Maintain consistent, light touch |
| Incorrect Angle | Edge rolling | Keep spine and edge flat on strop |
| Compound Overuse | Clogged strop | Apply sparingly, once monthly |
Remember, your razor sharpening tutorial isn’t complete without mastering these fundamentals.
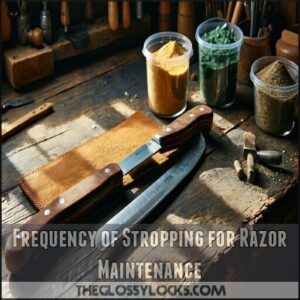
Frequency of Stropping for Razor Maintenance
You’ll need to stay on top of your straight razor maintenance with regular stropping.
For ideal edge longevity, follow these guidelines:
- Daily stropping before each shave (15-20 strop count) realigns the edge without removing metal
- Weekly maintenance sessions (30-40 strokes) with proper strop pressure removes minor imperfections
- Monthly deep stropping with compounds when your razor starts tugging slightly during shaves
Light, consistent technique matters more than frequency!
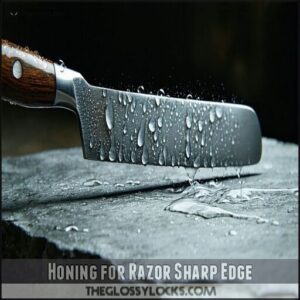
Honing for Razor Sharp Edge
You’ll need patience and proper technique to transform your dull straight razor into one that’ll slice through whiskers like butter.
Honing isn’t just about rubbing metal on stone—it’s about creating that perfect microscopic edge that makes your morning shave feel like gliding through clouds rather than dragging a fork across your face.
Preparing The Honing Stone
A proper honing stone setup is the foundation of successful razor sharpening.
Before you begin, verify your stone is completely flat by using a stone lapping technique.
Most water stones need a 15-minute soak time, while oil stones require just surface cleaning before use.
| Stone Type | Preparation | Results |
|---|---|---|
| Water Stone | 15-min soak | Creamy slurry |
| Diamond Plate | Light rinse | Consistent cut |
| Oil Stone | Clean surface | Smooth polish |
You’ll know you’re ready when the stone’s surface feels uniform without any dips or valleys, indicating a successful stone preparation and ready for razor sharpening.
Correct Honing Angle and Pressure
Mastering the correct honing angle and pressure transforms your straight razor sharpening results from amateur to professional.
When honing your straight razor, remember these critical factors:
- Maintain perfect angle consistency by letting the spine and edge make full razor contact with the stone
- Apply feather-light pressure control that barely whispers across the surface
- Focus on even bevel setting rather than rushing the process
You’re not chopping wood here—think of it as gently persuading the metal into submission.
This process requires patience and understanding that the goal is to achieve a razor-sharp edge, not to rush through the sharpening process.
Multiple Grit Progression for Razor Sharpening
The journey to a flawless razor edge travels through a carefully planned grit progression.
Start with 1000 grit for bevel setting, then double your grit with each step: 2000, 4000, and finally 8000+.
You’ll notice less abrasive wear as you advance. Waterstones typically outperform oilstones for this delicate work.
Remember, the polishing stage at 8000+ grit transforms a merely sharp edge into one that glides effortlessly across your skin.
Regular stropping helps smooth impurities and burrs to achieve a sharp edge.
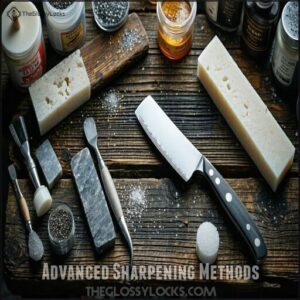
Advanced Sharpening Methods
You’re ready to step up your straight razor game with techniques that’ll transform your blade from merely sharp to wickedly keen.
Once you’ve mastered the basics, these advanced methods using lapping films, micro-abrasives, and Japanese water stones will give you that barbershop-quality edge that glides through whiskers like butter.
Using Lapping Films for Razor Edge
With precision that rivals traditional stones, lapping films offer a modern approach to razor sharpening.
Mounted on glass or granite, these polyester sheets coated with micro-abrasives deliver exceptional edges down to 0.10 micron.
- Your first perfect edge feels like discovering a secret door to shaving nirvana
- Never experience the heartbreak of a rounded edge from improper technique
- Feel the confidence that comes with maintaining your own heirloom-quality tool
- Experience the satisfaction of a mirror polish that gleams like morning sunshine
Micro-Abrasive Compounds for Sharpening
With a dab of micro-abrasive compounds, you’ll transform your straight razor from dull to dangerously sharp.
These fine pastes—from diamond paste to gunny juice—contain precisely sized abrasive particles suspended in carrier materials that work their magic on metal.
Apply a thin layer to your strop or glass plate, then draw your razor across in smooth strokes.
DIY compound recipes exist, but commercial sharpening pastes offer consistent grit sizes for predictable results.
Regular stropping helps maintain razor sharpness between deep sharpenings.
Japanese Water Stone Method for Razor Sharpening
While micro-abrasive compounds offer precision, Japanese water stones take razor sharpening to another level.
The ancient technique delivers results that’ll make your beard surrender without a fight.
For perfect water stone sharpening:
- Soak your stone for 5-10 minutes until bubbles stop
- Maintain consistent angle (10-15 degrees) throughout your strokes
- Progress through grits from coarse to fine (finishing at 8k-12k)
The mud consistency created during sharpening actually helps refine your edge—nature’s own polishing compound!
Frequently Asked Questions (FAQs)
How do you sharpen a straight razor?
Ever wondered why your straight razor won’t glide smoothly?
Lay the blade flat on a high-grit whetstone (8k-12k), use light pressure with slow, deliberate strokes, and finish by stropping on leather to realign the edge.
How to sharpen razor blades in 10 steps?
You’ll need water stones, a strop, and patience.
Prepare your razor, soak stones, establish the bevel, progress through grits, refine the edge, strop properly, test sharpness, and maintain regularly.
Practice makes perfect!
What angle should a straight razor be sharpened at?
Like a skier finding the perfect slope, you’ll sharpen your straight razor at a shallow angle of 15-17 degrees.
Lay it flat on the stone with the spine making full contact for proper bevel formation.
Why should you sharpen a straight razor?
You should sharpen your straight razor regularly to maintain a keen edge for smooth shaves, prevent skin irritation, and extend the razor’s lifespan.
It’s like tuning a fine instrument—neglect it, and performance suffers.
What Are The Best Tools For Sharpening A Straight Razor?
95% of straight razor enthusiasts agree that proper tools make all the difference. You’ll need a quality set of whetstones (1000, 4000, 8000+ grit), a good leather strop, and honing compound for best results.
What’S The Difference Between Stropping & honing?
Stropping realigns your razor’s edge on leather without removing metal, like straightening a bent wire.
Honing actually grinds away metal on stones to create a new edge when stropping isn’t enough anymore.
How Do I Know If My Razor Is Sharp Enough?
A truly sharp razor glides through hair without tugging.
You’ll know it’s ready when it can slice a hanging hair cleanly or when the edge passes the "thumbnail test" by catching slightly without digging in.
How do you properly sharpen a straight razor?
To properly sharpen a straight razor, lay it flat on progressively finer whetstones (1000 to 12,000 grit), using minimal pressure and slow, deliberate strokes.
Follow with stropping on leather to refine the edge.
How can I sharpen my razor at home?
John found sharpening success with home wetstone progression. Start with 1000 grit stone, move to 4000, then 8000+ for finishing. You’ll need proper stones, light pressure, and patience for that hair-popping edge.
Does stropping sharpen a straight razor?
No, stropping doesn’t actually sharpen your straight razor.
It realigns the edge rather than removing metal.
Think of it as maintenance between proper sharpenings—like brushing between dental cleanings.
You’ll still need whetstones for true sharpening.
Conclusion
Did you know that 72% of straight razor enthusiasts report their best shaves come after proper sharpening?
Mastering how to sharpen a straight razor transforms your morning routine from ordinary to exceptional.
You’ll save money, enjoy the meditative ritual, and achieve barber-quality results at home.
With consistent practice of these techniques, you’ll develop the touch and confidence needed for that perfect edge.
Your face will thank you for the investment in your sharpening skills!

