This site is supported by our readers. We may earn a commission, at no cost to you, if you purchase through links. This content is for general informational and educational purposes only and is not a substitute for professional medical, dermatological, or nutritional advice.
Dull clippers don’t announce themselves. They pull a hair here, leave a track mark there, and you blame the cut instead of the blades. Then one day a client winces, and you know the real cause: hair, oil, and bacteria packed between the teeth.
Dirty blades run hot, pinch skin, and spread germs from one customer to the next. A quick brush won’t fix that. Proper step by step blade cleaning for hair clippers takes about 15 minutes and protects your tools, your clients, and your reputation.
Here’s the exact 10-step process I use, starting with the supplies on your station.
Table Of Contents
- Key Takeaways
- Hair Clipper Blade Cleaning Supplies
- Quick Versus Deep Clipper Blade Cleaning
- Step-by-Step Hair Clipper Blade Cleaning
- Step 1: Switch Off and Unplug
- Step 2: Remove Guards, Brush Hair
- Step 3: Detach Manufacturer-Approved Removable Blades
- Step 4: Brush Between Blade Teeth
- Step 5: Disinfect Following Label Directions
- Step 6: Wipe Clipper Housing
- Step 7: Dry Blades Completely
- Step 8: Reassemble With Manufacturer-Specified Alignment
- Step 9: Apply Clipper Blade Oil
- Step 10: Run, Then Wipe Excess
- Clipper Blade Cleaning Mistakes to Avoid
- Clean Blade Storage and Replacement Signs
- Top 5 Clippers: Blade Cleaning Considerations
- Frequently Asked Questions (FAQs)
- How to clean blades on hair clippers?
- Is WD-40 good for clipper blades?
- Can you use rubbing alcohol to clean barber clippers?
- What do barbers use to sanitize clippers?
- Can I use household cleaners on clipper blades?
- How often should clipper blades be sharpened professionally?
- Is it safe to clean ceramic blades differently?
- What causes clipper blades to pull hair?
- Can pet clipper blades be cleaned the same way?
- Conclusion
Key Takeaways
- Clean your blades every time: a two-minute brush and disinfect between clients stops germs from spreading, and a full 15-minute deep clean every 3 to 5 cuts or at week’s end keeps buildup from dulling and overheating them.
- Follow the full routine in order, since unplugging first, brushing between the teeth, disinfecting for the label’s full contact time, and drying every part completely are what keep you safe and stop rust.
- Align the blades to your manufacturer’s specs and oil them with proper clipper oil after every clean, because dry or crooked blades run hot, pinch skin, and pull hair.
- Match your routine to your clipper, skip WD-40, bleach, and soaking, and replace blades when you see pulling, track marks, nicks, rust, or alignment you can’t fix.
Hair Clipper Blade Cleaning Supplies
The right hair clipper blade cleaning supplies keep your work safe and your blades sharp. You don’t need much, but you do need the correct items.
Even with perfect cleaning habits, blades eventually wear out, so check how often you should replace hair clipper blades to keep every cut clean.
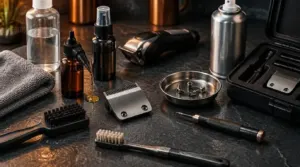
Start with a stiff-bristled clipper brush and a bottle of clipper oil. Add a disinfectant, either 70% isopropyl alcohol or a clipper-specific spray. Wipe with a soft cloth or paper towels, and use an old toothbrush for tight corners.
Keep a small dish or magnetic tray nearby so screws and blades don’t roll away. If your blades detach, grab a screwdriver. Compressed air clears stubborn hair from crevices, and a clipper blade cleaning solution helps when buildup gets heavy.
Many barbers buy a professional maintenance kit. It bundles the essentials in one storage case. If you prefer a ready-to-use option, a clipper spray disinfectant such as H-42 Virucidal Clean Clippers Spray usually costs between $9.41 and $17.99.
Quick Versus Deep Clipper Blade Cleaning
Quick clean vs deep clean comes down to timing and purpose. You do one between customers and the other at the end of the week.
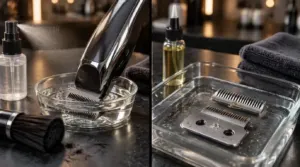
A quick clean takes about two minutes. Brush off loose hair, then spray the blades while they run, or dip the tips in 70% isopropyl alcohol and run them briefly. This is disinfecting hair clippers between customers, and it stops cross-contamination right away. Do it after every haircut.
A deep clean is blade cleaning and oiling in full. You remove the blades, soak them, and focus on removing hair buildup packed between the teeth. Do this every 3 to 5 haircuts, or at the end of each workweek.
Skip it, and your blades dull, pinch skin, and overheat. Finish by lubricating clipper blades so they last longer.
Step-by-Step Hair Clipper Blade Cleaning
You’re about to walk through the full process, from power-off to final wipe-down. Follow all 10 steps in order, because skipping one is how blades rust, dull, or spread germs. Each step is short, so you’ll finish a deep clean in about 15 minutes.
Step 1: Switch Off and Unplug
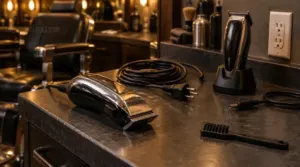
Picture a barber who flips the switch off, grabs a brush while the blades still coast. One slip, and a nick follows.
Turn Off and Unplug the Clippers. That’s Step 1: Switch Off and Unplug. For corded models, unplug the clippers. For cordless, disconnect power, including any charging cable. Run a Power Safety Check: switch off, blades stopped, nothing connected.
Step 2: Remove Guards, Brush Hair
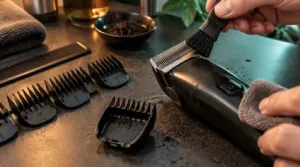
With the clippers off and unplugged, remove guards first. Pull snap-on guards straight off, or release the tabs on screw-in combs. Hair buildup hides underneath, so check there.
Next, grab your blade brush. Tap the clipper lightly to loosen trapped hair, then sweep it away from the housing. Use a soft cloth for stubborn loose hair around the buttons.
Step 3: Detach Manufacturer-Approved Removable Blades
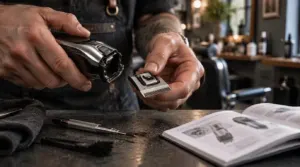
Check your manual first, then remove the blades if possible. Only detach blades the manufacturer approves for removal.
- Detachable blades: Press the blade lever or latch and pull straight off.
- Fixed blades: Use a Screwdriver for blade screw removal.
- Sealed units: Leave the Blade Assembly alone.
Don’t twist or pry. Keep the teeth facing down.
If your beard is dense, pairing these habits with one of the best beard trimmers for thick beards helps the blades cut cleanly without snagging.
Step 4: Brush Between Blade Teeth
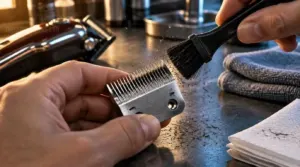
Brush Away Loose Hair and Debris from the blades first, using your blade brush. Work in the direction the blade teeth move, never against it. Against the grain, you push hair deeper into the assembly.
Keep your pressure light and steady. Never use metal objects between the teeth. Pins and wires ruin the cutting edges. Finish by wiping the blades with a soft cloth or paper towels.
Step 5: Disinfect Following Label Directions
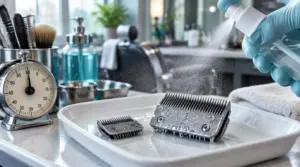
Say you spray your blades and wipe them a few seconds later. They look clean, but the job isn’t done. Disinfectant dwell time is what makes disinfecting hair clippers work.
Read your EPA-registered disinfectant label first. Andis Cool Care Plus 5in1 lists 10 minutes, while Barbicide Disinfectant follows its own directions. Keep blades wet that long, then wipe off the excess.
Step 6: Wipe Clipper Housing
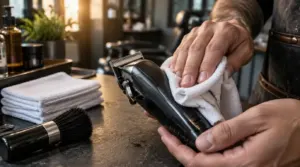
Imagine this: you finish a fade, and a fine layer of hair and oil is stuck to your clipper’s seams. Leave it, and it hardens.
Grab a lintfree cloth, a microfiber cloth, or a soft cloth or paper towels. Wipe clipper housing from top to bottom, working into the grooves. Stubborn spots need a slightly damp cloth, never a wet one. Keep liquid away from the vents. Then dry thoroughly.
Step 7: Dry Blades Completely
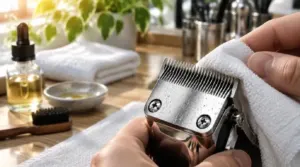
Wet steel rusts fast, sometimes within minutes. So don’t walk away yet.
Wet steel can rust within minutes, so don’t walk away until every blade is completely dry
If you did a warm water rinse, shake off the excess first. Then wipe every blade surface with a lintfree cloth, including between the teeth. Dry thoroughly, then let the blades air out in a dry environment for a few minutes.
Touch the steel. If it feels cool or damp, keep going. Add the protective cover only when everything is bone dry.
Step 8: Reassemble With Manufacturer-Specified Alignment
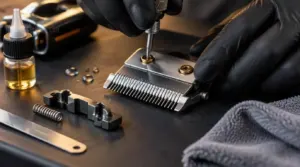
Alignment decides how well your clippers cut. Rush it, and you’ll pinch skin or leave streaks.
Start your blade reassembly in order: spring first, then blade guide, then cutter blade on the comb. Follow the manufacturer specifications. On Wahl, set top teeth.025" to.050" behind the bottom blade. Tighten each screwdriver turn gradually, alternating screws. Run the clippers briefly, then recheck.
Step 9: Apply Clipper Blade Oil
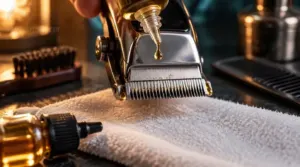
Your blades are aligned, so now it’s time for clipper oil application. Dry blades run hot and dull fast, so proper oiling technique matters.
Hold the clipper with the blade pointing down, then:
- Put 2-3 drops along the top blade.
- Add one drop on each side.
- Run the clipper briefly to spread it.
Use Wahl Blade Oil only.
Step 10: Run, Then Wipe Excess
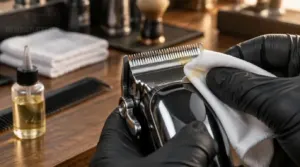
Now it’s time for the test run. Keep the blade pointed away from your skin and hair, then switch the clipper on briefly so the moving blades spread the oil across the cutting surfaces. Follow the maker’s instructions for post oil blade run time.
Switch it off. Wipe the excess oil from the blade with a clean, dry, lint-free cloth.
Clipper Blade Cleaning Mistakes to Avoid
Even after following all 10 steps, a few habits can undo your work. Here are the mistakes I see most often.
- Soaking the blades. Water rusts steel and can wreck the motor. Brush first, and dry every part right away.
- Using the wrong cleaning agents. WD-40, dish soap, and bleach leave residue or eat the coating. Stick to the label.
- Skipping lubrication. Dry blades run hot and wear fast. Oil them every time.
- Improper blade alignment. Crooked blades pinch skin and cut unevenly. Match the manufacturer’s setting.
- Ignoring blade rail cleaning. Packed hair on the rails stops the blade from gliding.
Also, don’t over-oil. A drop or two per blade is plenty.
Clean Blade Storage and Replacement Signs
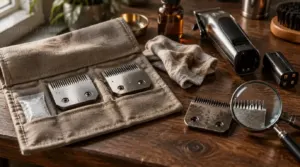
Clean blades still need a good home. Dry them completely, then finish your blade cleaning and oiling with a light coat of clipper oil, and wipe off the excess so dust doesn’t stick.
Blade storage matters more than most people think. Keep blades in a dry, low-humidity spot away from sunlight and heat. Use a breathable case or blade wallet, not an airtight plastic box, and toss in a silica gel pack. Going three months or more without use? Pull the battery from cordless clippers and wrap the blades in a lightly oiled cloth.
Your blade replacement timeline depends on use, so watch for signs. Pulling hair, track marks, extra passes, noise, or heat all point to dull blades. Check for nicks, chips, rust, and loose screws. Poor blade alignment that you can’t fix means it’s time to replace.
Top 5 Clippers: Blade Cleaning Considerations
Not every clipper cleans the same way, so your routine should match the tool in your hand. The five kits below differ in how their blades come off, how you can disinfect them, and what you should oil. Check each one before you buy so you know your cleaning routine will fit.
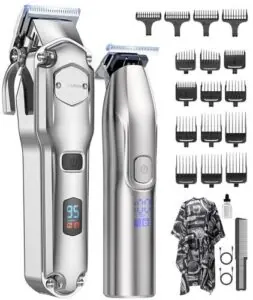
1. Jack & Rose Hair Clipper Set
 View On Amazon
Carbon steel blades make this set easy to maintain, but only if you stay on top of them. The included cleaning brush reaches between the teeth, and the lubricant oil is already in the box.
You can rinse the blades under running water, but dry them immediately. Carbon rusts. After wiping them dry, add 2-3 drops of oil and run the motor.
Some users report dulling after a few uses, so clean after every cut. Store everything in the pouch.
| Best For | Home users who want salon-style haircuts and beard trims for adults and children, and who don’t mind cleaning and oiling the blades regularly. |
|---|---|
| Cordless Runtime | 240 minutes |
| Weight | 1.98 lbs |
| Blade Type | Carbon T-blade |
| Guide Combs | 10 clipper, 4 trimmer |
| Body Grooming | Hair, beard, sideburns, body |
| Durability Concerns | Blade dulling, breakage after 5 months |
| Additional Features |
|
- Zero-gap T-blade trimmer cuts at 0.08mm, with an adjustable 0.8-2mm blade, for precise detail work on hair, beard, and sideburns
- Cordless with a 240-minute clipper runtime and 180-minute trimmer runtime, and it arrives fully charged
- Comes with 10 clipper guide combs, 4 trimmer guide combs, lubricant oil, a cleaning brush, a grooming apron, 2 USB cables, and a pouch
- Carbon blades can rust, so they must be dried right after rinsing and oiled afterward
- Some users report the blades dulling after only a few uses, so they need cleaning after every cut
- Some users report the product breaking after about 5 months, and motor performance may vary with hair thickness and type
2. Wahl Rechargeable Cord/Cordless Haircutting Kit
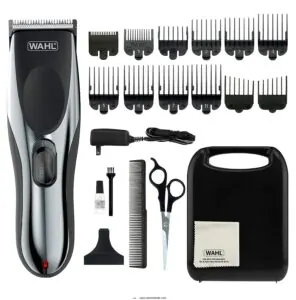
The Wahl 79434 makes cleaning easy because its blade detaches without tools. Pull the top edge of the blade away from the body, and it’s off. Don’t unscrew anything.
Brush out the hair with the supplied brush. Never use water on these blades.
Add three drops of Wahl Clipper Oil on the front of each blade and one on each side. Run the clipper a few seconds, then wipe off the excess. You’ll keep the self-sharpening stainless-steel blades cutting cleanly.
| Best For | People who want to cut and trim their own hair, beard, or body hair at home and like the option of using the clipper plugged in or cordless. |
|---|---|
| Cordless Runtime | 60 minutes |
| Weight | 1.81 lbs |
| Blade Type | Self-sharpening stainless steel |
| Guide Combs | 12 attachment guards |
| Body Grooming | Full-body grooming |
| Durability Concerns | Breakage after limited use |
| Additional Features |
|
- Runs cordless for up to 60 minutes or plugged in, and works on voltages from 100-240V
- Comes with 12 attachment guards from 1/16" to 1" and self-sharpening stainless-steel blades
- Blade detaches without tools, so cleaning and oiling are simple
- Customer feedback is mixed on how closely and how well it cuts
- Some users report it broke after limited use
- Needs a full charge every 6 months to keep the battery healthy
3. HUMMINGBIRD Pro Series Clipper Kit
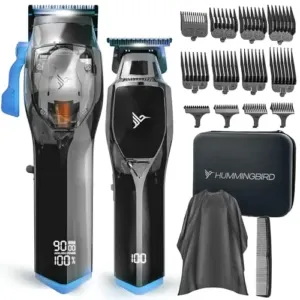
Say you just finished a fade on your nephew, and the MK11 trimmer is packed with fine hair. Here’s what to do with the HUMMINGBIRD Pro Series.
Set the trimmer to 2mm, power it off, and pull the blade outward along the arrow. No tools needed. Rinse the detached blades in clean water, then dry them right away. Keep water off the electrical components completely.
Oil the blades with the supplied oil, run them briefly, and wipe off the excess. Don’t skip that last wipe.
| Best For | Home users who want to cut hair for the whole family, including men, women, and kids, and who value sharp fades, beard shaping, and precise edge detailing without a trip to the barber. |
|---|---|
| Cordless Runtime | N/A |
| Weight | 13.3 oz (total kit) |
| Blade Type | DLC-coated, zero-gap T-blade |
| Guide Combs | 8 clipper, 4 trimmer |
| Body Grooming | N/A |
| Durability Concerns | N/A |
| Additional Features |
|
- The 9000 RPM brushless magnetic motor and DLC-coated blade on the MK10 clipper offer durability and cool operation.
- The MK11 trimmer’s zero-gapped T-blade handles precision detailing, and the kit includes 8 clipper guards and 4 trimmer guards for plenty of length options.
- It is USB-C rechargeable and cordless, with two 4FT braided charging cables included and real-time battery and RPM monitoring.
- Battery life gets mixed feedback from users.
- Some users report needing multiple passes at different angles to get a precise result.
- The kit weighs 13.3 ounces in total, which may feel heavy for some users.
4. Yineel Professional Cordless Hair Clipper Set
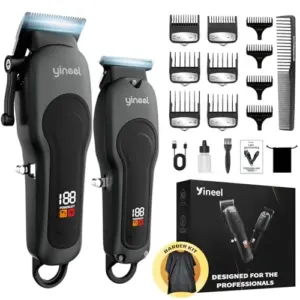
Imagine this: you finish a fade, rinse the blades under the tap, and toss the clipper in a drawer. With the Yineel, that’s actually fine.
The ceramic blades are rust-proof and self-sharpening, so water won’t hurt them. Turn it off, pull the guide combs, rinse, and dry completely.
Then oil them. Put drops on the blade center and ends, and run it briefly. The smart LED display sends maintenance alerts, so watch it.
Some buyers report problems after two uses, so test yours early.
| Best For | Home users who want to give themselves, their partners, or their kids salon-style haircuts, beard lines, and trims without leaving the house. |
|---|---|
| Cordless Runtime | 300 minutes |
| Weight | 6.8 oz |
| Blade Type | Self-sharpening ceramic |
| Guide Combs | 6 clipper, 4 trimmer |
| Body Grooming | N/A |
| Durability Concerns | Stops working after two uses |
| Additional Features |
|
- Self-sharpening, rust-proof ceramic blades stay sharp and can be rinsed under the tap.
- Up to 300 minutes of cordless runtime, with fast Type-C charging and a smart LED display for battery and maintenance alerts.
- Comes with 6 clipper combs (1.5mm–13mm) and 4 trimmer guide combs (1.5mm–6mm), in a durable, balanced 6.8oz body that survives 10ft drops.
- Some customers report it stops working properly after only two uses.
- Reviews are mixed on blade smoothness, and some find the cut not smooth.
- Feedback on power is inconsistent, with some finding it powerful and others underwhelming.
5. Braun Series 5 All-in-One Grooming Kit
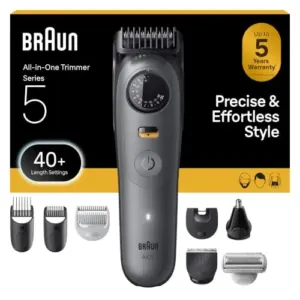
Think a waterproof clipper cleans itself? It doesn’t. The Braun Series 5 controls water fine, since it’s 100% waterproof, so you can rinse the head under lukewarm running water with mild liquid soap.
Switch it off first. Then use the included brush on the blade teeth. Keep the motor housing out of the water.
Let the blade air dry completely before you oil it. Add two or three drops of Braun light machine oil, then run the trimmer to spread it. Your 40 length settings stay sharp that way.
| Best For | Men who want one waterproof, cordless tool to trim and style their beard, hair, and body, including sensitive areas, with precise length control. |
|---|---|
| Cordless Runtime | 120 minutes |
| Weight | 8.96 oz |
| Blade Type | Ultra Sharp Blade |
| Guide Combs | Sensitive Body Comb |
| Body Grooming | Facial, body, sensitive areas |
| Durability Concerns | Cheaply made feel reported |
| Additional Features |
|
- 40 length settings in 0.5 mm steps, with a lock, for precise trimming
- Cordless and 100% waterproof, with up to 120 minutes of runtime for wet or dry use
- Interchangeable SmoothShave head and Sensitive Body Comb for face and body grooming
- Customer feedback is mixed on blade sharpness and long-term cutting performance
- Some users say the build feels cheap
- The charge indicator is helpful but may not work on every unit
Frequently Asked Questions (FAQs)
How to clean blades on hair clippers?
Want clean blades that cut evenly every time? Unplug the clippers, brush out all hair, and disinfect the blades. Dry them fully, then add two or three drops of oil. Blade maintenance keeps you safe.
Is WD-40 good for clipper blades?
Would you trust a degreaser to protect your blades? WD40 cleans, but it strips oil and leaves nothing behind. Skip it for blade lubrication. Use proper clipper oil instead.
Can you use rubbing alcohol to clean barber clippers?
Yes, you can use rubbing alcohol on your clippers, but check the label first. Choose isopropyl alcohol 70 or higher, and soak only the detached blades. Oil them right after, because alcohol strips lubricant.
What do barbers use to sanitize clippers?
Treat your blades like surgical steel. Barbers use an EPA-registered disinfectant, usually a clipper disinfectant or blade wash. Antimicrobial spray works too.
Barbicide spray stays on combs and shears, never blades, because it rusts them.
Can I use household cleaners on clipper blades?
A blade is a promise you keep to every head you cut. Can I use household cleaners on clipper blades? Yes, but only some. Dish soap, white vinegar, and 70% rubbing alcohol work. Skip bleach and ammonia.
How often should clipper blades be sharpened professionally?
Ironically, dull blades never announce themselves. Daily barbers need professional servicing every 6-8 weeks; home users, every 3-6 months.
Drag means blade sharpening can’t wait. Clipper blade replacement follows 3-5 sharpenings. Protect blade edge integrity.
Is it safe to clean ceramic blades differently?
No, you shouldn’t clean ceramic blades differently. Your standard blade cleaning and oiling routine works fine, and it helps with blade corrosion prevention. Just keep them from impacts, because they’re brittle and chip easily.
What causes clipper blades to pull hair?
Ever wonder why your clipper yanks instead of cuts? Usually, it’s hair buildup or dull teeth. Hair clumping in blades blocks movement. Misaligned blades snag strands. Overtightened screws and dry blades create drag.
Can pet clipper blades be cleaned the same way?
Pet blades are too different to treat the same" is a fair worry, but the cleaning routine is nearly identical. Unplug, brush, disinfect, dry, blade alignment check, oil. Just use pet-safe products and never skip blade lubrication.
Conclusion
What does a sharp blade really cost you? About 15 minutes. That’s it. Make step by step blade cleaning for hair clippers a habit, and you’ll stop fighting your tools. Cuts come out cleaner, clients leave comfortable, and your blades last longer.
Don’t wait for a wince or a pulled hair to tell you something’s wrong. Clean, oil, and check every blade. Your clippers will repay the effort every single time you pick them up.