This site is supported by our readers. We may earn a commission, at no cost to you, if you purchase through links. This content is for general informational and educational purposes only and is not a substitute for professional medical, dermatological, or nutritional advice.
A razor can look clean, feel sharp, and still start rusting overnight. All it takes is a thin film of water, trapped shaving cream, and the warm humidity left behind after a shower.
That brown speck isn’t only a cosmetic problem. Rust roughens the blade edge, turns smooth passes into tugging, and can leave your skin irritated. Razor rust prevention comes down to a few disciplined habits: rinse out debris, dry the head fully, and keep the razor out of damp air.
Catch surface rust early, and you may be able to clean it safely. Ignore pitting or roughness, and it’s time for a fresh blade.
Table Of Contents
- Key Takeaways
- Why Razors Rust and Why It Matters
- How to Prevent Razor Rust After Shaving
- Store Razors to Keep Blades Dry
- How to Remove Razor Rust Safely
- When to Replace Rusty Razor Blades
- Frequently Asked Questions (FAQs)
- Can you use oil to prevent razor rust?
- Do stainless steel razors ever rust completely?
- Whats the best razor material for preventing rust?
- Can rusty razors transfer tetanus to your skin?
- Should you disinfect razors before rust removal?
- Can razor rust spread to nearby blades?
- Does shaving cream affect blade corrosion rates?
- Are electric shaver heads susceptible to rust?
- Which water types cause razors to rust faster?
- Can blade coatings prevent rust over time?
- Conclusion
Key Takeaways
- Rust starts when water, steam, shaving cream, hair, and mineral residue stay trapped on the blade after shaving.
- Prevent rust by rinsing the razor thoroughly, shaking off water, drying the head and pivot, and storing it outside the humid shower area.
- A thin coat of mineral oil can protect a fully dry blade, especially during long storage or travel, but excess oil can trap debris.
- Clean only light surface rust gently; replace the blade immediately if it has pitting, roughness, discoloration near the edge, tugging, or irritation.
Why Razors Rust and Why It Matters
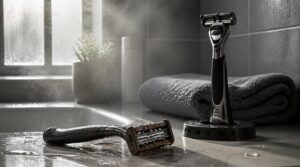
Rust doesn’t just happen — your razor is fighting a losing battle every time it sits wet in a steamy bathroom. A few things working against you are easy to fix once you know what they are. Here’s what actually causes razor rust, and why letting it slide costs you more than a sharp edge.
For practical razor rust prevention tips, rinse away residue and dry blades thoroughly after every shave.
Moisture, Humidity, and Oxidation
Although steel looks solid, a razor blade rusts when a thin moisture film remains after shaving. Water lets oxygen react with metal, while warm, humid air extends that reaction. Condensation is worse because it creates liquid water directly on the edge.
- High relative humidity slows drying
- Shower steam causes condensation
- Drier air reduces corrosion
- Moisture control reduces corrosion
Humidity accelerates metal corrosion processes by enabling electrochemical reactions on the blade. Use ventilation.
Hair, Skin, and Soap Residue
Steam leaves moisture behind, but trapped debris keeps it there. Hair buildup, dead skin cells, and soap residue clog the cartridge, holding water against edges and undermining razor hygiene.
Hard water can leave mineral soap residue, while styling-product buildup adds a layer. Rinse with lukewarm water for residue-free rinsing, surfactant film control, and skin pH balance.
Carbon Steel Versus Stainless Steel
That trapped moisture exposes a hardness vs corrosion resistance tradeoff. Carbon steel has higher carbon content, delivering a hard, cheaper edge but requiring coatings for rust prevention. Stainless steel uses chromium’s protective layer.
- Carbon steel: harder
- Stainless steel: corrosion-resistant
- Nickel and molybdenum: tougher
- Carbon steel: lower cost
This blade material science guides rust removal techniques: carbon steel needs more care.
Shaving Performance and Skin Irritation
A corroded edge loses razor sharpness retention, so it drags instead of slicing cleanly. That weakens hair removal effectiveness and forces you to press harder, a fast route to skin irritation.
Rust also creates uneven contact across the blade. For sensitive skin, that means more friction, rough passes, and poorer shaving comfort metrics. Good blade maintenance and blade rust prevention protect shaving safety by keeping each stroke smooth, light, and controlled.
Infection Risks From Corrosion
Because shaving creates tiny nicks, a rusty blade raises the stakes. Its rough surface holds moisture, skin oils, and debris, encouraging microbial growth and biofilm formation between uses.
Rust particles can spread along the edge and contribute to wound contamination. That raises the chance of skin infection, including folliculitis, if bacterial growth transfers during shaving. Skip risky salvage: prioritize blade sanitizing, thorough drying, and corrosion prevention.
Rusty razor blades can spread bacteria into tiny shaving nicks, so sanitize, dry thoroughly, and replace damaged blades
How to Prevent Razor Rust After Shaving

Rust usually starts in the minutes after you finish shaving, not days later. A quick post-shave routine keeps moisture and residue from sitting on the blades. Use these five steps to keep your razor clean, dry, and protected.
Where you keep the razor between shaves matters just as much, so check out these razor storage ideas that keep blades dry and away from metal-on-metal contact.
For razors stored longer, follow these razor blade edge preservation tips and apply a light mineral-oil coating.
Rinse Away Trapped Debris
Rinse your razor immediately after shaving. Hold it under strong running water, aim the flow at the blade, then tilt it from several angles to flush out hair, dead skin cells, soap, and blade residue.
Watch the runoff. Clear water with no foam or hairs is your cue. Irregular beading can signal residue microgaps, where moisture lingers and blade clogging starts.
Clean Between Razor Blades
After rinsing, inspect between the blades and behind the cartridge. This blade-gap cleaning stops hidden hair, skin, and soap from causing blade clogging.
Use hot water to flush both sides, lightly tap the handle against the sink, never your hand. For stubborn blade residue, gently work a soft toothbrush across the edges. Disassemble removable parts when possible, then flush again until no particles remain.
Shake Off Excess Water
Most people just set the razor down wet. That’s exactly where rust begins.
Shake immediately after rinsing, holding the blade at roughly 30 degrees from horizontal. That angle lets water drain away from the pivot and edge rather than pooling in the gap. Use a quick, controlled wrist flick. Carbon steel blades can start corroding within hours, so don’t wait.
Dry The Razor Completely
Shaking removes most water, but not all of it. Pat dry the blade with a clean towel. The pivot area is where water hides longest.
Then set it on a razor stand to air dry. A few minutes is enough. Enclosed holders trap humidity, so skip them. A quick blow dry on low heat finishes the job fast.
Apply Protective Mineral Oil
Apply a thin mineral oil coating once the razor is fully dry. Put one drop of white mineral oil on a clean cloth or cotton swab, then wipe it across the blades and pivot.
This moisture barrier helps with corrosion prevention and blade longevity. Don’t flood the cartridge, excess oil can collect debris. Before shaving again, rinse away the protective oil coating. It’s simple, sustainable razor care and effective rust inhibition.
Store Razors to Keep Blades Dry

Drying your razor is only half the job—where you keep it matters just as much. A damp shower shelf can undo good cleaning habits fast. Use the storage options below to keep moisture away from your blades.
Avoid Humid Shower Storage
Keep your razor out of the shower whenever possible. Steam, condensation, and direct spray keep metal damp long after you finish shaving, which speeds humidity damage.
- Store outside the spray zone
- Keep fan running post-shower
- Hang razor downward
- Choose ventilated storage
Use a razor stand with airflow containers, not a wet shelf or closed cabinet. This moisture control setup helps with drying razors and prevents trapped water around the blade.
Use Open-Air Razor Stands
A razor stand turns open-air storage into a simple drying system. Its angled cradle lets water drain off while exposed blades get steady airflow, improving drying efficiency by roughly 30 percent in a typical bathroom.
Choose stainless steel or powder-coated construction for humid spaces. Look for silicone contact pads, a broad nibbed base, and a blade-friendly cradle. These stability design details prevent tipping, scratches, and pooled moisture.
Add Moisture-Absorbing Desiccants
A razor stand improves airflow, but a small silica-gel packet adds moisture control around it. Silica gel works well in cabinets and travel cases, while rechargeable molecular-sieve packets pull water vapor faster in persistently humid bathrooms.
Place several small packets near, not against, the razor, and don’t block ventilation. Replace or recharge saturated packs as directed. Keep them away from children and pets, and choose reusable options to cut waste.
Cover Only Fully Dry Blades
Desiccants help, but covers can trap the last trace of water. Before you cover a cartridge or safety razor, dry your razor completely:
- Use towel drying blades with a lint-free cloth, removing surface moisture and preventing water pooling.
- Let air drying finish in a moisturefree spot for 60 seconds.
- Use blow drying only on cool air, ensuring blade dryness completely.
Protect Razors During Travel
When travel turns your toiletry bag into a humidity trap, use a protective case. Choose travel cases with separate compartments, a lid, and a silica packet. Pack only after using drying methods in a moisturefree spot.
| Item | Protect | Prevent |
|---|---|---|
| Blade covers | Edge nicks | Moisture |
| Soft cloth | Impact | Dulling |
| Vented case | Components | Rust |
Use blade storage solutions; inspect and oil after travel.
How to Remove Razor Rust Safely
Not every rusty razor is worth saving. Light surface rust may clean up safely, but pitting, rough edges, or corrosion near the cutting edge mean it’s time to replace the blade.
Use the steps below to assess, clean, and dry the razor without making it less safe to use.
Check Whether Rust is Repairable
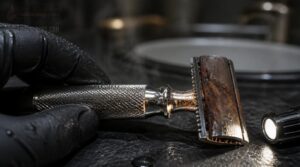
Before cleaning, check whether rust is repairable. Use this Rust depth assessment:
- Surface corrosion check: isolated, powdery spots mean oxidation process.
- Metal integrity test: press; firm metal is promising.
- Flaking weakness detection: crumbling metal means replace it.
- Hidden rust inspection: examine seams.
- Look for microscopic rust pits and blade pitting. Blade corrosion signals rust formation has progressed too far already.
Use Castile Soap First

Use Castile soap first for surface rust and residue. This gentle Castile soap application helps with razor cleaning, blade maintenance, moisture control, and rust prevention without attacking the steel.
| Need | Method |
|---|---|
| Castile soap benefits | Plant surfactants lift debris |
| Castile soap dilution | One tablespoon per cup |
| Castile soap technique | Soft horizontal toothbrush strokes |
| Castile soap storage | Seal bottle after use |
Rinse, dry.
Soak With Diluted Vinegar

Mix one part white vinegar with three parts water. Vinegar soaking loosens surface rust by dissolving deposits.
- Soak stainless or carbon-steel heads 10–15 minutes.
- Keep coated parts out.
- Rinse, then air dry.
Wear gloves, avoid skin contact, and apply a protective oil coating afterward. It blocks moisture and oxygen.
Scrub Rust Without Damaging Edges

After vinegar soaking, treat the edge like a fine knife, not a rusty wrench. Choose a gentle abrasive: baking soda paste, soft nylon brush, or ultrasonic cleaner. Avoid steel wool, wire brushes, and sanding techniques near blades.
Scrub with light pressure, moving away from the edge. This limits micro-scratches and preserves sharpness. Test non-metal-safe tools first on a hidden nearby spot.
Rinse, Sanitize, and Dry

Finish strong: rinse your razor under warm, not scalding, water, ideally near 110°F, until every trace of vinegar and debris is gone. For alcohol sanitization, mist with rubbing alcohol, then let it evaporate.
For drying razors, towel gently, then leave the head upside down for 5–15 minutes. Apply mineral oil and choose ventilated storage. These blade drying techniques stop corrosion returning.
When to Replace Rusty Razor Blades
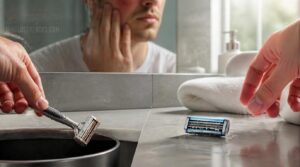
A little surface staining may clean up, but a rusty blade isn’t always worth saving. If it feels rough, looks damaged, or no longer glides cleanly, replace it before it irritates your skin. Use these signs to decide when it’s time for a fresh blade.
Watch for Tugging and Roughness
Stop shaving when tugging replaces glide. A rusty or worn edge has lost sharpness, so it pulls hair and forces pressure, even with warm skin, hydrated stubble, and thick lather.
First, correct your blade angle and guard clearance. If roughness continues after few strokes, blade performance has degraded. Replace it: protecting edge integrity extends razor lifespan, not failing blade unnecessarily.
Inspect for Pitting and Discoloration
After tugging alerts you to trouble, inspect the blade under bright light. Rust spots along the edge, brown staining, or dull rainbow discoloration can signal moisture and oxygen have damaged the protective film.
- Look for tiny cavities, or pitting
- Brush away loose corrosion products
- Check blade faces and edge line
- Use low-power magnification
Pits weaken blade edge integrity, even when they look small. Photograph suspicious areas after cleaning to track changes.
Follow Blade Replacement Guidelines
Small pits mean you should follow a replacement schedule, not guess. Track shave dates and watch for pulling, irritation, faded lubricating strips, poor rinsing, or rust. Any of these calls for blade replacement.
| Shaving pattern | Replacement window |
|---|---|
| Daily or sensitive skin | 3-7 shaves |
| Standard use | 5-10 shaves |
Manufacturer guidance: Mach3 15; Fusion5 20. Dry hands, eject safely, use puncture-proof container.
Choose Corrosion-Resistant Blade Materials
Your replacement schedule matters, but blade material decides how well a razor survives between changes. Choose stainless steel blades first. Quality stainless steel, including 316L stainless steel, uses chromium to form a protective surface layer that slows corrosion.
Titanium alloy options are lighter and highly rust resistant. Nickel rich alloys handle humid, chlorine-heavy conditions well. Ceramic coating benefits include lower moisture contact and better edge wear. Carbon steel coatings and other oxidationresistant coatings help, but damaged coatings expose steel quickly.
Reduce Waste With Refillable Razors
Choose refillable razors when a rusty blade reaches retirement, not the entire handle. This environmental impact comparison is simple: replacing only blades backs sustainable shaving and can reduce annual plastic waste by up to 80 percent versus disposables.
Your cost savings analysis improves with blade recycling programs and subscription service benefits. For travel convenience, pack lightweight refills, keep them dry.
Frequently Asked Questions (FAQs)
Can you use oil to prevent razor rust?
Yes. After rinsing and fully drying, apply one or two drops of mineral oil, camellia oil, or Ballistol. Wipe on a thin film, then store dry. Excess oil attracts residue, so keep this razor maintenance step light.
Do stainless steel razors ever rust completely?
By coincidence, the same toughness that makes stainless steel razors durable can hide damage. Scratches, salt, and trapped moisture can breach the chromium oxide layer, causing deep pitting and, eventually, complete corrosion if ignored.
Whats the best razor material for preventing rust?
Titanium alloy offers the strongest corrosion prevention, forming a stable oxide barrier.
For affordability, stainless steel with chromium oxide protection performs well.
Ceramic or titanium coatings boost blade longevity; avoid bare carbon steel, which accelerates material degradation.
Can rusty razors transfer tetanus to your skin?
Rust isn’t tetanus, but a dirty, corroded blade can carry spores into a shaving cut. Clean wounds, use a stainless steel razor, maintain vaccination boosters, and replace pitted blades to improve infection control.
Should you disinfect razors before rust removal?
Disinfecting first can trap moisture and worsen corrosion. Rinse away hair, clean with vinegar or rust remover, then use alcohol if needed. Dry immediately, apply protective lubricant, and avoid soaking stainless or carbon-steel blades.
Can razor rust spread to nearby blades?
Like corrosion dominoes, rust doesn’t spread like disease, but moisture bridging touching blades transfers rust specks and residue. Shared humid storage supplies oxygen, driving rust formation, so separate, dry, and replace blades with pitting promptly.
Does shaving cream affect blade corrosion rates?
Yes. Cream moisture retention can speed corrosion by keeping moisture and oxygen on steel. Emulsifiers may alter the surface, while residue traps minerals. Rinse and dry promptly for blade corrosion prevention and shaving safety.
Are electric shaver heads susceptible to rust?
Electric heads resist rust better than stainless steel razors, thanks to stainless steel coatings. Still, humidity, trapped water, and poor cleaning routines can corrode exposed contacts. Dry thoroughly, store ventilated, and replace pitted foil heads.
Which water types cause razors to rust faster?
Saltwater causes the fastest corrosion, while hard water deposits minerals that trap moisture. Soft water’s carbonic acid effect and alkaline water rust can contribute too. Even distilled water poses a risk if humidity keeps blades wet.
Can blade coatings prevent rust over time?
Example: PVD titanium blade passed coating durability testing; long-term corrosion resistance needs daily coating maintenance tips. Blade coatings support corrosion prevention, oxidation prevention, stainless steel maintenance, environmental coating performance, coating application methods, and blade longevity.
Conclusion
Dry steel stays smooth; damp steel turns rough. Your razor rust prevention routine takes less than a minute: rinse away hair and cream, shake off water, shake off water, then dry every surface. Store the razor outside shower humidity, not beside it. Cleanable specks may respond to gentle care, but pitting, tugging, or rough edges mean replacement. A fresh blade protects your skin, while disciplined storage protects every shave that follows with calm, dependable control, day after day.