This site is supported by our readers. We may earn a commission, at no cost to you, if you purchase through links. This content is for general informational and educational purposes only and is not a substitute for professional medical, dermatological, or nutritional advice.

That razor sitting in your shower isn’t just dull. It’s dirty. Trapped hair, dead skin, and soap scum build up in the blade gaps after every shave, turning a sharp tool into a breeding ground for bacteria.
A quick rinse won’t cut it. Water alone can’t dissolve the grime lodged between blades, and that residue speeds up rust and kills sharpness fast, sometimes after just a few uses.
The fix is simpler than you’d think. Cleaning razor blades with soap clears out buildup, protects your skin, and keeps your razor performing like new for longer.
Table Of Contents
- Key Takeaways
- Why Clean Razor Blades With Soap?
- What You Need for Soap Cleaning
- How to Clean Razor Blades With Soap
- How to Deep-Clean Stubborn Razor Buildup
- Keep Razor Blades Clean Longer
- Frequently Asked Questions (FAQs)
- What can I use to clean my razor blade?
- How do you get gunk out of a razor?
- Does vinegar clean razor blades?
- How to keep razors hygienic?
- How often should soap cleaning be performed?
- Can soap damage the razor blade?
- What are benefits of soap cleaning?
- Is soap cleaning suitable for all razor types?
- Can soap effectively disinfect razors?
- How often should you clean razor blades?
- Conclusion
Key Takeaways
- Rinsing with water alone won’t cut it—you need mild soap and a soft brush to clear out trapped hair, skin, and residue hiding between your blades.
- Leftover buildup breeds bacteria and speeds up rust, so cleaning after every shave protects both your skin and your blade’s sharpness.
- Follow soap cleaning with a weekly soak in 70% isopropyl alcohol, since soap alone loosens grime but doesn’t fully disinfect.
- Dry your razor completely and store it outside the shower, since trapped moisture is the real enemy behind rust and shortened blade life.
Why Clean Razor Blades With Soap?
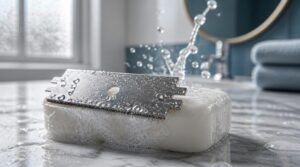
Your razor works hard every time you shave, and that buildup doesn’t just disappear on its own. Skipping soap turns a sharp tool into a dull, germy one fast. Here’s why grabbing that bottle of soap matters more than you think.
Rinsing with soap after every use clears away that leftover residue, but even with good habits, blades wear down over time, so it helps to know how often you should replace your electric shaver blades.
Remove Hair and Skin Buildup
Once you finish shaving, take a close look at the blade. That thin film clinging to the edges? It’s hair removal buildup mixed with skin residue.
Rinse loose debris under warm water first, then brush between the blades. Blade edge brushing clears trapped gunk that plain rinsing skips, leaving your razor blade cleaning routine actually effective.
Reduce Bacteria and Irritation
That leftover buildup isn’t just gross, it’s a bacteria breeding ground. Staph and other germs thrive in warm, wet conditions, raising your risk of skin infection.
Mild soap breaks down bacteria on contact, while warm water rinses microbes away completely. This simple habit helps with real irritation prevention, keeping razor bumps and folliculitis from ruining your shave.
Preserve Sharpness and Performance
Killing bacteria is only half the job. Soap also protects your blade’s edge, and that’s where shave quality really comes from.
Soap dissolves residue without stripping the blade’s coating, unlike harsh scrubbers that create burrs. This keeps cutting angle precision intact, helps blades retain their edge, and helps blades hold their sharpness for 5 to 7 shaves before performance drops. Beyond soap, proper drying and lubrication can further protect the blade from moisture-related corrosion that dulls the edge over time.
Prevent Rust and Corrosion
A sharp edge means nothing if rust eats through it. Moisture left on your blade breaks down its protective oxide layer, inviting corrosion fast.
A sharp edge means nothing once rust eats through it, so left-behind moisture is the real enemy of your blade
Most razors use stainless steel for a reason: chromium forms a self-repairing barrier against rust. Soap washes away the grime that causes chloride buildup, while thorough blade drying and humidity control keep corrosion from ever getting started.
What You Need for Soap Cleaning
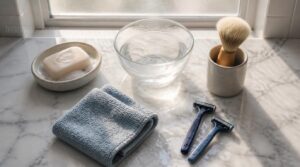
Good news: you don’t need a fancy toolkit for this job. Just a handful of everyday items already sitting in your bathroom will do the trick. Here’s exactly what to grab before you start.
Mild Fragrance-Free Liquid Soap
Not all soap belongs near your blades. Grab a mild, fragrance-free liquid soap with gentle surfactants like decyl glucoside, balanced to a skin-friendly pH of 5.5-7.0.
Look for hypoallergenic formulas with safe preservatives like sodium benzoate, no parabens. Skip the perfumed stuff. Fragrance-free labels mean no hidden irritants messing with your blade maintenance or your skin.
Warm Running Water
Before you touch soap to blade, run your tap and check the temp. Aim for 95-105°F, warm enough to melt residue without stressing the steel. Hold the razor at a 45-degree angle under the stream for full coverage.
Once you’ve rinsed the blade, that same warm water and mild soap combo is perfect for keeping your gear organized — check out this guide on cleaning a plastic shower caddy without damaging it to stop soap scum before it builds up.
Keep that flow steady and consistent throughout your routine. Skip the scalding water, over 110°F risks dulling those edges fast.
Soft Razor Cleaning Brush
Fingers alone won’t cut it. Grab a razor brush with soft nylon bristles, a curved head, and a comfy grip. Look for:
- Medium bristle firmness (soft but effective)
- Fan-shaped head for blade gaps
- Antimicrobial coating to fight odor
- Quick-drying bristles after each use
No razor brush? A soft-bristled toothbrush works in a pinch under warm water and mild soap.
Clean Microfiber Towel
Air-drying is nice, but a microfiber towel finishes the job faster and safer. Its split-fiber, polyester-polyamide combination soaks up moisture through capillary action, no lint, no streaks.
| Feature | Benefit |
|---|---|
| 200-600 GSM density | High absorbency |
| Zigzag stitched edges | Won’t fray |
| Wrung and air-dried | Quick drying |
| Washed separately | Preserves fibers |
Small Bowl for Soaking
Grab a small ceramic or glass bowl, six to twelve ounces works fine, for soaking stubborn buildup soap alone won’t budge.
Fill it with warm water and a few drops of mild soap, letting it dissolve fully before dunking your razor. Soak the blades for five minutes, then dry with your microfiber towel. This step protects blade life and saves your toothbrush for detail work.
How to Clean Razor Blades With Soap
You’ve got your soap and brush ready, so let’s put them to work. Cleaning your razor the right way only takes five simple steps. Follow them in order, and you’ll get a blade that’s truly spotless.
Rinse Away Loose Debris

Before soap ever touches the blade, give your razor a solid warm water rinse. Tap it against the sink first, then hold it under the stream at a slight angle for full debris removal.
- Loose hair fibers
- Dried shaving cream
- Dead skin cells
- Leftover product residue
Shake gently, rinsing back-to-front, and do a quick blade inspection before moving on.
Apply Soap to Blades
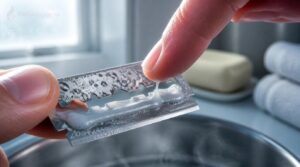
Once the rinse is done, put a pea-sized drop of mild soap right on the blade edges. Spread it with your fingertips across both faces, working it into every micro-groove.
Even soap distribution matters here. Don’t pool soap near the handle, keep it on the cutting edge where buildup actually hides.
Brush Between Blade Edges
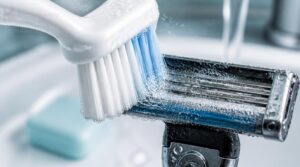
Now for the part fingers can’t handle. Pick up a soft-bristled toothbrush and hold it at a 45-degree angle against the edges. Use gentle circular motions, light pressure only, starting outermost and working inward. Brush each gap 10-15 seconds, rotate the cartridge, repeat. This debris removal technique reaches grime plain rinsing misses, keeping razor blade cleaning thorough without scratching anything.
Rinse From Every Angle
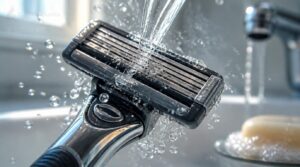
Once the toothbrush work is done, water finishes the job. Hold the razor head under warm water at a 45-degree angle, letting flow pass through blade gaps, not just across the surface.
- Flip and rinse the back edge too
- Angle for full blade surface coverage
- Flush the razor head from both sides
- Use gentle pressure to avoid pushing debris deeper
- Check for stagnant water prevention by shaking excess off
Quick blade inspection confirms nothing’s hiding.
Dry The Razor Completely

A wet blade is a rusty blade waiting to happen. Grab a clean microfiber towel and pat the razor dry, then set it in a ventilated space to airdry completely.
Check the pivot joint too. Water hides there. With no moisture left anywhere, you’ve got real rust prevention and a razor ready for dry storage.
How to Deep-Clean Stubborn Razor Buildup
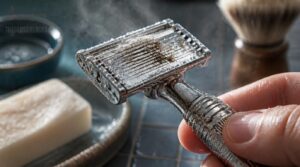
Sometimes a quick rinse just isn’t enough to get your razor truly clean. Dried soap scum, trapped hair, and hard water stains can build up fast, even with regular care. Here’s how to tackle that stubborn grime and get your blades back to fighting shape.
Soak in Warm Soapy Water
Some grime just won’t budge with a quick rinse. Grab a small bowl, fill it with warm water around 110°F, and add a squirt of mild soap.
Submerge the razor head completely for 5 to 10 minutes. Give it a gentle swirl now and then to help the soap work into every crevice.
Loosen Trapped Shaving Residue
After the warm water soak, that residue won’t just disappear on its own. Grab a soft-bristled toothbrush and work in gentle, vertical strokes between each blade.
Focus on backside flushing under running water to push debris out from behind. A quick blade inspection tells you if buildup remains before moving to disinfecting.
Disinfect With Isopropyl Alcohol
Once brushing loosens the buildup, it’s time to kill what soap left behind. Submerge the blade head in 70% isopropyl alcohol for 5-10 minutes, staying within the 60-90% range for real bactericidal power.
- Keep blades fully wet for at least one minute
- Skip the rinse afterward
- Air-dry completely before storage
Dilute below 50% and you’re just giving bacteria a bath.
Remove Minor Rust Safely
See orange specks forming? That’s early rust, and it’s fixable. Dab on a baking soda paste and scrub gently with an old toothbrush, or try a quick vinegar rust soak for a few minutes.
Citric acid method works too: soak, then rinse well. Whatever you choose, dry the blade completely afterward. Rust prevention starts with staying ahead of moisture.
Avoid Bleach and Abrasives
Bleach might seem powerful, but it’s the wrong tool here. It corrodes finishes and can even react with other cleaners to release harmful gas.
Skip scrubbers too. Abrasive contact wears down the edge, causing drag and micro-scratches.
Stick with mild soap and warm water for chemical-free shaving. This gentle blade care dissolves soap residue safely, no harsh cleaners needed.
Keep Razor Blades Clean Longer
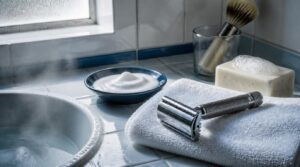
A clean razor is only half the job. Keeping it clean is what actually saves you money and skin trouble down the road. Here are five habits that make a real difference.
Rinse After Every Shave
That thirty-second habit does more work than most guys realize. Rinsing under warm water after every shave clears hair, gel, and skin cells before they dry and harden on the blades.
This single step drives immediate debris removal, blocks bacterial growth, and keeps edges sharp. It also fights rust and keeps lubrication strips clear, so your razor performs like new, shave after shave.
Disinfect The Razor Weekly
Rinsing controls daily buildup, but bacteria need a stronger response. Once a week, give your razor a real disinfecting soak.
- Rinse off loose debris first
- Submerge the head in 70% isopropyl alcohol
- Soak 5-10 minutes
- Shake off excess and air dry fully
Skip rinsing after alcohol, it invites rust. Dry completely before storage.
Store Outside The Shower
That alcohol soak works best when followed by smart storage. Your shower is a steam room, and steam feeds rust fast.
Give your razor dry cabinet placement instead. Try magnetic hook storage or elevated window storage for airflow. A childproof container keeps blades safe if kids are around. Good bathroom ventilation backs it all up, stretching your razor blade lifespan naturally.
Use a Draining Holder
Cabinets and hooks help, but a draining holder takes your razor care routine even further.
- Built-in drainage holes stop water pooling around the blade
- 304 stainless steel resists corrosion for years of use
- A stable suction cup mounts in seconds, no drilling needed
- Flexible hooks fit most handle sizes, including safety razors
Water runs off fast, air moves in, and rust doesn’t stand a chance.
Replace Dull or Damaged Blades
Even a good holder can’t save a blade that’s had its day. Pulling or tugging while shaving means blade edge integrity is gone, usually around 6-8 uses. Check for rust spots, dents, or dull edges each week.
Swap blades promptly, hold them by the dull side, and drop old ones in a puncture-proof container for safe disposal.
Frequently Asked Questions (FAQs)
What can I use to clean my razor blade?
Think of it as a mini spa day for your blades. Grab mild antibacterial soap, warm water, and a soft-bristled toothbrush. Scrub gently, rinse well, then dry completely to prevent rust and keep edges sharp.
How do you get gunk out of a razor?
Run hot water over the head while rotating it, then tap the razor against the sink to loosen trapped hair. Scrub gently with a toothbrush between blades, clearing stubborn residue water alone can’t reach.
Does vinegar clean razor blades?
Acid meets scale, and buildup quietly dissolves. Distilled white vinegar breaks down soap residue and mineral deposits well, though it’s not a true disinfectant. For real razor blade sanitizing, pair a 10-minute soak with an isopropyl alcohol rinse afterward.
How to keep razors hygienic?
Rinse after every shave, then follow a weekly disinfection routine with alcohol. Dry blade-side up to stop rust. This simple habit helps with skin infection prevention and keeps your razor genuinely hygienic, shave after shave.
How often should soap cleaning be performed?
A stitch in time saves nine. Use the soap cleaning method daily after shaving, weekly for sanitizing, and immediately for deep clean rust, film buildup, or between blade changes, this keeps razor hygiene and blade longevity intact.
Can soap damage the razor blade?
Worried soap eats away at steel? It won’t, if you pick right. Mild, pH-balanced soap actually protects blade coating, clearing residue and oils that cause corrosion, dulling, and shorter blade life.
What are benefits of soap cleaning?
Soap clears away hair, oils, and bacteria that dull blades and irritate skin. You’ll get better shaving comfort, longer blade life, and stronger rust prevention by keeping cleaning simple, consistent, and part of your daily routine.
Is soap cleaning suitable for all razor types?
Yes, with caveats. Safety razors suit soap cleaning best, thanks to exposed blades. Cartridge razors work too, but skip long soaks. Electric shavers need their own cleaner, not soap and water.
Can soap effectively disinfect razors?
Not on its own. Soap loosens debris and cuts bacteria numbers, but leftover residue can block real disinfection. For true germ-killing power, follow up with isopropyl alcohol weekly, since antibacterial soap alone won’t finish the job.
How often should you clean razor blades?
No, it won’t take extra time out of your day. Rinse after every shave, then add a weekly deep clean. Rinsing stops buildup fast; the weekly routine takes care of what daily rinsing misses, keeping blades sharp longer.
For a step-by-step walkthrough of the weekly deep clean, including how to handle foils and cutter heads, check out this electric razor cleaning routine.
For a full walkthrough of keeping electric razors in top shape, this guide to caring for electric razors covers everything from daily rinses to deep-cleaning steps.
Conclusion
That razor still has a secret, even after your last shave. Trapped grime doesn’t announce itself until skin gets irritated or blades turn dull too fast.
Here’s the truth: how to clean razor blades with soap isn’t a chore, it’s a habit worth keeping. A minute of soap, water, and a soft brush stands between you and a razor that lasts. Treat that blade right, and it’ll return the favor every single morning.