This site is supported by our readers. We may earn a commission, at no cost to you, if you purchase through links. This content is for general informational and educational purposes only and is not a substitute for professional medical, dermatological, or nutritional advice.

That razor sitting in your shower isn’t just collecting soap scum, it’s holding onto trapped hair, dead skin, and moisture that bacteria love. Most guys rinse quickly and call it clean, then wonder why their blade feels dull after five shaves instead of ten. That gap between "rinsed" and "actually clean" costs you money and skin health.
Knowing how to clean razor blades at home properly changes both. A few extra minutes with hot water, the right angle on your brush, and a proper drying routine keep blades sharper longer and cut down on irritation, bumps, and rust. Get the routine right, and you’ll know exactly when a blade’s earned retirement instead of guessing.
Table Of Contents
- Key Takeaways
- How to Clean Razor Blades at Home
- How to Deep Clean Razor Blades Safely
- Best Ways to Disinfect Razor Blades
- How to Dry and Store Razors
- When to Replace Razor Blades
- Frequently Asked Questions (FAQs)
- What is the best way to clean a razor blade?
- Is white vinegar enough to disinfect a razor?
- What is the brown stuff on my razor blade?
- Should you disinfect razor blades?
- How do I disinfect my shaving razor?
- How to deep clean a shaving razor?
- Does vinegar clean razor blades?
- How do I keep my razor blades sharp and clean?
- How do you get rid of bacteria in a razor?
- How do you get black mold off a razor?
- Conclusion
Key Takeaways
- Rinse your razor with hot water and brush between the blade gaps after every single shave to stop buildup from dulling the edge.
- Once a week, deep clean with a dish soap solution and disinfect with a 70% isopropyl alcohol soak to kill bacteria and extend blade life.
- Always dry your razor fully, shake off water, pat with a towel, and store it upright in a ventilated spot instead of a steamy shower to prevent rust.
- Replace your blade at the first signs of tugging, irritation, rust, or nicks, since a worn blade can’t be fixed by cleaning alone.
How to Clean Razor Blades at Home
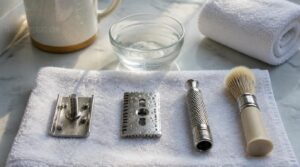
Cleaning your razor daily doesn’t take long, but skipping it costs you a smooth shave fast. Every blade traps hair, cream, and skin oils after each pass, and that buildup dulls the edge quicker than you’d think. Here’s the routine to run every single time you shave.
Even with a solid rinse-and-dry habit, blades wear down over time, so it’s worth knowing how often you should replace your electric shaver blades to keep every shave sharp.
Rinse With Hot Water
Crank the tap to 95–105°F, hot enough to hydrate keratin and swell hair shafts, but not so scalding it expands blade metal and dulls edges.
Rotate the cartridge under the stream for debris flushing front and back. This softens stubble, trims shaving strokes by roughly a quarter, and preserves oils without stripping your skin barrier.
After shaving, remember to follow proper blade drying to prevent rust.
Tap Out Trapped Hair
Once you’ve flushed the debris, hold the handle upright and give the head a few light taps against a towel, gravity and gentle tapping technique finish what water alone can’t.
- Tap immediately after shaving, before hair hardens
- Rotate the cartridge for full coverage
- Use minimal force, never a hard countertop
This post-shave tapping habit keeps blade gaps clear between deeper cleanings.
Brush Between Blade Gaps
Tapping only gets you so far. For real blade debris removal, grab a razor brush or a spare toothbrush with soft synthetic bristles, and work at a 45-degree angle against the edges for about 20 seconds under hot water.
Brush back to front, gap by gap, letting the bristles do the digging your fingers can’t safely manage.
Clean Both Blade Sides
Brushing copes the front, but the backside traps just as much residue, and most guys skip it. Rotate the head fully under a hot water flush, hitting both surfaces at every angle.
Check between blades for leftover gunk. This dual water rotation habit, paired with a quick visual debris check, keeps hidden buildup from transferring straight to your skin next shave.
Repeat After Every Shave
Every single shave deserves this same routine, no exceptions. Skip one session and you’re letting bacteria and residue set into the blade gaps, which makes next time’s cleaning twice as hard.
Rinse immediately after each pass, shake excess water, and let the head air-dry upright. Consistency here is what separates a blade lasting seven shaves from one tossed after two.
How to Deep Clean Razor Blades Safely
A quick rinse only gets you so far, especially once soap scum and dried hair pack into the blade gaps.
Deep cleaning takes a bit more effort, but it’s what actually keeps your razor sharp and safe to use.
Here’s how to break down buildup properly and get every part of that razor truly clean.
While you’re at it, check for signs it’s time to replace your razor blade, since rust spots or dulling often mean cleaning alone won’t cut it anymore.
Use Dish Soap
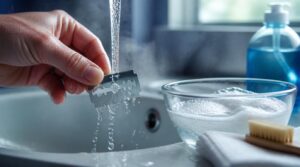
Grab your dish soap for real deep cleaning. Mix two tablespoons with four ounces hot water—that 20% ratio cuts oils fast. The gentle cleaning action lifts residue without scratching blade edges.
Antibacterial dish soap use adds extra bacteria-fighting power. Rinse thoroughly afterward; leftover soap residue attracts grime and speeds up corrosion, undoing your work before you’ve even dried the razor.
Scrub With Toothbrush
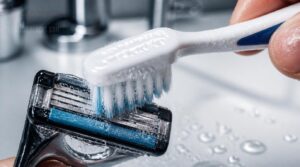
Once soap loosens the surface grime, an old, soft-bristled toothbrush finishes the job. Hold it at a 30° angle into the pivot joint and blade gaps, using light, fingertip-only pressure—heavy scrubbing mashes bristles and won’t clear biofilm.
- Brush perpendicular to the cutting edge, never parallel
- Alternate stroke direction, left-right, then right-left
- Spend 30 seconds per cartridge side
- Swap toothbrushes every 3-4 months
Soak Safety Razor Parts
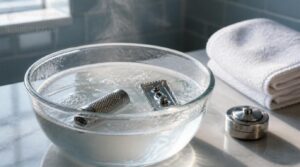
Threads corrode faster than blades do. Separate handle from head before soaking—metal-on-metal contact in warm soapy water speeds rust.
| Step | Action | Time |
|---|---|---|
| 1 | Separate parts | — |
| 2 | Soak in soapy water | 5-10 min |
| 3 | Rinse thoroughly | — |
Limit soak time strictly; longer weakens joints. Rinse after soaking under hot water, then dry parts thoroughly before reassembly.
Remove Shaving Cream Buildup
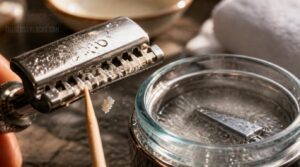
Dried cream is the stubborn stuff. A wooden toothpick pries hardened deposits from between teeth before you even reach for a brush, so scrubbing takes less muscle.
No toothpick? An ultrasonic cleaner at 40 kHz clears buildup in five minutes flat—add dish soap to cut soap scum faster.
Citric acid dissolves mineral film in two minutes; switching to shave oil prevents buildup altogether.
Avoid Touching Blade Edges
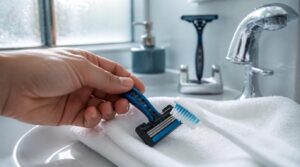
A blade slip during cleaning causes real cuts, so keep fingers off the edge entirely. Grip the handle only, holding cartridges by the plastic housing and safety razors by the base or spine, never the sharpened strip.
Use a toothbrush for scrubbing instead of bare fingers. Work over a towel-lined sink, angle the blade away from your body, and store it upright afterward on a proper razor stand.
Best Ways to Disinfect Razor Blades

Scrubbing gets the visible gunk off, but it won’t kill what’s living on the blade. Bacteria build up fast in that damp metal, especially if you’re sharing a razor or nursing a cut. Here’s what actually disinfects, and how to use each method the right way.
Isopropyl Alcohol Soak
Your razor’s best defense against bacteria is a proper isopropyl alcohol soak. Use 70% concentration, not 99%—water content helps it penetrate cell walls. Submerge the cartridge blade-down for 5-10 minutes.
- Kills staph bacteria in 30 seconds
- Wipes out flu and herpes viruses
- Eliminates fungal growth
- Extends blade life 2-3 weeks
- Skip rinsing—just air-dry
Hydrogen Peroxide Alternative
No alcohol on hand? Hydrogen peroxide works as a solid backup for blade sanitation. Mix 1 part peroxide to 4 parts water for stainless steel—stronger ratios risk oxidation. Check material compatibility first; skip plastic-trimmed cartridges.
Soak parts 10-15 minutes, this antimicrobial action clears biofilm regular rinsing misses. Air dry fully afterward to keep blades spot-free.
Vinegar for Mineral Buildup
White buildup on your blades? That’s hard water talking, not rust. Acetic acid breaks calcium bonds on contact—mix 1:4 vinegar to warm water, soak 10-30 minutes depending on severity.
Always rinse thoroughly afterward; leftover acid causes corrosion. Vinegar doubles as a mild disinfectant, cutting residue and bacteria in one pass. Skip the alcohol here—it’s overkill for mineral jobs.
When to Disinfect Razors
Timing matters as much as the method. Daily shavers need alcohol contact 2-3 times weekly, breakout-prone skin calls for after every pass, and humid bathrooms push that up further—moisture breeds bacteria fast.
| Usage | Frequency | Why |
|---|---|---|
| Daily | 2-3x/week | Buildup risk |
| Sensitive skin | Every use | Irritation control |
| Shared razor | Between users | Cross-contamination |
Diabetics and weakened immune systems shouldn’t skip a single session.
What Not to Mix
Some combos belong in the trash, not the sink. Never mix bleach and vinegar—toxic chlorine gas forms instantly. Same goes for bleach with ammonia (chloramine) or alcohol (chloroform fumes).
- Burning eyes and throat
- Coughing that won’t quit
- Dizziness or nausea
Peroxide plus vinegar creates corrosive peracetic acid, damaging blades. Baking soda and vinegar? Just neutralizes into salty water—no cleaning power at all.
How to Dry and Store Razors
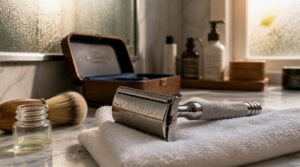
Cleaning and disinfecting your razor only gets you halfway there. What you do next, how you dry it and where you store it, decides whether that blade lasts or rusts out on you. Here’s exactly how to handle both.
Shake Off Excess Water
Grab your razor right after rinsing and give it several firm shakes while holding it vertically — gravity does the heavy lifting here. Shake back to front, using quick jolts instead of gentle taps, rotating the head to hit trapped droplets from every angle.
This clears 80-90% of surface water in seconds, cutting down moisture that breeds rust and bacteria between blades.
Pat Dry With Towel
Once you’ve shaken off the excess, reach for a clean microfiber towel — it grabs moisture without shedding fibers onto your blade. Pat, don’t wipe: dragging the towel across edges dulls them fast.
Focus on blade gaps and the housing perimeter, where water hides. Use a dry towel, press gently, and finish patting within seconds of rinsing — before the air-drying step takes over.
Air-Dry Upright
Set the razor upright in a ventilated space, blade facing up, with edges clear of the wall. Gravity drainage pulls leftover water down and off, while open air hits every surface for even drying.
This upright storage position cuts rust risk dramatically compared to leaving blades flat or wet. Give it a few hours before your next shave.
Avoid Shower Storage
Your shower feels convenient, but it’s the worst spot for dry razor storage. Steam keeps blades wet for hours, feeding rust and bacteria.
Skip that alcove. Instead:
- Keep razors away from direct water spray
- Choose ventilated storage over enclosed shower caddies
- Prioritize moisture control in humid bathrooms
- Prevent rust prevention issues from constant condensation
- Store blades where airflow reaches every edge
Use a Razor Stand
A cheap stand does more for your razor than most guys realize. Standing it upright, head up, keeps water from pooling on the blade, which cuts down on oxidation and rust.
Look for stainless steel or bamboo, weighted base, good ventilation. Beyond function, it consolidates your setup and genuinely extends blade life by keeping moisture off the edge.
When to Replace Razor Blades
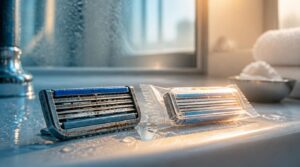
Even the best cleaning routine can’t keep a blade sharp forever. At some point, wear takes over and no amount of soaking or scrubbing will fix it. Here’s how to spot the signs it’s time for a fresh cartridge.
Before you write off your blade as dull, though, it’s worth ruling out buildup first by following this step-by-step electric razor cleaning guide, since grime can mimic the drag of true wear.
Pulling or Tugging
Feel your razor snag instead of glide? That’s your cue. Pulling usually points to blade sharpness wear, poor blade angle orientation, or blade buildup clogging the head. Rushed prep plays a role too.
Fix the angle, clean the blade edges, and if tugging persists after cleaning, the blade’s simply worn out and needs swapping.
Increased Skin Irritation
Redness or bumps after every shave? That’s your blade talking. Beyond tugging, blade alignment issues and buildup breed bacteria between passes, irritating skin further.
Watch for:
- Bacterial growth from unclean gaps
- Chemical residue left by harsh disinfectants
- Skin sensitivity from temperature swings during rinsing
Clean thoroughly, disinfect properly, and dry blades fully before storage. If irritation continues, retire the blade.
Rust or Corrosion
Rust doesn’t ask permission—it just shows up once water and oxygen team up on exposed steel. Orange flaking or dull spots mean rust formation has started, weakening the blade’s edge.
Rust doesn’t ask permission—it shows up the moment water and oxygen meet exposed steel
| Cause | Prevention | Action |
|---|---|---|
| Trapped moisture | Dry blades thoroughly | Toss immediately |
| No airflow | Store in dry place | Replace |
| Bare metal | Apply protective oil | Retire blade |
Corrosion never reverses. Once spotted, that blade’s done for good.
Nicks and Chips
Rust ruins a blade slowly. Nicks and chips ruin your shave instantly.
- A snagged edge that catches skin mid-stroke
- Tiny chips you can feel but barely see
- Razor burn showing up out of nowhere
- Blood spots you didn’t expect
Micro-chipping breaks edge integrity, weakening skin guard effectiveness. Run a fingertip test during blade inspection—catching damage early protects sharpness retention and prevents corrosion-induced tearing later.
Shave Count Guidelines
Numbers help, but they’re not gospel. Blade replacement frequency runs 4-6 shaves for safety razors, 5-10 for cartridges—longer with a solid blade maintenance routine. Coarse hair, dry shaving, or skipping your razor disinfection methods shortens that fast. Track shaves on a sticky note by the mirror. When performance drops before your count says it should, trust your skin over the schedule.
Frequently Asked Questions (FAQs)
What is the best way to clean a razor blade?
Picture the buildup hiding between blade gaps after every shave, that’s your target. Start with a hot water initial rinse, follow with mechanical brushing and a disinfection soak in isopropyl alcohol, then air dry upright before storage.
Is white vinegar enough to disinfect a razor?
Not entirely. Vinegar controls mineral deposits well but has a limited antimicrobial spectrum—it won’t touch S. aureus and needs longer contact time than alcohol. For real blade sanitizing, follow with a 70% isopropyl soak; alcohol still outperforms vinegar for disinfecting grooming tools.
What is the brown stuff on my razor blade?
That discoloration usually points to rust causes, mineral stains, or residue buildup—sometimes bacteria growth or coating reactions.
Blade inspection helps you spot corrosion early, so rinse thoroughly, dry completely, and prioritize rust prevention before soap scum turns into stubborn blade corrosion.
Should you disinfect razor blades?
Yes, disinfect. Rinsing removes debris, but only disinfection kills bacteria. Weekly bacterial transfer prevention cuts infection risk; sensitive skin needs it after every shave. Skipping this step invites folliculitis and irritation your razor hygiene routine shouldn’t allow.
How do I disinfect my shaving razor?
Submerge the blade head in 70% rubbing alcohol for 5–10 minutes. Skip rinsing, just shake off excess and air dry completely. Never mix alcohol with hydrogen peroxide, that combo creates unwanted chemical reactions on your skin.
How to deep clean a shaving razor?
Once a week, take the razor apart fully. Scrub threads and cap with a soft toothbrush in warm, soapy water, then soak in vinegar or alcohol before rinsing and air-drying completely.
Does vinegar clean razor blades?
Distilled white vinegar works through acetic acid action, dissolving mineral deposits and starting rust dissolution. Mix one part vinegar to four parts water, soak 10–20 minutes, then rinse well—this cuts buildup while offering mild bacteria reduction.
How do I keep my razor blades sharp and clean?
Rinse with hot water before and after every shave, then air-dry upright to protect blade sharpness retention. Disinfect weekly with alcohol, oil the pivot monthly, and swap blades at the first sign of dullness, tugging, or rust.
On the road, hotel sinks and cramped bags make upkeep harder, so these razor blade maintenance tips for travelers help your blades stay sharp wherever you wake up.
How do you get rid of bacteria in a razor?
Funny how something so small hides so much life. Kill it with a 70% isopropyl alcohol soak, 5–10 minutes, then air-dry fully—alcohol’s antimicrobial action wipes out bacteria fast, and skipping the rinse keeps rust away.
How do you get black mold off a razor?
Black mold needs a full alcohol soak, not a quick swish: submerge the head 5–10 minutes, then scrub gaps with an old toothbrush, rinse hot, and air-dry upright to stop spores returning.
Conclusion
A barber’s blade outlasts a home razor for one reason: it never sits wet in grime between uses. That’s the whole game.
Learning how to clean razor blades at home means treating every blade like a tool worth respecting, not a disposable afterthought. Rinse it, brush it, dry it, store it upright. Skip a step, and rust wins. Follow the routine, and you’ll shave longer on fewer blades, with sharper, safer results every single time.