This site is supported by our readers. We may earn a commission, at no cost to you, if you purchase through links. This content is for general informational and educational purposes only and is not a substitute for professional medical, dermatological, or nutritional advice.
Most people wash their hair several times a week—then drag a brush full of old oil, dead skin, and product residue straight through it. The tool meant to keep your hair clean is often the thing undoing that effort.
Hairbrush bristles trap more than loose strands. Sebum, dry shampoo, lint, and bacteria accumulate in layers between each use, and without regular cleaning, that buildup transfers right back onto freshly washed hair. It can also clog follicles and throw off your scalp’s natural pH balance—quietly working against the healthy hair routine you’re trying to build.
Knowing how to clean hairbrushes and combs the right way means your tools work with you instead of against you. The process is straightforward once you know the steps—and faster than you might expect.
Table Of Contents
- Key Takeaways
- Why Cleaning Hairbrushes and Combs Matters
- How Often to Clean Hairbrushes and Combs
- How to Clean Hairbrushes Step by Step
- How to Clean Combs Without Damage
- Top 4 Products for Cleaning Hairbrushes and Combs
- Frequently Asked Questions (FAQs)
- What do hairdressers use to clean combs and brushes?
- How do you remove buildup from hair brushes?
- Can I use Dawn dish soap to clean my hairbrush?
- What household ingredients can I use to clean my hairbrush?
- Should I wash my hairbrush before or after I wash my hair?
- How do I clean hair dye or other hair products out of my brush?
- Can I wash my hairbrush with my regular laundry?
- How often should children’s hairbrushes be cleaned?
- Can I clean hairbrushes in the dishwasher?
- How do I clean electric heated brushes?
- Conclusion
Key Takeaways
- Dirty hairbrushes transfer oil, dead skin, and product buildup back onto clean hair, quietly undermining your entire wash routine.
- Cleaning frequency should match your habits—oily scalps and heavy product users need a tool refresh every 3–4 days, not just weekly.
- The right cleaning sequence matters: remove hair first, loosen lint dry, then soak and scrub—skipping steps makes the whole process less effective.
- A few affordable tools (a brush cleaner, mild shampoo, white vinegar, and microfiber cloth) are all you need to keep your brushes genuinely clean and lasting longer.
Why Cleaning Hairbrushes and Combs Matters
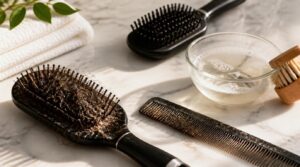
Your hairbrush does a lot more work than you might realize — and it collects proof of every session. Over time, oil, dead skin, and product residue build up fast, turning a helpful tool into something that works against you. Here’s why keeping it clean is worth the few minutes it takes.
A tool like the Denman Hairbrush Cleaning Brush makes removing that buildup quick and easy, so your brush stays genuinely clean between uses.
Removes Oil and Product Buildup
Every time you style your hair, a little something gets left behind. Oils from your scalp, traces of dry shampoo, styling cream — they all cling to bristles and build up quietly over time.
Surfactants in shampoo break that film apart through emulsion action, carrying dissolved grease away when you rinse. Warm water helps the cleaning solution work faster by reducing oil viscosity, so residue lifts with far less effort.
Reduces Lint and Dead Skin
Oil buildup doesn’t travel alone. Dead skin cells and lint hitch a ride too, settling between bristles where they compact into that familiar grey fuzz.
Cleaning your hairbrushes and combs regularly stops particle redistribution before it starts. Here’s what accumulates if you don’t:
- Shed hair trapping scalp debris
- Dried sebum binding skin flakes to bristles
- Lint forming from dust and dead skin cells
- Product residue accelerating skin flake accumulation
- Loose particles transferring back onto clean hair
This accumulation can lead to clogged hair follicles and scalp irritation.
Supports Healthier Scalp Care
That grey fuzz isn’t just cosmetic. When sebum mixes with product residue on dirty bristles, it can disturb your scalp pH balance — and a scalp that drifts from its acidic state becomes vulnerable to irritation and bacterial growth.
| Scalp Risk | Root Cause | Why It Matters |
|---|---|---|
| Microbiome disruption | Sebum buildup on tools | Weakens healthy bacteria |
| Follicle obstruction | Product residue transfer | Slows hair growth |
| Barrier damage | Repeated irritant contact | Raises sensitivity risk |
Hygiene for beauty tools — like regularly using clean hairbrushes and combs — helps with removing product buildup before it cycles back onto your scalp.
Prevents Dirty Hair Transfer
Think of your brush as a sponge — once it’s loaded with residue carryover, it deposits that same grime right back onto clean hair.
A dirty brush doesn’t clean hair — it just recycles yesterday’s grime back onto it
- Oils and bacteria cling to bristles between uses
- Product residue re-deposits onto freshly washed strands
- Debris falls back into hair during each pass
Regularly clean hairbrushes and combs to break that cycle and protect your hair hygiene at the source.
Helps Tools Last Longer
Neglect adds up fast. Bristles weaken, cushions crack, and metal parts rust when debris and moisture sit unchecked. A quick regular deep clean removes the buildup that quietly degrades your tools over time.
The same principle applies to your haircare tools—just as you’d thoroughly rinse shea butter from your strands to avoid residue buildup, your brushes deserve the same thorough follow-through.
Inspect your brush or comb occasionally for bent bristles or corrosion — catching small damage early means you replace tools less often and get more mileage from what you already own.
How Often to Clean Hairbrushes and Combs
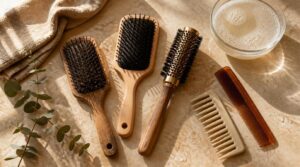
How often you clean your brush depends on your hair type, how much product you use, and whether you share your tools with others. There’s no single schedule that works for everyone, but there are some solid guidelines that make it easy to figure out your routine. Here’s what to follow based on your habits.
Daily Hair Removal
After every brush session, take 30 seconds to pull out shed hair with your fingers before it weaves deeper into the bristles. That loose hair acts like a net, catching lint and product residue faster than you’d expect.
For anything stubborn, a rat-tail comb or pointed tool lifts trapped strands quickly, keeping your hairbrush or comb ready for tomorrow.
Weekly Deep Cleaning
Once a week, give your brushes and combs a proper wash — not just a quick rinse, but a real deep clean. That means soaking plastic and metal tools in warm soapy water for 10 to 30 minutes, then scrubbing between bristles with an old toothbrush to lift trapped debris, oil residue, and dead skin flakes.
Drying fully before storing prevents musty odors and keeps tools fresh.
Oily Hair Cleaning Schedule
Oily scalps don’t follow a weekly rhythm — sebum can make hair look greasy within 24 to 48 hours, which means your brush collects that buildup just as fast.
If your scalp feels slick by midday, clean your tools every 3 to 4 days. Hot, humid weather speeds things up even more, so adjust your schedule accordingly.
Heavy Product Use Frequency
Oils, creams, and gels layer onto bristles with every pass — and that residue doesn’t just sit there. It transfers back to clean hair, leaving it greasy faster than you’d expect.
If you’re a heavy product user, clean your tools every 3 to 4 days. Waiting longer lets buildup harden, which takes more effort and stronger solutions to remove.
Shared Tool Sanitizing
Sharing a brush means sharing everything on it — oils, skin cells, and bacteria too. That’s why shared tools need sanitizing between each use, not just a quick wipe.
Follow these steps every shift:
- Wash your hands before handling the tool
- Surface clean first, then disinfect with an approved solution
- Allow full air-dry contact time before the next person uses it
Never mix cleaning chemicals — it creates harmful fumes.
How to Clean Hairbrushes Step by Step
Cleaning your hairbrush doesn’t have to be complicated — it just needs to happen in the right order. Each step builds on the last, so skipping ahead can make the whole process less effective. Here’s exactly what to do, from start to finish.
Remove Trapped Hair First
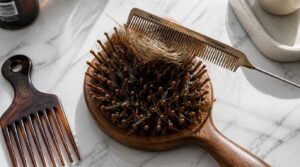
Start by pulling out as much loose hair as you can with your fingers — it takes seconds and makes every step after this easier.
Then use a rat-tail comb or pick to lift strands trapped deeper in the bristles, working from the handle outward. Always do this dry, so hair grips the tool instead of slipping around once wet.
Loosen Lint Between Bristles
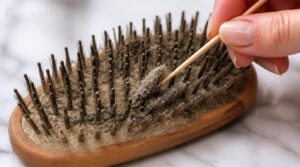
Once the hair is out, you’ll notice a gray, dusty layer sitting at the bristle base — that’s lint, dead skin, and product residue packed in tight.
Use a dental pick or toothpick to work it loose, moving from the base outward with short, controlled motions. Avoid forcing anything between rows, as that bends bristles out of shape.
Wash With Mild Shampoo
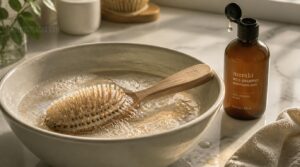
With the lint cleared, fill a bowl with warm water and mild shampoo, then swirl your brush gently through it.
Mild shampoo works because its pH-balanced, sulfate-free formula lifts oils and product residue without roughing up bristles or irritating your scalp. Conditioning agents in the formula also help bristles rinse clean without drying out. Swirl, don’t scrub hard.
Disinfect Safe Brush Materials
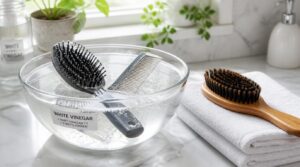
Once your brush is clean, disinfection depends on what it’s made of. Plastic and metal brushes handle a diluted white vinegar soak well — equal parts vinegar and water for about ten minutes.
Avoid alcohol on natural bristles, since it dries them out over time. Skip boiling entirely; high heat warps plastic and loosens the glue holding bristles in place.
Dry Brushes Bristle-Side Down
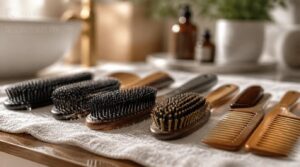
After rinsing, set your brush bristle-side down on a clean towel to dry. Gravity pulls moisture away from the ferrule, protecting both the glue line and the metal from corrosion over time.
Airflow moves freely between the bristles, so evaporation happens evenly rather than pooling at the base — which keeps your deep clean lasting longer.
How to Clean Combs Without Damage
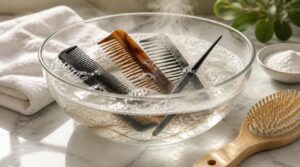
Combs are actually pretty forgiving to clean — most can handle a good soak without any fuss. The key is knowing your material and following a simple sequence so you don’t warp the teeth or weaken the structure. Here’s exactly how to get yours spotless from start to finish.
Remove Hair and Debris
Before any water touches your comb, remove all loose hair by hand first. Pulling strands out manually prevents them from turning into a soggy, harder-to-clean paste once wet.
For hair wedged deep between teeth, use a rat-tail comb or pointed pick to lift and separate stubborn clumps from the base where buildup is most compact.
Soak Plastic Combs Safely
Plastic combs handle soaking well — but temperature matters. Fill a bowl with warm water and mild shampoo, keeping it comfortable to the touch, not hot. Hot water warps plastic over time.
Soak for around 10 to 15 minutes. Watch for these signs you’re on track:
- Water stays warm, not steaming
- Comb feels clean, not tacky
- No visible residue floating after soaking
- Soak time stays under 20 minutes
Rinse thoroughly with clean water afterward.
Scrub Between Comb Teeth
Soaking softens the buildup, but it won’t pull residue out of tight gaps on its own. Grab an old toothbrush and work it between each tooth, angling the bristles to reach the walls, not just the top. Wide-tooth combs still need this step. Rinse thoroughly with clean water once you’ve worked through every gap.
Sanitize With Vinegar Solution
Mix one part white vinegar with one part water, then let your comb soak for about ten minutes. Rinse well after.
Vinegar’s acetic acid helps cut through grease and loosen residue, though it’s not an EPA-registered disinfectant — it won’t reliably eliminate dangerous bacteria like Staph. Think of it as a solid maintenance step, not a clinical-grade sanitizer.
Dry Before Storing
Shake off excess water and lay your comb flat on a dry towel, teeth facing up, somewhere with good airflow.
Don’t store it while it’s still damp — trapped moisture breeds mold and musty odors fast. Wooden grips especially need to dry fully to avoid water damage. Once no beads remain on the teeth, it’s ready.
Top 4 Products for Cleaning Hairbrushes and Combs
Having the right tools makes the whole process so much easier. A few well-chosen products can cut your cleaning time in half and keep your brushes and combs in better shape, longer. Here are four worth keeping on hand.
1. Olivia Garden Hair Brush Cleaner Tool
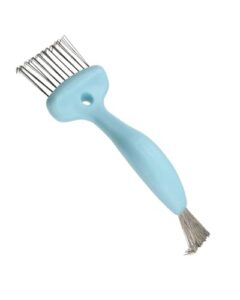
The Olivia Garden Hair Brush Cleaner Tool does the heavy lifting with a 2-in-1 dual-sided design — one side grips wide brush heads, the other reaches tight spaces between bristle tufts. At just 2.4 ounces, it won’t tire your hand out mid-clean.
Made from 80% recycled plastic, it holds up to daily salon-level use without bending or wearing down. Compatible with paddle, round, and vented brushes, it’s the one tool that earns its counter space.
| Best For | Professional stylists and everyday users who want to keep their brushes clean, extend their lifespan, and maintain peak performance without a lot of effort. |
|---|---|
| Material | 80% recycled plastic |
| Eco-Friendly | Recycled plastic construction |
| Durability | Withstands daily salon use |
| Ease of Use | Comfort-grip handle design |
| Best For | Professional stylists |
| Price Point | Premium tool investment |
| Additional Features |
|
- Dual-sided design tackles both wide brush heads and tight spaces between bristles, making it versatile for paddle, round, and vented brushes
- Sturdy steel bristles cut through stubborn hair, lint, and product buildup that plastic tools tend to miss
- Lightweight at just 2.4 ounces with a comfort-grip handle, so it’s easy to use without hand fatigue
- Sharp steel bristles require careful handling — definitely not something to leave within reach of small children
- Higher price tag than basic plastic cleaning tools, which may give budget-conscious shoppers pause
- Specialized enough that casual users who rarely deep-clean their brushes may not get full value from it
2. Barbicide Disinfectant Concentrate
The Olivia Garden tool takes care of the physical cleanup, but once the hair and lint are gone, you still need to kill what you can’t see.
That’s where Barbicide Disinfectant Concentrate earns its place. It’s been a fixture in professional barbershops since 1947, and its EPA-registered formula holds up against serious pathogens — HIV-1, Hepatitis B and C, MRSA, and Influenza — without rusting or staining your tools.
Using it is straightforward. Mix the concentrate with water at a 1:16 ratio, submerge your plastic or metal combs and brush grips, and let them soak for 10 minutes. Rinse clean, then air-dry.
One 16-ounce bottle stretches across many uses, so professional-grade disinfection doesn’t have to mean a professional-grade price tag.
| Best For | Professional barbers, stylists, and nail technicians who need a reliable, compliance-ready disinfectant for high-traffic salon or spa environments. |
|---|---|
| Material | Liquid concentrate formula |
| Eco-Friendly | Concentrated to reduce waste |
| Durability | Hospital-grade stable formula |
| Ease of Use | Simple 1:16 mix ratio |
| Best For | Barbers and salons |
| Price Point | Cost-effective concentrate |
| Additional Features |
|
- Hospital-grade formula kills serious pathogens like HIV-1, MRSA, and Hepatitis B & C, meeting OSHA and State Board standards
- Anti-rust, non-staining solution keeps metal shears, clippers, and combs in great shape
- Highly concentrated 1:16 mix ratio makes it cost-effective for busy, high-volume shops
- Requires a full 10-minute soak, which can slow down workflow during busy shifts
- Solution must be replaced daily, adding a recurring prep step to your routine
- Tools need to be pre-cleaned with soap and water before disinfecting, so it’s a two-step process
3. Microfiber Cleaning Cloths For Home And Car
Once your tools are disinfected, keeping them clean between sessions is where microfiber cloths earn their spot in your routine.
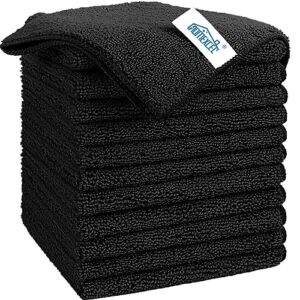
The HOMEXCEL JP-101 cloth is built on an 80/20 polyester-nylon mix that creates microscopic pockets to trap oil, lint, and residue — things a regular cotton cloth just smears around. At 11.5 by 11.5 inches, it’s easy to handle without feeling bulky.
The scratch-free surface means you can wipe down brush grips, barrel surfaces, and comb teeth without worrying about damage. It leaves glass and stainless steel completely streak-free, too.
Machine wash it up to 500 times without losing absorbency — just skip the fabric softener, which clogs the fibers. Air dry or tumble on low heat, and it’s ready again within an hour or two.
| Best For | Anyone who wants a versatile, gentle cleaning cloth for home surfaces, car interiors, and delicate items like glassware or mirrors. |
|---|---|
| Material | 80/20 polyester-nylon blend |
| Eco-Friendly | Reusable up to 500 washes |
| Durability | 500 machine wash cycles |
| Ease of Use | Machine washable, quick-dry |
| Best For | Home and car surfaces |
| Price Point | Budget-friendly multi-pack |
| Additional Features |
|
- Soft, scratch-free microfiber picks up oil, lint, and residue without smearing or leaving streaks
- Works on a wide range of surfaces — countertops, dashboards, glass, stainless steel, and more
- Machine washable and reusable, making it a practical long-term addition to any cleaning kit
- Smaller than some users expect at 11.5" x 11.5", which can feel limiting for bigger jobs
- The loopy texture tends to trap debris, so the cloth itself can be tricky to rinse clean
- Absorbency and overall performance may gradually decline after repeated machine washes
4. Stanley Quencher Insulated Tumbler Cup
You’ve got your tools clean and your cloths ready — now think about what you’re actually soaking those brushes in.
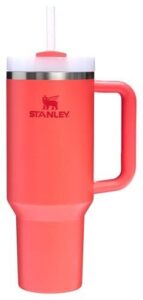
The Stanley Quencher holds up to 40 ounces, which gives you enough warm, soapy water to fully submerge combs and let brushes soak without crowding. The double-wall vacuum insulation keeps that water warm for hours, so your cleaning solution stays effective even if you’re working through a full kit.
It’s built from 90% recycled stainless steel, resists rust, and is dishwasher safe — practical for something that’s going to sit alongside your cleaning routine regularly.
The FlowState lid has three settings, including a full-cover top that keeps debris out between uses. Sizes run from 14 to 64 ounces, and most fit standard cup holders except the largest. A lifetime warranty backs every purchase from authorized resellers.
| Best For | Beauty professionals and enthusiasts who want a durable, insulated tumbler that keeps water warm long enough to soak and clean a full brush kit efficiently. |
|---|---|
| Material | 90% recycled stainless steel |
| Eco-Friendly | Recycled steel, reduces single-use plastic |
| Durability | Lifetime warranty included |
| Ease of Use | Dishwasher safe, ergonomic handle |
| Best For | Daily hydration on the go |
| Price Point | Mid-to-premium range |
| Additional Features |
|
- Double-wall vacuum insulation keeps your soaking water warm for hours, so it stays effective through an entire cleaning session
- Made from 90% recycled stainless steel and dishwasher safe — easy to clean and built to last alongside a regular grooming routine
- The FlowState lid’s full-cover setting keeps dust and debris out between uses, making it practical for a workspace environment
- Not fully leak-proof when tipped, which could be a concern around brushes or work surfaces
- The 64oz size doesn’t fit standard cup holders, limiting portability for that model
- Larger sizes can get heavy when filled, which may be awkward to move around during a cleaning session
Frequently Asked Questions (FAQs)
What do hairdressers use to clean combs and brushes?
Like a shield against invisible threats, Barbicide disinfectant is the salon standard. Hairdressers also rely on 70% isopropyl alcohol and warm soapy water to keep combs and brushes clean between every client.
How do you remove buildup from hair brushes?
Start by removing loose hair, then soak the brush in warm water with mild shampoo for 5–10 minutes. Scrub bristles gently with a toothbrush, rinse thoroughly, and dry bristle-side down.
Keeping up with this routine matters more than you might think, since how often you should wash your hair brush directly affects how well it prevents tangles and breakage.
Can I use Dawn dish soap to clean my hairbrush?
Yes, Dawn dish soap works well for hairbrushes. A few drops in warm water cuts through oil buildup and product residue that plain water can’t lift. Just rinse thoroughly until the water runs completely clear.
What household ingredients can I use to clean my hairbrush?
Your kitchen cabinet is basically a cleaning kit in disguise. Baking soda, white vinegar, dish soap, and shampoo all cut through oil and buildup — no special products needed.
Should I wash my hairbrush before or after I wash my hair?
After washing your hair, give your brush a quick clean — warm water loosens oils and product residue more effectively, and you won’t drag wet scalp debris back into freshly detangled strands.
How do I clean hair dye or other hair products out of my brush?
Hair dye clings stubbornly, so soak bristles in warm soapy water for five minutes, then gently massage the base. A clarifying shampoo breaks down pigment fast — rinse until the water runs clear, then air dry bristle-side down.
Can I wash my hairbrush with my regular laundry?
Your brush won’t survive a spin cycle. The heat and agitation can warp bristles, loosen the cushion pad, and leave fabric covered in shed hair. Handwashing is always the safer, smarter call.
How often should children’s hairbrushes be cleaned?
An ounce of prevention is worth a pound of cure — weekly cleaning works for most kids. But for scalp issues, styling products, or shared brushes, bump it to 2–3 times per week.
Can I clean hairbrushes in the dishwasher?
Technically yes, but it’s not a great idea. Dishwasher heat and detergent can warp cushions, loosen bristles, and leave chemical residue behind — hand-washing with shampoo is the safer, smarter move for most brushes.
How do I clean electric heated brushes?
Think of your heated brush like a phone — you wipe the screen, not dunk it in water. Always unplug it first, let it cool completely, remove hair, then wipe with a damp cloth. Never submerge.
Conclusion
Your hairbrush touches every strand you own—that’s too much influence to leave to a grimy tool. Learning how to clean hairbrushes and combs properly isn’t a luxury step; it’s the foundation your whole hair routine quietly depends on.
Clean tools mean clean results. The buildup you can’t see is the kind that costs you most. Remove it weekly, protect your scalp, and your hair will reflect exactly the care you’ve put in.