This site is supported by our readers. We may earn a commission, at no cost to you, if you purchase through links.
 Cutting curly hair isn’t a one-size-fits-all game.
You’ll want to start by working with dry, freshly styled hair to see its natural pattern.
Always use sharp, professional shears and cut vertically, not horizontally, to maintain your curl’s natural shape and prevent harsh lines.
Snip small sections at a time, focusing on removing split ends and creating movement.
Don’t rely on traditional straight hair cutting techniques—curls have a mind of their own!
Consider working with a stylist who specializes in textured hair, as they’ll understand how each curl type behaves.
Your locks will thank you for the expert touch and the care to maintain your curl’s natural shape.
Table Of Contents
- Key Takeaways
- Preparing Curly Hair
- Cutting Curly Hair Correctly
- Managing Curly Hair Texture
- Essential Cutting Techniques
- Maintaining Curly Hair Health
- Frequently Asked Questions (FAQs)
- Is it better to cut curly hair wet or dry?
- What is the correct way to cut curly hair?
- Does curly hair get cut differently?
- What is the perfect haircut for curly hair?
- Should curly hair be layered?
- How can I prevent curl stickiness after cutting?
- Whats the best way to air dry curls?
- How should I handle multiple curl types together?
- Whats a good routine for post-cut care?
- How do I find a curl-specialist stylist?
- Conclusion
Key Takeaways
- You’ll want to always cut your curly hair when it’s dry, using sharp professional shears and working with its natural pattern. This ensures you see the true length and texture of your curls before making any cuts.
- Layering is crucial for curly hair – it’ll break up heavy volumes, create natural movement, and prevent the dreaded "triangle head" shape. Strategic vertical layers will help your curls bounce and dance with life.
- Don’t rely on traditional straight hair cutting techniques – curls have their own unique behavior. You’ll need specialized methods like the Mizani Aircut or point cutting to preserve curl definition and minimize frizz.
- Maintaining your curly hair’s health goes beyond cutting – you’ll need a consistent routine of regular trims (every 8-12 weeks), gentle drying techniques like using a diffuser or air drying, and moisture-rich products to keep your curls vibrant and frizz-free.
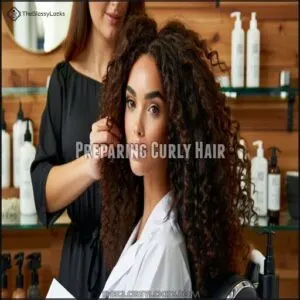
Preparing Curly Hair
You’ll want to prep your curly locks with care before making the first snip, ensuring a stunning haircut that highlights your natural texture.
Proper preparation—from choosing the right shampoo to understanding your unique curl pattern—will set the stage for a cut that transforms your hair from frizzy to fabulous.
Choosing The Right Shampoo
When commencing on your curly hair journey, selecting the right shampoo is like finding your hair’s soulmate.
Ditch sulfate-laden products that strip away precious moisture and embrace gentle cleansers designed for curl enhancement.
Embrace the curl revolution—gentle cleansers are your moisture’s best defense!
- Unleash your curl’s potential with sulfate-free formulas
- Hydrate and transform with natural, nourishing ingredients
- Break free from frizz’s oppressive grip
Look for moisturizing shampoos packed with aloe vera, coconut oil, and botanical extracts.
These curl-loving products will cleanse without compromise, leaving your locks bouncy, defined, and radiantly healthy.
To achieve the best results, understanding curly hair care is essential for making informed decisions about your hair regimen.
Minimizing Frizz and Damage
Every curly-haired queen knows the battle against frizz is real. Your hair’s health hinges on smart product choices and careful maintenance.
Ditch sulfate-laden shampoos for gentler cleansers that preserve your curl’s natural magic. Using a sulfate free shampoo can make a significant difference in reducing frizz and damage.
| Frizz Challenge | Pro Solution | Curl Transformation |
|---|---|---|
| Dry Strands | Leave-in Conditioner | Moisture Revival |
| Unruly Texture | Damp Hair Product Application | Defined Curls |
| Damaged Ends | Regular Sharp Shear Trims | Strength Restored |
| Heat Stress | Minimal Styling Tools | Breakage Prevention |
| Tangled Mess | Wide-Tooth Comb Technique | Smooth Sailing |
Microfiber towels and strategic product layering are your secret weapons in the frizz-fighting arsenal. They help in achieving moisture revival and defined curls.
Importance of a Professional Stylist
After taming frizz, you’ll want a pro who understands your curls’ unique personality.
A skilled professional hairstylist doesn’t just cut hair—they sculpt your crowning glory.
A skilled stylist doesn’t just trim—they transform your hair into a masterpiece of personal expression.
With specialized Stylist Training in curl expertise, they’ll map out a personalized cut that celebrates your hair’s natural rhythm.
During a thorough hair consultation, they’ll analyze your curl pattern, recommend the perfect salon experience, and use precise curly hair cutting techniques that transform your look from flat to fabulous.
Cutting Curly Hair Correctly
Mastering the art of cutting curly hair requires precision and respect for your unique texture. Your curl journey starts here:
- Dry-Cut Technique: Always trim when your hair is dry to prevent shocking surprises. Wet curls can deceive you with their length, leading to unintended over-cutting.
- Curl Mapping: Treat each curl like a unique landscape. Cut where natural bends occur, following your hair’s individual roadmap.
Professional curly hair cutting isn’t just a skill—it’s an intimate dance with your locks. Sharp, dedicated shears are your partners, helping you navigate intricate curl patterns with surgical precision. Work in small, deliberate sections, moving slowly and mindfully.
Understanding the curly hair basics is essential for a successful cut.
By understanding your hair’s natural rhythm, you’ll transform trimming from a nerve-wracking experience into a confident, empowering moment of self-care. Remember: patience trumps perfection when sculpting those beautiful, bouncy curls.
Managing Curly Hair Texture
You’ll need to understand your curly hair’s unique texture and shrinkage pattern before picking up those scissors.
When you master the art of managing your curls’ natural movement through strategic layering, you’ll transform your haircut from basic to brilliant.
Considering Shrinkage and Length
Some folks might feel their curly hair is playing a magic trick when dry cutting reveals dramatic length changes.
Understanding curly hair shrinkage helps you manage expectations and protect your precious locks.
When dry cutting, anticipate 2-3 inches of potential curl retraction. Focus on preserving your unique curl pattern by trimming sparingly, respecting your hair’s natural texture.
Professional stylists recommend cutting less to maintain shape, letting your curls shine in all their glorious, unpredictable splendor.
Embracing your natural hair shrinkage is key to a healthy hair care routine, and understanding the importance of dry cutting and curl retraction will help you make informed decisions about your hair care.
Importance of Layers for Movement
When dealing with curly hair’s natural bulk, layers become your secret weapon.
They transform lifeless locks into a dynamic, bouncy masterpiece that moves with personality.
Let’s discover the magic of strategic layering:
- Break up heavy hair volumes
- Create natural curl movement
- Prevent the dreaded "triangle head"
- Add dimension and shape
- Enhance your hair’s unique texture
Cutting layers isn’t just a technique—it’s an art form that liberates your curls, allowing for natural curl movement and preventing the dreaded "triangle head".
Vertical Layers for Added Movement
Want your curls to dance with life? Vertical layering is your secret weapon for curl enhancement. By raising each curl to the 12 o’clock position, you’ll release natural movement and texture magic.
- Break free from heavy, lifeless locks
- Embrace your curl’s unique personality
- Transform your hair into a flowing masterpiece
Cut strategically, targeting bulk removal while preserving length. The result? Vibrant, bouncy curls that move with confidence and style. Understanding types of layers is essential for achieving the perfect curly hair cut.
Essential Cutting Techniques
When cutting curly hair, mastering the right techniques can transform your styling routine from frustrating to fabulous.
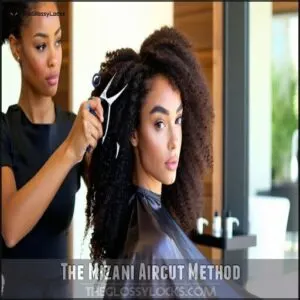
You’ll learn pro methods like the Mizani Aircut that help you create beautifully defined, natural-looking layers that enhance your unique curl pattern, using techniques that can make your styling routine fabulous.
The Mizani Aircut Method
Discover your curls’ true potential with the Mizani Aircut method, a game-changing hair cutting technique that breathes life into every strand.
By strategically creating air pockets, this method sculpts your unique curl pattern without compromising its natural texture.
Designed by expert stylists, the Aircut transforms your hair’s shape, adding incredible volume and definition.
High-quality Mizani scissors become your secret weapon, precisely trimming each curl to reveal its most flattering form.
Say goodbye to flat, lifeless locks and hello to bouncy, vibrant curls.
Trimming Dry Hair for Better Texture
After mastering the Mizani Aircut, you’re ready to elevate your curly hair game with dry cutting techniques.
Snip your locks when fully dry to reveal their true texture and shape. Point cutting individual curls prevents frizz and preserves definition, giving you a balanced, natural look that celebrates your hair’s unique personality.
Less is more—trim with confidence. Using the right dry cutting tools is essential for achieving a professional finish with a natural look.
Avoiding Common Mistakes
A haircut’s horror story begins when scissors attack curly locks without strategy.
Cutting errors can transform your beautiful curls into a frizzy nightmare faster than you can say "bad hair day."
Avoid thinning shears and razors—they’re curl destroyers that invite unwanted frizz and damage.
Professional stylists know the golden rule: never stretch your curls while cutting, or you’ll end up with a shorter surprise.
Always perform visual checks and maintain precise sectioning to prevent split ends and minimize hair breakage.
Maintaining Curly Hair Health
Your curly hair is a unique masterpiece that demands specialized care and precise maintenance.
By understanding the right techniques for trimming, styling, and protecting your natural texture, you’ll discover the secret to keeping your curls healthy, bouncy, and beautifully defined, with specialized care being essential to their upkeep.
Regular Trims and Maintenance
Your curl confidence starts with smart trim schedules.
Every 8-12 weeks, say goodbye to split ends and hello to vibrant hair. Grab sharp scissors and trim curl by curl when dry, following your unique hair growth pattern.
Consistent maintenance isn’t just about length—it’s your secret weapon for frizz control and curl preservation. Stay proactive, and watch your locks transform.
Styling and Drying Techniques
After keeping your curls trim and tidy, it’s time to style like a pro. Your drying ritual can make or break those beautiful spirals.
Embrace these game-changing techniques:
- Use a diffuser for maximum volume and definition
- Air dry to minimize heat damage
- Swap rough towels for a soft t-shirt or microfiber cloth
- Scrunch lightly and let those waves breathe
Gentle handling is your secret weapon for stunning, bounce-filled locks. To achieve the best results, consider using a curly hair dryer as part of your styling routine to get beautiful curls.
Reducing Frizz and Breakage
When battling frizz and breakage, your curly hair needs a gentle touch and strategic care.
Protect your precious locks by embracing microfiber towels and leave-in conditioners that boost moisture balance and curl definition.
Ditch heat tools and opt for air-drying or a diffuser to maintain your natural texture.
Regular trims and mindful frizz management will transform your curls from wild and unruly to beautifully defined and resilient.
Your hair’s health starts with intentional, loving care, which includes understanding the right curly hair routine for maintaining healthy and vibrant curls, and providing the necessary loving care.
Frequently Asked Questions (FAQs)
Is it better to cut curly hair wet or dry?
You’ll want to cut your curly locks dry to see their true personality.
Wet hair can trick you with misleading length, so embrace your natural texture and snip with confidence when those spirals are fully air-dried.
What is the correct way to cut curly hair?
Like a sculptor shaping marble, you’ll master curly hair cutting by working with dry, natural curls.
Snip tiny sections vertically, follow your hair’s unique pattern, and use sharp scissors to preserve each curl’s integrity and movement.
Does curly hair get cut differently?
Yes, curly hair requires a unique cutting approach.
You’ll need to dry it fully, section carefully, and use specialized techniques like the clock method to preserve its natural texture and prevent unwanted triangular shapes.
What is the perfect haircut for curly hair?
Your perfect curly haircut embraces your unique texture with strategic layers, targeting key areas to boost volume, shape, and definition.
Trust a curl-specialized stylist who’ll customize the cut to your hair’s natural pattern and face shape, ensuring a look that complements your features with strategic layers.
Should curly hair be layered?
Ironically, your curls crave layers like a desert craves rain.
They’ll breathe life into your mane, adding movement, reducing bulk, and preventing that dreaded triangle shape.
Layering isn’t just recommended—it’s your hair’s secret weapon for stunning definition.
How can I prevent curl stickiness after cutting?
After cutting curly hair, prevent stickiness by using a lightweight leave-in conditioner and avoiding heavy styling products.
Gently scrunch in a curl-defining cream, then air dry or diffuse to maintain your hair’s natural bounce and texture.
Whats the best way to air dry curls?
Let your curls air dry naturally by gently scrunching with a microfiber towel.
Avoid touching or disturbing them until they’re 80% dry.
Gravity and patience are your best friends for defined, frizz-free, bouncy curls.
How should I handle multiple curl types together?
When dealing with multiple curl types, section your hair, identify each texture, and use specialized techniques.
Adjust your cutting angle and tension for each section, ensuring each curl pattern receives customized care and precision.
Whats a good routine for post-cut care?
After your cut, nourish those curls with leave-in conditioner and curl-enhancing cream.
Avoid heat styling, use a microfiber towel, and diffuse gently.
Hydrate and define with gentle scrunching for bouncy, healthy-looking locks.
How do I find a curl-specialist stylist?
Lost in a sea of scissor-wielding stylists?
Your curl salvation lies in research: seek out specialized stylists trained in DevaCut, Ouidad, or Mizani techniques.
Check online reviews, and ask fellow curly-haired friends for recommendations.
Conclusion
Imagine your curls dancing with newfound freedom—that’s the magic of expert hair cutting.
Mastering how to cut curly hair isn’t just a skill; it’s an art form that transforms your locks.
By understanding your unique texture, investing in professional techniques, and treating each curl with care, you’ll reveal stunning, bouncy results.
Don’t settle for ordinary trims, embrace your curls’ natural beauty, and watch them come alive with the right cut.
- https://www.instagram.com/ash_hairbarbie/
- https://www.fishbowlapp.com/post/i-know-shrinkage-happens-to-everyone-but-do-any-of-you-have-uneven-shrinkage-when-my-hair-is-blown-out-my-hair-length-is-even
- https://naturallclub.com/blogs/the-naturall-club-blog/why-does-my-hair-have-shrinkage?srsltid=AfmBOorESN1vzOzntZbbWGQnXnz3Eo8XyaJxCrtqwCSL6ChOLUZ83e1b
- https://lusbrands.com/blogs/news/embracing-shrinkage
- https://www.quora.com/How-can-I-make-my-hair-appear-longer-and-stop-shrinkage-as-type-2c-3a


