This site is supported by our readers. We may earn a commission, at no cost to you, if you purchase through links.
Start by deep conditioning your hair 48 hours before bleaching, then conduct a strand test to determine timing.
Mix your bleach powder with developer, apply it carefully to just the tips using a frosting cap or foil, and monitor the lightening process closely to avoid damage.
The key is patience and precision – rushing the process can lead to uneven results or fried hair.
With proper technique, you can achieve anything from subtle highlights to bold platinum ends that turn heads wherever you go.
Table Of Contents
- Key Takeaways
- What Are Frosted Tips?
- Understanding The Bleaching Process
- The Importance of Proper Preparation
- Mixing and Applying The Bleach
- Safely Bleaching Your Hair
- Toning for Desired Color Results
- Aftercare and Maintenance for Frosted Tips
- Modern Frost Tip Hairstyles
- Choosing The Right Products for Frosted Tips
- Frequently Asked Questions (FAQs)
- Can I do frosted tips at home?
- What products do I need for frosted tips?
- How do you frost your hair?
- Are frosted tips easy to maintain?
- What does frost your tips mean?
- Are frosted tips coming back?
- When was frosted tips a thing?
- Who started the frosted tips trend?
- How do people get frosted tips?
- What’s the difference between frosted tips and highlights?
- Conclusion
Key Takeaways
- Prepare your hair properly – You’ll need to deep condition 48 hours before bleaching and conduct a strand test to prevent damage and determine the right processing time for your specific hair type.
- Mix bleach correctly and apply with precision – You’ll combine one part bleach powder with two parts developer, then use a frosting cap or foil method to target only the hair tips while protecting your scalp and roots.
- Monitor the process closely and don’t rush – You’ll check your hair every 10 minutes during the 20-30 minute processing time, watching for proper lightening while avoiding over-processing that leads to breakage.
- Maintain your frosted tips with proper aftercare – You’ll use purple shampoo twice weekly to prevent brassiness, apply deep conditioning treatments regularly, and schedule touch-ups every 6-8 weeks to keep your look fresh.
What Are Frosted Tips?
Frosted tips bring back that iconic 90s style with a fresh twist for today’s man.
This hairstyle definition involves bleaching only the ends of your mens hair, creating striking natural accents that catch the light.
Think of it as highlighting’s cooler cousin – you’re painting contrast right where people notice first.
The technique transforms ordinary hair into something extraordinary through strategic hair bleaching.
Whether you’re hitting a wedding or just grabbing coffee, this look offers perfect occasion suitability for any setting.
Frosted tips give you serious color experimentation freedom without going full blonde.
This 90s comeback isn’t just nostalgia – it’s smart styling.
You control the drama level, from subtle hair highlights to bold statement pieces.
The beauty lies in its versatility: works with any texture, length, or base color, making it accessible for everyone ready to level up their look.
Understanding The Bleaching Process
Understanding the bleaching process is your gateway to achieving perfect frosted tips without turning your hair into a brittle mess.
When you bleach hair at home, you’re basically using chemical warfare against your hair’s natural pigments – but in a good way!
The bleaching techniques involve mixing bleach powder with developer, which opens your hair cuticles and strips away color molecules.
Hair damage occurs when you leave bleach on too long or use incorrect ratios, so timing is everything.
Color theory plays a vital role here: darker hair requires longer processing times and stronger developers.
Frosting methods vary from pull-through caps to freehand application, each offering different precision levels.
Bleach safety means wearing gloves, ensuring proper ventilation, and never exceeding recommended processing times.
Hair bleaching tips include starting with healthy hair and performing strand tests.
DIY frosted tips require patience and careful monitoring.
The hair frosting technique transforms ordinary locks into eye-catching statements when done correctly.
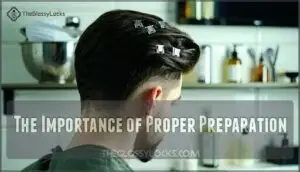
The Importance of Proper Preparation
Before you start bleaching, you’ll want to set yourself up for success by taking a few smart preparation steps.
Think of this phase as laying the foundation for your new look—skip it, and you might end up with damaged hair or uneven results that’ll have you reaching for a hat.
Conditioning Your Hair Before Bleaching
Think of your hair like a sponge – it needs proper hydration importance before facing bleach’s harsh reality. Hair conditioning becomes your best friend here.
Start damage prevention by deep conditioning 48 hours before bleaching, giving strands time to absorb moisture and strength. Apply protein treatments to fortify your hair’s structure – think of it as armor against chemical assault.
Use sulfate-free shampoos that won’t strip away natural oils. These oils act as your scalp’s natural shield during hair bleaching tips sessions.
Skip washing the day before bleaching. Your scalp produces protective oils overnight that’ll help during hair lightening. Focus on scalp health by massaging in leave-in conditioners.
When you bleach hair at home, properly conditioned hair accepts bleach more evenly, preventing hair damage and patchy results.
Conducting a Strand Test
When you’re ready to transform your hair, a strand test becomes your insurance policy against bleaching disasters. This simple step can save you from major hair damage and disappointing results.
Select a hidden section behind your ear—about pencil-width—and mix a small amount of bleach with developer. Apply the mixture evenly and set your timer for 20 minutes. Watch closely for any signs of hair reaction or scalp irritation during processing.
Here’s what your strand test reveals:
- Allergy Detection – Spots potential skin reactions before full application
- Timing Accuracy – Shows exactly how long your hair lightening needs
- Color Preview – Gives you a sneak peek at your final shade
After rinsing, examine the results for damage assessment. Your hair should feel relatively healthy, not overly brittle. This hair bleaching tips technique helps determine if you need different processing times or if your hair’s ready for the full frosted tips transformation. It’s like a dress rehearsal before the main event.
Considering Professional Help
Before diving into DIY bleaching, consider whether a professional stylist consultation might save you heartache down the road. Salon services come with expertise that’s hard to replicate at home—stylists understand your hair’s unique needs and can prevent those dreaded DIY risks like uneven color or chemical damage.
Sure, consultation fees might sting your wallet initially, but they’re often cheaper than costly color corrections later. A professional stylist can assess your hair’s condition, recommend the perfect shade, and guarantee superior results.
Plus, they’ll set you up for easier touch-up ease with proper product recommendations. The salon experience offers peace of mind that’s worth considering, especially when cost factors include potential damage repairs.
Mixing and Applying The Bleach
Now you’re ready to mix and apply the bleach, which is where the real transformation begins.
This step requires careful attention to timing and technique to achieve those perfect frosted tips without damaging your hair.
Protecting Your Clothes and Shoulders
The wrong shirt can turn your frosting session into a permanent reminder of poor planning. Bleach stains won’t come out, no matter what stain removal tricks you try.
Start with clothing coverage by wearing something you’d happily toss afterward. A proper salon cape works best, but cape alternatives like old towels or plastic garbage bags can save the day. Protective fabrics matter—avoid anything with holes or thin material that bleach can seep through.
DIY shields for your shoulders and neck area are essential since gravity works against you during hair dye application. Consider these precautionary measures:
- Wrap a dark towel around your shoulders like a superhero cape
- Use plastic wrap over clothes for extra hair protection
- Layer newspaper on nearby surfaces to catch drips
- Keep protective gear within arm’s reach throughout the process
For ideal protection, consider investing in a quality salon apparel. Your future self will thank you for taking these steps seriously.
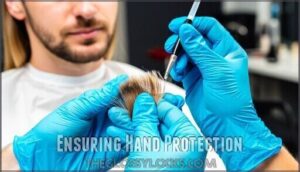
Ensuring Hand Protection
Protection matters when working with bleach. High-quality chemical-resistant gloves serve as your first line of defense against harsh chemicals. Choose latex or nitrile based on allergy prevention needs.
Glove Material affects performance – nitrile offers superior chemical resistance while latex provides flexibility. Proper fit guarantees dexterity without compromising safety. Selecting the right glove chemical compatibility is vital for safety.
| Glove Type | Best For |
|---|---|
| Latex | Flexibility, cost-effective |
| Nitrile | Chemical resistance, latex allergies |
| Vinyl | Light tasks, budget option |
Check for tears before use. Keep spare pairs handy for quick changes. Protective gear creates a safe working environment, letting you focus on achieving perfect results. Bleach safety starts with proper glove disposal – never reuse contaminated gloves.
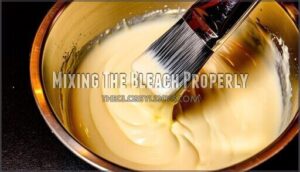
Mixing The Bleach Properly
Perfect bleach ratios determine whether you’ll get salon-worthy frosted tips or a patchy disaster.
Your bleach mixture makes or breaks your entire frosted tips transformation—get the ratios wrong and face disaster.
Mix one part bleach powder with two parts developer in a non-metallic bowl. Your developer volume matters – 20 volume handles most hair types, while 30 volume tackles stubborn dark strands.
Understanding the correct product ratios is essential for achieving the desired lift.
Mixing order and technique prevent lumps:
- Combine bleach powder and developer gradually
- Stir until you achieve smooth, yogurt-like consistency matters
- Check for unmixed clumps that cause uneven lightening.
This careful hair dye mixing creates the foundation for patchy prevention and professional-looking results.
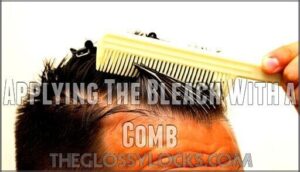
Applying The Bleach With a Comb
With your bleach mixed, grab a wide-tooth comb for precise application. Comb Selection matters – plastic resists bleach better than metal.
Dip the comb in your bleach mixture, then work through each sectioned strand using a 45-degree Application Angle. Focus on Even Distribution while Avoiding Roots to prevent damage. Check Bleach Saturation regularly for consistent coverage.
| Technique | Application Method | Processing Time |
|---|---|---|
| Hair Sectioning | Use clips to separate 1-inch sections | 5-10 minutes |
| Developer mixing | Apply with comb in downward strokes | 20-30 minutes |
| Hair Processing | Check every 5 minutes for lightening | Variable timing |
| Hair Highlighting Kit | Follow manufacturer’s comb instructions | As directed |
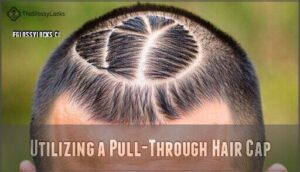
Utilizing a Pull-Through Hair Cap
A pullthrough cap transforms your DIY frosted tips from guesswork into precision. This tool gives you salon-level hair sectioning without the price tag.
Here’s your game plan for flawless bleaching:
- Cap Size: Choose a snug fit that won’t slide around but doesn’t give you a headache
- Hole Placement: Pull sections through systematically, front to back for Even Distribution
- Pulling Technique: Use gentle, consistent pressure to avoid Avoiding Tangles
- hair frosting technique: Work methodically – rushed sectioning leads to uneven results
Your pullthrough cap keeps bleach exactly where you want it while protecting your scalp.
Safely Bleaching Your Hair
Now that you’ve mixed and applied your bleach properly, it’s time to focus on hair safety during the processing time. Think of this step as babysitting your hair—you can’t just walk away and hope for the best.
Set a timer and check your progress every 10 minutes. Damage control starts with using the right bleach strength—stick with 20-30 volume developer for scalp protection.
Remember to perform a strand test first to assess how your hair will react.
Here’s your safety timeline:
| Time Check | Action Required |
|---|---|
| 10 minutes | Assess lightening progress |
| 20 minutes | Check for irritation signs |
| 30 minutes | Final evaluation before rinse |
Watch for redness or burning sensations that signal allergic reactions. Your chemical-resistant gloves and proper ventilation are non-negotiable precautionary measures.
Remember, bleaching damaged hair is like trying to lighten a wet paper towel—it’ll fall apart. When in doubt, rinse it out early rather than risk fried hair.
Toning for Desired Color Results
Why struggle with brassy, orange-tinted tips when toner application can transform your bleached hair into salon-worthy perfection? Color Correction starts with choosing the right toner based on your hair’s current level.
Toner Selection matters – blue-violet formulas tackle orange undertones at level 7-8, while purple-based toners neutralize yellow at level 9-10. Application Techniques require working quickly on damp hair, starting with the brassiest areas first. For ideal results, consider toning pre-lightened hair with non-oxidative products.
Your Brassiness Control strategy should include:
- Purple shampoo for maintaining cool tones between sessions
- Ashy toners for that modern, edgy grey finish
- Blue-based formulas for cleaner, whiter blonde results.
Process for 15-25 minutes maximum, monitoring constantly. Over-toning creates unwanted blue casts, so choose level-appropriate formulas. Tone Longevity depends on proper timing and avoiding over-processing. Remember: if stubborn orange remains, your hair wasn’t lifted enough before toning.
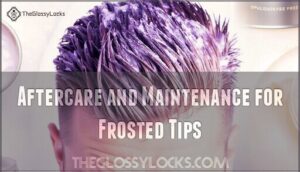
Aftercare and Maintenance for Frosted Tips
Proper hair aftercare turns your fresh frosted tips into a long-lasting style statement. Your newly bleached hair needs Damage Prevention through strategic care routines that protect both Scalp Health and Color Preservation.
Essential hair aftercare practices include:
- Use purple shampoo every third wash to neutralize brassiness and maintain vibrant tones
- Apply Hydration Treatments like deep conditioning masks twice weekly to restore moisture lost during bleaching
- Schedule professional touchups every 6-8 weeks following your Trim Schedule to maintain crisp, healthy ends
Daily hair moisturizing techniques involve sulfate-free products and leave-in conditioners that shield against environmental damage. Bond-strengthening treatments repair chemical stress while Color Refresh products between salon visits keep your frosted tips looking salon-fresh. This consistent routine guarantees your investment stays sharp and healthy.
Modern Frost Tip Hairstyles
Now that you’ve mastered the basics, it’s time to explore the exciting world of modern frosted tip variations that’ll make your style stand out.
Today’s frosted tips aren’t just about the classic spiky look—they’re about creating personalized styles that work with your face shape, lifestyle, and personal flair.
Short Frosted Hair Brushed Up
Brushed-up mens frosted tips create striking vertical dimension when styled properly.
Start with damp hair and apply volumizing styling products from roots to ends. Use a round brush while blow-drying upward to maximize lift and showcase your mens hair highlights.
Work frosted hair men looks require matte pomade for texture without stiffness. This mens hair styling technique pairs perfectly with facial hair for balanced contrast.
Regular maintenance frequency of 6-8 weeks preserves hairstyle longevity, while color variations like platinum or silver enhance the brushed effect.
Asymmetrical Frosted Tips for Men
Asymmetrical frosted tips create striking visual interest through deliberate imbalance that transforms ordinary highlights into statement-making edgy asymmetry. This modern styling technique leverages strategic color placement to draw attention and showcase your personal flair.
Here’s your roadmap to mastering asymmetrical frosted hair men love:
- Create the asymmetrical base – Cut one side longer than the other for dramatic contrast
- Map your color zones – Apply mens hair highlights to the longer sections only
- Focus on hair texture compatibility – Works best on straight to slightly wavy hair
- Style with intention – Use firm-hold pomade to emphasize the uneven lengths
- Plan your maintenance needs** – Purple shampoo weekly prevents brassiness
To achieve the best results, consider different hair types when selecting products. The magic happens when you style upward or sideways, making the lightened portions pop against your darker base.
This asymmetrical frosted tips approach delivers maximum impact while keeping hair frosted tips men looking intentionally crafted rather than accidental.
Short Frosted Highlights With Undercut
Combining edgy undercut precision with blonde frosted tips creates one of the most striking mens hair styles today.
Your undercut length should contrast sharply with the top—keep sides tight while maintaining 2-3 inches up top for ideal highlight placement.
This color contrast between dark sides and lightened tips makes your mens frosted tips pop like neon signs.
Focus your hair frosting on the longest sections where light catches best.
Apply styling products like texturizing paste to separate frosted strands and amplify definition.
The beauty lies in the clean lines—your undercut frames the highlighted area perfectly.
Hairstyle maintenance involves regular fade touch-ups and purple shampoo to prevent brassiness.
This cut photographs incredibly well and works whether you’re hitting the office or weekend parties.
Bleached Hair Men Faux Hawk
With its rebellious edge and attention-grabbing style, the faux hawk transforms mens frosted tips into a statement piece. This Faux Hawk Origin dates back to punk culture, but today’s version offers versatility without the commitment of a full mohawk.
Creating your bleached faux hawk involves strategic placement and proper technique:
- Shape – Form a central ridge 2-3 inches wide from hairline to crown
- Bleach – Apply product only to the ridge area, avoiding sides completely
- Process – Wait 20-30 minutes for ideal lightening results
- Style – Use strong-hold gel to spike the frosted section upward
Your Styling Product Guide should include texturizing paste and high-hold hairspray. Maintenance Frequency requires touch-ups every 6-8 weeks as roots grow.
Color Variation Ideas include platinum, silver, or even bold blues for extra impact. With proper care, Hairstyle Longevity extends several months, making this mens hair bleaching technique worth the investment.
Brushed Up Blonde Ends
While the faux hawk brings punk-inspired edge, brushed up blonde ends offer a more versatile approach to frosted tips.
This style transforms your look by lifting lightened sections away from your scalp, maximizing the brightness of your blonde tips.
Start your hair bleaching process by applying product only to the tips, creating that signature contrast. Once you’ve achieved your desired blonde shades, the real magic happens during styling.
Use a blow dryer and round brush to build height at the roots, then work a volumizing styling products through the lightened ends.
Hair texture plays a huge role here – coarser hair holds the brushed-up shape longer, while fine hair benefits from texturizing spray. The hairstyle versatility is unmatched; you can go from casual quiff to structured spikes depending on your mood.
For upkeep frequency, refresh your mens hair color every 6-8 weeks. This mens hair dye technique works with most face shapes and hair lengths, making it perfect for guys wanting contemporary edge without commitment.
Choosing The Right Products for Frosted Tips
The right products can make or break your frosted tips experience, turning a potential hair disaster into a stylish success.
You’ll need quality bleach, the correct developer strength, and specialized aftercare products to achieve professional-looking results at home.
Choosing The Right Bleach
Now that you’ve picked your perfect hairstyle, selecting the right bleach becomes your next mission.
You’ll want high-quality products with protective additives to keep your hair healthy during the bleaching process.
Here’s what you need to keep in mind:
- Developer Strength – Use 10 volume developer for light hair, 30-40 volume for darker shades
- Bleach Alternatives – Look for blue or purple-tinted powders that minimize brassiness
- Hair Porosity – Test how your hair absorbs moisture to determine processing time
- Toning Needs – Choose bleach that works well with your planned toner shade
Trusted brands like L’Oréal offer reliable hair chemicals for consistent results.
To prevent damage, remember to assess hair hydration before bleaching.
Considering Hair Color
Your base hair determines which shades work best for frosted tips.
Choose colors that complement your skin tones and natural undertones.
Here’s your color matching guide:
| Hair Color | Best Tip Shades | Skin Match |
|---|---|---|
| Dark Brown | Golden blonde, caramel | Warm undertones |
| Light Brown | Ash blonde, platinum | Cool undertones |
| Black Hair | Dirty blonde, bronze | Any skin tone |
| Blonde Base | Silver, white highlights | Fair to medium |
| Red Hair | Copper, strawberry blonde | Warm complexion |
Consider color permanence – bleaching creates lasting changes that require professional correction if you’re unhappy with results.
Aftercare With Purple Shampoo
Every frosted tip needs purple shampoo to fight brassiness and maintain color longevity.
Use it twice weekly—overuse creates unwanted purple tints. Choose sulfate-free products like Fanola No Yellow for gentle hair care.
Follow with deep conditioning after each hair shampooing session to restore moisture and prevent brittleness.
Application frequency matters: consistent hair rinsing with purple shampoo keeps your frosted tips looking salon-fresh between touch-ups.
Frequently Asked Questions (FAQs)
Can I do frosted tips at home?
Yes, you can absolutely do frosted tips at home!
With the right materials like bleach, developer, and gloves, plus careful preparation and patience, you’ll achieve that trendy look without expensive salon visits.
What products do I need for frosted tips?
You’ll need bleach powder, 20 or 30-volume developer, a frosting cap, a hook tool, mixing bowl, tinting brush, gloves, and neutralizing shampoo for aftercare.
How do you frost your hair?
Frosting your hair isn’t rocket science, but you’ll need steady hands.
Section damp hair, spike tips with gel, apply bleach carefully with gloves, wrap in foil.
Process 30-60 minutes, then rinse thoroughly and condition.
Are frosted tips easy to maintain?
Maintaining frosted tips isn’t too demanding, but you’ll need regular touch-ups every 6-10 weeks as your hair grows.
You’ll also want purple shampoo to prevent brassiness and sulfate-free products to keep your hair healthy after bleaching.
What does frost your tips mean?
Frosting your tips means bleaching or lightening the ends of your hair to create contrast with your natural base color.
You’re basically adding highlights to just the tips, creating that signature two-toned look that’s both edgy and stylish.
Are frosted tips coming back?
Celebrities like Justin Timberlake sparked this trend’s massive ’90s popularity. You’re witnessing frosted tips making a serious comeback with modern adaptations that look fresh and sophisticated today.
When was frosted tips a thing?
Frosted tips peaked from the late 1990s to early 2000s, with Justin Timberlake popularizing the trend in
You’ll recognize this iconic look from celebrities like Lance Bass and Mark McGrath during that era.
Who started the frosted tips trend?
Since 98% of trendsetting hairstyles come from music icons, you’ll find Justin Timberlake pioneered frosted tips in 1998 during NSYNC’s peak.
His bold blonde-tipped curls sparked the movement that defined late ’90s style.
How do people get frosted tips?
You bleach the tips of your hair using a mixture of bleach powder and developer, apply it carefully to the ends.
Then process for 20-30 minutes until you achieve the desired lightness.
What’s the difference between frosted tips and highlights?
You’re targeting specific sections when getting highlights, while frosted tips focus only on your hair’s ends.
Highlights create dimension throughout your hair, but frosted tips give you that edgy contrast just at the tips.
Conclusion
Mastering how to do frosted tips on mens hair transforms your look from ordinary to extraordinary with the right technique and patience.
You’ve learned the essential steps from preparation through aftercare, but remember that practice makes perfect.
Don’t rush the bleaching process—your hair’s health depends on careful timing and proper products.
With dedication and the right approach, you’ll achieve those coveted frosted tips that showcase your personal style confidently.
- https://www.reddit.com/r/HairDye/comments/1kraq8z/frosted_tips_diy_for_an_8_year_old/
- https://forums.overclockers.co.uk/threads/frosted-tips.18965761/
- https://www.youtube.com/watch?v=aTvdmNEyuec
- https://www.allthingshair.com/en-us/hair-color/hair-frosting/
- https://www.tiktok.com/discover/how-to-do-frosted-tips-on-men-without-cap-at-home


