This site is supported by our readers. We may earn a commission, at no cost to you, if you purchase through links.
Salon visits for a full color transformation can cost anywhere from $150 to $300—and that’s not counting the tip or the three-hour commitment. You don’t need a cosmetology license to achieve professional-looking results in your bathroom, but you do need the right technique.
The difference between Instagram-worthy color and a brassy disaster often comes down to three things: proper prep work, strategic application, and understanding how dye actually interacts with your hair.
Most first-timers make the same avoidable mistakes—skipping the clarifying wash, applying color to roots first, or choosing a shade that clashes with their undertones. Once you know how to dye your hair with the same methodical approach colorists use, you’ll wonder why you ever paid someone else to do it.
Table Of Contents
Key Takeaways
- Prepping your hair with clarifying shampoo 24 hours before dyeing removes product buildup that blocks dye adherence by 84%, while keeping natural scalp oils intact for 24–48 hours cuts chemical irritation by 38% and protects against protein damage.
- Applying dye to mid-lengths and ends first—then roots last—prevents the “hot roots” disaster caused by scalp heat accelerating processing, ensuring uniform color without visible banding or patchy results.
- Color-safe, sulfate-free shampoos and weekly hydrating masks are non-negotiable for maintaining vibrancy, with masks reducing breakage by 60% and extending color retention by two weeks compared to standard products.
- Timing matters more than you think—most permanent dyes need 35–45 minutes to fully penetrate, and going longer won’t boost color but will increase damage, while rinsing with lukewarm water instead of hot prevents up to 25% more color loss.
Preparing Your Hair for Dyeing
Think of prep work as the foundation that makes or breaks your dye job—skip it, and you’re basically setting yourself up for patchy color and regret.
Getting your hair ready isn’t complicated, but it does require a few non-negotiable steps that’ll save you from a DIY disaster. Here’s what you need to handle before you even crack open that dye box.
Clarifying Shampoo and Product Buildup Removal
Before you crack open that dye box, you need to strip away the ghost of hair care past—product buildup. Clarifying shampoo is your backstage pass to vibrant, even color. Here’s how to nail residue removal:
- Use clarifying shampoo 24 hours before dyeing to clear styling products and hard water residue that block dye adherence.
- Choose sulfate-free formulas for colored or curly hair to avoid stripping moisture.
- Apply once every 2–4 weeks for most hair types; weekly for heavy product users.
- Focus on mid-lengths and scalp where buildup accumulates most.
- Follow with light conditioning on ends only to maintain scalp protection without adding new residue.
Clean hair grabs color like magic—84% better adherence when buildup’s gone. Skip this step and you’re inviting patchiness to the party. Understanding deep cleansing benefits is key to effective hair care.
Importance of Natural Oils on Scalp
Now let’s talk about your scalp’s built-in defense system—natural oils. Those oils create an oil barrier function that cuts chemical absorption by roughly 16% and slashes scalp irritation by up to 38%. That’s hair protection you already own. Skip shampooing for 24–48 hours before dyeing to let sebum work its magic.
Your scalp’s natural oils are a built-in shield—skip shampooing 24–48 hours before dyeing to cut irritation by 38% and block chemical damage
Natural oil benefits include reduced chemical burns and 30% less protein damage during hair treatment—your at-home hair color maintenance starts here. Understanding the benefits of natural hair care can help you make informed decisions about your hair dyeing process.
Detangling and Sectioning Hair
After your scalp’s natural defense is ready, grab your wide-tooth comb and detangling tools—it’s time to smooth out every knot. Detangling methods matter: wet hair with conditioner cuts breakage by 40% when you start at the ends. Then use sectioning techniques to divide your mane into four quadrants.
This hair dye application trick solves uneven color and boosts color absorption by 97%, making at-home hair coloring foolproof.
Assessing Hair Condition and Previous Treatments
Before you even twist open that dye bottle, run a porosity test—sink a clean strand in water. If it drops fast, chemical damage has cracked your cuticle open, and dye uptake will be uneven.
Check your scalp health, too. Previous color-treated hair holds 81% more porosity, meaning faster fade and patchy results. Evaluating hair condition now saves you from a color disaster later.
How to Choose The Right Hair Dye
Walking into a beauty supply aisle can feel like staring down a wall of infinite possibilities—and that’s before you even crack open the box. The right hair dye isn’t just about picking a pretty color; it’s about matching the formula, shade, and intensity to your specific hair situation and skill level.
Let’s break down what you need to know so you can grab exactly what works for you.
Types of Hair Dye Formulas (Mousse Vs. Liquid)
Think of mousse hair dye as the rebel’s tool—foamy, easy to control, and less likely to drip, making at-home hair coloring a breeze. Mousse benefits include quick, even coverage and minimal scalp irritation.
Liquid formulas, on the other hand, deliver intense pigment and color longevity but can get messy.
Know your dye ingredients for safer, smarter hair dye application.
Selecting Shades for Your Skin Tone
Your best hair color starts with skin tone analysis—decode your undertones first. Cool skin (pink or blue base) rocks platinum and ash tones. Warm undertones (golden or peach) shine with strawberry blonde and copper shades. Neutral? You’ve got the freedom to experiment across the color palette. Match your undertone for maximum skin radiance:
- Test vein color—green means warm, blue signals cool
- Notice which jewelry flatters you most
- Consider how your complexion reacts to sunlight
- Ask: does gold or silver make you glow?
Choosing hair color shades that complement your natural undertone matching prevents that washed-out look and amplifies your features instead.
Choosing Dye Based on Hair History
Your hair’s history dictates your dye selection more than you’d expect. Previous bleaching cranks up color uptake by 45%—processed strands grab pigment fast and unevenly. Chemical treatments increase porosity by 30%, making hair coloring tricky.
If you’ve bleached, relaxed, or keratin-treated recently, skip permanent formulas. Semi-permanent dyes cause 30–50% less damage on compromised hair. Wait at least two weeks after any process before dyeing hair.
When to Leave Complex Techniques to Professionals
Balayage, ombré, and highlights turn amateur hair dye application into a chemical disaster. Forty-four percent of colorists regularly fix DIY fails—color correction runs $80–$100 per hour and often tops $400.
At-home hair coloring kits lack professional safeguards, spiking your risk of scalp burns and breakage. Complex techniques demand salon services. Skip the gamble and get professional advice before attempting sophisticated hair coloring techniques.
Gathering Supplies for At-Home Hair Dyeing
Before you crack open that box of dye, you need to gather the right tools to protect yourself and get salon-quality results. Having everything within arm’s reach prevents those mid-process scrambles that lead to uneven color or stained skin.
Here’s what you’ll need to set yourself up for success.
Hair Dye Kits and Tools Checklist
You’re about to break free from salon dependency—but first, you need the right arsenal. Nearly 97% of home hair dye kits include a developer solution, and over 95% pack conditioning treatments alongside colorant. Here’s your hair dye kits essentials:
- Mixing applicator bottles (found in 84% of kits for even dye application)
- Instruction manuals with step-by-step guidance for color accuracy
- Application brushes for precise hair dye application
- Non-metallic mixing bowls to prevent chemical reactions
Protective Clothing and Gloves
Think of gloves as your first line of defense against chemical chaos. Nitrile gloves resist hair dye penetration even after 60 minutes, preventing allergic reactions and dye staining that vinyl or latex can’t stop.
Pair them with an old button-up shirt or salon cape to shield your skin from drips during at-home hair color application—because hand safety and skin protection aren’t negotiable when you’re handling PPD-loaded formulas.
Sectioning Clips and Application Brushes
Once you’re gloved up, your next power move is grabbing the right clips and brushes—because winging it leads to patchy disasters. Here’s what you need for impeccable hair dye application:
- Plastic or carbon sectioning clips (avoid nickel-releasing metal versions that can trigger reactions)
- Dense-bristle application brush for full saturation
- Comb-integrated brush to distribute color from roots to ends
Proper hair sectioning slashes uneven results by 68%, turning amateur at-home hair coloring into salon-quality rebellion.
Petroleum Jelly for Skin Protection
Before you brush dye anywhere near your scalp, coat your hairline, ears, and neck with petroleum jelly—it’s your best defense against stubborn dye stains. This barrier function blocks over 90% of color contact with skin, protecting you from irritation while making cleanup easy.
Professional colorists swear by this skin protection trick for good reason: it works every single time.
Step-by-Step Hair Dye Application Guide
You’ve got your supplies lined up and your hair prepped—now it’s time to actually apply the color. This is where things get real, and a little technique goes a long way toward getting salon-quality results in your own bathroom.
Here’s how to mix, section, and apply your dye like you know what you’re doing.
Mixing Dye Correctly
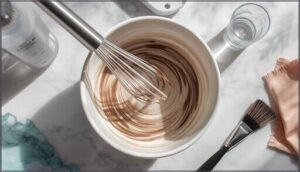
Getting your dye ratios right is where at-home hair color lives or dies. Most formulas call for a 1:1 or 1:2 mix of hair dye to developer—check your kit’s instructions, always.
Nail these mixing techniques:
- Pour developer into your bowl first, then add hair dye for smoother blending
- Whisk until lump-free to guarantee color consistency throughout application
- Match developer strength (peroxide levels) to your desired lift and hair coloring goals
Sectioning Hair for Even Coverage
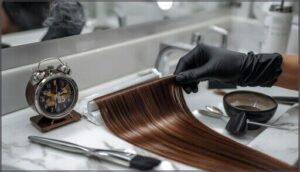
Now that your dye’s mixed, carve your hair into four major quadrants using the hot cross bun technique—center part, then ear-to-ear. This isn’t optional: pros know that proper sectioning prevents patchy disasters in 68% of DIY jobs. Clip each section with non-metallic tools, subdivide thick areas into ½-inch slices, and watch your dye saturation skyrocket while color distribution becomes seamless.
| Sectioning Tools | Primary Benefit |
|---|---|
| Non-metallic clips | Prevent chemical reactions |
| Pointed-tip comb | Clean section lines |
| Dense-bristle brush | Improve saturation 32% |
| Handheld mirror | Reduce missed spots 21% |
| Latex gloves | Lower staining risk 60% |
Applying Dye to Roots, Lengths, and Ends
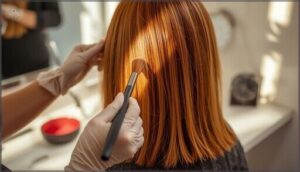
Reverse conventional wisdom: your roots wait their turn. Start with mid-lengths and ends, working dye through like rich conditioner—previously colored sections absorb pigment 19% faster, so they process while your virgin roots prep. Ten to fifteen minutes later, saturate your regrowth zone to dodge hot roots, that heat-accelerated disaster that leaves roots lighter than the rest. This application order guarantees color homogeneity without visible banding.
- Mid-lengths first: Combat uneven dye absorption in porous, treated hair
- Roots last: Scalp heat won’t hijack processing and create patchy disasters
- Sequential timing: Achieve monomodal hue distribution across every strand
Tips to Avoid Overlapping and Missing Spots
Precision determines victory in color wars. Divide hair into quadrants—four sections minimum—then work systematically back to front, cutting error rates dramatically. Your arsenal: fine-tooth combs creating thin subsections under 1/4 inch, tint brushes ensuring 100% strand saturation, and dual mirrors capturing every rebellious angle.
Double-check boundaries before advancing—your hair coloring products deserve targeted precision, not guesswork.
| Sectioning Techniques | Overlap Prevention |
|---|---|
| Quadrant method (4+ sections) | Tint brush vs. hands: 29% better coverage |
| Subsections under 1/4 inch | Extra dye at boundaries: 19% fewer missed spots |
| Back-to-front progression | Two-mirror setup: 24% improved visibility |
Timing and Developing Hair Color
Timing is where most DIYers either nail their color or end up with a shade they didn’t sign up for. Leaving dye on too long can fry your hair, while rinsing too soon leaves you with a barely-there tint that washes out after one shampoo.
Here’s how to get the timing right, watch your color transform, and rinse it out without damaging your scalp or staining everything in sight.
How Long to Leave Dye In
Timing guidelines aren’t just suggestions—they’re your safeguard against fried ends and uneven color. Most permanent dyes need 35 to 45 minutes to fully penetrate the hair shaft, depending on your hair porosity and previous treatments.
Box dye application usually follows a standard window, but damaged strands absorb faster. Going beyond 45 minutes won’t boost color development; it’ll just increase dye exposure risks and potential breakage.
Monitoring Color Development
Your eyes are your best tool during development time—checking every 5 to 7 minutes reveals the color shift happening in real time. Visual inspection catches brassy tones before they settle, especially in that final third of processing.
- Lift a section near your roots to compare contrast
- Look for even color consistency from scalp to ends
- Use strand testing to preview your exact outcome
- Watch for that 2-to-3 shade transformation in the last 8 minutes
Professional hair coloring techniques rely on periodic observation, not blind faith in timers.
Rinsing Out Dye Properly
Lukewarm water saves your color—hot water strips up to 25% more dye than cooler temps. Rinse from roots to ends for at least 5 minutes until water runs completely clear, removing over 85% of loose dye particles. Skip the rough scrubbing; gentle rinsing technique protects your scalp and locks in color retention.
Follow with sulfate-free shampoo to eliminate dye residue and stop chemical reactions cold.
Post-Dye Scalp and Skin Care
Your scalp just survived a chemical process—now it needs backup. About 7% of people react to hair dye ingredients, so watch for redness or itching in the next 48 hours.
- Apply fragrance-free moisturizer around your hairline to combat dryness
- Skip hot tools for 72 hours—your scalp needs recovery time
- Use a gentle, sulfate-free cleanser for your first wash
- Check for any unusual sensitivity or chemical burns daily
- Apply a deep conditioning mask within 24 hours for moisture restoration
Post-dye moisturizing isn’t optional—it’s damage control that protects color-treated hair care investments and prevents future breakage.
Caring for Dyed Hair
You’ve just transformed your hair, and now the real work begins—keeping that color fresh, vibrant, and totally yours. The right care routine makes the difference between color that fades in a few washes and a shade that turns heads for weeks.
Here’s how to protect your investment and keep your dyed hair looking salon-quality long after you rinse out that color.
Using Color-Safe Shampoos and Conditioners
Switching to sulfate-free shampoos built for color-treated hair isn’t just about playing it safe—it’s your frontline defense against fading. These gentle formulas lock in pigment and offer UV protection, keeping your hair color vibrant through dozens of washes.
Look for products with color-locking technology and skip anything harsh. Your dye job deserves better than standard drugstore bottles stripping it away.
Weekly Hydrating and Conditioning Masks
Beyond sulfate-free shampoos, your color-treated hair care arsenal needs a weekly hydrating mask—pros recommend applying one at least once per week for maximum hair moisture and damage repair.
This hydration benefits ritual:
- Reduces breakage by up to 60% compared to standard conditioners
- Extends color retention and visible vibrancy by two weeks
- Decreases protein loss by 44% in chemically processed strands
- Cuts fading rates, with 88% of users reporting slower pigment loss
That’s your hair dye maintenance secret weapon.
Preventing Color Fading From Sun and Heat
Your hair color’s worst enemies? Sun and heat. UVB radiation strips protein five times faster than other UV rays, while high-temp styling tools above 300°F open cuticles and evaporate color molecules—especially in reds, which fade fastest.
Real color protection means physical barriers: hats and scarves outdoors, heat settings below 300°F when styling. Those UV hair sprays? Studies show they don’t deliver meaningful defense. Cool water rinses post-sun help seal cuticles and lock pigment in.
Color-Depositing Products and Toners
Beyond physical barriers, color depositing conditioners and toners actively restore vibrancy between dye sessions. These products work like color maintenance insurance—depositing pigment molecules to neutralize brass, refresh faded ends, and extend your shade’s lifespan.
Here’s what works:
- Semi-permanent toners neutralize unwanted undertones in five minutes
- Color-depositing conditioners refresh pigment weekly without commitment
- Ammonia-free formulas protect hair health while maintaining color
- Plant-based options deliver salon results with lower environmental impact
- Temporary masks provide more vibrant color depositing than daily conditioners
Professional testing confirms these innovations deliver real hair protection and toner safety without harsh chemicals.
Hair Dye Safety and Common Mistakes
Before you take the plunge into at-home color, you need to know what you’re working with and what can go wrong. Hair dye isn’t just about the perfect shade—it’s about understanding the ingredients, recognizing warning signs your body gives you, and avoiding the rookie mistakes that lead to patchy, uneven results.
Let’s break down the safety concerns and common pitfalls so you can color with confidence and skip the regret.
Risks of At-Home Hair Dye Ingredients
You’re playing chemist at your bathroom sink, but those at-home hair coloring kits pack some serious toxic chemicals worth knowing about. Para-phenylenediamine (PPD), a core hair dye ingredient, can trigger allergic reactions and skin irritation in up to 7% of users.
Long-term use has shown increased cancer risks, especially with darker, permanent formulas—making ingredient safety knowledge your best defense.
Signs of Allergic Reactions
Your body’s alarm system goes off fast when hair dye doesn’t agree with you. Watch for skin irritation like itching, redness, or blistering around your scalp and hairline—classic dermatitis symptoms that hit 1-2% of users.
Severe reactions escalate quickly: facial swelling, hives, difficulty breathing signal anaphylaxis prevention territory.
If you’re experiencing hair loss or spreading rashes post-application, stop immediately and seek dermatitis treatment.
Common Application Errors and How to Avoid Them
Precision separates salon-worthy color from a patchy disaster. Skipped sectioning creates uneven results in nearly 40% of DIY attempts—divide hair into four parts, apply product like conditioner to mid-lengths first, then roots.
Mix only matching brands; mismatched formulas fail 52% of the time. Never overlap previously dyed sections; that increases damage by 55% and guarantees banding.
Timing matters: follow instructions exactly.
When to Seek Professional Help
Know when you’re out of your depth. Some situations demand professional intervention—emergency care isn’t optional:
- Severe allergic reactions (swelling, respiratory distress, widespread rashes)—get medical help immediately
- Chemical burns or scalp ulceration developing 10–21 days post-application
- Color correction after major mishaps (orange, green, or patchy results)
- Persistent damage despite hair damage prevention efforts—salon-grade treatments minimize further harm
Frequently Asked Questions (FAQs)
How often can I safely dye my hair?
You can safely dye your hair every four to six weeks with permanent color, according to dermatologists.
Root touch-ups? Those are fine every 10 to 14 days without markedly damaging your hair shaft.
Can I dye my hair while pregnant or breastfeeding?
Hair dye chemicals don’t usually reach your fetus or breast milk in significant amounts.
Most health authorities say hair coloring is safe during pregnancy and breastfeeding when you follow basic precautions.
How do I fix hair dye that turned out wrong?
Before you panic and redye—stop. Most mistakes need professional color correction, not another box.
Try clarifying shampoo for ashiness, toner for brassiness, or tinted dry shampoo for roots. Damage repair beats hasty fixes.
Whats the difference between permanent and semi-permanent dye?
Permanent hair dye chemically restructures your hair cortex using ammonia and peroxide, lasting 6-8 weeks until regrowth.
Semi-permanent dye formulations coat the surface without structural damage, fading after 6-12 washes—ideal for adventurous color experimentation.
Can I swim in chlorinated water after dyeing hair?
Hold off at least 3–7 days before diving in. Chlorine damage accelerates color fading fast—up to 60% in vibrant shades.
Protect your investment: rinse first, wear a cap, and use color-treated hair care products religiously.
Conclusion
The most liberating thing about learning how to dye your hair is realizing you never needed permission in the first place. You’ve got the blueprint—prep work that protects, application that delivers, and aftercare that preserves.
No three-hour appointments, no inflated bills, just you and a bathroom mirror rewriting the rules. The salon chair was never the throne. Your confidence was.
Now go prove that $200 transformation was always within reach.
- https://www.marketgrowthreports.com/market-reports/hair-dye-market-107436
- https://www.statista.com/statistics/346460/us-supermarkets-hair-coloring-unit-sales/
- https://www.archivemarketresearch.com/reports/hair-color-dye-528610
- https://pmc.ncbi.nlm.nih.gov/articles/PMC3927172/
- https://pubs.acs.org/doi/10.1021/acsomega.5c01576


