This site is supported by our readers. We may earn a commission, at no cost to you, if you purchase through links.
 Mastering the art of fading beard sideburns can elevate your look from scruffy to polished.
You’ll learn pro tips for achieving a seamless, stylish fade that blends your facial hair with your haircut.
We’ll cover essential techniques like gradual trimming, precise line-ups, and maintaining that crisp fade.
With the right tools and know-how, you’ll be able to create a professional-looking beard fade at home, saving time and money on barber visits.
Get ready to take control of your facial hair game.
Table Of Contents
- Key Takeaways
- How to Fade Beard Sideburns?
- Beard Sideburn Fade Overview
- Trim Slowly for a Seamless Fade
- Transition to Shorter Lengths Gradually
- Blending Beard & Sideburns
- Line Up the Sideburns With Precision
- Maintain a Neat and Tidy Fade
- Tips for Fading Your Neckline
- Fading the Sides Professionally
- Achieving Even Sideburns
- Using Clippers for Sideburn Fading
- Frequently Asked Questions (FAQs)
- How to fade a beard on the sides?
- How do I get rid of sideburn on my beard?
- How to even out sideburns?
- How to fade sideburns with clippers?
- How often should I touch up my beard sideburn fade?
- Can I fade sideburns with longer beard styles?
- Whats the best facial hair length for starting sideburn fades?
- How do I fix an uneven beard sideburn fade?
- Are there any face shapes unsuitable for beard sideburn fades?
- Conclusion
Key Takeaways
- Slow and steady wins the race: Take your time and trim gradually for that seamless fade. Rome wasn’t built in a day, and neither is a perfect beard sideburn fade!
- Tools of the trade: Invest in a quality trimmer with adjustable guards—it’s like having a Swiss Army knife for your facial hair.
- Blend it like Beckham: Master the art of blending different lengths for a smooth transition. Your sideburns should flow into your beard like a well-orchestrated symphony.
- Maintenance is key: Keep that fade fresh with regular touch-ups. Think of it as giving your beard a little TLC every couple of weeks—it’ll thank you with a dapper look!
How to Fade Beard Sideburns?
To fade beard sideburns, start with a clean, dry beard and a quality trimmer.
Begin with the longest guard, working your way down to shorter lengths. Switch at the cheekbone for the mid-sideburn and at the temple for the upper sideburn.
Blend carefully, moving from sideburns into the beard in small sections. Comb facial hair downward and adjust lengths for a smooth shift.
Take your time and work slowly for the best results.
Regular maintenance is key – touch up every few days and use beard products to keep your fade looking sharp.
With practice, you’ll master this stylish technique and transform your beard game.
Beard Sideburn Fade Overview
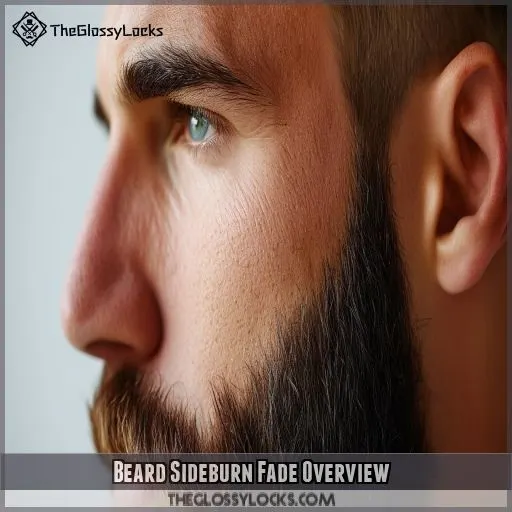
You’re about to explore beard sideburn fades, a style that’s taking the grooming game by storm.
To achieve a seamless look, start by fading the sideburns with a guard one level down from your overall beard length, using a beard trimmer with adjustable length combs. This beard fade technique blends your sideburns seamlessly into your facial hair, creating a polished look that’s both modern and timeless.
Whether you’re rocking a full beard or a shorter style, mastering sideburn fades can elevate your overall appearance.
There are various fade types to choose from, depending on your face shape and personal preference.
Get ready to transform your beard trimming routine and reach a new level of beard grooming mastery.
Trim Slowly for a Seamless Fade
Fading your beard sideburns is a slow and steady process. You’ll want to take your time with your beard trimmer to achieve that seamless look. Patience is key as you work on perfecting your technique. Remember, practice makes perfect, and consistency in your approach will yield the best results.
Here are some tips to help you trim slowly for a seamless fade:
- To prepare your beard for a seamless fade, make sure to wash it with a dedicated beard shampoo product. To keep your beard sides looking healthy and well-groomed, consider using a nourishing best beard conditioner. Start with a clean, dry beard for better visibility
- To achieve a seamless fade, consider opting for a cordless beard trimmer like the Panasonic Cordless Beard Trimmer, which offers up to 60 minutes of use and an ergonomic grip for comfort, as discussed in Choosing the Right Electric Beard Trimmer. Use a quality electric beard trimmer with adjustable settings
- Work in small sections, checking your progress often
- Take breaks to step back and assess your overall beard style
Transition to Shorter Lengths Gradually
After trimming slowly, it’s time to move towards shorter lengths gradually. This step is key for achieving that seamless fade in your beard sideburns. Start with the longest guard on your electric shaver and work your way down. Here’s a handy guide:
| Guard Length | Area to Trim | Transition Point |
|---|---|---|
| Longest | Full beard | Ear level |
| Medium | Mid-sideburn | Cheekbone |
| Shortest | Upper sideburn | Temple |
Blending Beard & Sideburns
Now that you’ve gradually moved to shorter lengths, it’s time to nail the art of blending your beard and sideburns.
This important step creates that seamless fade you’re after.
Grab your beard comb and start by combing your facial hair downward.
Then, using your trimmer, work in small sections, moving from the sideburns into the beard.
Adjust the length as you go, creating a smooth transition.
Don’t rush the process – take your time to achieve that perfect, stylish blend that’ll turn heads.
Line Up the Sideburns With Precision
To line up your sideburns with precision, you’ll need the right tools and technique.
Grab your trimmer and a guide comb to maintain consistent length.
Start at the top of your sideburn, following your natural facial hair line.
Work your way down, blending seamlessly into your beard.
Pay attention to your cheek line and neckline, ensuring they complement your sideburn fade.
For a hipster beard look, keep the sideburns slightly longer.
C. Gillette would be proud!
Maintain a Neat and Tidy Fade
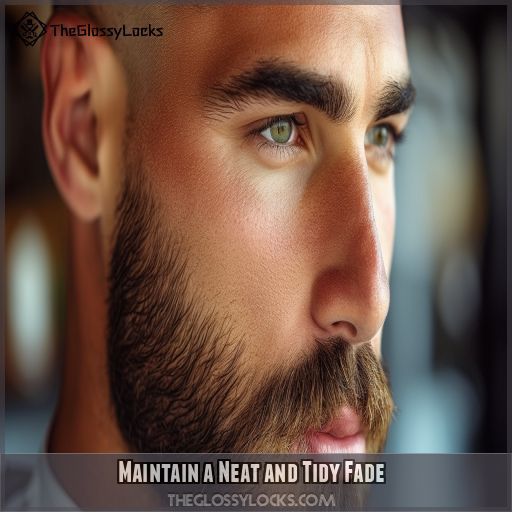
Regular maintenance is key to a sharp beard fade.
Grab your trusty trimmer and touch up every few days to prevent uneven growth.
Don’t forget to use a quality beard and face wash to keep things clean and prevent beard dandruff.
Apply some beard balm to keep your fade soft and manageable.
Make this routine a habit, and you’ll always be ready to rock that seamless look.
Tips for Fading Your Neckline
Ready to master the art of fading your neckline? It’s all about creating a smooth change that complements your beard’s shape. Start by defining your neckline, then gradually blend it into your beard. Here are some pro tips to nail the perfect fade:
- Use a shorter guard setting for the neckline area
- Work upwards, increasing length as you go
- Focus on blending the change point between neck and beard
- Maintain symmetry by checking both sides frequently
Fading the Sides Professionally
To fade the sides professionally, start with a longer guard on your trimmer.
Work your way up the sideburn, gradually decreasing the guard size for a smooth change.
Focus on blending the hair approaching your beard, rather than cutting into it.
Experiment with different sideburn styles to find what suits you best.
Keep the length consistent on both sides, and don’t rush the process.
With practice, you’ll master the art of fading your sideburns like a pro, achieving that polished, stylish look.
Achieving Even Sideburns
Getting your sideburns even is really important for a good beard fade. You’ll want to focus on sideburn length, shape, and symmetry to get that perfect look. Here’s how to master the art of even sideburns:
- Start with clean, dry hair for accurate trimming
- Use a quality trimmer with adjustable guards for precise control
- Begin with longer settings and gradually decrease length
- Check symmetry frequently by comparing both sides in a mirror
Using Clippers for Sideburn Fading
Start with a longer guard length and work your way down, blending as you go. Move the clipper in upward strokes, gradually decreasing the guard size as you approach the top of the sideburn.
For a pro-level fade, use the corners of the clipper to create softer lines and achieve that perfect blend between your beard and sideburns.
Frequently Asked Questions (FAQs)
How to fade a beard on the sides?
Did you know 62% of men struggle with beard fades? Start with the longest guard, trim upwards from your jawline. Gradually switch to shorter guards as you move up, blending seamlessly. You’ll master the art in no time!
How do I get rid of sideburn on my beard?
To eliminate sideburns on your beard, start with a higher guard on your trimmer. Gradually decrease the guard size as you move down, blending smoothly into your beard. Finish with an outliner for clean edges and a smooth change to your beard.
How to even out sideburns?
You’ll be a sideburn superstar in no time! Start with clean, dry hair. Use a trimmer with adjustable guards, working from longest to shortest. Gradually blend lengths, moving upward. Brush and check for evenness, making small adjustments as needed.
How to fade sideburns with clippers?
Start with the longest guard on your clippers. Trim your sideburns, then gradually switch to shorter guards as you move down. Work in small sections, blending each length seamlessly. Brush between cuts to check your progress.
How often should I touch up my beard sideburn fade?
Keep your fade fresh for a sharp look. You’ll typically need to touch up your beard sideburn fade every 1-2 weeks. Keep clippers handy and trim when you notice uneven growth. Regular maintenance helps keep your style sharp.
Can I fade sideburns with longer beard styles?
Yes, you can fade sideburns with longer beard styles. Start with a longer guard, gradually decreasing as you move up. Blend carefully to maintain the length below while creating a smooth change at the temples and cheeks.
Whats the best facial hair length for starting sideburn fades?
You’ll want your beard to be at least 1/4 inch long before starting a sideburn fade. This length gives you enough hair to work with, creating a smooth blend from your facial hair to your haircut.
How do I fix an uneven beard sideburn fade?
To fix an uneven beard sideburn fade, start by trimming the longer side to match the shorter one. Use a guard one size smaller than your current length, gradually blending the change in length. Finish with a detailer for crisp edges.
Are there any face shapes unsuitable for beard sideburn fades?
Fortunately, fades fit faces flawlessly. You’ll find this versatile style suits any shape. Experiment with different lengths and angles to complement your features. Don’t hesitate to try it – you’re likely to love the look you create.
Conclusion
Mastering how to fade beard sideburns is like sculpting your own facial masterpiece.
You’ve now got the tools and techniques to create a seamless, stylish look that’ll turn heads.
Take your time, use the right tools, and maintain your fade regularly.
With practice, you’ll perfect your technique and achieve that professional look at home.

