This site is supported by our readers. We may earn a commission, at no cost to you, if you purchase through links.
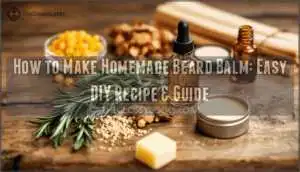
When you craft your own beard balm, you control everything that touches your face. No mystery additives, no synthetic fragrances, no irritating chemicals. You choose oils that match your skin type, beeswax that provides the hold you need, and scents you actually enjoy.
The process is straightforward—melt, mix, pour, cool. You’ll end up with a product that performs better than most commercial options and costs a fraction of the price. Plus, you can adjust the formula until it’s perfect for your beard.
Table Of Contents
Key Takeaways
- Making your own beard balm costs about $5 and takes under 30 minutes, compared to $20+ for store-bought versions with ingredients you can’t control.
- You only need four main ingredients—beeswax for hold, shea butter for softness, carrier oils for nourishment, and essential oils for scent and therapeutic benefits.
- The process is simple: melt beeswax first, add shea butter, stir in carrier oils after removing from heat, then add essential oils before pouring into tins to cool.
- You can customize every aspect—adjusting beeswax ratios changes firmness, swapping carrier oils matches your skin type, and choosing different essential oils creates your preferred scent and benefits.
Why Make Your Own Beard Balm?
Making your own beard balm puts you in the driver’s seat. You control what touches your skin and how your beard looks and feels. Here’s what that control gets you.
Customizing for Skin and Hair Needs
When you make your own DIY beard balm, you can match it to your exact skin care and hair needs. If you have sensitive skin, swap harsh ingredients for gentle carrier oils like grapeseed or jojoba. Struggling with oil control? Non-comedogenic options like argan keep pores clear. Coarse hair texture benefits from extra shea butter, while fine beards need lighter formulas.
You can also pick scent profiles you love and explore vegan options like candelilla wax. Natural skincare with essential oils means no mystery chemicals—just ingredients that work for you. Carrier oils can also minimize ingrown hairs, contributing to a healthier beard.
Cost Savings and Ingredient Control
Beyond personalization, making your own beard balm puts more cash back in your pocket and lets you know exactly what’s going on your face. Store-bought balms can run $15-30 per tin, but homemade cosmetics cost a fraction of that.
You control quantity and choose budget-friendly options like bulk beeswax and carrier oils. Ethical sourcing becomes your call, not a marketing claim. Natural ingredients mean no hidden fillers, and you reduce waste by reusing tins. DIY beard balm gives you organic ingredients without the premium price tag.
Essential Ingredients and Tools for Beard Balm
Making your own beard balm doesn’t require a chemistry degree or fancy equipment. You’ll need a handful of natural ingredients and some basic kitchen tools.
Let’s look at what you’ll need to get started.
Key Ingredients and Their Benefits
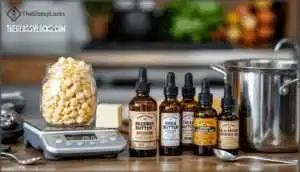
Your beard balm only needs four main ingredients, and each one pulls its weight. Beeswax creates the hold you need for styling while forming a protective barrier that cuts moisture loss by up to 21%. Shea butter softens coarse hair in about a week and boosts skin hydration by 40%.
Beard balm’s four ingredients—beeswax, shea butter, carrier oils, and essentials—each deliver hold, hydration, and protection that transforms your beard
Carrier oils like jojoba, argan oil, or sweet almond deliver deep nourishment that lasts around 12 hours. Essential oils add fragrance and therapeutic perks—tea tree fights dandruff, while eucalyptus calms irritation.
Vitamin E acts as your preservative, extending shelf life while strengthening hair. Using both products can lead to improved beard health.
Tools and Equipment Needed
You won’t need anything fancy—just a few basic kitchen items you probably already own. Gather these essentials before you start mixing your DIY beard balm:
- Double boiler or small saucepan for melting beeswax and shea butter
- Glass measuring cup to pour and measure carrier oils accurately
- Metal spoon for stirring ingredients together
- Small tins or containers (2-4 oz) to store your finished balm
- Pouring funnel to keep things neat when filling tins
Skip Teflon-coated pots since beeswax can be tough to clean. Keep a dedicated pot for balm-making if you plan to whip up batches regularly.
Step-by-Step Guide to Homemade Beard Balm
Making your own beard balm doesn’t require a chemistry degree or fancy equipment. The process is straightforward and takes less than 30 minutes from start to finish.
Here’s how to transform a few simple ingredients into a professional-quality beard balm.
Measuring and Preparing Ingredients
Getting the measurements right from the start saves you from wasting ingredients and ending up with a balm that’s either too runny or hard as a hockey puck. Use a digital kitchen scale for ingredient precision when measuring beeswax, shea butter, and carrier oils.
Lay everything out on your counter before you begin. Make sure your tools are clean and your oils are cold-pressed for quality. This prep work makes the actual DIY beard balm process smooth and stress-free.
Melting and Combining The Base
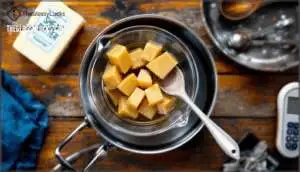
Once your ingredients hit the heat, the transformation from separate solids into a smooth base happens faster than you might expect. Heat control matters here. Your homemade beard balm base needs gentle warming, not aggressive boiling.
Follow this process:
- Melt beeswax first on low heat for even consistency
- Add shea butter once wax liquefies completely
- Stir constantly to prevent scorching or separation
- Watch for full blending—no solid chunks remain
- Remove from heat when mixture flows smoothly
Adding Carrier and Essential Oils
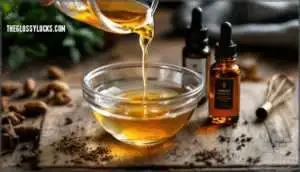
Right after the base cools slightly, carrier oils slide into the mix to bring moisture and nourishment straight to your beard and skin. Jojoba or argan oil work best—they absorb quickly without leaving grease. Add about two tablespoons for every tablespoon of beeswax.
Then drop in essential oils for scent profiles and extra nutrients. Five to ten drops total does the trick.
Pouring, Cooling, and Storing The Balm
Pour the warm mixture into your tin while it’s still liquid—wait too long and you’ll be stuck with a lumpy mess that won’t spread evenly.
Let your homemade beard balm cool completely at room temperature for about two hours. Once solid, snap the lid on and store it somewhere cool and dry to prevent contamination and extend shelf life up to six months.
Customizing and Using Your Beard Balm
Once you’ve made your balm, you can tweak it to match your beard’s needs and your personal style. The recipe you just followed is a starting point, not a final product.
Here’s how to adjust hold, change up scents, apply it correctly, and keep your balm fresh for months.
Adjusting Hold and Consistency
Think of beeswax as your balm’s backbone—more beeswax means firmer hold, less means softer spread. Wax ratios drive consistency: start with one part beeswax to four parts combined butter and carrier oils for DIY beard balm.
Shea butter adds creaminess without stiffness, while oil viscosity affects absorption.
Heating effects matter—overheating weakens hold, so melt gently. The cooling process locks in texture, giving your homemade beard balm its final form.
Scent and Ingredient Variations
Swap cedarwood for sandalwood, add vanilla, or skip scent altogether—your beard balm recipe becomes your signature once you start playing with essential oils and base ingredients. Essential oil blends like tea tree and peppermint offer different benefits than citrus options.
Carrier oils vary too—argan oil absorbs faster than jojoba, while cocoa butter can replace shea butter if you prefer its chocolate scent. Beeswax alternatives exist for allergen considerations, though they change texture slightly.
Application Tips and Beard Care Routine
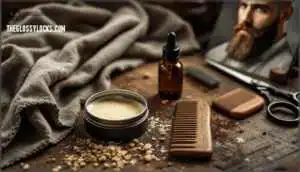
Getting your balm right matters, but knowing how to work it into your beard makes all the difference between a polished look and a waxy mess. Scoop a dime-sized amount, warm it between your palms, then work through damp facial hair after beard washing.
Daily grooming works best when you pair balm application with beard oil underneath for deeper conditioning. Comb through for even distribution, then style as needed—trimming techniques stay sharper when hair’s properly conditioned.
Storage and Shelf Life Best Practices
Once you’ve nailed application, proper storage keeps your homemade beard balm fresh for 12–18 months. Keep it between 60°F and 75°F in amber glass or dark containers—temperature control and oxidation prevention matter. Watch for off smells or texture changes as expiration signs.
Label jars with dates and rotate batches, using oldest first. Natural ingredients in DIY beard balm thrive with these simple beard care and maintenance habits.
Frequently Asked Questions (FAQs)
Can beard balm expire or go bad?
Yes, beard balm can go bad. Natural beard care products have a shelf life of six to twelve months.
Ingredient degradation and rancidity signs like off-smells indicate expiration. Proper storage extends freshness in beard maintenance routines.
How much balm should I use daily?
Start with a dime-sized amount for shorter beards, then adjust based on beard length, balm consistency, and daily climate.
Overuse can weigh hair down, so application frequency matters—you’ll find the right balance through beard care and styling practice.
What mistakes should beginners avoid when making balm?
Overheating ingredients ruins essential oils, inaccurate ratios create unusable texture, and poor mixing leaves clumps. Wrong containers leak, ignoring allergies causes reactions.
When making DIY beard balm with beeswax, shea butter, and essential oils, measure carefully and melt gently for perfect homemade beard balm.
Can women use beard balm for hair?
Women can absolutely use beard balm for hair. The natural ingredients work well for hair texture and styling needs, providing conditioning and scalp health benefits. Just check ingredient safety and scent preference before applying.
Is beard balm safe for sensitive skin?
Beard balm can irritate reactive skin if it contains common triggers. Patch testing is essential—apply a small amount to your inner wrist and wait 24 hours.
For allergy concerns, swap synthetic fragrances for gentle carrier oils and skip irritating essential oils entirely.
Conclusion
The best things in life take a little effort, but they’re worth it. Learning how to make homemade beard balm gives you complete control over what goes on your face, saves you money with every batch, and lets you fine-tune the formula until it’s exactly right.
You’ve got the recipe, the process, and the knowledge to craft something better than store-bought. Now it’s just a matter of melting some wax and making it happen.
- https://www.healthline.com/health/lanolin-oils
- https://www.cosmeticsbusiness.com/technical/article_page/Cationic_emulsifiers_an_emerging_trend_in_skin_care/47155
- https://swaggerandjacks.com/blogs/beardcare-advice/the-ultimate-guide-to-beard-balm-ingredients
- https://www.vinevida.com/blogs/carrier-oils/best-carrier-oils-for-beard
- https://trilogylaboratories.com/benefits-of-beard-oil-and-balm/


