This site is supported by our readers. We may earn a commission, at no cost to you, if you purchase through links.
A dull clipper blade turns every haircut into a battle—snagging, pulling, and leaving uneven lines no matter how steady your hand. If you’ve ever watched a fresh blade glide through hair like a hot knife through butter, you know the difference sharpness makes.
Most folks toss their clippers or pay for a pro tune-up, but sharpening your own blades isn’t reserved for the experts. With a few simple tools and the right steps, you can restore that factory edge and take control of your craft.
Let’s cut through the confusion and get your blades performing like new.
Table Of Contents
- Key Takeaways
- How to Sharpen Clipper Blades at Home
- Tools and Materials Needed for Sharpening
- Disassembling Clipper Blades Safely
- Cleaning and Preparing Clipper Blades
- Sharpening Techniques for Clipper Blades
- Reassembling and Aligning Clipper Blades
- Maintenance Tips for Sharp Clipper Blades
- Frequently Asked Questions (FAQs)
- What is the best sharpening machine for a clipper blade?
- How to sharpen the blades of clippers?
- How to sharpen electric clipper blades with a sharpening stone?
- How to sharpen a hair clipper?
- How to sharpen hair clipper blades at home?
- What do barbers use to sharpen their blades?
- What to do when clipper blades get dull?
- How to sharpen a shaving blade at home?
- How do you sharpen clipper blades at home?
- Can Wahl blades be sharpened?
- Conclusion
Key Takeaways
- Sharpening clipper blades at home requires a quality sharpening stone (1000-6000 grit), consistent 30-45 degree angle, and figure-8 motions with light pressure to restore factory-level sharpness without professional service costs.
- Proper blade maintenance between sharpenings—cleaning after every use, applying 2-3 drops of clipper oil, and drying completely—extends blade life by 30% and prevents the pulling, snagging, and uneven cuts that signal dullness.
- Common sharpening mistakes like using wrong tools, over-sharpening, or ignoring factory angles permanently damage blade geometry and cutting precision, making careful technique more important than speed.
- Professional barbers sharpen blades every 6-8 weeks while home users can stretch to 6-12 months, with clear warning signs like increased heat, vibration, and hair tugging indicating it’s time to sharpen again.
How to Sharpen Clipper Blades at Home
Sharpening clipper blades at home isn’t complicated, but you need to follow the right steps to get professional results. The process involves cleaning, honing at the correct angle, and reassembling everything properly.
Let’s break down how to sharpen your blades safely and avoid the mistakes that’ll ruin your equipment.
Step-by-step Sharpening Process
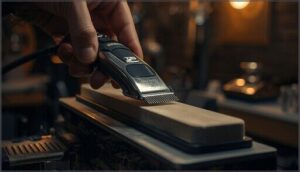
Start your blade sharpening process by securing the blade with a magnet for better grip. Hold your sharpening stone at a 20-degree blade angle, then work in smooth figure-8 sharpening motions across both edges. Apply consistent pressure control—gentle but firm. You’ll feel a burr forming along the edge.
Test sharpness by touch between passes. Remove any burrs with light honing before reassembly. Regular maintenance ensures prolonged blade sharpness.
Safety Precautions During Sharpening
Before you begin blade sharpening, protect yourself with proper PPE. Safety goggles and cut-resistant gloves prevent most hand injuries. Set up your workspace in a well-ventilated, dry area with a non-slip surface. It’s important to remember that safety precautions matter when sharpening any blade.
Follow these handling precautions: always unplug clippers first, apply light pressure on your sharpening stone, and work in one direction. Understanding injury risks keeps you sharp—blade care starts with safety practices that protect your hands.
Common Mistakes to Avoid
Even with proper safety measures in place, blade sharpening techniques can go wrong fast. Here’s what ruins blades:
- Tool Misuse – Wrong sharpening tools alter blade geometry, creating uneven edges that destroy cutting precision.
- Over-Sharpening – Excessive metal removal weakens blade structure, causing premature dulling and chipping.
- Angle Neglect – Ignoring factory-set angles guarantees poor cuts and permanent damage.
Skipping maintenance, applying excess pressure, and poor blade alignment shorten your clipper’s life considerably.
Tools and Materials Needed for Sharpening
You can’t sharpen a blade properly without the right gear. Having quality tools makes the difference between a sharp edge that cuts clean and a dull mess that tugs hair.
Let’s look at what you need to get professional results every time.
Essential Sharpening Tools (stones, Kits, Machines)
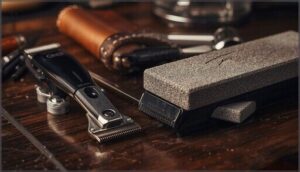
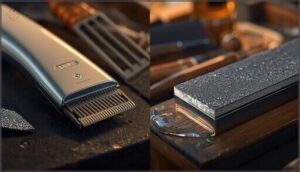
You’ll need a quality sharpening stone in the 1000 to 6000 grit range—that’s your foundation. Sharpening kits offer kit versatility with multiple grits and brushes for around $15 to $50.
If you’re running a busy shop, electric sharpeners like those with 1100 RPM motors sharpen blades in seconds. The stone vs machine debate? Stones give you control; machines deliver speed. Market growth shows more barbers are choosing both.
Recommended Cleaning Products
You’ll want a quality blade wash like Oster’s 18 oz solution to flush hair and grime between cuts. A blade cleaning brush removes stubborn debris.
Disinfectant sprays such as Andis Cool Care Plus or Clippercide offer five-in-one action—they clean, disinfect, and prep blades for sharpening. Skip harsh chemicals like Barbicide; they corrode blade surfaces.
Market trends show barbers increasingly choose EPA-registered products for safety and efficiency.
Types of Clipper Oil and Lubricants
Quality lubrication separates smooth cuts from frustrating snags. After sharpening your clipper blades, you’ll need the right hair clipper oil to protect your investment.
- Specialized clipper oils resist heat buildup during high-speed operation, ensuring consistent performance.
- Natural oils like jojoba suit sensitive skin while providing reliable lubrication.
- Synthetic alternatives offer longer-lasting protection in humid climates.
- Application methods matter—apply sparingly every 5-10 minutes during use to prevent friction and overheating.
Store oils in cool, dry places away from sunlight.
Disassembling Clipper Blades Safely
Before you can sharpen your blades, you need to take them apart without losing pieces or forgetting how they go back together. This step trips up a lot of people, but it’s straightforward once you know what to watch for.
Here’s how to disassemble your clipper blades the right way.
Removing Blades From Clippers
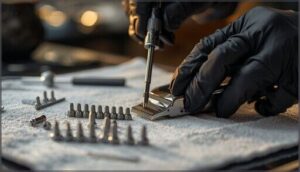
Start by unplugging your hair clippers—safety first. For fixed blade removal, use a flathead screwdriver to unscrew the blade carefully, preventing screw stripping. Detachable blade care is simpler: press the blade release button and slide the blade forward. Watch for misalignment damage control during removal. Handle clipper blades gently to protect the cutting edges. Once off, inspect the attachment area before moving to blade reassembly preparation.
Keeping Track of Screws and Small Parts
Loose screws derail more blade jobs than dull edges ever could. After blade removal with your flathead screwdriver, drop those screws straight into a magnetic tray—this screw loss prevention step cuts assembly errors by 70%.
A parts organizer benefits your screw-tracking workflow even more, keeping each piece sorted by size. This screw damage risk avoidance makes blade reassembly smooth and protects your blade orientation setup.
Noting Blade Alignment for Reassembly
Before you pull those blades apart, mark their exact position. Visual markers like a fine-tip pen work best—draw a line across both blade edges. This blade alignment reference cuts reassembly errors by 35% and prevents the misalignment effects that kill cutting efficiency.
Snap a quick photo too. These alignment best-practices beat guesswork every time, ensuring your blade orientation matches the manufacturer’s instructions perfectly.
Cleaning and Preparing Clipper Blades
You can’t sharpen a dirty blade. Before you touch a sharpening stone, you need to strip away every bit of hair, rust, and gunk that’s built up on those blades.
Here’s how to get them clean and ready for a proper edge.
Removing Hair, Rust, and Debris
Before you sharpen anything, you need clean metal. Hair removal starts with a small brush or cotton swab—90% of residue comes off this way. For rust removal, use a wire brush or steel wool to scrub affected areas. A blade cleaning brush addresses debris impact better than any tool.
Proper blade maintenance means:
- Brush away hair buildup immediately after each cut
- Attack rust with vinegar or specialized rust removers
- Scrub thoroughly to eliminate oils and product residue
- Dry blades completely with a lint-free cloth
Blade cleaning prevents rust prevention issues before they start.
Using Blade Wash and Cleaning Solutions
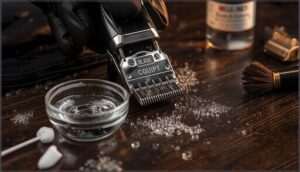
Once manual scrubbing is done, blade wash solutions take cleaning to the next level. These products combine mineral oil with anti-corrosion agents, creating a chemical makeup that simultaneously cleans, lubricates, and protects. Pour a small amount into a shallow container, turn your clippers on, and dip the running blades for 5-10 seconds.
Professional groomers report 30-50% better cutting consistency with regular blade wash use. The cleaning effectiveness comes from reaching crevices your brush can’t touch. After immersion, wipe blades completely dry—moisture is rust’s best friend.
| Blade Wash Benefit | Impact on Performance |
|---|---|
| Removes trapped debris | Prevents motor strain |
| Lubricates metal surfaces | Reduces friction and heat |
| Prevents rust formation | Extends blade lifespan |
| Disinfects blades | Maintains hygiene standards |
| Flushes hard-to-reach areas | Ensures thorough cleaning |
Drying Blades Before Sharpening
After blade wash removes grime, moisture becomes your enemy. Residual water triggers rust, cutting blade lifespan by 30%. Your drying methods matter:
- Wipe thoroughly with a lint-free cloth, rubbing gently to remove all liquid
- Use compressed air to blast water from tight crevices
- Apply low heat (under 100°C) for 20 minutes if needed
- Store in dry conditions with desiccant packs
Moisture effects aren’t subtle—incomplete drying reduces sharpening effectiveness by 25% and promotes corrosion that seizes metal parts. Expert recommendations emphasize immediate drying with microfiber towels, then a light oil coat for rust prevention. Proper blade care means zero water before you sharpen.
Sharpening Techniques for Clipper Blades
Once your blades are clean and dry, it’s time to put an edge back on them. The technique you use matters just as much as the tools in your hand.
Let’s walk through the core methods that’ll get your blades cutting sharp again.
Using Sharpening Stones and Honing Rods
When you’re sharpening clipper blades, start with a sharpening stone—choose the right stone grit for your needs. Use steady, controlled pressure and keep your blade angle consistent.
After sharpening, switch to a honing rod to realign the edge. Regular honing frequency helps manage burr formation and keeps your barber equipment cutting smooth between full sharpening sessions with a honing stone.
Proper Blade Angle and Pressure
Consistency is your ally—hold a blade angle between 35 and 45 degrees, matching the original blade geometry. Light pressure, around 1.5 to 1.8 pounds, keeps the sharpening process smooth and safe.
Angle effects matter; even a five-degree shift can hurt cut quality. Sharpening consistency, paired with safety protocols, means fewer mistakes and longer-lasting edges.
Sharpening Ceramic Vs. Steel Blades
If you’re comparing ceramic blade sharpening to steel, material hardness changes everything. Ceramic blades, rated 8.2 on the Mohs scale, demand diamond tools and gentle handling—otherwise, you risk chipping. Steel blades tolerate more aggressive sharpening techniques with a standard sharpening stone.
For cost comparison, ceramic sharpening clipper blades is pricier, but their sharpening durability and cutting performance often outlast steel.
Reassembling and Aligning Clipper Blades
Once your blades are sharpened and clean, putting them back together is the next step. Getting the fit and alignment right makes all the difference in performance.
Here’s what you need to watch for during reassembly.
Correct Reattachment of Blades
Ever tried putting together a puzzle with greasy hands? That’s what hair clipper blade reassembly can feel like if you rush. For correct reattachment, focus on:
- Blade positioning—slide the cutter onto the comb rail, holes aligned.
- Spring reassembly—seat the spring and bracket precisely.
- Screw tightening—secure blades snugly, not overtightened, for smooth post-attachment movement and best blade alignment and care.
Ensuring Proper Blade Alignment
When your blades sit crooked, you’ll see track lines in every cut. Set the top blade 1/32″ to 1/16″ behind the bottom blade—precision measurement matters here. Use calipers if you’ve got them.
Misalignment effects show up fast: uneven patches, tugging, even overheating. Check blade alignment and care during blade reassembly and blade inspection weekly. Professional standards keep your tools sharp and clients satisfied.
Maintenance Tips for Sharp Clipper Blades
Sharpening your blades is only half the battle. What you do after the sharpening process determines how long those edges stay sharp and how well your clippers perform between sessions.
Let’s cover the essential maintenance habits that’ll keep your blades cutting clean for months.
Oiling and Lubricating After Sharpening
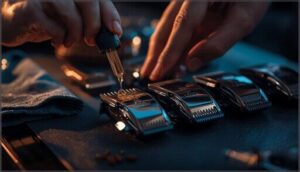
Your blades won’t stay sharp without proper lubrication. After sharpening and blade cleaning and oiling, apply 2-3 drops of high-quality clipper oil like Andis or Wahl along the teeth. Run your clippers for 5-10 seconds to distribute the lubricant evenly.
- Lubrication slashes friction and heat, extending blade life by 30%
- Proper oiling cuts blade dulling by 50% between sharpenings
- Quality oils reduce drag and snagging by 25-40%
- Regular application drops motor strain by 40%
- Consistent blade oiling saves you 25% on replacement costs
How Often to Sharpen and Maintain Blades
How often should you sharpen? Think of blade care like tuning a high-performance engine—routine keeps you ahead of wear and tear. For a professional groomer, sharpening frequency lands every 6–8 weeks. Home users can stretch to 6–12 months.
Proper clipper blade maintenance means cleaning, oiling, and rotating sets, all extending blade lifespan and slashing costly replacements.
| Sharpening Frequency | Maintenance Impact |
|---|---|
| Pro: 6–8 weeks | Extends blade life |
| Home: 6–12 months | Reduces wear & tear |
Signs Your Blades Need Sharpening Again
You know blade sharpness is slipping when the cut feels more like a tug-of-war than a clean sweep. Cutting performance drops, and visual inspection shows nicks or rust. Sensory feedback—like increased vibration—alerts you. Heat buildup points to dull blades. Time benchmarks matter too; after 40–60 hours, blade efficiency fades, and damage creeps in.
When your clipper starts tugging, vibrating, or overheating, it’s a clear sign your blades need sharpening
- Pulling or snagging hair
- Uneven or patchy cuts
- Excessive heat buildup
- Visible nicks or rust
- Increased vibration
Frequently Asked Questions (FAQs)
What is the best sharpening machine for a clipper blade?
Precision and speed rarely go hand in hand, yet the Nebraska CS-101 stands out for sharpening hair clippers efficiently.
Its automation benefits, broad blade compatibility, and strong user reviews justify the machine cost for serious blade sharpening techniques.
How to sharpen the blades of clippers?
Start by cleaning and removing the blade. Use a sharpening stone at a 30–45º angle, applying light pressure in controlled strokes.
Check blade alignment and care after sharpening.
DIY sharpening saves cost, but professional services offer precision.
How to sharpen electric clipper blades with a sharpening stone?
Use a 4000-grit sharpening stone with your clipper blades at a 30-45 degree angle. Apply medium pressure and move the blade forward across the stone. Repeat for both edges until sharp.
How to sharpen a hair clipper?
You’ll notice the metal singing differently once you’ve hit the right rhythm—move the blade in figure-8 patterns across a 4000-grit stone, applying steady pressure at 35 degrees for best sharpening.
How to sharpen hair clipper blades at home?
Sharpening at home involves DIY sharpening with 150-grit, then 220-grit sandpaper—10 and 20 strokes respectively. Maintain proper blade alignment at 30 degrees.
Safety first: unplug clippers, use light pressure, and secure blades with magnets.
What do barbers use to sharpen their blades?
Barbers rely on diamond sharpening stones, professional machines with aluminum honing plates, sandpaper alternatives at 150-220 grit, iron block kits, and handheld diamond plates around 1200 grit for precise blade maintenance.
What to do when clipper blades get dull?
When dull blades cause hair pulling and cutting inefficiency, you’ll notice motor strain and uneven cuts immediately.
Blade wear and tear from daily use leads to damage. Clean them first, then sharpen or consider blade replacement.
How to sharpen a shaving blade at home?
You’ll need a wet honing stone with 4,000-8,000 grit. Hold your blade at a consistent angle, apply gentle pressure, and slide it forward across the stone using controlled strokes.
How do you sharpen clipper blades at home?
You’d think blades cut hair forever, but they don’t.
Sharpening clipper blades at home involves cleaning them first, then using a 1000-grit stone at the proper blade angle with controlled pressure, finishing with oil application.
Can Wahl blades be sharpened?
Yes, Wahl blades can be sharpened. You’ve got two routes: DIY sharpening using diamond stones and honing guides, or professional services that deliver factory-level precision. Both methods work—choose based on your skill level.
Conclusion
Sharp blades don’t just cut better—they transform your entire workflow, turning what used to feel like wrestling a lawnmower into pure, fluid precision.
Now that you know how to sharpen clipper blades, you’re not at the mercy of dull edges or expensive tune-ups anymore.
Keep your stones clean, your alignment tight, and your oil flowing. Master this skill once, and you’ll never settle for a subpar cut again.
- https://www.osterpro.com/supportShow?cfid=blades-faq&utm_source=chatgpt.com
- https://babylisspro.com/on/demandware.static/-/Sites-master-us-babylisspro/default/dw845444bf/manuals/FX870%20Series%20IB-15498D.pdf?srsltid=AfmBOoqWp1_KrwmfAwZ59c3QOy7gOYjOWlHBaa8DyxE7TmLcy_uVcS3g&utm_source=chatgpt.com
- https://patents.google.com/patent/US20040067859A1/en
- https://www.themillstores.com/products/blade-wash
- https://biz.booksy.com/en-us/blog/beyond-the-cut-the-professionals-guide-to-clipper-care-and-longevity

