This site is supported by our readers. We may earn a commission, at no cost to you, if you purchase through links. This content is for general informational and educational purposes only and is not a substitute for professional medical, dermatological, or nutritional advice.
Your razor starts tugging instead of gliding, and the culprit isn’t always old hair or clogged foils. Humid bathroom air oxidizes blade edges within hours, while sweat salts eat away at the metal every time you shave. Add friction heat and thousands of cutting cycles, and even premium blades dull faster than you’d expect.
The good news: learning how to sharpen electric razor blades can add months to their lifespan, no replacement cartridge required. Rotary heads respond well to a bit of toothpaste and fine-grit sandpaper; foil blades need a gentler touch.
Grab your tools, unplug the razor, and let’s get that edge back to fighting shape.
Table Of Contents
- Key Takeaways
- Why Electric Razor Blades Get Dull
- Yes, but Mostly Rotary Blades
- Tools Needed Before Sharpening
- How to Sharpen Rotary Razor Blades
- Clean, Oil, and Maintain Blades
- Frequently Asked Questions (FAQs)
- Can electric shaver blades be sharpened?
- What to do when an electric razor gets dull?
- How to sharpen shaver blades at home?
- How to sharpen electric trimmer blades at home?
- Do electric razor blades need sharpening?
- How does a razor blade’self sharpen’ & ‘honing’ work?
- Why should you use a razor sharpener?
- How often should you sharpen your electric razor?
- How often should you replace the electric razor blades?
- What oil should you use on the electric shaver?
- Conclusion
Key Takeaways
- Blade dulling comes mainly from moisture-driven oxidation and salt corrosion, not just mechanical wear, so drying and oiling your razor after every use matters as much as cleaning it.
- Rotary blades can be genuinely sharpened with toothpaste or fine-grit sandpaper, but foil blades can’t be safely sharpened due to their oscillating, perforated design—replacement is the only real fix for those.
- Sharpening restores decent performance but never fully recovers original factory sharpness, so treat it as a way to extend blade life, not reverse damage or fix nicks.
- Watch for clear replace-not-sharpen signals—visible cracks, persistent tugging, or no improvement after two to three sharpening attempts—since pushing a dead blade past that point just irritates your skin.
Why Electric Razor Blades Get Dull
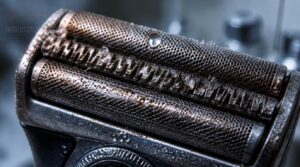
Your razor doesn’t lose its edge overnight—it’s a slow team effort between two forces working against you. Moisture and friction both chip away at that sharpness, just in different ways. Here’s what’s actually happening under the hood.
Oxidation and Moisture Damage
Your bathroom is basically a corrosion lab. Steam and splashback mean humid bathroom environments speed up oxidation, forming iron oxide on blade edges within hours. Salt from sweat makes it worse, creating conductive films that eat metal faster.
Hard water compounds the problem by leaving mineral deposits that trap moisture against the steel, so these tips for preventing razor rust can help your blades last longer between replacements.
That’s why blade corrosion often outpaces mechanical dulling. Combat it: dry blades fully after cleaning, apply a light oil coating, and store your razor somewhere ventilated—not sealed in a steamy shower caddy.
Friction and Blade Wear
Corrosion isn’t working alone. Every stroke rubs metal against metal, and that friction temperature rise softens edges fast.
Contact stress cracks microscopic cutting edges, forming wear particles and rounding the blade. Heat also degrades coatings, speeding decline.
- Edge deformation from repeated cyclic stress
- Wear particle buildup dulling contact zones
- Coating heat degradation weakening protection
- Mechanical wear compounding friction dulling
Signs of Dull Blades
Your razor tells on itself before it ever fails outright. Watch for rounded edges under bright light, faint rust spots, or burrs along the blade.
| Signal | What You’ll Notice | What It Means |
|---|---|---|
| Visual | Nicks, discoloration | Corrosion damage |
| Sound | Rasping, whining | Mechanical dulling |
| Performance | Tugging, extra passes | Blade fatigue |
That grinding pitch? Classic blade performance decline. A blade that requires more force to cut is often showing early signs of dulling, similar to what’s described in guides about blade dulling indicators.
Shaving Irritation Risks
That grinding pitch does more than annoy you—it punishes your skin. Dull blades force repeated friction drag, more passes, more pressure, breaking down your moisture barrier and inviting razor burn.
Weakened skin lets aftershave sting harder (product contact irritation) and traps regrowing hairs into ingrown follicles. Add friction heat from overheating pressure, and shave comfort disappears fast—sharp blades aren’t cosmetic, they’re skin protection.
Sharp blades aren’t cosmetic—they’re skin protection against irritation, stinging, and ingrown hairs
Yes, but Mostly Rotary Blades
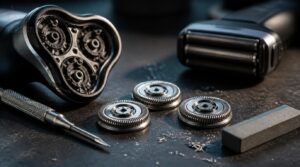
So can you actually sharpen electric razor blades? Yes, but it depends heavily on the type you own. Here’s how rotary and foil razors stack up, and what that means for your sharpening options.
Rotary Versus Foil Blades
Rotary blades respond to sharpening far better than foil ever will, thanks to their spinning cutter design. That’s a direct result of blade movement differences.
If you’re weighing which cutter style to invest in, this guide on sharpening techniques for rotary and foil razor blades breaks down why spinning blades hold an edge so much longer.
Rotary heads also suit:
- Thick or coarse hair
- Curly, multi-directional growth
- Contoured jawlines
Skin sensitivity varies too, and finish quality depends on hair type—not just blade choice.
Why Foil Blades Differ
Underneath that thin metal sheet lies the real reason foil heads behave so differently.
The foil blade structure uses oscillating cutters moving side-to-side, not spinning—so hairs get captured through perforations, then sliced flat against skin. That protective foil shields you from direct blade contact entirely.
Foil material durability varies by alloy, but the design itself, not just sharpness, determines how safely and closely it cuts.
Self-Sharpening Razor Limits
That "self-sharpening" label oversells things. It slows dulling—it doesn’t reverse it.
Edge geometry and material fatigue limit how much correction happens per pass. Environmental corrosion still wins eventually.
Realistic limits:
- Extends life, doesn’t restore original sharpness
- Can’t fix nicked edges
- Design tolerances cap total shaves
- Results vary by beard type
Run periodic blade sharpness tests to catch decline early.
Check Manufacturer Guidance
Before you touch a blade, crack open the manual. It’ll tell you whether sharpening voids your warranty, which cleaning agents won’t corrode the coating, and approved lubricants for your specific model.
Skipping this step risks safety hazards and premature replacement. Manufacturers also list recommended replacement schedules—sometimes sharpening simply isn’t worth the risk compared to a fresh head.
Tools Needed Before Sharpening
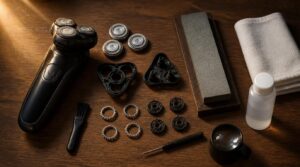
Before you touch a single blade, gather what you’ll need. Sharpening rotary blades takes a few household items, not a specialty toolkit. Here’s exactly what to have on hand.
Cleaning Brush and Towel
Grab a textured cleaning pad and a lint-free microfibre towel before you touch a single blade. Rinse bristles on the pad until water runs clear, then blot—never tug—on the towel to lift moisture.
Lay brushes flat, bristles hanging off the edge, so they dry evenly. This same hygiene habit keeps your razor parts debris-free before sharpening starts.
Toothpaste or Polishing Paste
Your bathroom cabinet already holds a decent sharpening tool: toothpaste.
Its mild abrasives—calcium carbonate or hydrated silica—strip oxidation without gouging metal. Rub a pea-sized dab into the blades for 30–60 seconds, this activation window matters, then rinse thoroughly.
Compared to dedicated polishing paste:
- Toothpaste: gentler, slower results
- GOI paste: stronger, oil-diluted for control
- Both: risk drying residue if left too long
- Both: require complete drying before reassembly
- Both: work best on rotary blades only
Fine-Grit Sandpaper
When toothpaste isn’t cutting it, step up to fine-grit sandpaper—specifically 1200-grit for starters.
Look for aluminum oxide or silicon carbide abrasives, wet/dry rated, in the 180-240 range. Press the blade assembly flat, add water or oil for a lubricated cutting environment, and run the razor using light, even strokes. This grit progression removes burrs without gouging the edge.
Glass or Sharpening Stone
Sandpaper takes care of the heavy lifting, but a glass sharpening stone finishes the job right.
- Tempered glass bonded with abrasives, thin and lightweight
- Ceramic-bonded surfaces resist wear, stay flat longer
- Delivers mirror-finish edge polishing on rotary blades
- Dries fast, minimal soaking required
- Uniform grit means repeatable honing results
Handle carefully—drops can crack it—but daily wear won’t.
Razor Oil or Mineral Oil
Once the blade’s sharp, oil is what makes it last. A few drops of mineral oil or clipper oil after every sharpening session prevents micro-pitting from moisture.
| Oil Type | Best Use |
|---|---|
| Mineral oil | Stainless steel, brass |
| Clipper oil | Rotary cutting blocks |
| Scented razor oil | Skin-contact areas |
| Silicone additive oil | Extra glide, more dust |
Wipe excess for lubrication for longevity without buildup.
How to Sharpen Rotary Razor Blades
You’ve got your tools laid out and your razor prepped for action. Now comes the part that actually restores your edge. Here’s the process, step by step, from first twist of the head to final reassembly.
Unplug and Disassemble Razor

Skip this step and you’re gambling with a live motor and exposed blades. Safety first: unplug your razor completely before disassembling anything.
Remove screws or clasps securing the casing, then gently pry it open. Detach the blade assembly with steady pressure—no twisting. Watch for springs or clips that might pop loose. Handle components carefully, keeping connectors intact as you separate parts for cleaning.
Clean and Dry Parts
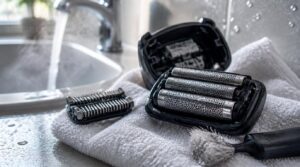
Rinse the head under hot water, brushing away debris and old oils—proper cleaning prevents hygiene risks before sharpening even starts.
Air dry for 5–15 minutes, or blot with a lint-free towel. Check for a uniform matte finish; no beads means truly dry. This corrosion prevention step matters most in humid bathrooms, where trapped moisture ruins your work fast.
Toothpaste Sharpening Method
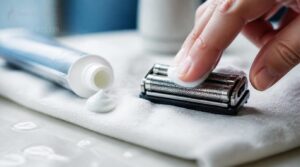
Reaching for that tube in your medicine cabinet works better than you’d think. Toothpaste’s fine abrasive particles—hydrated silica, calcium carbonate—gently polish away oxidation and micro burrs.
Dab a pea-sized amount, rub with a soft cloth for 20-60 seconds using even strokes:
- Light, circular motions
- Consistent pressure
- Both blade sides
- No aggressive scrubbing
This won’t fix true blade geometry, but it restores decent cutting performance on mildly dull, inexpensive blades. Rinse and dry thoroughly afterward.
Sandpaper Sharpening Method
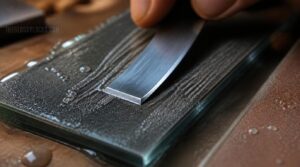
Grit selection matters most here: start with 1200-grit for cutting away oxidation, then step up to 2500-grit for a smoother edge.
| Grit | Purpose | Technique |
|---|---|---|
| 1200 | Initial contouring | Wet sanding, light pressure |
| 2500 | Edge smoothing | Blade angle alignment, consistent strokes |
| Glass backing | Surface prep | Stable, flat contact |
Inspect the edge for a uniform shine before proceeding.
Polish, Rinse, and Reassemble
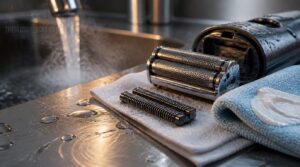
Sandpaper leaves scratches you can’t shave with. That’s what polishing fixes.
Dab toothpaste or polishing paste onto a soft cloth and work it into the edge with light circular motions—friction generates heat, and heat undoes your progress. Rinse under running water for 15-30 seconds until residue’s gone. Dry with a lint-free cloth, then reassemble in original orientation, torquing screws to spec. Test-shave a small patch before committing.
Clean, Oil, and Maintain Blades
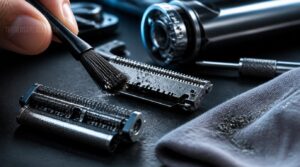
Sharpening is only half the job. Those fresh edges need care to actually last, not just look good for a day. Here’s what keeps them cutting clean, shave after shave.
Disinfect After Sharpening
All that grinding leaves metal dust and residue behind, so wipe blades with isopropyl alcohol before anything touches your skin again. Let it sit 30-60 seconds for real contact time, not just a quick swipe.
Rinse with clean water to clear leftover residue, then dry completely. Trapped moisture invites corrosion fast, undoing your sharpening work almost instantly.
Lubricate Moving Parts
A dry blade is a fast-dying blade—friction without oil turns your sharpening work to waste in weeks.
Add 1-2 drops of clipper oil or mineral oil to foils and cutters, then run the razor a few seconds to spread it evenly. Skip motor oil or WD-40.
- Oil after every deep clean
- Wipe excess to avoid buildup
- Check monthly for dryness
Test Shaving Performance
Once oiled, run a shave closeness test: pass over your usual spots and check stubble reduction. Follow with a quick skin irritation check—any redness should fade fast.
Notice cutting efficiency and hair capture rate across strokes. Uneven feel or patchy coverage means shave quality isn’t consistent yet, and it’s time to revisit your sharpening work.
Sharpen Versus Replace
Sharpen versus replace comes down to math and safety. If cracks show up, replace immediately—no exceptions. Otherwise, weigh cost: sharpening costs pennies, replacement heads run $15-30.
Three red flags mean it’s time to buy new:
- Tugging or pulling during shaves
- No improvement after 2-3 sharpening attempts
- Visible material loss changing blade shape
Diminishing returns are real—don’t punish your skin chasing a dead blade.
Common Sharpening Mistakes
Most botched sharpening jobs come down to five habits. Catch these before they wreck your blade:
| Mistake | What Happens | Fix |
|---|---|---|
| Inconsistent angle | Jagged, uneven edge | Lock one angle, whole session |
| Over-sharpening | Thinned, weakened metal | Stop after 2-3 passes |
| Skipping honing | Leftover burrs, poor cut | Always hone post-sharpen |
Wrong tools and dirty stones cause chips. Clean thoroughly, then check blade alignment before reassembly.
Frequently Asked Questions (FAQs)
Can electric shaver blades be sharpened?
Despite what the marketing myth of "self-sharpening" implies, your razor isn’t secretly a tiny whetstone. Yes, rotary blades can be sharpened with fine abrasives; foil blades usually can’t, so replacement beats risky DIY attempts there.
What to do when an electric razor gets dull?
First, deep clean and inspect the blades. If grinding or irritation persists, try safe sharpening techniques or replace the head. Stick to a blade maintenance schedule—it beats guessing every time your razor starts pulling instead of cutting.
How to sharpen shaver blades at home?
Disassemble and dry the head, then use the toothpaste method or 1200-grit sandpaper at a shallow blade angle. Polish, rinse thoroughly, dry completely, lubricate, and verify reassembly before testing on your skin.
How to sharpen electric trimmer blades at home?
Trimmer blades sharpen differently than rotary shavers — no toothpaste tricks here. Unplug, remove blades, then use a fine flat file along the original bevel, polish with 600–1000 grit sandpaper, oil moving parts, and test-cut before regular use.
Do electric razor blades need sharpening?
Not really—oxidation, not knife-style dulling, kills most edges. Rotary blades respond well to sharpening; foil blades don’t. Regular blade inspection tells you whether you’re looking at sharpening vs replace blades decisions for your specific razor.
How does a razor blade’self sharpen’ & ‘honing’ work?
Ever wonder why some blades never seem to need sharpening? It’s micro-contact, not magic: the edge brushes the foil or guard thousands of times per shave, causing tiny edge realignment — true honing, not full blade geometry restoration.
Why should you use a razor sharpener?
A dull blade drags, tugs, and irritates. Sharp edges cut cleanly, meaning reduced skin irritation and a smoother shave.
Sharpening also means extended blade lifespan, better edge retention, and lower replacement costs than constantly buying new heads.
How often should you sharpen your electric razor?
Your usage-based sharpening cycle depends on hair type and frequency: daily shavers with coarse hair need attention every 3-4 months, while occasional users can stretch maintenance schedules to 6 months with consistent blade care.
How often should you replace the electric razor blades?
Plan on a 12 to 18 month replacement interval under normal use. Daily shavers tackling coarse or thick beards should watch for dragging or irritation and swap sooner—often within 6 to 12 months—since heavier use accelerates blade wear regardless of your sharpening routine.
What oil should you use on the electric shaver?
Stick with light mineral oil or clipper oil—just a drop or two after proper cleaning. Skip heavy kitchen oils; they gum up mechanisms fast. Lubricate the blades weekly to cut friction, prevent rust, and keep that edge cutting smoothly for months longer.
Conclusion
Picture the blade catching light again, clean and bright, gliding like a skate over fresh ice instead of dragging through slush. That’s the payoff.
Once you know how to sharpen electric razor blades, dullness stops feeling like a countdown to buying a new head. Toothpaste, sandpaper, a little oil—simple tools, real results.
Rotary heads respond fastest; foils need patience. Keep them clean, keep them dry, and your razor will keep cutting sharp, shave after shave, for months longer than you’d expect.