This site is supported by our readers. We may earn a commission, at no cost to you, if you purchase through links. This content is for general informational and educational purposes only and is not a substitute for professional medical, dermatological, or nutritional advice.
Most people blame the flat iron when their hair won’t cooperate. The creases, the frizz, the ends that curl back up within the hour. The tool always takes the blame. But hand that same iron to someone who understands technique, and it produces something completely different.
Temperature, section size, and plate movement work together in ways most tutorials gloss over. Get one wrong and you’re either scorching your hair or repeating passes that do more damage than good. Getting it right means knowing how to straighten hair with a flat iron precisely and deliberately enough that the results hold.
Table Of Contents
- Key Takeaways
- How to Choose The Right Flat Iron and Heat Setting
- How to Prepare Hair Before Flat Ironing
- How Do You Straighten Hair With a Flat Iron?
- How to Prevent Heat Damage, Frizz, and Creases
- How to Keep Hair Straight Longer and Maintain Your Flat Iron
- Frequently Asked Questions (FAQs)
- How do I know if my hair is suitable for straightening?
- Is there a way to reduce the time it takes to straighten my hair?
- What are the pros and cons of using a flat iron?
- How often should I use a flat iron to straighten my hair?
- How often can I straighten hair safely?
- Can I straighten damp or towel-dried hair?
- Does hair type affect straightening time needed?
- Should I straighten hair before or after cutting?
- Can I swim after straightening my hair?
- Can you flat iron hair extensions or wigs?
- Conclusion
Key Takeaways
- Match your flat iron’s plate material and width to your hair type—ceramic for fine or color-treated hair, titanium for coarse hair, with wider plates covering more per pass.
- Heat settings should follow hair texture: fine hair at 300–320°F, medium at 330–350°F, and coarse or curly hair at 360–380°F, always starting low and applying heat protectant first.
- Technique drives results: work bottom-up in uniform 1–2 inch sections, start a quarter inch below the roots, glide slowly at a steady speed, and cap each section at three passes.
- Protect your results and your hair by straightening only fully dry strands, avoiding touching hair while it cools, using silk pillowcases and anti-frizz serum to extend the style up to 24 hours, and limiting sessions to two or three times weekly.
How to Choose The Right Flat Iron and Heat Setting
Not all flat irons are created equal, and the one you pick can make or break your results. A few key factors determine whether you’ll get a sleek, lasting finish or a frustrating, damaging experience. Here’s what to look at before you buy or reach for your tool.
Whether you’re chasing beachy waves or sleek straight styles, mastering flat iron and wand curling techniques expands what your tools can do—and changes what features actually matter when you’re shopping.
Plate Material
Plate material is your first power move. How your iron distributes heat and glides through strands shapes everything.
- Ceramic flat irons: even heat distribution, ideal for fine or color-treated hair
- Titanium plates: rapid heat-up, best for coarse or thick hair
- Tourmaline plates: emit negative ions, fighting frizz during hair straightening
- Nanoceramic plates: smoothest glide, fewer snagged strands
Plate Width
Width matters just as much as material. Your plate width controls how much hair your flat iron covers per pass, directly affecting speed and control.
| Plate Width | Best For | Benefit |
|---|---|---|
| 0.75–1 inch | Fine hair, bangs | Precision, less heat exposure |
| 1–1.5 inch | Medium-density hair | Speed and maneuverability |
| 1.5–2 inch | Thick, coarse hair | Fewer passes, faster results |
When sectioning hair, match your section size to your plate. For ceramic flat irons with wider plates, use 2-inch hair sections; narrower plates pair with 1-inch sections for even coverage across different hair thickness levels.
Adjustable Temperature Controls
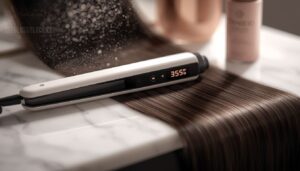
Once you’ve matched your plate width, adjustable temperature controls become your next real advantage. Before each pass, apply a heat protectant, then dial your temperature setting precisely. Most flat irons span 250–450°F—that full range is your power. A flat iron with digital temperature control takes the guesswork out of hitting that perfect degree.
For tailored guidance on pairing heat levels with your hair type, protecting your hair from heat damage long-term starts with understanding exactly where in that 250–450°F range your strands thrive.
- Own every result through thermal protection
- Nail consistency with ±4°F temperature accuracy
- Stop damage during hair sectioning
- Command 300–375°F for color-treated hair
Hair Type And Texture
That temperature range means nothing without knowing your hair. Fine, low-density strands straighten efficiently at 300°F or below—push higher and you’re risking breakage.
Coarse, highly textured hair grips more heat but needs longer, deliberate passes through each section. If your hair’s damaged or high-porosity, keep the heat lower and steady; cuticle lift happens fast, and frizz follows right after.
Start With Lower Heat
Resist the urge to max out the dial. A low temperature setting locks in moisture and gives you control. Begin at 300°F, then raise only if one pass isn’t enough:
- Fine hair: 300–320°F
- Medium hair: 330–350°F
- Coarse or curly hair: 360–380°F
- Apply a heat protectant first
Your heat damage prevention starts before straightening hair with a flat iron even begins.
How to Prepare Hair Before Flat Ironing

Before picking up the flat iron, proper hair preparation separates a smooth, lasting finish from one you’ll regret.
Starting with clean, product-free strands makes all the difference, and applying argan oil before flat ironing adds a protective layer that enhances both smoothness and longevity.
Wash 24 to 48 hours ahead so your hair moisture balance lands between freshly clean and fully settled. Use a sulfate-free shampoo, towel-dry gently, then blow-dry on low until completely dry.
Detangle from ends upward with a wide-tooth comb. Clean hair strand separation prevents snagging and uneven passes later.
Build your product base in this order:
- Mist a heat protectant spray evenly over completely dry hair.
- Press a silicone-based serum into the ends to seal out frizz.
- Apply a light leave-in conditioner to mid-lengths only, never near the roots.
- Clip top layers away using a hair sectioning technique so you work bottom-up.
How Do You Straighten Hair With a Flat Iron?
Once your hair’s prepped and protected, it’s time to actually use that flat iron. Technique matters more than you’d think — small adjustments in how you section and move through your hair make the difference between sleek results and unnecessary damage. These five steps walk you through exactly how to do it right.
Section Hair From Bottom Up
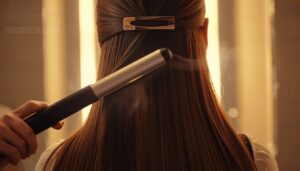
Starting from the bottom is what separates a polished finish from a chaotic one. Clip the top layers away, begin at your nape, and work upward toward the crown.
This bottom-up hair sectioning technique gives your flat iron consistent access to each layer with even heat distribution, so no strand gets missed or over-processed before you progress higher.
Use One- to Two-Inch Sections
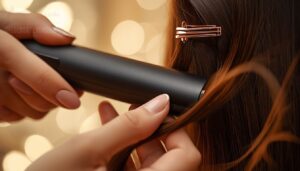
One of the most critical hair straightening tips: section size matters.
- Use one- to two-inch sections for controlled heat exposure
- 1-inch sections deliver crisper, more defined results
- Coarse hair needs 1-inch for full plate contact
- For fine hair, 1–1.5 inches prevents creasing and heat buildup
After applying your heat protectant, don’t vary width: uniform sections give your flat iron even heat distribution.
Start Below The Roots
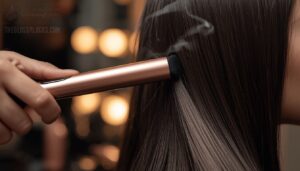
Place the flat iron just past the root line — never flush against the scalp. Your heat protectant should already coat mid-shaft to ends before your straightening passes begin. That thin barrier is critical for hair damage prevention near the most vulnerable zone. A single, controlled glide starting from below the roots sets them flat without scorching sensitive scalp skin.
| Hair Type | Plate Placement | Max Root Passes |
|---|---|---|
| Fine | ¼" below root line | 1 |
| Medium | ¼" below root line | 1–2 |
| Thick | ¼" below root line | 2 |
| Coarse | ¼" below root line | 2 |
| Color-treated | ½" below root line | 1 |
Glide With Steady Pressure
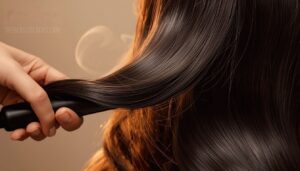
This is where results are made. Grip the flat iron close to the roots without touching the scalp, then glide down in a slow, continuous motion at roughly 2–3 centimeters per second. Maintain slight downward pressure throughout.
Rushing breaks contact and leaves waves behind; hesitating builds heat. Keep it moving, keep it smooth.
Move too fast and you lose contact; move too slow and you build heat—keep the iron steady and smooth
Limit Each Section to Three Passes
Once you’ve completed that steady glide, stop. Three passes maximum per section is the rule. Each pass compounds heat exposure, and your heat protectant can only do so much. Beyond three, you’re not smoothing hair anymore; you’re stressing it.
If a section isn’t straight after three passes, reassess your heat setting or reduce your section width before going again.
How to Prevent Heat Damage, Frizz, and Creases
Straightening well is only half the battle. Keeping your hair healthy while you do it is where real control lives.
Heat damage happens fast when you’re careless, and it compounds with every session. Your best defenses:
- Apply heat protectant evenly from mid-length to ends before you iron.
- Work with fully dry hair; trapped moisture creates steam and roughness.
- Keep passes to three or fewer per section to limit exposure.
- Use a hair smoothing product designed for thermal styling to lay cuticles flat.
- Don’t touch your hair while it cools; friction lifts strands and recreates frizz.
For frizz control, maintain steady glide speed and clean plates. Residue drags hair, creating crease-like lines. Start below the roots, too — re-clamping near the scalp leaves ridges, especially on fine hair.
A lightweight anti-frizz serum for straight hair applied after cooling locks cuticles down and keeps plates gliding clean longer.
How to Keep Hair Straight Longer and Maintain Your Flat Iron
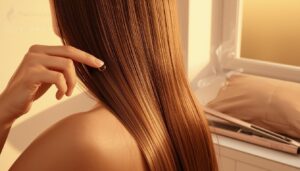
Once the iron is down, your work isn’t done. A proper cool-down routine locks in gloss and can hold your style for up to 24 hours.
- Apply a lightweight silicone serum to ends for 6–12 hours of frizz control.
- Sleep on a satin or silk pillowcase to reduce overnight friction. If a purple tint still sneaks in despite your gentle routine, this guide on how to remove purple hue from purple shampoo walks you through easy fixes. For even more ways to protect and refresh your look overnight, this creative hair styling inspiration guide offers ideas that work beautifully alongside a silk pillowcase routine.
- Avoid high humidity; above 60%, reversion hits fast.
- Limit hair straightening frequency to once daily to prevent cumulative heat damage.
- Always use a heat protectant, even on re-iron days.
For the flat iron, clean plates weekly, check the cord monthly, and replace them after a year of daily use. Finish with a hair smoothing serum to preserve your hair straightening benefits for another 4–8 hours.
Frequently Asked Questions (FAQs)
How do I know if my hair is suitable for straightening?
Picture your strands pulled taut. Do they stretch, then snap back cleanly? Hair elasticity and porosity signal your readiness. Damaged, chemically treated, or highly porous hair needs lower heat and extra precaution before heat styling.
Is there a way to reduce the time it takes to straighten my hair?
Yes, and it starts with smarter prep. Work in two-inch sections, use a heat protectant, and glide steadily once. Pair fast heat recovery with proper blow drying, and you’ll cut your routine a lot.
What are the pros and cons of using a flat iron?
A flat iron offers instant texture transformation and cost-effective versatility, but repeated high temperature styling risks damage. Using a heat protectant helps hair cuticle protection and hair breakage prevention, keeping your styling routine both bold and safe.
How often should I use a flat iron to straighten my hair?
How often should you flat iron? For healthy hair, two to three times weekly works.
Damaged or processed strands need longer gaps.
Always apply heat protectant, use the lowest effective heat setting, and alternate styles for hair breakage prevention and lasting hair health maintenance.
How often can I straighten hair safely?
Here’s the twist: the safest straightening schedule isn’t a number, it’s your hair’s response. Most heads tolerate two to three sessions weekly, but watch for dryness, snapping, or frizz. Use heat protectant, limit passes, and prioritize hair moisture control.
Can I straighten damp or towel-dried hair?
Can you straighten damp hair? No. Applying a flat iron to wet strands creates steam that damages hair from within. Towel-dry fully, apply heat protectant, and confirm complete dryness—this hair drying method prevents serious damage.
Does hair type affect straightening time needed?
Texture, thickness, and porosity all shape your timeline. Fine hair straightens fast at low heat; coarse, curly hair texture types need higher heat settings and extra passes to straighten hair smoothly.
Should I straighten hair before or after cutting?
Cut first, then straighten. Hair cutting before heat styling keeps length accurate, since curls shrink and appear shorter. Straightening after the cut refines shape, and a light dusting after styling preserves blunt, even ends.
Can I swim after straightening my hair?
Can I swim after straightening my hair? Ideally, no. Water swells the hair shaft and reactivates your curl pattern. Wait at least 24 hours—let the hair cooling phase finish—then apply a hair straightening serum before swimming.
Can you flat iron hair extensions or wigs?
Yes, you can, but heat isn’t a one-size-fits-all situation. Match your flat iron’s temperature to your hair type: human hair tolerates up to 400°F, while synthetic fibers melt past 300°F. Always apply heat protectant spray first.
Conclusion
Think of your flat iron as a paintbrush, not a magic wand. The wand gets credit it doesn’t deserve; the brush rewards the hand that knows its strokes.
Learning how to straighten hair with a flat iron is really learning patience, heat control, and rhythm. Master those, and the tool stops fighting you.
Your hair stops being a daily battle and becomes something you shape on purpose, confidently, every single morning.