This site is supported by our readers. We may earn a commission, at no cost to you, if you purchase through links.
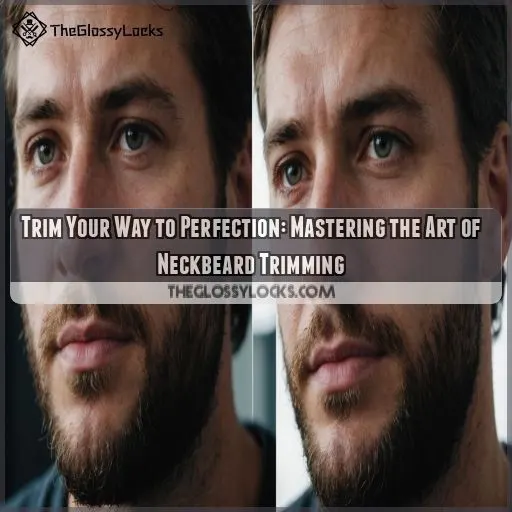
First, choose a trimmer that fits your style – cordless or corded, it’s up to you.
Next, prep your beard by detangling it with a brush and oil.
Find your natural neckline by placing one finger above your Adam’s apple, and use head creases as a guideline for symmetry.
Start trimming in the middle and work your way outwards, using mirrors to check your progress.
The key to a seamless blend is just a snip away!
Table Of Contents
- Key Takeaways
- Essential Tools for Trimming Neckbeard
- Preparing Your Beard for Trimming
- Finding Your Ideal Neckline
- Trimming With Care and Precision
- Defining Your Beard Neckline
- Shaping Your Neckbeard
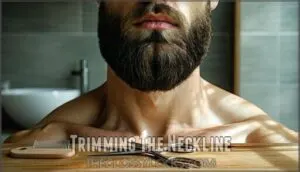
- Trimming the Neckline
- Mastering the Art of Neckbeard Trimming
- Maintaining Your Neckbeard
- Advanced Neckbeard Trimming Techniques
- Frequently Asked Questions (FAQs)
- How do I shape my Neckbeard?
- How to get rid of neckbeard?
- How high to shave a neck beard?
- How to trim your neck hair?
- How often should I trim my neckbeard for maintenance?
- Can I use a razor to trim my entire neckbeard?
- How do I prevent ingrown hairs after trimming my neckbeard?
- What is the best way to trim a curly neckbeard?
- How do I fix a uneven or patchy neckbeard trim?
- Conclusion
Key Takeaways
- You’ll want to start by prepping your beard with a brush and some oil to get all those hairs in line – think of it as the "pre-game" routine for your trim.
- Finding your natural neckline is key: place one finger above your Adam’s apple, and use head creases as a guideline for symmetry – it’s like discovering your own personal beard blueprint.
- To achieve a seamless blend, trim in the middle and work your way outwards, using mirrors to check your progress and make sure you’re not missing any stray hairs – it’s all about the angles.
- Don’t be afraid to use scissors for precise trimming, especially for curved or angled beard shapes – they’re like the secret ingredient in your favorite recipe, adding that extra oomph to your overall look.
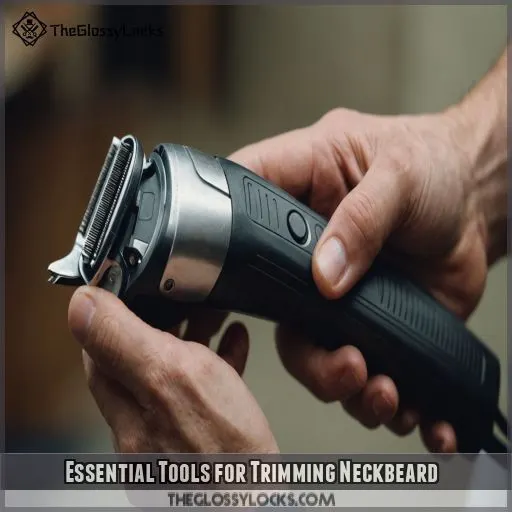
Essential Tools for Trimming Neckbeard
To master the art of neckbeard trimming, you’ll need the right tools for the job – and that’s where a quality beard trimmer, comb, and mirrors come in. By choosing the right trimmer, using scissors for precise trimming, and utilizing a comb and mirrors for a clear view, you’ll be well on your way to achieving a clean and defined neckline that complements your beard style .
Choosing the Right Trimmer
How do you find the perfect trimmer for your neckbeard? Start by considering your needs. Here are three key factors to think about:
- Trimmer type: Do you prefer a cordless or corded trimmer?
- Blade length: What length blade do you need to achieve your desired beard shape?
- Budget options: Are you looking to splurge or save on your trimmer?
Importance of a Comb and Mirrors
Your trusty sidekicks in neckbeard trimming are a comb and mirrors. A wide-tooth comb detangles your beard hairs, preventing snags and ensuring accurate trims. With a bathroom mirror and a hand mirror, you get a 360-degree view, helping you shape your beard neckline with precision. Visual feedback is key to mastering the art of neckbeard trimming.
Using Scissors for Precise Trimming
Scissors can be your best friend for precise trimming. Use them to tidy up stray hairs or create a seamless blend between your beard and neckline. For curved or angled beard shapes, scissors offer more control than electric trimmers. Just remember to work slowly and carefully to avoid accidental snips or unevenness.
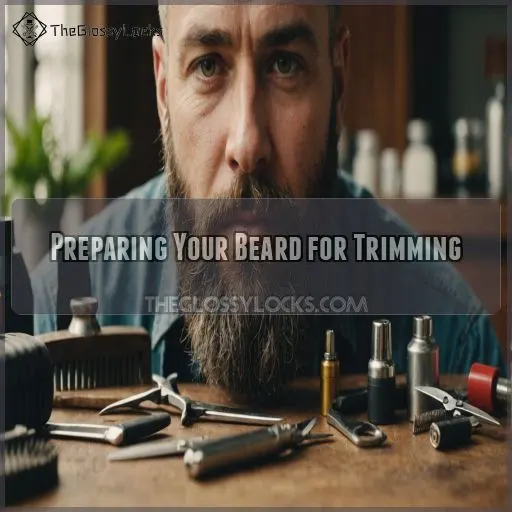
Preparing Your Beard for Trimming
Before you start trimming your beard, take a few minutes to style and comb it.
This will help ensure all the hairs are in their natural position.
This will give you a more accurate trim.
By prepping your beard, you’ll be able to see what you’re working with.
This will help you avoid common trimming mistakes that can leave you looking like you stuck your finger in a socket.
Styling and Combing Your Beard
Now that you’ve got the right tools, it’s time to style and comb your beard. Think of this step as the "pre-game" routine for your trim. Use a beard brush and some beard oil to detangle those unruly hairs. Here are three detangling tips to keep in mind:
- Start at the ends: Work your way up to avoid matting.
- Comb in the direction of growth: Don’t fight the beard, work with it.
- Be gentle: Your beard is a delicate creature, treat it with care.
Finding the Natural Neckline
Now that your beard is styled and combed, it’s time to find the natural neckline.
This is where your beard growth patterns meet your neck, typically around the Adam’s apple.
To find it, tilt your head down and observe where your head creases on the neck.
This guideline will help you achieve a seamless blend with your jawline and facial hair.
Avoiding Common Trimming Mistakes
The art of neckbeard trimming – a delicate dance between style and disaster! To avoid common trimming mistakes, keep these three pitfalls in mind:
- Don’t trim too high: A neckline that’s too high can make your beard look like a chin strap.
- Uneven neckline: Use a mirror to make sure your neckline is even and symmetrical.
- Shaving too close: Avoid razor burn by not shaving too close to the skin.
Finding Your Ideal Neckline
As you get ready to tame that neckbeard, finding your ideal neckline is important for a clean and stylish look. In this section, you’ll learn how to use the one finger rule, adjust the neckline to suit your style, and use head creases as a guideline to achieve a seamless blend with your beard.
The One Finger Rule
Now that your beard is prepped, it’s time to find your ideal neckline. The one finger rule is a great starting point. Place one finger above your Adam’s apple to get a general idea of where your neckline should be . This simple trick helps you visualize the perfect line, setting you up for a clean and stylish trim (Source).
Adjusting the Neckline for Personal Preference
Adjusting the neckline for personal preference is where the magic happens. You get to decide how high or low you want to go, based on your beard length, face shape, and desired look. Consider these factors:
- Beard length: Shorter beards might require a higher neckline.
- Face shape: Round faces benefit from a defined, angular neckline.
- Beard style: A higher neckline can make a chin strap beard pop.
- Desired look: Go for a natural, effortless vibe or a sleek, polished finish – it’s up to you!
Using Head Creases as a Guideline
Now that you’ve adjusted your neckline to your liking, it’s time to fine-tune it using head creases as a guideline. This technique is especially helpful for those new to beard trimming. Simply tilt your head down and observe where your head creases on your neck.
| Head Crease Variations | Neckline Symmetry |
|---|---|
| Single Crease | Symmetrical Neckline |
| Double Crease | Asymmetrical Neckline |
| No Crease | Follow Jawline |
| Shallow Crease | Higher Neckline |
| Deep Crease | Lower Neckline |
Use these creases to guide your trimmer for a more natural-looking neckline.
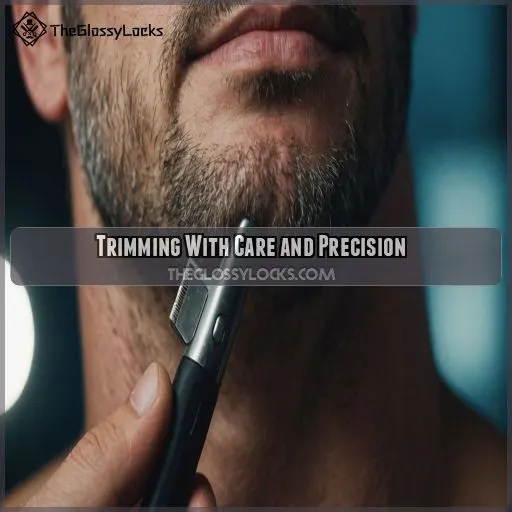
Trimming With Care and Precision
Now that you’ve found your ideal neckline, it’s time to grab your trimmer and get to work – with care and precision, of course. As you start trimming, remember to take your time, work slowly, and use those mirrors to get a clear view of what you’re doing, because a defined neckline is just a snip away.
Setting Aside Uninterrupted Time
Now that you’ve got a sense of your ideal neckline, it’s time to get down to business. Set aside uninterrupted time to trim – think of it as a date with your beard. Clear a dedicated space, put your phone on silent, and mentally prep yourself to focus. Prioritize trimming and avoid distractions; your beard will thank you.
Starting in the Middle and Working Outwards
Now that you’ve set aside uninterrupted time, let’s get started! Begin trimming in the middle, just above your Adam’s apple. This helps you achieve Neckline Balance and trimming symmetry. Focus on the middle section first, then work your way outwards using an outward technique. This approach helps you get a clean beard edging and helps you maintain control.
Using Mirrors for a Clear View
Now that you’ve started trimming in the middle, it’s time to get a better view of your handiwork. Grab your bathroom mirror and a hand mirror to check your progress from multiple angles. Proper mirror placement and good lighting can make all the difference – you want to see every stray hair, not a funhouse reflection!
Defining Your Beard Neckline
As you refine your beard-trimming skills, defining your beard neckline is a key step that can make or break your overall look. By understanding where to place your neckline and how to adjust it to your beard style and length, you’ll be able to achieve a clean, stylish finish that elevates your entire beard game.
Understanding the Importance of a Defined Neckline
A well-defined neckline is the secret to a polished beard look. Think of it as the frame that showcases your masterpiece. Here are three reasons why a defined neckline matters:
- Neckbeard styles: A clean neckline enhances your chosen style, whether it’s a sleek, modern look or a rugged, bushy vibe.
- Clean vs. messy: A defined neckline keeps your beard from looking scraggly and unkempt.
- Confidence boost: A sharp neckline can elevate your entire demeanor, making you feel more put-together and confident.
Precision Placement of the Neckline
Now that you know why a defined neckline matters, let’s get precise! Imagine a line between the lowest points of your ears, meeting at your Adam’s apple. For a more defined look, place your neckline two fingers (or 1.5 inches) above your Adam’s apple. This sweet spot creates a harmonious balance between your beard and face shape.
Adjusting for Beard Length and Style
Now that you’ve mastered precision placement, let’s talk about adjusting your neckline for your beard length and style.
For shorter beard styles, a higher neckline creates a cleaner look.
Longer beards can rock a less defined line, blending seamlessly with the neck.
Consider your facial structure and beard shape to find the perfect balance that makes you feel like a total boss.
Shaping Your Neckbeard
Now that you’ve defined your beard neckline, it’s time to shape your neckbeard – the final step in creating a polished, put-together look that’ll make you feel like a million bucks. Shaping your neckbeard is all about finding the perfect style to complement your face shape, so let’s get started on finding the perfect fit for you.
Round Faces and Neckbeard Styles
If you have a round face, you’ll want to balance it out with a beard style that creates length. Opt for a short, defined neckbeard that’s trimmed close to the jawline. Avoid too much volume on the sides, as it can accentuate the roundness. Instead, focus on a sleek, streamlined look that creates a more angular silhouette.
Oblong Faces and Neckbeard Styles
With an oblong face, you’ve got a canvas for a stylish neckbeard! Balance your features with a shorter, rounded beard shape, and a slightly longer neckbeard length. Avoid pointy or angular styles, as they’ll accentuate your face’s length. Opt for a soft, rounded edge, and you’ll be rocking the best neckbeard for your oblong face in no time!
Square Faces and Neckbeard Styles
As a square-faced individual, you’ll want to balance out your angular jawline with a softer, more rounded neckbeard style. Opt for a medium to short length to create a seamless blend with your beard. Avoid sharp angles and instead, aim for a gentle curve that follows the natural contours of your neck. This will create a harmonious, put-together look.
Trimming the Neckline
As you prepare to tackle the tricky task of trimming your neckline, remember that patience and precision are key to achieving a clean, defined look. With the right tools and a little practice, you’ll be a pro at shaping your neckbeard in no time, and your beard will thank you for it.
Identifying the Natural Neckline
As you prep for trimming, identifying your natural neckline is key. Start by tilting your head down and observing where your head creases on your neck – this is a great guideline. Consider your beard growth patterns, jawline, and hair texture to determine the perfect symmetry for your neckline. Get ready to define your unique look!
Trimming the Front of the Neckline
Trimming the front of your neckline can be a breeze with the right approach. To start, place your trimmer at the center of your neckline, just above the Adam’s apple. Work your way outwards, following the natural curve of your neck, and adjust your trimmer settings according to your beard length and desired shape.
Trimming the Sides and Back of the Neckline
Now that you’ve conquered the front of your neckline, it’s time to tackle the sides and back. This is where the magic happens, and your neckbeard transforms from scruffy to sleek. Here are some tips to help you master this tricky terrain:
- Use a trimmer with a curved blade for smooth sideburn blending.
- Employ fade techniques to seamlessly merge your beard with your hairline.
- Take your time to avoid bumps and unevenness.
- Use a comb to guide your trimmer and maintain symmetry.
- Shave in small sections to get a defined, polished line.
Mastering the Art of Neckbeard Trimming
You’ve made it to the final stretch – mastering the art of neckbeard trimming! With a little practice and patience, you’ll be a pro at shaping your neckbeard to perfection, and we’re here to guide you through the process with expert tips and tricks.
Trimming Against the Grain
When trimming your neckbeard, it’s tempting to go with the flow, but trimming against the grain is key. Cutting against the beard growth direction can lead to a closer shave, but be cautious not to irritate your skin. Use shaving cream to reduce razor burn and adjust your technique based on your hair texture to avoid discomfort.
Trimming in Multiple Passes
Now that you’re trimming against the grain, it’s time to master the art of multiple passes! Think of it as a "beard layering" technique. Trim in small sections, checking your progress in the mirror. This helps you create clean edges and helps you achieve the perfect beard length. Adjust your technique based on skin sensitivity and hair density.
Maintaining a Clean and Defined Neckline
Now that you’ve mastered trimming in multiple passes, it’s time to maintain that clean and defined neckline. To keep your neckbeard shape on point, regularly tidy up stray hairs and adjust your neckline fades as needed. Don’t be afraid to experiment with different beard lines and neckline styles – just be mindful of common trimming mistakes.
Maintaining Your Neckbeard
Now that you’ve mastered the art of neckbeard trimming, it’s time to maintain that perfectly groomed look. By regularly trimming your beard and adjusting your schedule as needed, you’ll keep your neckbeard looking its best and avoid common mistakes that can ruin an otherwise great beard.
Regular Trimming for a Healthy Beard
You’ve mastered the art of neckbeard trimming – now it’s time to keep that beard in top shape! Regular trimming is key to maintaining a healthy beard. Depending on your beard growth rate, trim every 1-4 weeks to prevent split ends and breakage. Make trimming a part of your grooming routine and your beard will thank you.
Adjusting Your Trimming Schedule
The sweet spot: finding your ideal trimming schedule! As your beard growth rate changes, so should your trimming frequency. If you’re rocking a shorter style, you may need to trim every 4-5 days, while longer beards can go 7-10 days. Don’t forget to adjust for seasonal changes and style changes – your beard will thank you!
Common Mistakes to Avoid
The perils of neckbeard trimming! To avoid a grooming catastrophe, steer clear of common mistakes. Don’t shave too low, as this can create an awkward, unnatural line. Be mindful of uneven trimming, neglecting the sides, and ignoring the chin. And, above all, don’t rush the process. Take your time to achieve a clean, defined neckline that’s the envy of all.
Advanced Neckbeard Trimming Techniques
Now that you’ve mastered the basics of neckbeard trimming, it’s time to take your skills to the next level with advanced techniques.
These techniques will help you achieve a seamless blend with your beard and a crisp, defined neckline.
In this section, you’ll learn how to use a precision blade or razor to create a more refined look.
You’ll also discover expert styling and grooming tips to keep your neckbeard looking its best.
Using a Precision Blade or Razor
Now that you’ve mastered regular trimming, it’s time to upgrade your skills with a precision blade or razor. To avoid nicks and skin irritation, make sure your blade is razor-sharp and use a rich shaving cream. Be gentle, and don’t forget post-shave care to keep your skin happy and healthy. With practice, you’ll be a pro in no time!
Creating a Seamless Blend With the Beard
The art of creating a seamless blend with your beard – it’s the ultimate goal of neckbeard trimming mastery! To achieve this, try using beard fading techniques to gradually blend your neckline change with the rest of your beard. Experiment with different blending techniques to find what works best for your beard length, aiming for a smooth, gradual fade.
Advanced Styling and Grooming Techniques
Now that you’ve mastered creating a seamless blend with your beard, it’s time to take your styling game to the next level. Experiment with beard oils, balms, and washes to find the perfect combo for your beard care routine. Don’t be afraid to mix and match products to achieve the ultimate look that’s uniquely yours.
Frequently Asked Questions (FAQs)
How do I shape my Neckbeard?
Shaping your neckbeard is an art that requires precision. Place two fingers above your Adam’s apple, then trim along that line, working outwards and using a mirror to guide you .
How to get rid of neckbeard?
Want to ditch that pesky neckbeard? Start by defining your neckline, typically two fingers above your Adam’s apple (Source). Use a quality trimmer and comb to achieve a clean trim, and consider following up with a razor for a closer shave .
How high to shave a neck beard?
When shaving your neck beard, aim for a line about two fingers (or 5 inches) above your Adam’s apple. Adjust this based on your beard style and personal taste – shorter beards might benefit from a higher line.
How to trim your neck hair?
Ready to tame that neck hair? Grab a quality beard trimmer and comb, and position the trimmer just above your Adam’s apple .
How often should I trim my neckbeard for maintenance?
To keep your neckbeard in check, trim it every 1-2 weeks, or whenever you notice stray hairs creeping in. Regular trims will maintain a clean, defined look and prevent unruly growth from taking over.
Can I use a razor to trim my entire neckbeard?
Be careful not to go overboard! Using a razor to trim your entire neckbeard can be a recipe for disaster. Instead, use it to tidy up and define the edges after trimming with a trimmer.
How do I prevent ingrown hairs after trimming my neckbeard?
To prevent ingrown hairs, shave in the direction of hair growth , exfoliate and tease out hairs , and moisturize your skin . Be gentle and patient, and consider using a trimmer instead of a razor for a closer shave .
What is the best way to trim a curly neckbeard?
To trim a curly neckbeard, start by detangling with a wide-tooth comb, then use a trimmer with a curved blade to follow the natural shape of your neck, working in small sections.
How do I fix a uneven or patchy neckbeard trim?
To fix an uneven or patchy neckbeard trim, re-trim the area carefully, following the natural neckline . Use a comb and trimmer to create a clean edge, and tidy up stray hairs with scissors or a razor (Source).
Conclusion
You’ve done it, mastered the art of neckbeard trimming and joined the ranks of the bearded elite!
With the right tools and techniques, how to trim a neckbeard is no longer a mystery.
You’ve learned to tame the unruly, define the neckline, and blend with precision.
Your newfound skills will leave you looking dapper and feeling confident.

