This site is supported by our readers. We may earn a commission, at no cost to you, if you purchase through links. This content is for general informational and educational purposes only and is not a substitute for professional medical, dermatological, or nutritional advice.

Somewhere between ancient Ayurvedic tradition and your bathroom cabinet sits one of the most underrated remedies for thinning hair—and it smells terrible.
Onion juice has been quietly delivering results for people dealing with hair loss long before scalp serums came in sleek bottles with triple‑digit price tags.
The sulfur compounds and quercetin packed inside a single red onion do something those fancy formulas often can’t: they feed your follicles at the root level, boosting circulation and slowing shedding in ways researchers have actually documented in clinical settings.
If you’re ready to give your hair growth routine a serious upgrade—odor and all—here’s exactly how to use onion juice for hair growth, step by step.
Table Of Contents
- Key Takeaways
- Choose Onions and Tools
- Make Fresh Onion Juice
- Apply Onion Juice Correctly
- Leave, Rinse, and Shampoo
- Improve Results With Mixes
- Follow a Safe Growth Routine
- Frequently Asked Questions (FAQs)
- Can I wash my hair only with water after applying onion juice?
- How to use onion juice for hair growth?
- How long does onion juice take to grow hair?
- How to use onion juice as a hair rinse?
- Does onion juice reduce hair fall?
- Is onion juice beneficial for hair follicles?
- Does onion help in hair growth?
- How long does onion juice take to regrow hair?
- What are the disadvantages of onion juice on hair?
- What is the best way to use onions for hair growth?
- Conclusion
Key Takeaways
- Sulfur compounds and quercetin in red onion juice feed your follicles at the root level, with clinical studies showing up to 86.9% of participants experiencing regrowth within six weeks of consistent use.
- Applying fresh juice to a dry scalp two to three times weekly, massaging for five to ten minutes, and leaving it on for thirty minutes before rinsing gives you the best shot at real results without overdoing it.
- Mixing onion juice with castor oil, coconut oil, or a splash of lemon juice can boost absorption, reduce irritation, and seriously cut down that lingering sulfur smell.
- Always patch test first, store fresh juice in an airtight container for no more than three to five days (or freeze it for up to a month), and track monthly progress photos so you can actually see what’s working.
Choose Onions and Tools
Before you make a single drop of onion juice, let’s talk gear. You don’t need anything fancy, just a few basics that actually work. Here’s what to grab before you get started.
Organic Red Onions
Onions are the star here, so don’t grab just any bag from the discount bin! Go for organic red onions — they skip sketchy pesticides and have richer anthocyanin pigments (that deep purple‑red color), plus a stronger antioxidant punch for onion juice for hair growth.
Their rich sulfur compounds and antioxidants make red onions especially effective, as this onion juice for hair growth guide explains in detail.
Pick firm bulbs with dry, papery skin, no soft spots, and store them cool and dry until you’re ready to make onion juice for hair.
Rich in vitamin C promotes scalp health.
Blender or Food Processor
Got your onions? Good. Now grab a strong blender instead of a grater — it pulls everything into a smooth, juicy mess fast.
- thick, milky pulp
- foamy pink swirl
- silky liquid pool
Higher wattage (over 600) beats low-power processors for texture control. Processor blades chop; blender blades blend. Strain the pulp through cloth for pure onion juice. Rinse parts immediately—dried onion residue clings stubbornly!
Reusable Cotton Nut Milk Bag

Now you’ve got that silky onion mess — time to separate juice from pulp. A reusable cotton nut milk bag does this better than cheesecloth, honestly.
The tight weave (think finer than grade-90 cheesecloth) catches pulp while letting pure juice flow through, with no gritty bits in your bottle.
Look for one with a drawstring closure, so you can squeeze every last drop without a mess.
Bonus: it’s washable and reusable, so you’re not buying cheesecloth every single week!
- Tight 66×70 weave strains out pulp more effectively than standard cheesecloth, leaving juice and milk smooth and grit-free
- Double-stitched seams and a built-in drawstring make straining, squeezing, and hanging secure and mess-free
- Fully washable and reusable, so it pays for itself compared to buying cheesecloth over and over
- The fine mesh can slow down straining and may require extra squeezing to push liquid through
- Very fine particles, like coffee grounds, can still get trapped in the tight weave
- Needs hand washing and thorough drying each time to avoid mildew and keep it performing well
Airtight Storage Bottle
Once strained, your juice needs a safe home. Grab a squeeze bottle or airtight container with strong seal integrity, food-grade silicone for material safety, and built-in odor prevention. Refrigerate fast—storage life of fresh extracts runs 3–5 days, for best onion juice results.
| Feature | Detail |
|---|---|
| Cleaning Methods | Dishwasher safe |
| Size Options | 250ml–1000ml |
| Seal Integrity | Blocks air leaks |
| Material Safety | BPA-free, glass |
Make Fresh Onion Juice

Okay, you’ve got your onions and your tools ready, so now comes the fun part. Making the juice itself is quick, only four real steps, and you’ll have it done in about ten minutes. Here’s exactly how to go from whole onion to bottled juice, start to finish.
Once your onion juice is ready, try layering it into your routine with a simple DIY hair mask for frizz — sectioning your hair first ensures even coverage and a quick scalp massage helps everything absorb better.
Peel and Chop Onions
Ready to chop without the tears? Cut off one end first so your onion sits flat and steady (no wobbling!).
Use claw grip for safety, keep the root intact, and slice cut-side down to cut fume exposure.
Even pieces blend more smoothly, giving you the strongest onion juice for real natural hair growth results.
Blend Until Smooth
Now toss those chunks into your blender and let’s get this party blending!
Start on low speed, so everything moves evenly, then bump it up gradually. Watch for a vortex—that swirl pulls pieces down to the blades, so nothing’s just floating there, being lazy. Pulse if chunks get stubborn.
You’re aiming for smooth, pourable onion juice, no gritty bits, ready for straining next.
Strain Out Pulp
Pour that blended mush through a nut milk bag set over a bowl—cheesecloth or a fine strainer works too. Squeeze gently, don’t shred, to coax out every drop while pulp stays trapped behind. Let it settle a minute so heavy bits sink, then pour off the clear top layer.
This keeps your bottle from clogging and cuts down odor residue later.
Refrigerate Immediately
Don’t let that fresh juice just sit on the counter—get it into the fridge right away. Room temp is a danger zone for bacterial growth, so cold storage preservation starts the moment you’re done straining.
Pour into your airtight bottle, seal tight, and chill at or below 40°F. This simple habit keeps your onion juice safe, potent, and ready for real hair growth results.
Apply Onion Juice Correctly
Getting the juice onto your scalp the right way makes all the difference — this isn’t just pour-and-go. How you apply it, what you use, and where you focus actually shapes whether you’ll see results. Here’s exactly how to do it step by step.
Start With Dry Scalp

Before you apply onion juice, make sure your scalp is completely dry. Wet or damp skin actually blocks absorption, so the juice slides off instead of soaking in.
Dry scalp also absorbs active compounds better, letting sulfur and quercetin reach your follicles where they matter most.
Use Bottle or Cotton
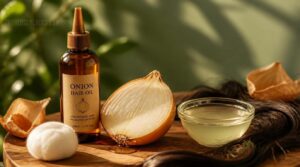
Your two best tools here are a squeeze bottle and a cotton ball — and each has its place. A squeeze bottle gives you control, letting you direct onion juice in clean lines along your part or hairline without drips.
Cotton is your go-to for spot treatment, dabbing juice precisely onto thinning patches at the temples or crown.
Massage Five to Ten Minutes

Once the juice is on, use your fingertips — not nails — and work in small circular motions across your scalp. This gentle pressure boosts local blood flow, helping nutrients reach your hair follicles.
It also feels surprisingly relaxing. Keep going for five to ten minutes, moving steadily so the juice spreads without pooling in one spot.
Cover Thinning Areas Evenly
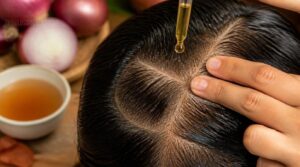
Here’s where sectioning saves you. Split your scalp using natural part lines, then treat each zone with onion juice before moving on—no skipping, no double-dipping. Use light, even pressure so you saturate without pooling or dripping down your neck.
Check your part lines under bright light; dry streaks mean you missed a spot. Even coverage means stronger hair follicle stimulation across every thinning patch, not just the center.
Leave, Rinse, and Shampoo

Okay, your scalp’s covered in onion juice, now what? This part’s just as important as the application itself, so don’t rush it. Here’s exactly how long to wait, how to rinse, and how to get that smell out for good.
Leave for Thirty Minutes
Once you’ve worked the onion juice in, set a timer for 30 minutes — that’s your sweet spot for letting the hair mask do its job without pushing your luck. Pop on a shower cap to keep drips contained and the scent somewhat tamed. Watch for:
- Stinging or burning (rinse early!)
- Excess heat under the cap
- Itching that feels off
Trust your scalp here, friend.
Rinse With Lukewarm Water
Timer’s done? Time to rinse, and lukewarm water is your best friend here — not hot, not cold.
Hot water irritates an already-sensitive scalp, while icy water just won’t clear onion juice residue properly. Aim for water that feels comfortably warm on your wrist.
Run your fingers through gently, letting the water carry away the juice until your scalp feels clean, not stripped or stinging.
Use Mild Shampoo
Grab a mild shampoo now, not whatever’s sitting in your shower. Your scalp just worked hard soaking up that onion juice, so it deserves gentle care, not a harsh strip-down. Look for three things:
- Sulfate-free formulas
- pH-balanced labels
- Gentle surfactants, like cocamidopropyl betaine
These choices protect scalp hydration, minimize irritation, and keep your hair growth routine moving forward.
Double Wash for Odor
Since onion juice clings stubbornly, rinse once, then repeat for odor-prone, oily zones like your crown and hairline.
| Wash | Technique |
|---|---|
| First | Full rinse, removes loose residue |
| Second | Brief contact time, lukewarm rinse, lifts leftover film |
Lukewarm water dissolves oils without drying. Finish with lemon-rinse scent-masking for fresher hair growth results.
Improve Results With Mixes
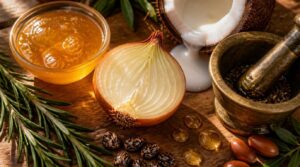
Onion juice works great on its own, but pairing it with the right ingredients can speed things up even more. Each mix brings something different to the table, whether you need extra moisture, more strength, or just a better smell. Here are a few combos worth trying.
Onion Juice and Coconut Oil
Onion juice alone can feel a little harsh on dry scalps, so pairing it with coconut oil softens the whole experience. Coconut oil works as an emollient barrier, sealing in moisture and easing flakiness while the onion juice does its sulfur magic underneath.
To mix them right:
- Warm the coconut oil slightly for easier blending.
- Combine equal parts onion juice and coconut oil.
- Apply gently to scalp and hair.
- Shampoo thoroughly afterward to manage oily residue.
Onion Juice and Castor Oil
Want your onion juice to actually stick around instead of dripping down your neck? Mix it with castor oil.
That thick texture slows evaporation and boosts scalp contact time, so the sulfur compounds soak in deeper.
Try one tablespoon castor oil to one or two tablespoons onion juice. It’s sticky, sure, but your scalp (and your hair growth goals) will thank you.
Rosemary or Amla Oil
Why stop at onion juice when rosemary or amla oil can boost your hair growth game?
Rosemary’s potent, so essential oil dilution matters—mix a few drops with a carrier, never apply it straight.
Amla oil benefits scalp health naturally; no dilution required.
Use gentle scalp massage techniques, then honor rosemary leave time (hours, not minutes).
Patch test safety first; your natural hair remedy should feel invigorating, never risky.
Honey or Flaxseed Gel
Got dry, brittle strands? Mix raw honey or flaxseed gel right into your onion juice for a softer hair growth mask. Honey’s hygroscopic, locking in moisture while fighting bacteria. Flaxseed gel adds slip and thickness, easing that thin, watery texture.
Patch test first (flaxseed allergies happen!), and only mix small batches—this DIY hair care combo spoils fast, so use it within a day or two.
Lemon Juice for Odor
Let’s talk about that onion smell, because it’s real. Mix in lemon juice using a 3:2 onion-to-lemon ratio.
Citric acid pH drops, protonating smelly amines, so they stop floating into the air. Lemon’s limonene terpene volatiles also help with odor source binding on your scalp.
This easy scentmasking technique works, but rinse well after, since scalp acidity safety still matters.
Follow a Safe Growth Routine

Okay, you’ve got the juice, the mixes, and the technique down—now let’s make this routine actually stick. Going in smart from day one means fewer surprises and faster, safer progress. Here are the five ground rules I want you to keep close as you get started.
Patch Test Before Use
Before your scalp meets a single drop, give your skin a heads-up first. Dab juice on your inner elbow, wait 24 hours, and watch for:
- Redness
- Itching
- Burning
This quick patch test catches allergic reactions and aspirin-related sensitivity early, sparing you scalp irritation later. Smart, not scared.
Use Two to Three Weekly
Once your patch test gives the green light, two to three times weekly is your sweet spot. Not daily — your scalp needs those rest days to recover between sessions. Space applications every two to four days, and you’ll keep irritation low while still building real momentum. If any burning or itching shows up, drop to twice weekly.
| Schedule | Applications/Week | Best For |
|---|---|---|
| Light routine | 2x weekly | Sensitive scalps |
| Standard routine | 3x weekly | General hair loss |
| Maintenance | 1–2x weekly | After visible regrowth |
Consistency beats frequency — every time.
Showing up regularly matters more than showing up often
Track Results for Months
Consistency is doing the work — but tracking is how you know it’s working.
Take monthly progress photos in the same spot, same lighting, same distance, every single time. Measure scalp visibility in your thinning areas with a ruler. Log your daily shedding count after combing. Note any new baby hairs appearing. Your data tells the real story.
Avoid Irritated Scalp
Even the best routine needs a pause button. If you notice redness, burning, or itching during or after application, stop immediately — don’t push through it.
Always do a patch test on your inner elbow first, and wait 24 hours before applying to your scalp.
If you take aspirin regularly, know that it can increase skin sensitivity to onion juice.
Store Three to Five Days
Fresh onion juice doesn’t last long, so refrigerate immediately after straining — it stays potent for three to five days. Always use an airtight container to block oxygen, lock in freshness, and contain that strong sulfur smell.
Watch for these signs it’s time to toss it:
- A sour or "off" odor
- Unusual foam or separation
- Noticeably worse cloudiness
Freeze in ice cube trays to stretch usability up to one month.
Frequently Asked Questions (FAQs)
Can I wash my hair only with water after applying onion juice?
Think rinsing veggies under the tap, looking clean but still gritty? Same with onion juice. Water-only rinsing leaves sulfur residue and odor behind. Always follow with a mild shampoo, that’s your real protection against irritation and lingering smell.
How to use onion juice for hair growth?
Apply fresh onion juice directly to your scalp two to three times weekly, massage for five to ten minutes, leave for thirty minutes, then rinse with lukewarm water and a mild shampoo.
How long does onion juice take to grow hair?
Most people notice early hair regrowth signs around four to six weeks with consistent daily use. Roughly 87 percent of participants in one study showed regrowth at six weeks.
How to use onion juice as a hair rinse?
To use onion juice as a hair rinse, apply it directly to your scalp, massage gently, leave for 30 minutes, then rinse with lukewarm water and a mild shampoo.
Does onion juice reduce hair fall?
Yes, it can. Onion juice for hair fall works through sulfur, which feeds keratin production, calms scalp inflammation, and boosts follicle circulation — with 9% of participants showing regrowth in clinical observation.
Is onion juice beneficial for hair follicles?
Onion juice does support hair follicle health — its sulfur aids keratin synthesis, flavonoids offer antioxidant protection, and improved blood circulation helps keep follicles nourished and less inflamed.
Does onion help in hair growth?
There’s real science behind this. Sulfur in onion juice feeds amino acid metabolism, which your body needs to build keratin — the very protein your hair is made of, from root to tip.
How long does onion juice take to regrow hair?
Most people notice early regrowth signs within two to four weeks of consistent use. By six weeks, studies show up to 9% regrowth — with men responding faster than women overall.
What are the disadvantages of onion juice on hair?
It works — and it bites back. Onion juice can cause scalp irritation, redness, itching, and even increased shedding if overused. The strong sulfur odor lingers, and those with onion allergies risk serious reactions.
What is the best way to use onions for hair growth?
The best approach is applying fresh onion juice directly to your scalp, massaging it in for 5–10 minutes, leaving it 30 minutes, then rinsing thoroughly — done two to three times weekly for consistent results.
Conclusion
Like a garden that rewards patient, consistent watering, your hair responds best when you simply show up for it regularly.
Now that you know exactly how to use onion juice for hair growth, the hard part is already behind you—the method is straightforward, the ingredients are affordable, and the results genuinely speak for themselves.
Commit to two or three sessions each week, track your progress, and let your hardworking follicles do all the rest.