This site is supported by our readers. We may earn a commission, at no cost to you, if you purchase through links.

A single millimeter can turn a sharp fade into a patchy disaster. That’s the reality every barber faces when clippers meet scalp—precision separates professional work from amateur mistakes.
Most people think fades are about blending, but they’re really about control: knowing which guard to use, where to start your guideline, and how to read the natural patterns in someone’s hair before you make the first pass.
Professional fade styling techniques demand more than steady hands. You need the right tools, a systematic approach to blending, and the ability to adjust your method for different textures without second-guessing every stroke. Master these fundamentals, and you’ll deliver consistent results that keep clients coming back.
Table Of Contents
- Key Takeaways
- Essential Tools for Professional Fade Styling
- Preparing Hair for a Perfect Fade
- Step-by-Step Fade Styling Techniques
- Customizing Fades for Different Hair Types
- Maintaining and Styling Your Fade
- Frequently Asked Questions (FAQs)
- What is the best fading technique?
- Can a fade look professional?
- What is the 3 2 1 buzzcut rule?
- How do you fade thick versus thin hair differently?
- What causes uneven fading on one side only?
- Can you fade hair thats been chemically treated?
- How do barbers blend multiple fade heights together?
- Whats the best clipper maintenance schedule for professionals?
- Conclusion
Key Takeaways
- Professional fades depend on precision tooling—magnetic guards, adjustable clippers, convex edge shears, and carbon fiber combs—maintained through daily oiling, post-client sanitization, and six-month blade sharpening to guarantee consistent cuts across all textures.
- Creating clean fades requires systematic progression from establishing a baseline guideline at the occipital bone through quarter-inch guard increments and clipper-over-comb blending, then finishing with zero-guard detailing that follows natural hairline irregularities instead of forcing straight edges.
- Hair texture dictates your approach—straight hair needs careful blending with higher guards, wavy hair requires mid-range guards to preserve natural movement, and curly hair demands lower guards near the crown with pre-cut moisture to manage frizz and curl patterns effectively.
- Fade maintenance cycles every two to four weeks with daily brushing, sulfate-free washing, and strategic product selection based on hair porosity—water-based formulas for low porosity and oil-based options for high porosity—while avoiding over-wetting and excessive oil application that compromises hold.
Essential Tools for Professional Fade Styling
A professional fade starts with the right equipment in your hands. You can’t create clean transitions and sharp lines without quality tools built for precision work.
The right fade haircut styling products help you maintain that crisp look between barber visits.
Let’s break down the clippers, shears, combs, and products that every serious stylist keeps within reach.
Clippers and Guard Attachments
Your professional-grade clippers are the engine of every fade you create. Choose models with adjustable blades and reliable motors for consistent power. Guard attachments control cutting length and bluntness, so understanding guard sizes is essential to mastering fade techniques.
- Magnetic guards swap quickly between passes and fit multiple clipper models
- Guard sizes from zero to eight create different fade heights and transitions
- Clean guards after each client to maintain clipper safety and blade performance
- Inspect attachments for cracks or warping that compromise haircut maintenance and care
For more details on the, consult thorough guides used by both professionals and home users.
Scissors and Blending Shears
Once your guards are set, reach for styling scissors and blending shears—these hair cutting tools perfect the haircut’s final look.
Shear selection matters: convex edge blades offer sharper cuts and longer edge life. Use texturing shears for hair blending between clipper lines and edge refining around the crown.
Proper blade maintenance keeps cutting techniques smooth, so clean and oil your shears after each session.
Combs, Brushes, and Mirrors
Your shears won’t finish the job alone—you’ll need a quality widetooth comb for lifting sections and a barbers comb for precise blending.
Round brushes smooth hair during blow-drying, while carbon fiber combs resist heat without warping.
A handheld mirror lets you check the back, and ergonomic grips reduce wrist strain during long sessions. Sanitation methods matter: wipe down each tool between clients.
Recommended Styling Products
Your tools won’t mean much without the right styling products backing them up. Once you’ve sectioned and shaped that fade, you’ll need formulas that deliver hold without stiffness or shine overload.
- Matte clay and texture pastes add separation and definition to short layers
- Pomades provide sleek control for polished, reflective finishes
- Styling creams offer flexible hold that keeps natural movement intact
- Hair serums smooth frizz along the hairline without weighing down short fades
Identifying your hair type is important—learn more about to improve your fade’s look and health.
Understanding how to trim a beard to look professional can help you maintain clean lines that complement your fade and enhance your overall style.
Preparing Hair for a Perfect Fade

Proper preparation sets the foundation for every successful fade. Before you even pick up your clippers, you need to get the hair in the right condition to work with.
Here’s how to prep your client’s hair for clean lines and flawless transitions.
Washing and Drying Techniques
Proper hair preparation sets the stage for a smooth fade. Start with warm water to open cuticles and lift residue, then apply a sulfate-free shampoo. Rinse with cool water to seal cuticles and boost shine. Pat dry with a microfiber towel to reduce frizz.
For scalp care and ideal hair porosity, control water temperature and choose drying methods that protect your client’s hair texture before styling techniques begin.
| Step | Key Action |
|---|---|
| Wash | Use warm water and gentle shampoo |
| Rinse | Switch to cool water for cuticle closure |
| Dry | Pat with microfiber towel, avoid rubbing |
| Prep | Apply heat protectant before blow drying |
Sectioning and Detangling
Clean divisions make all the difference. Use a tail comb to map four to six horizontal and vertical sections around the head, creating precise guide lines for your fade foundations. Detangle damp hair with a wide-tooth comb or flexible-bristle brush to prevent snagging and reveal scalp geometry before clippers touch skin.
- Divide hair into even sections using parting tools for symmetry and weight control
- Detangle before cutting to minimize breakage on coarse or curly textures
- Assess natural growth direction at the crown to inform sectioning patterns
- Use clips to hold parts securely without leaving crease lines
- Map parietal and occipital zones for precise taper fade styling techniques
Assessing Hair Texture and Growth Patterns
Hair Texture Analysis starts before the first cut. Measure strand diameter to classify fine, medium, or thick textures—fine averages 0.04 millimeters, thick exceeds 0.08.
Growth Pattern Mapping reveals cowlicks and whorls that affect blend lines. Check Curl Classification and Scalp Density Assessment to choose guards correctly.
Follicle Angle Evaluation shows how quickly regrowth shadows appear, guiding your fade strategy.
Step-by-Step Fade Styling Techniques
Now that your hair is prepped and ready, it’s time to execute the fade with precision.
The techniques that follow build on what you’ve already established in your prep work.
Each step requires focus, control, and a clear understanding of how to create fluid transitions from skin to length.
Creating Clean Guidelines

Every precise fade haircut starts with a rock-solid guideline. Before you touch the hair texture, map the hairline and visualize the fade geometry you’re building.
Choose your starting guard—usually a #2 or #3—and establish your baseline around the occipital bone. Keep your clipper techniques steady. Edge control determines the entire structure. This guideline becomes the anchor for all your taper fade styling techniques and edge definition work.
Blending and Transition Methods

Blending transforms your guideline into a cohesive taper fade styling techniques showcase. You’ll move between guards in quarter-inch increments, adjusting the clipper lever from closed to open for half-step transitions that erase harsh lines across transition zones.
- Work clipper over comb along the parietal ridge where the head curves to prevent shelves in your fade blending
- Target dark spots with focused passes using a higher guard and light pressure instead of recutting entire sections
- Use blending shears on dry hair texture to soften any remaining lines your clippers couldn’t eliminate
Each pass refines the blend point between fade transitions.
Detailing Edges and Hairlines

Once you’ve nailed your blend, Edge Control and Hairline Design separate pros from amateurs. Use a zero-guard or no guard to sharpen the temple and nape with light, sweeping strokes—Detailing Techniques that prevent overcutting.
Follow your natural hairline’s slight irregularities; perfectly straight edges scream amateur. A dry tissue cleans stray hairs, boosting Fade Precision. These taper fade styling techniques deliver crisp, professional edges every trim.
Troubleshooting Common Mistakes

Even sharp edges won’t save a fade if Error Analysis reveals these common fade styling mistakes. Spot Fault Detection early with Diagnostic Tools and apply Correction Techniques fast:
- Making multiple guard changes at once hides the real problem and ruins your blend
- Skipping line checks between passes lets uneven spots slip through
- Forgetting to document what worked costs you next time
Mistake Prevention beats rework every session.
Customizing Fades for Different Hair Types

Not every head of hair responds the same way to a fade. Your clippers might glide smoothly through straight hair, then hit resistance the moment you work on thick curls.
Understanding these differences helps you adapt your technique so every client walks out with a clean, balanced fade that actually suits them.
Adjusting for Straight, Wavy, and Curly Hair
Hair Texture Analysis starts with understanding how each strand behaves. Straight hair shows crisp lines with higher guards, so you’ll blend more carefully.
Wavy hair needs mid-range guards to preserve natural texture—curl pattern management matters here. For curly hair, use lower guards near the crown and apply frizz control methods through light moisture before cutting.
These fade customization strategies guarantee flawless taper fade styling techniques across all hair types.
Face Shape and Fade Placement
Once you understand texture, match the fade haircut to face shape for facial symmetry. Oval faces balance well with a mid fade that keeps Face Proportions natural.
Square jaws need Hairline Framing through higher clipper guards for Jawline Enhancement. Round faces work best when you start the blend point near Temple Alignment to add visual length.
Always check the hairline before choosing your fade placement.
Popular Fade Variations (Low, Mid, High, Skin, Burst)
After placing the fade for face shapes, choose your variation. Each offers distinct contrast and upkeep demands.
- Low fade sits just above the ears, blending hair texture subtly for everyday clients.
- Mid fade reaches the temples, balancing scalp health with crisp styling products appeal.
- High fade starts near the crown, creating bold separation.
- Skin fade and burst demand precision fade techniques for maximum impact.
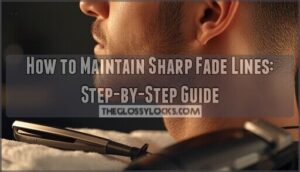
Maintaining and Styling Your Fade

A sharp fade doesn’t maintain itself. Once you’ve tailored the cut to work with your client’s hair type and face shape, the real work begins with daily upkeep and smart product choices.
Let’s cover the routines, products, timing, and mistakes that separate a fresh fade from one that’s lost its edge.
Daily Styling Routines
Your daily hair care routine starts the moment you wake up. Refresh your fade with light brushing every 2 to 3 hours for daily maintenance and fade preservation.
Work styling products through towel-dried hair using a comb for even coverage. Morning prep focuses on hair texturizing and establishing clean edges.
Air dry 5 to 15 minutes before heat styling techniques to protect your gradient.
Product Selection for Hold and Texture
Select styling products based on your client’s hair texture and desired finish. Fine hair needs light to medium hold formulas to preserve volume. Thick or coarse strands require stronger styling cream for sharp fade transitions.
Match texture products to hair porosity—water-based options suit low porosity, while oil-based formulas penetrate high porosity better. Product compatibility with hold levels determines your end result.
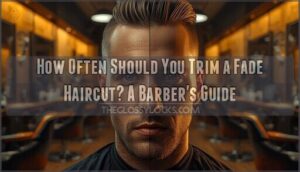
Touch-Up Frequency and At-Home Care
Most clients need touch ups every two to four weeks to keep fade haircut maintenance sharp. Hair regrowth shows faster on shorter fades, so regular trims matter.
Between visits, use gentle sulfate-free shampoo and apply light scalp hydration oils to prevent dryness. Brush daily to train the top section. These at home tips extend your fade’s crisp look and reduce corrective blending later.
Avoiding Common Styling Errors
Over-wetting hair before styling is a common fade haircut styling guide mistake that causes products to slide off and lose hold. Avoid oil-based styling product daily—it weighs down shorter sides and attracts dirt.
For error prevention and regrowth management, never skip scalp prep or rush blending passes. These hair styling techniques and hair cutting tools prevent fade correction later and reduce hair damage from repeated rework.
Frequently Asked Questions (FAQs)
What is the best fading technique?
The best fade haircut technique depends on hair texture and blade selection.
Graduate fading with multiple guards creates smooth transitions, while zero gap blending removes visible steps for a flawless taper fade.
Can a fade look professional?
Absolutely. A fade haircut delivers a professional appearance when you execute clean guidelines, maintain sharp hairlines, and use proper blending techniques.
Precision barber skills and regular hair maintenance guarantee the fade stays polished for any setting.
What is the 3 2 1 buzzcut rule?
The 3 2 1 buzzcut rule uses clipper guards at three millimeters on the crown, two millimeters on the sides, and one millimeter on the back—creating a gradual fade haircut with smooth transitions between lengths.
How do you fade thick versus thin hair differently?
Thick hair demands higher guards and deliberate texturizing to prevent bulky transitions, while thin hair needs lower guards with gentle passes to preserve fullness and avoid exposing scalp through over-blending.
What causes uneven fading on one side only?
Uneven tension during clipper passes is the most common culprit.
Hair growth patterns, tool alignment issues, and scalp conditions like uneven oil production also create one-sided fade irregularities that disrupt your blending work.
Can you fade hair thats been chemically treated?
Yes, you can fade chemically treated hair with adjusted techniques. Use gentler clipper passes, larger guards initially, and protective products to prevent breakage.
Chemical treatment increases hair porosity, requiring careful fade repair tips and damaged hair restoration methods.
How do barbers blend multiple fade heights together?
Barbers use successive guard sizes and tilted clippers to create smooth fade transitions.
Blending techniques include feathering passes, clipper-over-comb work, and adjusting pressure based on hair texture for flawless gradient styling.
Whats the best clipper maintenance schedule for professionals?
Oil your clipper blades after every haircut, sanitize between clients, and schedule blade sharpening every six months.
Daily brushing and weekly tension checks keep your tools sharp and your fades crisp.
Conclusion
A client walks in asking for a mid fade—hair thick, cowlick at the crown, round face shape. You assess the texture, pick your starting guard, establish your guideline, and blend upward with controlled passes.
Thirty minutes later, he’s checking every angle in the mirror, nodding with satisfaction. That’s what professional fade styling techniques deliver: repeatable precision built on proper tools, systematic methods, and adaptive skills. Master the fundamentals, and every fade becomes second nature.