This site is supported by our readers. We may earn a commission, at no cost to you, if you purchase through links. This content is for general informational and educational purposes only and is not a substitute for professional medical, dermatological, or nutritional advice.
Two clients can sit in the same chair, both wanting "sun-kissed brown," and walk out with completely different results. Same formula, same developer, wildly different outcomes. The variable isn’t luck. It’s porosity, undertone, and how well the colorist reads what’s already happening on the strand before mixing a single ounce.
That’s the gap between a colorist who follows steps and one who understands professional hair color blending techniques. Formulas don’t fail on their own, they fail when applied without accounting for what the hair brings to the table.
Get the groundwork right and blending stops feeling like guesswork. What follows breaks down exactly how pros plan, mix, and apply color that holds its dimension instead of turning muddy by week three.
Table Of Contents
- Key Takeaways
- Plan a Professional Hair Color Blend
- Formulate and Mix Blended Hair Colors
- Apply Professional Hair Color Blending Techniques
- Correct Uneven Color and Unwanted Tones
- Maintain Blended Hair Color Longer
- Frequently Asked Questions (FAQs)
- What are the pros/cons of blending gray?
- What is a hair color blending technique?
- What are the advanced hair coloring techniques?
- How to blend two hair colors together?
- Whats the difference between cool and warm undertones?
- Can you mix brands of professional hair color safely?
- How long should you wait between bleaching sessions?
- How much does professional color blending typically cost?
- How long does a full blending appointment usually take?
- What certifications should a colorist have for advanced blending?
- Conclusion
Key Takeaways
- Before you mix a single formula, you’ll need to check porosity, undertone, and natural level, since skipping this groundwork is what turns a good formula into a muddy, patchy result.
- Your mixing ratio should match your goal: lean 70/30 for lift-heavy brightening, 60/40 to balance tone and lift, or 50/50 when deposit and coverage matter most.
- Techniques like balayage, foilyage, root smudging, and color melting each demand different placement and timing, but layered together, they’re what create that seamless, sun-kissed dimension clients want.
- Nearly 70% of color correction visits trace back to skipped porosity checks, proving that lasting results come from careful prep and aftercare, not just a better formula.
Plan a Professional Hair Color Blend
Every smooth color shift starts long before dye touches a single strand. Skipping the planning stage is how muddy tones and patchy results happen, even with the right formula in hand. Here’s what you’ll need to check off before mixing anything.
Start by checking your hair’s current condition and porosity, since knowing how to fix hair that’s already dyed unevenly beforehand helps you spot warning signs before they turn into a bigger fix later.
Assess Hair Porosity and Condition
Porosity dictates pigment absorption, so start every mix with a porosity float test before touching formula. Sinking strands mean high porosity and fast uptake; floating means low porosity and resistance.
- Check cuticle condition for raised, damaged scales
- Test water absorption rate on clean strands
- Note scalp health indicators affecting overall results
Skipping this step invites uneven, patchy color you’ll spend weeks correcting. Combining the float test with a strand and spray bottle test gives a more accurate porosity reading before formulating.
Identify Natural Level and Undertone
With porosity mapped, turn to what’s underneath: your natural level and undertone. Check regrowth at the natural hair growout for true base tone, then confirm undertone using the wrist-vein or white-fabric test, blue veins mean cool, green means warm.
This undertone analysis during consultation prevents muddy results before you ever open the color wheel for shade matching.
Map Shades Using Color Theory
Once your undertone’s confirmed, the color wheel becomes your prediction tool. Warm bases pull toward analogous golds; cool bases favor complementary schemes for neutralization.
- Identify hue family
- Check saturation levels
- Map value placement
- Pair complementary colors
- Confirm with analogous shades
This mapping prevents muddy blends before mixing even starts.
Perform Allergy and Strand Tests
Before mixing a single formula, run a patch test 48 hours out, small amount behind the ear, watching for redness, itching, or swelling.
Skip this and you’re gambling with anaphylactic risk. Pair it with a strand test on a cut clipping to confirm pigment absorption and predict your actual outcome before committing the whole head.
Choose Formula and Developer Strength
Once your strand test confirms how the hair reacts, you’ll need to lock in developer volume based on your target lift. Higher porosity strands grab pigment fast, so 10 volume often deposits enough without overprocessing.
For blending work, matching color family to natural undertone keeps your mixing ratios predictable and your final formula true to shade.
If you’re unsure where to start, this guide to choosing the best hair dye for men breaks down undertone matching so your color stays believable.
Formulate and Mix Blended Hair Colors

Once you’ve assessed the hair and mapped out your shade strategy, it’s time to turn that plan into an actual formula. This is where color theory meets math, and precision determines whether your mix reads smooth or splotchy. Here’s what you’ll need to nail down before you ever pick up a brush.
If your formula work is part of a broader styling routine, check out this guide on achieving perfect 180 waves for tips on pairing your color with the right finish.
Select Compatible Color Shades
Great blends start on the color wheel, not the bottle. Match warm undertones to golden or honey shades, pair cool undertones with ash tones, and let neutral bases work easygoing beige-caramel combos.
Factor in skin tone depth and natural level before committing, then use complementary colors or analogous neighbors to guide compatibility and set up smooth color melting later.
Set Ratios Based on Goals
Every formula starts with a question: are you lifting or depositing? That single call drives your mixing ratios.
A 70/30 lift-heavy mix brightens with warmth; 60/40 balances tone and lift; 50/50 favors deposit for smooth coverage.
Goal-oriented formulation means picking developer volume to match, not the other way around.
Predict Lift and Deposit Results
Before you ever pick up a brush, run the math in your head: lift potential assessment plus porosity impact analysis tells you where pigment will grab fastest.
Higher porosity lifts and deposits quicker, so calibrate processing time accordingly. Developer volume selection determines your ceiling, while undertone preservation strategy keeps mixing ratios honest against pigment deposit and final tone.
Choose Permanent, Demi, or Semi
Commitment level drives this choice. Permanent delivers full gray coverage and lasts until regrowth, ideal for dramatic shifts. Demi deposits pigment for 24-28 washes, no full lift, gentler upkeep. Semi skips developer entirely, fading in 4-12 washes based on porosity.
Match formula longevity to client goals, then let developer volume and color compatibility guide your final formulation decision.
Restore Undertones With Color Fillers
Skipping fillers invites muddy results. Undertone restoration deposits missing warmth or coolness before your target shade goes on, preventing that flat, murky outcome clients hate.
Golden fillers fix ash drift; violet fillers tame brass. Multidimensional fillers target roots to ends separately, especially useful when porosity varies or color melting’s involved. Match filler application to porosity and undertone goals, and pair with bond repair for compatible, lasting results.
Apply Professional Hair Color Blending Techniques
Once your formula’s mixed and ready, application becomes the real test of your skill. Every technique here demands a different hand movement, timing, and placement strategy, so precision matters as much as product choice.
Here’s how you’ll put these five methods to work, from soft-edged balayage to smooth gray blending.
Create Soft Balayage Transitions
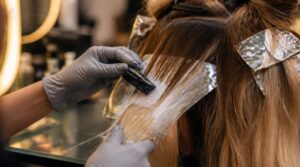
Painting soft balayage means working freehand, sweeping lighter tones from mid-lengths to ends while roots stay darker for natural regrowth. Diagonal sectioning mimics growth patterns, keeping edges feathered rather than blocky.
You’ll build gradual lift in thin, irregular strokes, avoiding harsh lines. Once processed, tone immediately to neutralize brass and mix undertones, locking in that soft, sun-kissed effect clients want.
Boost Dimension With Foilyage
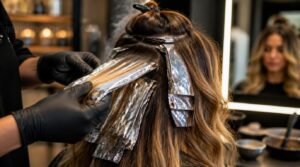
When soft balayage isn’t enough dimension, foilyage steps it up by wrapping painted sections in foil. Foil tension control matters here, trapping heat for faster lift while keeping placement precise.
Run a strand test first, then match developer volume selection (20-30 vol) to your target. Use face-framing placement at the crown for maximum hair color dimension.
Blur Roots With Smudging
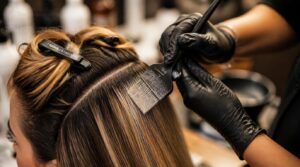
Once foils come off, that hard root line still needs softening. This is where root smudging earns its keep, feathering demi-permanent color within 1-2 cm of the scalp for true edge diffusion.
Working the scalp color melt requires:
- Section root panels precisely
- Apply demipermanent blur with a soft brush
- Feather pigment outward gently
- Check tone against demitones
The result: low-maintenance, blended regrowth.
Graduate Shades Through Color Melting
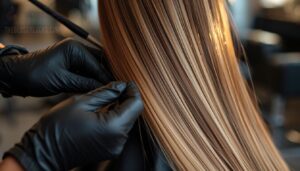
With regrowth blurred, you’ll graduate the rest through color melting, layering warm midtones into cooler ends for smooth blending. Overlapping pigment molecules erase edge definition at each junction, creating true color gradation.
Weave balayage with lowlights for depth, and you’ll get that sunlit tone shift clients chase, no harsh lines, just gradient blending done right.
Blend Gray With Highlights and Lowlights
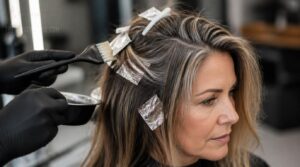
Gray isn’t a flaw to erase, it’s texture to work with. Use cool ash or neutral tones near the scalp, scatter highlights slightly lighter than the gray for reflective contrast, and drop lowlights in neutral browns for depth.
Gray isn’t a flaw to erase, it’s texture to work with, blended through highlights and lowlights for natural dimension
Face-framing placement brightens features while mimicking natural aging patterns, giving clients dimension instead of one flat, mono-toned plane.
Correct Uneven Color and Unwanted Tones
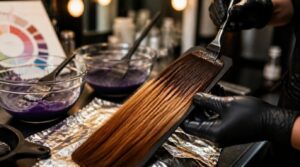
Even the most careful mix can shift once you factor in porosity, prior processing, or a formula that lifted faster than expected. When that happens, correction isn’t guesswork, it’s a set of targeted fixes matched to the exact problem you’re seeing. Here’s how you’ll diagnose and solve the most common color and tone issues.
Neutralize Brass With Toners
Brass doesn’t fade quietly, it announces itself in warm, muddy patches you didn’t ask for. Neutralize it using complementary colors: purple cancels yellow, blue cancels orange. Match toner shade to your base pigment and porosity.
- Unwanted orange-yellow tones
- Dull, flat blonde
- Uneven color patches
- Faded, tired-looking hair
- Muddy, lifeless results
Restore Depth Using Lowlights
Weave strategic lowlights two to three levels darker through mid-lengths and ends, mimicking natural shadow instead of harsh contrast.
| Placement | Result |
|---|---|
| Root/Shadow Root | Controlled depth |
| Mid-shaft | Dimensional richness |
| Ends | Natural shadowing |
Match processing time to your base lift, then rinse and cool fully. Skipping that step lets warmth bloom back in.
Refresh Color With Glazes
Think of a glaze as a shine refresh, not a color rebuild, it deposits pigment on the cuticle without lifting.
- Apply 2–4 weeks post-color for best tone accuracy
- Choose glaze shades one level lighter than target
- Glazes deposit only; toners neutralize brass specifically
- Reapply every 4–6 weeks to maintain vibrancy
UV sprays and sulfate-free care extend results between glosses.
Adjust Developer for Controlled Lift
Correction isn’t about starting over, it’s about recalibrating your developer choice mid-process.
Drop from 30 to 20 volume when lift outpaces your target level, or extend processing time in low-porosity zones that resist pigment. Run a quick strand test to confirm timing before committing. Cooler mixing temperatures slow runaway lift, while bondbuilders and ammonia-free formulas protect fragile strands during these adjustments.
Balance Uneven Porous Areas
Patchy strands happen when porosity varies across one head. High-porosity zones grab pigment fast and fade warm, while resistant patches stay stubborn.
Balancing porosity means applying color fillers first to equalize absorption before your target shade goes on. This ensures even color distribution and prevents demarcation lines. Finish with a toning pass for uniform brightness and a smooth overall look.
Maintain Blended Hair Color Longer
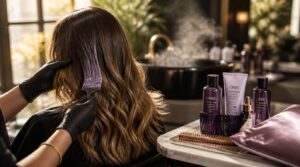
Getting the color right is only half the job; keeping it looking fresh is where your real skill shows. Fading, brassiness, and dullness creep in fast without the right aftercare routine backing up your work. Here’s what you’ll need to build into your client’s maintenance plan to make that color last.
Use Sulfate-Free Color Care
Sulfates strip pigment fast, so swapping to sulfate-free conditioners protects your hair from day one.
Mild surfactants cleanse without stripping color, while pH balanced formulas keep the cuticle sealed and moisture locked in.
You’ll notice slower hair color fading and stronger vibrancy between salon visits, especially when paired with color-depositing products that support tone every wash.
Apply Weekly Color-Protecting Masks
Sulfate-free care sets the foundation, but weekly masks do the heavy lifting for hair color longevity.
They deliver deep hydration, smooth the cuticle, and lock in pigment between glosses.
- Replenishes moisture lost during processing
- Reduces frizz for smoother strands
- Seals cuticle to pigment lock color
- Restores gloss with concentrated polymers
- Strengthens fiber for breakage prevention
Shield Hair From UV Exposure
Masks protect from the inside, but sunlight attacks from the outside, so UV protection matters just as much.
Apply UV-protective sprays or hair UV serums before heading out, since they absorb rays before pigment does. Pair that with a wide-brimmed hat or scalp sunscreen along your part, and lean on protective styling like braids to extend hair color longevity.
Use Heat Protectant Before Styling
UV sprays guard against sun, but hot tools bring their own risk to freshly blended color. Apply heat protectant to damp hair, sectioning for even distribution, so pigment stays locked in.
Look for heat activated polymers rated to 450°F, and adjust application for porous, color treated strands to prevent uneven fading.
Schedule Glosses Every 4–8 Weeks
Rarely does one mix stay perfect without upkeep. Gloss interval planning at 4-8 weeks keeps tone, shine, and vibrancy intact between full services.
Shorter cycles suit high-porosity or brass-prone hair; longer ones work for stable, low-maintenance blends. Developer-free, color-depositing products refresh reflectivity without added lift, giving you a suited gloss schedule that extends color longevity and prevents brassiness before it starts.
Frequently Asked Questions (FAQs)
What are the pros/cons of blending gray?
Like blending paint on a palette rather than picking one color, gray blending uses highlights and lowlights for dimension and softer regrowth. Pros: less maintenance, healthier strands. Cons: still needs toning every 4-6 weeks and skilled application.
What is a hair color blending technique?
A blending technique is a method that fuses two or more shades into one smooth result, think color melting, shadow roots, or balayage with strategic lowlights, guided by color balance, porosity, and the right developer choice.
What are the advanced hair coloring techniques?
Think of your palette as a painter’s canvas: balayage and foilyage sculpt light freehand, color melting graduates tone, root smudging blurs regrowth, and gray blending harmonizes silver strands with bondbuilders protecting every strand.
How to blend two hair colors together?
Stay within one brand and formula line, then set your mixing ratio (1:1 for balance, 3:1 for dominance) before adding developer. Whisk thoroughly, strand test first, and apply fast for smooth color melting.
Whats the difference between cool and warm undertones?
Check veins first: blue reads cool undertones, green signals warm tones. Cool bases pull ash and platinum; warm bases build honey and copper. The jewelry test and foundation matching confirm which side of the color wheel flatters you.
Can you mix brands of professional hair color safely?
You can mix brands, but only after brand compatibility testing confirms similar formulations. Match developer strength, document ratios, and always run a documented strand test first, since pigment behavior and processing speed can differ quite a bit between lines.
How long should you wait between bleaching sessions?
Give strands 4 to 6 weeks to recover, longer if damage shows. Factor in porosity, scalp sensitivity, and prior bleach history, plus at least half an inch of new growth before your next lightening session.
How much does professional color blending typically cost?
Ready for the number that stings? You’ll pay $120 to $300 for full-head blending, $60 to $150 for partial work, and up to $600 at high-end salons, depending on technique complexity and regional pricing.
How long does a full blending appointment usually take?
Plan on 5 to 2 hours total. Full highlight sectioning, processing time, and toning add-ons stack up fast, and your consultation, application, and finishing steps each need their own dedicated block on the schedule.
What certifications should a colorist have for advanced blending?
Think of certification as your color compass. You’ll need recognized hair color certification covering expert color theory, hands-on practicum hours, portfolio assessment, plus continuing education credits every 1-3 years to stay sharp.
Conclusion
Colorists estimate that nearly 70% of color correction visits trace back to skipped porosity checks, not bad formulas. That single number says everything about where mastery actually lives: in the prep, not the product.
Mastering professional hair color blending techniques means reading the hair before you mix, not after you’re troubleshooting brass or muddy mids. Get the assessment right, and every foil, melt, and gloss you apply afterward simply works, holding dimension long after week three.