
This site is supported by our readers. We may earn a commission, at no cost to you, if you purchase through links. This content is for general informational and educational purposes only and is not a substitute for professional medical, dermatological, or nutritional advice.
Your electric shaver pulled smoothly last month. Now it snags, tugs, and leaves patches you swore you’d covered. The culprit is rarely a dull blade. Tiny hair clippings, skin oils, and shaving residue pack into the cutter block and foil until the whole head works harder for worse results.
That buildup also traps moisture and bacteria against your face, so removing hair buildup from electric shaver heads protects your skin as much as your shave.
The fix takes about fifteen minutes and a few household items. You’ll start by powering down and taking the shaver apart safely.
Table Of Contents
- Key Takeaways
- Prepare and Disassemble Your Electric Shaver
- Brush Out Trapped Hair and Buildup
- Clean Shaver Heads According to Washability
- Dry and Inspect Every Shaver Component
- Lubricate and Reassemble Your Electric Shaver
- Prevent Hair Buildup With Regular Maintenance
- Frequently Asked Questions (FAQs)
- Conclusion
Key Takeaways
- Hair clippings, skin oils, and shaving residue packing into the foil and cutter block are what make your shaver snag and miss patches, and they can also trap bacteria against your skin.
- Check your manual before cleaning: washable heads get a warm rinse, a short soapy soak, and a gentle brush, while dry-only models should stay away from water and be wiped with a cloth dampened with 70% isopropyl alcohol.
- Let every part air dry for about an hour before you add one drop of light machine oil to each lubrication point, since oiling damp parts traps moisture and heavy household oils gum up the cutters.
- Tapping out loose hair and brushing the head after every shave, plus a weekly deep clean if you shave daily, keeps buildup from returning and helps prevent pulling and ingrown hairs.
Prepare and Disassemble Your Electric Shaver
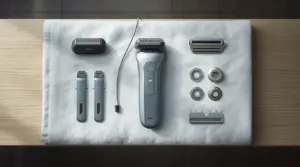
You’ll want to start by switching your shaver off and unplugging it, which protects you from accidental blade activation and keeps the electronics safe. Next, check your manual for the model-specific disassembly guide, since it shows exactly how your design comes apart without forcing anything.
Once the shaver is off and unplugged, this step-by-step electric shaver cleaning guide walks you through each stage so you can open it up with confidence.
Then gently twist or pull off the shaving head, and lift out the blades, combs, and retainer rings. Keep matched cutter and comb pairs together, and set all your detached parts on a clean towel.
Brush Out Trapped Hair and Buildup
With your parts laid out, you’re ready to clear the hair. Start with the tap out method: hold the removable head over a waste bin and tap it gently, never against a hard surface. This frees up loose hair first.
Then use the supplied brush or a soft toothbrush to sweep the cutter block, the underside of the head, and the frame edges, where trapped hair collects. Keep your strokes light and sweeping, and never push bristles through the foil. Leftover hair and skin oils can reduce cutting efficiency and irritate your skin, so brushing the head after every shave keeps it performing well.
Clean Shaver Heads According to Washability
Now that the loose hair is brushed away, it’s time to clean the shaver heads themselves. How you do that depends on whether your model is safe to wash, so check your manual or look for a waterproof symbol first. Below, you’ll find the right approach for each type, so you can clean with confidence.
Washing Water-Safe Shaver Heads
Rinse first, soak second, scrub last. That simple order keeps your shaver heads clean without wearing them down.
For a shaver that makes this routine easier, these electric shaving kit reviews compare models and the cleaning accessories included.
Clean gently in sequence, starting with a flush, then a soapy soak, and finishing with a light brush, so your blades stay sharp
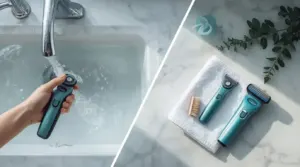
Start by taking off the shaver head and holding it under warm running water for 10 to 15 seconds. This flushes out loose hair and debris so the deeper cleaning goes faster.
Next, soak the detachable heads in warm water with a little mild soap for 2 to 3 minutes. Then use your cleaning brush to gently scrub the blades and frame, going easy on the edges so they stay sharp.
Once everything is clean and fully dry, it helps to know how your trimmer compares, and this guide to the best nose trimmers for women covers models built with easy-to-clean, detachable heads.
Rinse until no soap remains, and let everything air dry completely.
Cleaning Nonwashable Shaver Heads
Not every shaver can handle water, so if yours is a dry-only model, keep it away from the sink. Water can seep into the motor and cause damage you can’t undo.
Instead, tap the head over a bin to loosen loose hair, then use your cleaning brush to sweep the foil and cutter block. Wipe the foil surface with a cloth dampened with 70% isopropyl alcohol, or use a spray cleaner made for non-waterproof razors. Keep liquid off the blades and internal parts.
Let everything air dry fully before you move on.
Dry and Inspect Every Shaver Component
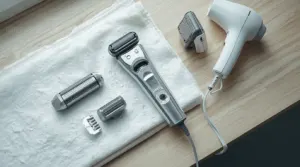
Pat every part with a clean, lint-free cloth to soak up excess water, then set the pieces out to air dry. Keep the shaving head detached so moisture can evaporate faster and more completely. If you’re short on time, a hair dryer on low heat, used in brief bursts, speeds things along without harming anything.
Give everything at least one full hour before reassembly. Then check for stray hairs between the cutters and foils, make sure each foil sits snugly, and wipe away grime from the charging contacts.
Lubricate and Reassemble Your Electric Shaver
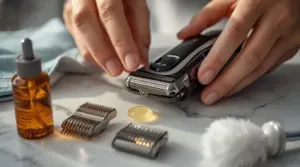
Add one drop of light machine oil or sewing-machine oil to each lubrication point, but only once every part is fully dry. Oiling damp parts can trap moisture inside the head. Skip heavy household oils and sprays, since they can gum up the cutters.
Next, return each cutter to its matching guard, because every piece fits only one way. Set the retaining frame on top, press its wheel down, and turn it clockwise to lock. Seat the unit on the handle until it clicks, then switch the shaver on briefly so the oil spreads evenly.
Prevent Hair Buildup With Regular Maintenance

Picture Dana, who shaves daily and noticed her shaver sounding sluggish by week three. A quick routine fixed it, and yours can too.
- Tap out loose hair and debris after every shave.
- Brush the head after each use.
- Schedule a weekly deep cleaning if you shave daily.
- Inspect the parts monthly for wear.
- Note any dip in performance for early buildup detection.
Small habits keep your shaver smooth, quiet, and efficient, so every shave feels as comfortable as the first.
Frequently Asked Questions (FAQs)
Why does my shaver pull hair instead of cutting?
Your shaver usually pulls because something is making the blades work harder than they should. Dull blades, clogged heads, rough technique, long hair, or a weak battery are the common culprits, and each is fixable.
Can I use isopropyl alcohol to clean my electric shaver?
Yes, but only on the right parts. Isopropyl alcohol works well on metal foils and cutters, but it can crack plastic and strip lubricant. Check your manufacturer guidelines first, since some brands advise against it.
Does shaving wet make buildup worse?
Yes, it can. Shaving cream and water bind hair and debris into a paste that clings to metal and hardens over time. Hard water adds mineral deposits, so rinse and dry your shaver promptly.
Why is my electric shaver giving me ingrown hairs?
Your shaver is likely pulling hair instead of cutting it. Buildup and dull blades add friction, so hairs tear and curl back into your skin. Cleaning regularly and replacing worn heads usually calms things down.
Conclusion
What if a smoother shave only took fifteen minutes and a small brush? It does. Once you’ve finished removing hair buildup from electric shaver heads, you’ll feel the difference on the very first pass, with less tugging, fewer missed patches, and calmer skin.
Keep it that way with a quick brush after each shave and a deeper clean every few weeks. A little care now means your shaver glides like new for years to come.