This site is supported by our readers. We may earn a commission, at no cost to you, if you purchase through links.

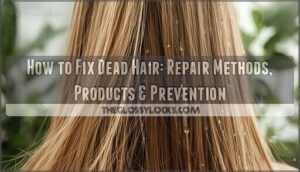
Your hair was glossy last month; today it feels like straw, the second you put down the flat iron. The shine is gone, the ends snag on your brush, and no amount of serum keeps the frizz down.
Heat damage can sneak up fast, but it doesn’t have to take months to fix your hair. With the right mix of smart trims, targeted treatments, and small routine changes, you can repair heat damaged hair quickly and safely.
Think of this as your stylist-approved reset plan: calm the breakage, refill moisture, rebuild strength, and get your hair back to bending, not breaking.
Table Of Contents
- Key Takeaways
- Signs of Heat Damaged Hair
- Causes of Heat Damage
- Assessing The Extent of Damage
- Quick First Steps for Repair
- Trimming for Fast Recovery
- Deep Conditioning and Hair Masks
- Bond-Building and Repair Treatments
- Nourishing Oils and Serums
- Optimizing Your Hair Care Routine
- Preventing Future Heat Damage
- Frequently Asked Questions (FAQs)
- How can I fix straw-like hair?
- How to identify heat damaged hair?
- Does Olaplex reverse heat damage?
- Can you bring your hair back from heat damage?
- How can I repair my damaged hair after straightening?
- How long does heat damage recovery take?
- Can diet affect heat damage repair?
- Are scalp treatments helpful for damaged hair?
- Do hair growth supplements repair heat damage?
- Can swimming pools worsen heat-damaged hair?
- Conclusion
Key Takeaways
- First, learn to spot heat damage by checking for dullness, frizz, rough or straw-like texture, breakage, and poor “snap back” in strand stretch tests so you know how bad things really are.
- Hit reset fast with a 48-hour no-heat break, gentle detangling, a switch to sulfate-free shampoo, and small regular trims to stop split ends from traveling up the hair shaft.
- Rebuild your hair with a mix of deep moisturizing masks, protein treatments, and bond-builders like Olaplex or K18, then seal the cuticle with nourishing oils and leave-in serums applied mainly to mid-lengths and ends.
- Protect your results long-term by washing and detangling gently, using silk pillowcases and protective styles at night, and treating heat styling like a “sometimes” tool with lower settings, heat protectant every time, and regular heat-free days.
Signs of Heat Damaged Hair
Heat damage doesn’t always show up the same way on every head of hair.
The way it shows up depends a lot on your hair type, which is why knowing the common signs of heat damaged hair can help you catch it early.
Sometimes obvious, and sometimes it sneaks up on you in ways you might not immediately connect to your styling routine.
Here are the most common signs to watch for.
Dullness and Lack of Shine

When your hair looks flat and lifeless no matter what you do, you’re likely seeing heat damage stealing your shine.
Focus on Cuticle Smoothing, Mineral Buildup Removal, and Hydration Balance first.
Then layer in deep conditioning, protein masks, and a heat protectant. Finish with Light‑Reflective Products and a Serum Gloss Boost—simple hair repair, smart hair health tips for lasting radiance.
Split Ends and Breakage

Split ends are your hair’s way of waving a white flag. Once the hair fiber splits, it travels up the shaft — and without proper Trim Frequency, that damage spreads fast.
Watch for:
- Short, uneven pieces signaling hair breakage
- Rough, bumpy tips that snag during brushing
- Reduced Hair Fiber Strength when stretching wet strands
Sharp Shear Sharpness matters when you trim split ends — dull blades cause more damage.
Excessive Frizz and Tangling

When ends start snapping, you usually see wild frizz and stubborn knots next.
High humidity swells the cuticle, so Humidity Control and frizz control strategies suddenly matter.
Focus on Cuticle Smoothing, Static Neutralizing, and Gentle Brushing to reduce snags and improve Fiber Alignment.
A heat protectant helps hair damage prevention and other hair repair techniques between washes and in humidity.
Brittle or Rough Texture

Beyond the frizz, you might notice your hair feeling like sandpaper — rough, stiff, almost brittle. That’s Heat‑Triggered Porosity at work: lifted cuticles let moisture escape quickly, leaving strands coarse and snappy.
Cuticle Hydration becomes your priority here. Start with a protein‑rich hair mask and hair strengthening treatments built around Protein Rebonding to restore what heat stripped away.
Causes of Heat Damage

Heat damage doesn’t just happen out of nowhere — there’s always a reason behind it. Knowing what’s causing the problem is the first step to actually fixing it.
Here are the most common culprits to watch out for.
High-Temperature Styling Tools
Most styling tools run between 350 and 450°F — that’s hot enough to literally fry an egg. Without proper temperature control, those ceramic or titanium plates can strip moisture from your strands in seconds.
At 350–450°F, your styling tools can fry hair moisture in seconds
Look for tools with auto shutoff, a swivel cord for safer handling, and calibration software to keep temps accurate. Your heat damage repair journey starts with knowing your tool.
Lack of Heat Protection
Neglect is one of the sneakiest causes of heat damage. Skipping heat protectant leaves your strands completely exposed — no barrier film, no buffer, just direct heat.
Here’s where most people go wrong:
- Barrier film failure from uneven product application
- Exceeding temperature limits your protectant can handle
- Ignoring reapplication timing between sections
- Misunderstanding moisture loss mechanisms during styling
Don’t skip this step.
Frequent Heat Exposure
Daily heat styling is where cumulative passes quietly add up to real damage.
Each time you run a flat iron over the same section — ignoring plate pressure, airflow distance, or sectioning frequency — you’re stacking stress onto already weakened strands.
Even moderate tool temperature limits, when exceeded repeatedly, outpace your hair’s recovery.
Consistent heat protectant use and smart hair treatment options are your best defense against long‑term heat damage repair needs.
Chemical and Color Treatments
Color and chemical treatments are another major cause of heat damage — and they work differently than a flat iron ever could. Bleach, permanent color, and toners all rely on oxidative chemistry that opens the cuticle and disrupts internal bonds.
Developer Volume Selection matters here: higher volumes mean faster lift but more stress.
Without proper pH Balance post‑color care and bond‑building treatments like Olaplex No. 3 or K18 Peptide Mask, your hair stays vulnerable long after you leave the salon.
Assessing The Extent of Damage

Before you start any repair routine, you need to know what you’re actually working with. Heat damage shows up differently from strand to strand, so a quick assessment saves you time and money on the wrong products.
Here’s how to check your hair from three key angles.
Visual and Texture Inspection
Start with a simple Cuticle Reflection Test — hold your hair under bright light. Healthy strands shine evenly; heat damage makes light scatter, leaving hair looking flat.
Next, try a Finger Roughness Check by sliding fingers from root to ends. Rough, grippy texture signals cuticle disruption.
Also watch for Frizz Pattern Mapping near the crown, End Feathering Observation at the tips, split ends, Color Lightness Contrast, and breakage.
Elasticity and Strength Tests
Think of your hair like a tiny bungee cord in a Strand Stretch Test to check basic hair strength and heat damage.
Gently stretch a single wet strand, then release; healthy hair springs back, damaged hair stays longer and limp.
Notice your Breakage Threshold, Combing Resistance, Clump Formation, Diameter Consistency; these clues guide hair strengthening, hair repair, and damage prevention.
Identifying Severely Damaged Areas
After those stretch tests, start simple Porosity Mapping so you can spot severely hit zones. Watch for Cuticle Roughness, Knot Hotspots, Color Fade Patches, and Odor Persistence that point to focused heat damage and needed hair repair.
- Tag spots with knots for ail damage alerts.
- Prioritize masks there to protect hair health.
- Plan trims and cooler tools for damage prevention.
Quick First Steps for Repair

Good news — you don’t need a cabinet full of products to start turning things around. A few simple changes right now can stop the damage from getting worse and give your hair a real chance to recover.
Here’s where to begin.
Immediate No-Heat Period
While your hair cools off from heat damage, give it a strict 48‑hour no‑heat pause for real Hair Repair and Hair Protection.
Use a Cool Water Rinse, Moisture Sealing, and Air Dry Technique to support your Hair Care Routine, Scalp Reset, and Gentle Styling for Heat Styling Prevention.
| Action | Benefit |
|---|---|
| Cool Water Rinse | Scalp Reset |
| Air Dry Technique | Moisture Sealing |
Gentle Detangling Techniques
Now that your strands are resting, detangling gently is your next move. Rough brushing on damaged hair is like dragging a rake through wet grass — it tears everything.
- Use a Wide-tooth Comb on damp hair with Conditioner Slip to glide through knots.
- Try Finger Detangling first for tight tangles, working ends‑up.
- Apply Sectioned Tension and skip No‑Dry Brushing completely.
Switching to Sulfate-Free Shampoo
With tangles calm, reset your hair care routine: swap sulfate shampoos for sulfate‑free formulas for focused hair repair and hair protection on heat‑damaged hair; expect lather differences, gentler scalp tolerance, improved color retention, and an adjustment period guided by ingredient transparency.
| Focus | Before | After |
|---|---|---|
| Clean | Big foam | Soft foam |
| Feel | Dry scalp | Calm scalp |
| Tone | Fades quick | Lasts longer |
Trimming for Fast Recovery

Trimming is one of the fastest ways to stop heat damage from spreading.
Even a small cut can make a noticeable difference in how healthy your hair looks and feels.
Here’s what you need to know to do it right.
Removing Split Ends
Think of split ends like frayed threads on your favorite shirt—once they’re unraveling, the only fix is to trim split ends.
Use Sharp Scissor Selection, Precise Sectioning, Ideal Lighting, and the Twist-and-Trim Method for a gentle dusting trim that minimizes length loss, helps hair repair, and reduces hair damage.
Finish with Post-Trim Moisture for smoother ends, less snagging, easier styling.
How to Trim at Home Safely
You can absolutely pull off a safe trim at home—here’s how to do it right:
- Sharp Scissor Choice – Use hair shears only, never kitchen scissors.
- Sectioning Techniques – Divide hair into four clean sections using clips.
- Wet vs Dry Cutting – Trim dry to see your true shape.
- Mirror Setup – Use two mirrors to check the back.
- Incremental Cutting – Snip small amounts, then re-check before cutting more.
When to Visit a Stylist
Sometimes you need a pro.
Visit a stylist when you see Persistent Split Clusters creeping up the shaft, Localized Breakage at the crown, or clear Elasticity Loss in wet strands.
If Color Overlap Damage or Unmanageable Frizz makes your Heat Damaged Hair feel off, you need Hair Damage Repair, Hair Restoration, and a Hair Care Routine with Hair Repair Tips.
Deep Conditioning and Hair Masks

Once you’ve trimmed away the worst damage, your hair needs focused treatments to rebuild what heat has stripped out. Deep conditioners and masks can target strength, moisture, or both, depending on what your hair is craving most.
Next, you’ll see a few options you can mix and match, so you can choose the treatments that fit your hair’s needs and your routine.
Protein Treatments for Strength
Heat-damaged hair is basically hungry hair — it’s lost what held it together. Protein fills those gaps and gives your strands something to hold onto again. Here’s how to do it right:
- Choose hydrolyzed keratin for fine hair protein needs — it’s lighter and won’t weigh hair down
- Apply to damp, towel-dried hair for the best application timing and absorption
- Use Olaplex No. 3 as a bond repair treatment to rebuild broken links inside the strand
- Practice porosity based dosing — high porosity hair absorbs fast, so keep treatments shorter
- Watch your protein moisture balance — if hair feels stiff or brittle after treatment, add conditioner
Spacing treatments every one to two weeks keeps this hair repair effective without overdoing it.
Moisturizing Masks for Hydration
Your moisturizing Hair Masks are where real Hair Repair and Restoration start for Heat Damaged Hair.
Look for Humectant Ingredients like glycerin or panthenol to pull in water, plus Lipid Emollients to smooth rough cuticles, and an Occlusive Oil Blend to seal it in.
Respect Application Timing, Surfactant Balance, and weekly Hair Treatment limits for effective Hair Damage and Repair.
DIY Repair Mask Recipes
Ready to play hair chemist and stay safe? Try one Hair Mask at a time, watch Protein Blend Ratios, and avoid overusing clay or acids.
- Creamy Repair: Avocado, Coconut Oil, and Aloe Vera for Gel Slip Enhancers.
- Clarifying Clay Base Variations: Olive Oil, water; mind Acid Rinse Timing.
- Quick Protein Boost: gelatin mix, rinse, DIY Mask Storage.
Bond-Building and Repair Treatments

When heat has really roughened up your hair, bond‑building treatments are the heavy lifters that go deeper than regular conditioner. They’re designed to target the broken inner structure so your strands can feel stronger, smoother, and more resilient over time.
Next, we’ll look at the key options, what they do, and how to fit them into your routine.
Popular Bond Repair Products (e.g., Olaplex, K18)
Two names dominate the bond-building treatments conversation: Olaplex and K18. Both tackle heat damage differently, so knowing which fits your routine matters.
| Product | Key Detail |
|---|---|
| Olaplex No. 3 | Restores disulfide bonds |
| K18 Peptide Mask | Reconnects keratin chains |
| Bond Repair Pricing | K18 costs more per ounce |
| Application Frequency | Weekly to every wash |
| Ingredient Safety | Both are silicone-free |
Olaplex ingredients work deep inside the strand, while K18’s peptide mechanism targets elasticity fast — sometimes in four minutes. The key ingredient Bis‑Aminopropyl is essential for repairing disulfide bonds.
How Bonding Treatments Work
So how does bond repair actually work?
Inside every strand, keratin proteins are held together by disulfide bonds — and heat breaks them. Products like Olaplex No. 3 target disulfide reconnection by driving active ingredients through cortex penetration into the hair shaft.
Activation timing matters here — the formula needs dwell time to rebuild those links. Rinse stabilization then smooths the cuticle, and temperature influence affects how quickly the chemistry responds.
Frequency and Application Tips
Now that you know how the chemistry works, let’s talk timing. Using these treatments too often can actually make hair feel stiff and brittle — so follow this order:
- Apply leave‑in, wait 1–2 minutes (Leave‑In Wait)
- Layer heat protectant sprays next (Layering Order Timing)
- Reapply Every Pass between hot tools
- Limit hair mask use to weekly
- Space Wash Interval to every 2–3 days
Nourishing Oils and Serums

Once you’ve started repairing the inside of your hair, the next step is feeding it from the outside. Nourishing oils and serums can soften rough ends, add shine, and cushion your strands from more damage.
Up next, you’ll see which ones to choose, how to put them on, and easy ways to fit them into your routine.
Best Oils for Damaged Hair
Not all oils are created equal — here’s what actually works for damaged hair:
| Oil | What It Does |
|---|---|
| Castor Oil | Strengthens, seals, prevents breakage |
| Argan Oil | Restores argan oil shine, smooths frizz |
Coconut oil moisture, rosehip blend conditioning, and bonding oil repair treatments, such as Olaplex No.7, round out your toolkit.
Try an oil soak with olive oil or avocado for deep nourishment — aloe vera seals it all in.
Using a protective barrier benefits can help shield hair from further heat damage.
Application Methods for Quick Results
Applying oils the right way makes all the difference. Mist damp hair evenly, section spray application across 4–6 parts, and focus on targeted root coating to the ends. Before heat styling, these mini-section passes guarantee full coverage:
- Warm oil between palms first
- Work roots to tips
- Rapid cool down protects your style
- Seal with light pressure
Using Leave-in Serums for Protection
Choosing the right serum matters more than most people think.
Film choice is everything — look for heat-resistant polymers like dimethicone or polyquaternium on the label, since these create a real barrier on heat‑damaged hair.
Nail your application timing by working serum into towel‑dried hair before heat protectant sprays.
Focus scalp vs. ends intentionally — roots stay lighter, ends get more.
Smart layering techniques seal in your bond repair work beautifully.
Optimizing Your Hair Care Routine

Repairing heat damage isn’t just about the products you use — it’s also about how you treat your hair every single day.
Small changes to your routine can make a big difference in how fast your hair bounces back.
Here’s what to focus on.
Gentle Washing and Detangling
Think of wash day as a fresh start for your hair. Start with a lukewarm rinse and divide hair into sections before using a wide-tooth comb on it — sectioned detangling cuts breakage dramatically.
Massage shampoo into your scalp only, then let conditioner work through the ends.
Blot dry with a microfiber towel and seal in moisture with a leave-in slip product.
Weekly Deep Treatments
One deep treatment a week is your hair repair secret weapon.
Alternate between a protein-based hair mask for Protein‑Moisture Balance and a DIY Hydrating Mask for hydration — never stack both back‑to‑back.
For Treatment Timing, apply your Hair Treatment to damp strands after shampooing, mid‑lengths to ends first.
Try an Overnight Leave‑In mask sealed under a satin bonnet for extra Heat Damage recovery.
Silk Pillowcases and Protective Styles
Ever wish your hair stayed smooth overnight? Silk pillowcases and Protective Overnight Braids are key hair maintenance strategies.
- Use silk for Silk Friction Reduction, Moisture Retention Benefits, and Nighttime Frizz Control in a Silk Care Routine.
- Keep Protective Overnight Braids loose as hair protection methods and prevention.
- Finish with sprays for thermal protection and heat protection.
Preventing Future Heat Damage

Now that you’ve started repairing the damage, the goal is to keep your hair safe going forward.
A few simple changes to the way you use heat can make a big difference in how your hair looks and feels.
Here’s what to pay attention to every time you style.
Heat Protectant Sprays and Creams
Ready to treat Heat Styling like a controlled experiment instead of a gamble?
Use Heat Protectant Sprays for weightless Heat Protection and creams for richer Hair Damage Prevention based on Hair Type Suitability.
Master Application Techniques, respect product Temperature Thresholds, and note Ingredient Benefits.
Comb through, then use light Reapplication Strategies on long styling days to support faster Hair Repair.
Choosing Lower Heat Settings
Your heat protectant sprays laid the foundation — now let your Tool Wattage Control do the heavy lifting. Lower settings mean less heat damage, full stop.
- Fine hair: stay under 300°F
- Color-treated or bleached hair: 250–300°F max
- Coarse or thick hair: 350–375°F
- Practice Temperature Timing Balance — fewer passes beat higher heat
- Mind Airflow Distance Management — keep dryers moving, never hovering
Embracing Heat-Free Styling Days
Lower temperatures help — but giving your tools a day off does even more.
| Style | Method | Benefit |
|---|---|---|
| Protective Braids | Loose, damp sections | Reduces breakage |
| Heatless Rollers | Overnight foam rods | Defines curls, zero heat |
| Silk Night Caps | Worn while air drying | Cuts friction damage |
Air Dry Techniques and Low Manipulation Styles let your hair breathe between heat styling sessions — no heat protectant needed.
Frequently Asked Questions (FAQs)
How can I fix straw-like hair?
Straw-like hair is screaming for moisture and protein.
Start with protein‑rich shampoos, follow with hair fiber rehydration masks, and always finish with a cold‑water rinse to seal the cuticle and restore softness fast.
How to identify heat damaged hair?
You identify heat damaged hair by Cuticle Roughness, frizz, split ends, and breakage, plus Color Fading, Static Electricity, fast porosity absorption, and Scalp Heat Sensitivity;
These changes signal stress and the need for damage repair.
Does Olaplex reverse heat damage?
Yes, Olaplex No 3 can reverse heat damage — but not completely in one shot. Its bond chemistry rebuilds broken internal bonds, improving strength and shine with consistent treatment frequency over time.
Can you bring your hair back from heat damage?
Bringing your hair back from heat damage is absolutely possible. With the right Damaged Hair Solutions — like Protein Rebuilding treatments, smart Lifestyle Hair Habits, and consistent heat protection — your Thermal Recovery Timeline is closer than you think.
How can I repair my damaged hair after straightening?
After straightening, start with a no-heat break, switch to sulfate-free shampoo, and apply bond-building treatments like Olaplex.
Regular deep conditioning, thermal protection, and overnight treatments support hair repair and fiber reconstruction effectively.
How long does heat damage recovery take?
Hair recovery time depends on damage severity. Mild dryness improves within 1–3 washes. Elasticity and feel recover in 2–6 weeks with consistent bond treatments and trimming.
Can diet affect heat damage repair?
Absolutely.
What you eat shows up in your hair.
Prioritize protein intake, vitamin C, omega‑3s, and antioxidant foods to support damage repair, hydration levels, scalp health, and overall hair nourishment from the inside out.
Are scalp treatments helpful for damaged hair?
Imagine Scalp Cleansing and Hydrating Scalp with Anti‑Inflammatory Ingredients, Follicle Support, creating Scalp‑Hair Repair Balance, yes, Scalp Health and Care and Scalp Health, expanding Hair Treatment Options, Hair Repair and comfort for Heat Damaged Hair.
Do hair growth supplements repair heat damage?
Supplements don’t repair existing Heat Damaged Hair; they support Hair Growth by improving Nutrient absorption.
Supplement efficacy follows Growth timeline, Dosage recommendations, and Interaction with treatments like bond-building Hair Treatment, Hair Protection, and Hair Restoration.
Can swimming pools worsen heat-damaged hair?
Think of a pool like a double agent — revitalizing on the surface, but working against your strands below.
Yes, chlorine damage, UV exposure, and mineral buildup can all worsen heat-damaged hair considerably.
Conclusion
Here’s the part no one tells you: hair remembers everything. Every skipped heat protectant, every maxed-out temperature — it keeps score.
But it also responds when you show up differently.
The moment you commit to the right steps, repair heat damaged hair quickly becomes less of a wish and more of a reality you can see and feel.
Your hair isn’t broken forever. It’s just waiting for you to lead.
- https://www.wella.com/professional/en-CA/blog/hair-care/repair-heat-damaged-hair
- https://gloweluxe.au/blogs/blog/how-to-repair-heat-damaged-hair-prevention-treatment
- https://heaterguides.com/best-heat-damage-repair-products/
- https://www.healthline.com/health/heat-damaged-hair
- https://www.aad.org/public/everyday-care/hair-scalp-care/hair/repair-damage