This site is supported by our readers. We may earn a commission, at no cost to you, if you purchase through links.

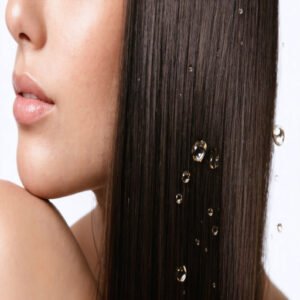
Most people treat dry scalp and dry ends as the same problem—they’re not. Your scalp is skin that produces oil, loses moisture through evaporation, and reacts to everything from shampoo pH to cold air. Your ends, meanwhile, are the oldest part of the hair shaft, starved of sebum because oil physically can’t travel down damaged cuticles. Treating both with the same product usually fixes neither.
A targeted scalp and ends moisturizing routine accounts for this disconnect. It involves layering the right humectants, occlusives, and barriers where each one actually does its job. This approach ensures moisture is restored to the scalp while nourishing the brittle, oil-deprived ends without overloading either area.
Table Of Contents
- Key Takeaways
- What Causes Scalp and Ends Dryness
- Choose Moisturizing Ingredients Wisely
- Hyaluronic Acid for Lightweight Scalp Hydration
- Glycerin for Drawing Moisture Into Hair and Scalp
- Aloe Vera for Soothing Dryness and Irritation
- Shea Butter for Coarse or Very Dry Ends
- Honey as a Natural Humectant
- Ceramides for Supporting The Scalp Barrier
- Ingredients to Avoid if Your Scalp is Sensitive
- Choosing Water-based Formulas for Non-greasy Hydration
- Wash Without Stripping Moisture
- Moisturize Scalp After Washing
- Hydrate Ends Without Oily Roots
- Use LOC or LCO Correctly
- Exfoliate Scalp for Better Absorption
- Top 6 Scalp Moisturizing Products
- Build Your Weekly Moisturizing Routine
- Daily Scalp Check for Dryness or Oiliness
- Wash-day Scalp Hydration Steps
- Midweek Refresh for Dry Ends
- Weekly Exfoliation and Pre-wash Treatment
- Adjust Routine for Fine, Straight, Curly, or Coarse Hair
- Increase Hydration During Cold or Dry Weather
- See a Dermatologist for Persistent Flakes, Itching, or Redness
- Frequently Asked Questions (FAQs)
- Can high cortisol cause dry scalp?
- How do I moisturize my scalp and hair?
- What is the 3 minute rule for moisturizer?
- Can diet changes improve scalp moisture levels?
- How does hair porosity affect product absorption?
- Are scalp moisturizers safe during pregnancy?
- Does scalp hydration slow hair loss progression?
- How long before visible hydration results appear?
- Conclusion
Key Takeaways
- Dry scalp and dry ends are two separate problems with different causes, so treating them with the same product usually fixes neither — your scalp needs hydration, while your ends need moisture sealed in.
- Layering products in the right order (LOC for coarse hair, LCO for fine hair) makes a bigger difference than which products you use, because porosity determines how well your hair holds onto moisture.
- Timing your scalp serum application within three to five minutes of washing is the single most effective way to lock in hydration, since damp skin absorbs product significantly faster than dry skin.
- Conditions like seborrheic dermatitis, eczema, and psoriasis can mimic simple dryness, so persistent flaking, redness, or itching that don’t respond to at-home care are a clear sign to see a dermatologist rather than keep trialing products.
What Causes Scalp and Ends Dryness

Dryness doesn’t always start in the same place — sometimes it’s your scalp, sometimes it’s your ends, and often it’s both at once.
If your scalp keeps flaking no matter what you try, it’s worth looking into dry scalp causes and underlying skin conditions that might need more targeted care.
A handful of everyday habits and conditions quietly chip away at your hair’s natural moisture barrier before you even notice the damage. Here’s what’s actually behind it.
Dry Scalp Versus Dry Hair Ends
Dry scalp and dry ends aren’t the same problem — they just feel like it. Your scalp loses moisture from dehydration, while your ends break down from structural damage. Knowing the difference makes zone-based care much more effective.
low ambient humidity reduces scalp moisture by up to 25% in colder seasons.
- Flake Texture Contrast: Dry scalp flakes are small, white, and powdery; dandruff flakes are oily and larger
- Scalp Itch Intensity: Dry scalp triggers tightness and itching, especially after washing
- Hair Shaft Brittleness: Dry ends feel straw-like, frizzy, and snap easily — a clear moisture retention gap
Why Sebum May Not Reach The Ends
Even when your scalp produces enough sebum, that oil rarely makes it to your ends. Follicle plugging blocks outflow early, while sebum viscosity and hair porosity determine how far it travels.
Cuticle wear strips whatever coating survives, and gravity rinse during washing pulls the rest away. Balancing oily scalp and dry hair ends means understanding sebum distribution — it simply can’t do the whole job alone.
Cold Weather, Low Humidity, and Harsh Shampoos
Sebum distribution is only part of the story. External conditions hit just as hard. Cold air reduces seasonal sebum output, while low humidity pulls moisture directly through the scalp’s barrier. Adding a harsh shampoo—one with aggressive surfactant strength—strips away the remaining protective layer.
Four factors compound quickly:
- Shower temperature above lukewarm accelerates moisture evaporation.
- Water hardness leaves mineral deposits that block hydration.
- Strong surfactants dissolve protective skin lipids.
- Low humidity triggers transepidermal water loss.
Over-washing and Scalp Barrier Damage
Overwashing strips lipids from your scalp’s protective layer, triggering a pH imbalance that increases skin reactivity. Every extra wash compounds these issues by disrupting the scalp’s natural defenses.
Products that disturb your microbiome allow opportunistic microbes to thrive, further destabilizing the scalp’s delicate ecosystem. This aggressive stripping shifts microbial balance, creating an environment where harmful organisms flourish.
The cumulative effect is an inflammatory response that stresses follicles, accelerates follicle shedding, and weakens the scalp barrier. Protecting its function then becomes an uphill battle, as the skin struggles to recover from repeated irritation.
Heat Styling, Color Treatments, and Split Ends
Heat styling and color treatments are two of the biggest culprits behind dry ends and split ends. Flat irons and blow dryers pull moisture straight out of the hair shaft, so thermal protectants and temperature control aren’t optional — they’re essential.
Bleaching makes hair more porous, accelerating moisture loss and color fade. Protein treatments and end sealing help restore moisture balance before damage travels further up the strand.
Stress, Hormones, Diet, and Scalp Irritation
What’s happening inside your body shows up on your scalp faster than you’d expect.
Cortisol’s impact from chronic stress disrupts your skin barrier, while hormonal shifts in sebum during menopause or postpartum periods throw off moisture balance entirely.
An inflammatory diet high in processed foods worsens irritation, and micronutrient deficiency — especially low zinc or vitamin D — weakens barrier repair.
Keeping the microbiome balance stable starts with managing these internal triggers.
When Eczema, Psoriasis, or Seborrheic Dermatitis May Be Involved
Sometimes dry, flaky scalp isn’t just about moisture — it signals a deeper condition. Eczema, psoriasis, and seborrheic dermatitis can all mimic each other, making diagnostic differentiation essential before treating. Seborrheic dermatitis involves yeast overgrowth (Malassezia), disrupting the skin microbiome and triggering greasy flakes. Anti-fungal therapy targets that root cause, while barrier function repair matters most for eczema management.
Common flare triggers to watch:
- Cold, dry weather or sudden humidity shifts
- Stress and hormonal fluctuations
- Harsh shampoos that strip natural oils
- Gaps in consistent scalp moisturization techniques
- Skipping prescribed treatments for managing eczema, psoriasis, or seborrheic dermatitis during remission
Choose Moisturizing Ingredients Wisely

Not every moisturizing ingredient works the same way, and that difference matters more than most people realize.
The right ones can rebuild your scalp’s moisture barrier, soothe irritation, and keep your ends soft without weighing your hair down.
Here’s what to look for — and what to skip.
Hyaluronic Acid for Lightweight Scalp Hydration
Hyaluronic acid is one of the smartest ingredients for scalp care. Its water-binding action pulls moisture directly to the scalp surface, eliminating concerns about heavy residue or greasy buildup.
The gel texture delivers the benefits of a lightweight serum, absorbing fast for seamless integration into daily routines. This ensures daily wash compatibility without compromising hydration.
Molecular weight variants allow formulators to customize penetration depth, ensuring real scalp hydration rather than superficial coating.
Glycerin for Drawing Moisture Into Hair and Scalp
Glycerin is one of the most reliable natural humectants in scalp serums — it literally draws water from the air into your scalp and hair. That humidity sensitivity is actually a feature: apply it to damp hair for best dampening, and it locks moisture right in.
Follow concentration guidelines (less is more) and manage tackiness near the roots. Confirm layering compatibility with your leave-in before sealing dry ends.
Aloe Vera for Soothing Dryness and Irritation
Aloe vera is one of those calming ingredients that pulls double duty — its cooling gel feel instantly soothes an irritated dry scalp, while its polysaccharides’ soothing compounds support barrier hydration over time.
As a natural remedy for dry scalp, aloe’s anti-inflammatory action calms redness without heaviness.
Just patch test first, since sensitive skin can occasionally react.
Shea Butter for Coarse or Very Dry Ends
Where aloe calms, shea butter seals. For coarse or curly textures with very dry ends, shea butter works as an occlusive rather than a humectant — it locks moisture in rather than drawing it from the air.
Try the Butter Melt Technique: warm a pea-sized amount between your palms before applying to damp ends.
Residue prevention tips: keep it entirely off your roots.
Honey as a Natural Humectant
Unlike shea butter’s occlusive seal, honey’s humectant properties work by pulling moisture toward your hair.
Its natural sugars — mainly fructose and glucose — create a water-binding effect through sugar humectancy, forming a lightweight sticky film that slows evaporation.
Apply honey-based scalp moisturizer or natural humectants in scalp serums to damp hair — damp application genuinely improves moisture retention, helping soften dry ends without heaviness.
Ceramides for Supporting The Scalp Barrier
Honey pulls moisture in — ceramides lock it there. Think of Ceramide Lipid Layers as your scalp’s mortar, filling gaps in the skin barrier to cuts transepidermal water loss. Leave-On Ceramide Treatment options outperform rinse-offs because contact time matters.
Look for formulas offering Barrier Lipid Synergy:
- Ceramide Serum Formulation paired with fatty acids
- Pseudo-Ceramide Benefits for budget-friendly barrier repair
- Protecting the scalp barrier function with lipid blends
- Benefits of hyaluronic acid and ceramides for scalp hydration
Ingredients to Avoid if Your Scalp is Sensitive
Now that you’re building your barrier, don’t let the wrong ingredients tear it back down. Sulfate surfactants strip sebum fast, worsening dryness. Denatured alcohol evaporates and pulls moisture with it. Fragrance allergens and cooling irritants like menthol can burn already-sensitized skin. Strong acids and salicylic acid overwhelm a compromised scalp.
Choose sulfate-free, paraben-free formulas to avoid product buildup and recurring irritation.
Choosing Water-based Formulas for Non-greasy Hydration
Selecting a water-based scalp serum means checking more than the label. Lightweight formulas use humectants like glycerin or hyaluronic acid dissolved in water, ensuring quick absorption without greasiness.
Good viscosity management, smart emulsifier selection, and pH balancing around 4–6 keep your barrier intact. These elements work together to maintain scalp health while delivering effective hydration.
Polymer film-formers and alcohol solvents control texture, preventing residue or heaviness. Meanwhile, hydrogel technology delivers hydration evenly, ensuring roots remain lightweight and nourished without buildup.
Wash Without Stripping Moisture

How you wash matters just as much as what you put on your hair afterward.
The right technique keeps your scalp’s natural oils intact instead of washing them straight down the drain.
Here’s what to do at every step of your wash routine.
Use a Gentle, Hydrating Shampoo
Your shampoo choice sets the foundation for everything else. A sulfate-free cleansing formula preserves your scalp’s natural barrier oils, while a pH-balanced shampoo keeps cuticles calm after every wash.
For a balanced, moisturized scalp, prioritize these qualities:
- Free of harsh sulfates
- Fragrance-free option for sensitive scalps
- Lightweight humectants for build-up control
- Formulated for daily scalp care routine for healthy hair
Look for Aloe, Glycerin, Oat Extract, or Mild Cleansers
When scanning a label, a few key ingredients carry significant weight. Aloe calms inflammation and soothes irritation. Glycerin draws moisture into the scalp. Oat extract offers anti-inflammatory benefits ideal for sensitive skin. Together, they work as barrier-supporting actives in pH-balanced cleansers.
| Ingredient | Why It Helps |
|---|---|
| Aloe | Soothes, hydrates |
| Glycerin | Locks in moisture |
| Oat Extract | Calms irritation |
Choose fragrance-free options and non-comedogenic formulas to avoid buildup.
Wash With Lukewarm Water, Not Hot Water
Hot water feels soothing, but it’s quietly working against your scalp care routine. Water above 38°C strips natural oils, damages the skin barrier, and triggers scalp heat stress that worsens flaking and itchiness.
Lukewarm temperature — around 30–38°C — is your ideal rinse temperature. It aids cuticle smoothing, reduces flare sensitivity, and keeps your hydrating shampoo from losing its effectiveness before it even starts working.
Focus Shampoo on The Scalp Only
Think of your scalp as the only part that truly needs cleansing — your ends don’t produce oil. Shampoo should focus on the scalp, ensuring a measured product dosage and distributing it through sectioned shampoo application.
A fingertip scalp massage for 30 to 60 seconds lifts buildup efficiently. This technique ensures thorough cleansing while minimizing product contact with the hair lengths.
This short contact duration and end protection strategy keeps lengths from drying out, preserving moisture where it matters most.
Let Suds Cleanse The Lengths While Rinsing
Once you’ve massaged your scalp, let the rinse do the rest. Suds distribution happens naturally as water moves downward — surfactant travel through the rinse flow carries away dirt from mid-lengths without any scrubbing.
Managing water pressure to a gentle, steady stream gives you rinse flow control that aids length hydration.
Shampoo should focus on the scalp; the lengths get a passive, effective clean for free.
Avoid Clarifying Shampoos Too Often
Clarifying shampoos are great for removing stubborn buildup, but clarifier frequency matters. Use one every one to four weeks — not every wash day. Overuse strips your scalp’s natural oils, weakens the barrier, and accelerates color fade in dyed hair.
Watch for buildup indicators like dullness or limpness instead. When needed, reach for gentle alternatives and always follow with post-clarifying hydration.
Finish With a Cool Rinse for Smoother Ends
After skipping the clarifying step, end your wash with a cool rinse — it’s one of the simplest ways to smooth ends and lock in your hydrating conditioner. Water temperature matters more than most people realize. Cooler water encourages cuticle sealing by flattening those overlapping scales, which directly affects shine and softness.
- Rinse Duration: Spend 30–60 seconds saturating lengths and ends thoroughly
- Hair Porosity Adjustment: Fine, low-porosity strands benefit most from a brief, not ice-cold, rinse
- Post-Rinse Styling: Gently squeeze with a microfiber towel, then layer a lightweight finishing oil to seal hydration
Moisturize Scalp After Washing

This is where your routine either pays off or falls flat — the few minutes right after washing are prime time for scalp hydration. Your scalp is damp, pores are open, and it’s ready to absorb whatever you put on it.
Follow these steps to make the most of that window.
Apply Scalp Moisturizer Within Three to Five Minutes
Right after you rinse, your scalp enters a brief absorption window — and that’s exactly when to act. Applying a scalp serum within three to five minutes is a simple timing technique that facilitates moisture capture before the surface dries out.
This rapid sealing approach works best with a lightweight, non-greasy formula, giving you immediate hydration with no wait time needed.
Use a Lightweight Serum on Damp Scalp
Once that three-to-five-minute window opens, reach for a water-based scalp serum — not a heavy cream. Lightweight formulas absorb faster on damp skin because the moisture already present helps humectants like hyaluronic acid spread evenly.
Keep these application methods for scalp serums in mind:
- Droplet Quantity: Two to three drops cover most scalps without buildup
- Serum Temperature: Room-temperature serum absorbs more comfortably than cold product
- Application Pressure: Fingertip pressure — light, not firm — moves serum without irritating the barrier
- Absorption Timing: Let it settle thirty seconds before Post-Serum Styling begins
Part Hair in Sections for Even Application
Sectioning your hair before applying serum isn’t optional — it’s the difference between full coverage and patchy results. Precise Parting with a tail comb creates clean zones so product reaches every part of your scalp. Use Clip Placement Strategy to secure each section immediately, and rely on Section Size Adjustments — smaller for thick hair, larger for fine — to guide your Systematic Application Order.
| Section Zone | Application Focus |
|---|---|
| Front hairline | Light serum amount |
| Crown | Full product concentration |
| Sides | Even Root-to-End Segmentation |
| Nape | Don’t skip — often missed |
| Partings | Zone-specific hair care routine |
This zone-based care approach mirrors proper shampoo placement for the scalp and your conditioning strategy for mid-lengths to ends — keeping every application method intentional.
Massage Gently With Fingertips, Not Nails
Once your serum is applied, use your fingertips—never your nails—for circular motions across each section. This pressure control protects your scalp barrier and enhances circulation boost without causing tiny skin breaks that worsen dryness.
Damp application makes friction reduction easier, as the product spreads smoothly.
For irritation prevention, keep movements slow and steady. A gentle scalp massage is genuinely one of the simplest wins for long-term scalp health and comfort.
Use Less Product Near Oily Roots
Micro-dosing with precision applicators — like a narrow nozzle or dropper — lets you control exactly where product lands, keeping lightweight oils and root-focused formulations away from areas prone to buildup.
Balancing scalp oil production starts with controlled product application zones. If you notice greasiness creeping in, reach for an oil-control shampoo to address excess oil at the source.
Avoid Heavy Creams Directly on Fine Scalps
Heavy creams might seem like the perfect fix for dryness, but on fine or straight hair, they often cause more problems than they solve. Thick formulas risk pore-clogging, scalp greasiness, and product migration that weighs roots down fast. Fragrance irritation and volume reduction are real concerns too.
Stick to a non-greasy formula or lightweight hair oils instead — balancing scalp oil production means choosing less, not more.
Let The Scalp Dry Before Layering Oils
Timing matters more than most people realize. Once you’ve applied your water-based serum, allow your scalp a few minutes to dry completely before reaching for any oil. A dry surface benefits absorption greatly — oil spreads evenly instead of pooling at your parts.
- Reduced buildup when oil layers over dry, not damp, skin
- Ideal absorption locks lightweight hair oils close to the scalp
- Consistent layering sequence prevents that slippery, tacky feeling at roots
Hydrate Ends Without Oily Roots

Getting moisture to your ends without turning your roots into an oil slick comes down to where and how you apply each product. The steps below make that balance easy to nail, whether your hair is fine, thick, or somewhere in between.
Here’s exactly what to do.
Apply Conditioner From Mid-lengths to Ends
Conditioner works best from mid-lengths to ends — where hair is oldest, driest, and most porous. To ensure even coverage, divide hair into 2–4 sections. Detangle each section using a wide-tooth comb, starting at the ends and moving upward.
| Step | What to Do |
|---|---|
| Slip Ratio | Use enough product to feel slip, not coating |
| Product Quantity | Adjust based on length — more past shoulder length |
| Post-rinse Care | Blot gently; don’t rub ends dry |
The role of conditioner in moisture retention is most critical when balancing cleansing and conditioning steps consistently. Moisturizing dry ends fully before rinsing is crucial.
Avoid Conditioner Directly on The Scalp
Once you’ve conditioned mid-lengths to ends, keep that product away from your scalp. Conditioner residue buildup near the roots traps sebum, sweat, and dead skin — a fast track to root oiliness and flaking.
Scalp-friendly cleansing depends on product placement technique: non-root conditioning enables balancing of cleansing and conditioning steps to actually work. Your scalp moisturizer manages hydration up top.
Use Leave-in Conditioner on Damp Ends
Now that your scalp moisturizer is handling hydration up top, your ends need their own targeted step. Leave-in conditioners absorb best when hair is towel-dried but still slightly wet.
Work a small amount through, using the finger comb method for even product distribution from mid-lengths down. Keep it lightweight to moisturize dry ends without residue buildup.
Add One or Two Drops of Lightweight Oil
Once your leave-in is absorbed, one or two drops of lightweight oil lock everything in. Drop Precision matters here—too much and ends turn stringy. Rub between palms first for even oil distribution, then smooth downward.
- Fine or short hair: one drop
- Long or coarse hair: two drops
- Curly ends prone to frizz: focus on tips for Frizz Suppression
- Color-treated strands: distribute mid-length down for Product Compatibility
Seal Only The Driest Sections
Not every section of your hair requires the same attention. Viscosity impact is real with lightweight oils—thinner oils stay precisely where applied, enhancing sectioned application and targeted occlusion on dry ends.
Focus porosity sealing on the thirstiest areas: rough tips, layered ends, or color-treated zones. Zone-based care with leave-in conditioner prevents oily roots while addressing specific needs.
Refresh Dry Ends Between Wash Days
Between wash days, your ends deserve a quick reset — not a full routine. Lightly mist sections with a humectant mist, then use a wide-tooth comb to mist-detangle without pulling.
Apply leave-in conditioner to damp ends, add one or two targeted drops of a lightweight oil, and blot with a microfiber towel.
This sectioned refresh keeps a zone-specific hair care routine manageable while ensuring your ends stay moisturized.
Protect Ends Before Heat Styling
Before reaching for your flat iron, dry ends need a shield, not an afterthought. Apply a protectant spray using light, even passes from mid-lengths down, or warm a serum between your palms first using the serum warming method for smoother coverage.
Section hair for controlled, sectioned heat application, pre-styling detangle with a brush.
Keep ideal temperature settings low to reduce friction and dryness.
Trim Split Ends That No Longer Hold Moisture
No amount of conditioner can fix what’s already split. Once the cuticle breaks apart, dry ends shed moisture faster than any product can replace it — that’s just physics.
Split ends shed moisture faster than any product can replace it — that’s just physics
Dusting trims every six to eight weeks remove the worst offenders before splits travel upward.
After trimming, post-trim hydration is absorbed noticeably better because conditioner works best from mid-lengths to ends on intact strands.
Use LOC or LCO Correctly
The order you layer your products matters more than most people realize.
LOC and LCO are not just acronyms — they’re two different strategies, and picking the wrong one for your hair type can leave you with buildup or ends that dry out by midday.
Here’s how to tell which method fits your hair and how to apply each one correctly.
Use LOC for Coarse or High-porosity Hair

Coarse or high-porosity hair loses moisture fast — think of it as a sponge with oversized holes. The LOC method (Liquid, Oil, Cream) helps moisturize dry ends and hydrate your scalp by working with your hair porosity, not against it.
- Layer ratios matter: start light, seal heavy
- Product measurement prevents buildup on dense strands
- Seasonal adjustments keep moisture locked in year-round
Start With Liquid Hydration First

Think of liquid hydration as the foundation your scalp can’t skip. The Humectant First Principle is simple: applying a hydrating serum — ideally with hyaluronic acid or glycerin — to a damp scalp lets those ingredients bind to water already present.
Damp Scalp Application ensures Uniform Hydration Spread, eliminating dry patches through even moisture distribution. This method maximizes ingredient efficacy by leveraging existing water on the scalp.
Follow Quick Seal Timing and layer products immediately after for optimal results, locking in hydration effectively.
Add Oil to Seal Moisture

Oil is the "O" in LOC — and it’s doing more work than you might expect. Once your liquid layer is in place, a lightweight oil creates a seal that slows moisture from escaping the shaft. Nailing your Drop Ratio matters: one to two drops for shorter hair, two to four for longer lengths.
Smart Sealing Technique and Oil Distribution Tips:
- Choose lightweight Oil Selection options like grapeseed or fractionated coconut for fine hair
- Apply oil to damp — not dripping — hair for even Oil Distribution
- Focus on the ends first, then mid-lengths, for buildup prevention
- Use serums and oils for scalp hydration only if your scalp is visibly dry
- Small amounts support moisture retention without weighing strands down
Finish With Cream for Lasting Softness

Cream is your final layer — the one that holds everything together. After sealing with oil, a lightweight leave-in conditioner or moisturizing hair product locks softness in place.
Cream Timing matters: apply it while ends are still damp. A good non-greasy formula with film-former ingredients reduces friction, delivering a hydration boost that lasts.
Seasonal adjustments — richer creams in winter, lighter ones in summer — help with moisture retention year-round.
Use LCO for Fine or Low-porosity Hair

Fine or low-porosity hair plays by different rules. Its tightly packed cuticles resist water, so the LCO order — Leave-in, then Cream, then Oil — works better here.
- Damp Hair Importance: Always start on damp hair so the leave-in spreads evenly
- Mid-length Focus: Keep products away from roots
- Lightweight Oil Choices: Grapeseed or jojoba absorb without greasiness
- Precise Product Dosing: Less is genuinely more for dry ends
Keep Layers Light to Prevent Buildup

Once you’ve nailed the LCO order, the next challenge is keeping each layer genuinely light. Preventing product buildup on the scalp starts with measured product amounts — a pea-sized serum, one to two drops of lightweight oil.
| Layer | Max Amount |
|---|---|
| Leave-in | Quarter-sized |
| Cream | Pea-sized |
| Lightweight oil | 1–2 drops |
| Scalp serum | Targeted scalp zones only |
Strategic layer order and timed absorption (let each layer sit briefly before adding the next) stop formulas from becoming greasy.
Adjust Product Amount by Hair Density

Hair density changes everything about how much product you need. Fine Hair Scaling calls for less — a pea-sized amount of leave-in keeps dry ends hydrated without limpness. Thick Hair Allocation often means two to three times that, using zone-based care from roots to ends. Medium Density Guidelines land somewhere between.
Porosity Based Volume also matters: high-porosity strands absorb product faster, so adjust your Product Load Balance accordingly, layering lightweight oil last to seal without adding unnecessary weight.
Watch for Greasy Roots or Weighed-down Ends

Even a well-intentioned LOC or LCO routine can quietly tip into too much. Watch your weighty hair cues — if roots show excess scalp shine by midday or ends feel coated rather than soft, you’ve layered too heavily. Product drift detection matters here.
- Swap heavy oil for a lightweight oil at the ends
- Run a root heaviness test by pressing a tissue to your scalp — oil transfers fast if buildup is the issue
- Use an oil control shampoo on wash day to reset
- Recognize the difference between buildup vs volume — one weighs down, the other lifts
- Prevent oil buildup scenarios by spacing oil application to the driest sections only
Exfoliate Scalp for Better Absorption

Think of your scalp like any other skin — it needs regular exfoliation to clear away dead cells and buildup that block moisture from getting in. Without that step, even the best serums and treatments can’t do their job properly.
Here’s how to exfoliate the right way without overdoing it.
Exfoliate Once or Twice Weekly
Think of scalp exfoliation as a reset button for your scalp — clearing the buildup that blocks your moisturizing products from actually working. Frequency guidelines suggest once weekly for most people, bumping up to twice if you deal with persistent flaking.
Always patch test new exfoliating scalp treatments first, especially if your irritation threshold is low.
Seasonal adjustments matter too — dry winters often call for slightly more consistent exfoliation.
Use Fingertips or a Soft Scalp Brush
Your choice of tool matters almost as much as the technique itself. Fingertips offer natural pressure control — you can feel exactly how firm you’re going, which makes them ideal when scalp sensitivity is a concern. A soft silicone brush works well on damp, product-coated scalps using gentle circular motions that glide without dragging.
- Work in sectioned application for even coverage
- Keep pressure light, especially over tender areas
- Use circular motions, not back-and-forth friction
- Prioritize brush hygiene — rinse it after every use
Remove Flakes, Buildup, and Dead Skin
Flakes don’t just appear out of nowhere — they’re the result of dead skin cells, excess sebum, and product residue slowly accumulating on your scalp.
Acidic scrubs with salicylic acid, enzyme treatments that dissolve keratin, and oil-binding clays all target different layers of that buildup.
Clarifying rinses help sweep everything away, making scalp exfoliation genuinely effective at preventing scalp buildup and flakes before they worsen.
Avoid Harsh Scrubbing on Irritated Scalps
An irritated scalp is already working overtime to heal — scrubbing it harder only sets that process back. Instead, use a gentle scalp massage with light pressure, letting your fingertips move in small circles.
Dilute shampoo to soften the formula’s initial intensity, followed by a warm water rinse.
Watch for sensitivity cues like stinging or burning that signal you should ease up immediately.
Follow Exfoliation With a Hydrating Treatment
Exfoliation opens the door — hydration walks through it. That’s why timing matters: apply your hydrating treatment within minutes of rinsing, while your scalp still feels warm from the temperature shift.
Reach for a lightweight serum using a targeted dropper applicator for precise delivery.
Humectant pairing works best here — glycerin or hyaluronic acid binds moisture fast, supporting scalp exfoliation and health benefits without risking buildup prevention issues.
Skip Exfoliation During Active Flare-ups
When your scalp is actively flaring — think visible redness, burning on product contact, or sudden itch spikes — an Inflammation First Approach means pausing exfoliation completely. Scrubbing inflamed skin worsens barrier damage, not buildup.
Flare‑Safe Cleansing and Gentle Rinse Techniques take priority instead:
- Swap scrubs for a fragrance-free, barrier-friendly wash
- Pat dry softly — no rubbing
- Focus on Barrier Repair Strategies until symptoms settle
Balance Exfoliation With Gentle Cleansing
Once your scalp has calmed down, balance is everything. Think of Exfoliation Frequency and scalp cleansing as partners — one clears the way, the other maintains the foundation. Use a Scalp Brush Technique with Gentle Massage Pressure once or twice weekly, then follow immediately with a hydrating wash.
Product Layer Timing and Temperature Impact matter too — lukewarm water after exfoliation keeps your barrier intact and dry ends hydrated.
Top 6 Scalp Moisturizing Products
Finding the right scalp moisturizer can feel overwhelming with so many options on the shelf.
Here’s what’s worth your attention: These six products stand out for their ingredients, effectiveness, and ease of use across different hair types.
1. SheaMoisture Aloe Butter Vitamin B3 Prewash Masque
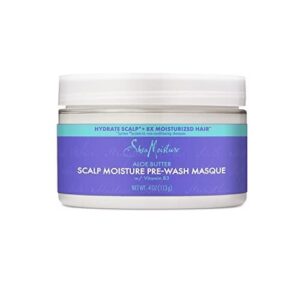
SheaMoisture Aloe Butter Vitamin B3 Prewash Masque is one of the best pre-wash options for dry, textured hair. Massage it from roots to ends after wetting your hair, let it sit for up to 30 minutes, then rinse and shampoo.
The formula’s aloe butter softens the scalp, while niacinamide helps restore moisture balance.
Free of parabens and mineral oil, it delivers 8× greater hydration compared to non-conditioning shampoos—a solid pick at under $20.
| Best For | Anyone with dry, textured, or chemically treated hair who wants a deep moisture boost before shampooing. |
|---|---|
| Price | $18.90 |
| Net Volume | 4 oz |
| Scalp Benefit | Moisturizing |
| Cruelty-Free | Yes |
| Application Type | Pre-wash |
| Fragrance | Fragranced |
| Additional Features |
|
- Packs serious hydration—up to 8× more than a regular shampoo—and helps cut down on breakage
- Made with Fair Trade Shea Butter, free of parabens and mineral oil, and certified cruelty-free
- Works great for curly and 4C hair types, making detangling a lot easier
- The 4 oz jar goes fast—most people get through it in about 2–3 months
- Can feel too heavy for fine hair or anyone who’s prone to product buildup
- Has a noticeable scent, so it’s not the best fit if you’re sensitive to fragrance
2. Living Proof Dry Scalp Treatment
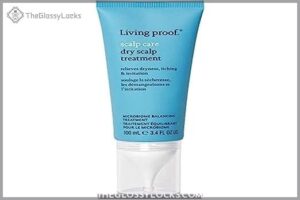
Living Proof Dry Scalp Treatment is worth the $38 investment for those seeking a solution that works effortlessly, even while you sleep or shower. This lightweight, leave-in serum eliminates the need for rinsing, offering convenience without compromising efficacy.
The formula combines sodium hyaluronate and glycerin to draw moisture directly to your scalp, addressing dryness at its source. Apply it to damp hair post-wash, massaging gently in sections for even coverage. This ensures the treatment penetrates effectively without leaving a greasy residue.
Over time, the vitamin B3 microbiome complex helps restore your scalp’s natural balance, reducing itching and flaking. The result is a healthier, more comfortable scalp with minimal effort—no rinsing required.
| Best For | Anyone dealing with chronic dry scalp, itching, or mild flaking who wants a lightweight, no-fuss serum they can work into their regular wash routine. |
|---|---|
| Price | $42.00 |
| Net Volume | 3.4 oz |
| Scalp Benefit | Anti-flaking |
| Cruelty-Free | Not stated |
| Application Type | Leave-in |
| Fragrance | Light, dissipates |
| Additional Features |
|
- Fast-absorbing and non-greasy — massaged in properly, it won’t weigh your hair down or leave residue
- Targets the root cause by supporting a balanced scalp microbiome, so it’s doing more than just masking symptoms
- Easy to fit into your routine — just apply to wet hair after washing, no extra steps needed
- At $42 a bottle, it’s a splurge — though one bottle can stretch several months with weekly use
- Results aren’t instant for everyone; some people need up to four weeks before noticing a real difference
- The lid has been reported to detach from the bottle, which can make dispensing messier than it should be
3. Christophe Robin Hydrating Cream Scrub
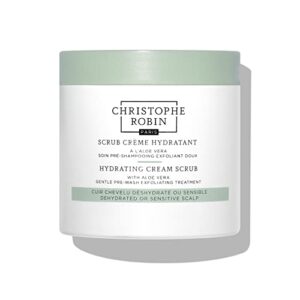
At $43, the Christophe Robin Hydrating Cream Scrub exfoliates and hydrates in one step—eliminating the need for separate treatments. Its formula combines spherical jojoba particles to gently lift flaky buildup with aloe vera and fermented agave juice, which soothe irritation and replenish moisture for a parched scalp.
Massage the scrub into dry or damp hair once or twice weekly, then follow with your regular shampoo. Unlike harsh alternatives, it leaves the scalp feeling refreshed, not stripped, while hair appears noticeably sleeker after rinsing.
| Best For | Anyone with a sensitive or dehydrated scalp who wants a gentle, hydrating exfoliant without the harshness of traditional scrubs. |
|---|---|
| Price | $43.00 |
| Net Volume | 8.4 fl oz |
| Scalp Benefit | Exfoliating |
| Cruelty-Free | Yes |
| Application Type | Pre-wash |
| Fragrance | Not stated |
| Additional Features |
|
- Aloe vera and fermented agave juice soothe and hydrate while the jojoba particles lift buildup—no need for a separate treatment.
- Leaves the scalp feeling fresh and comfortable, not tight or irritated, even on sensitive skin.
- Hair comes out looking sleeker and shinier after rinsing, which is a nice bonus on top of the scalp benefits.
- At $43 for 8.4 oz, it’s a pricier pick compared to most drugstore scalp treatments.
- The gentle formula may not cut through heavy product buildup or stubborn dandruff on its own.
- Using it beyond the scalp—like as a body scrub—will burn through the product fast.
4. Nécessaire Scalp Serum Capixyl Hyaluronic
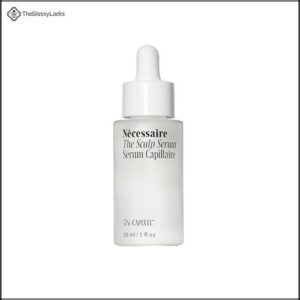
At $48, the Nécessaire Scalp Serum delivers targeted care with two key actives: a 5% Capixyl peptide complex to enhance hair density and a 1% hyaluronic acid blend that hydrates the scalp without greasy residue.
It’s fragrance-free, vegan, and bears the National Eczema Association Seal, making it ideal for sensitive scalps.
Apply using the pipette directly to sections of a damp scalp, with no rinsing required.
| Best For | Anyone dealing with thinning hair or a dry, sensitive scalp who wants a clean, no-fuss daily serum that fits right into their existing routine. |
|---|---|
| Price | $48.00 |
| Net Volume | 1 fl oz |
| Scalp Benefit | Hydrating |
| Cruelty-Free | Yes |
| Application Type | Leave-in |
| Fragrance | Fragrance-free |
| Additional Features |
|
- Combines Capixyl and hyaluronic acid to tackle both hair density and scalp hydration in one step
- Fragrance-free, vegan, and NEA-approved — a solid pick for reactive or eczema-prone scalps
- No rinsing needed and doesn’t mess with your color or styling products
- Some users notice increased oiliness or flaking, especially on styling days
- Results take consistent daily use for up to a month, so patience (and commitment) is required
- At $48 for just one ounce, it’s pricier than a lot of comparable options out there
5. The Ordinary Multi Peptide Hair Serum
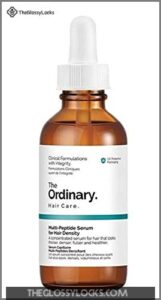
The Ordinary Multi-Peptide Hair Serum delivers exceptional value at just $24, combining Redensyl, Procapil, CapiXyl, and caffeine into a lightweight, water-based formula. This blend promotes follicle activity and supports fuller-looking hair over time. Designed for nightly use, apply a few drops to a clean, dry scalp—no rinsing required.
Its vegan, fragrance-free, and silicone-free composition ensures compatibility with sensitive scalps. The formula prioritizes gradual, consistent improvement, with noticeable results emerging over several months of dedicated use.
Consistency is key: while not an overnight solution, the serum fosters long-term scalp and hair health through sustained application.
| Best For | Anyone dealing with thinning hair from hormonal changes, aging, or medication side effects who wants an affordable, clean-formula serum to layer into their existing hair care routine. |
|---|---|
| Price | $24.00 |
| Net Volume | 2 fl oz |
| Scalp Benefit | Follicle support |
| Cruelty-Free | Yes |
| Application Type | Leave-in |
| Fragrance | Fragrance-free |
| Additional Features |
|
- Great value at $24 — you get a solid multi-peptide blend (Redensyl, Procapil, CapiXyl, caffeine) without spending a fortune.
- Vegan, silicone-free, and alcohol-free, so it plays nicely with sensitive scalps and fits into most hair loss routines.
- Easy to use — just a few drops on a dry scalp before bed, no rinsing needed.
- Results take time — don’t expect changes overnight; most people need several months of consistent use to notice a difference.
- Some users find it feels a bit greasy, which might mean washing your hair more often.
- Works best as part of a broader routine — on its own, it may not move the needle much.
6. Its A 10 Scalp Restore Leave In
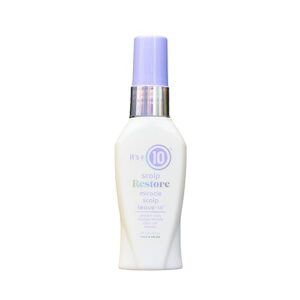
If your scalp feels tight between wash days, the It’s a 10 Scalp Restore Leave In was made for exactly that moment. At $13.99, this lightweight formula combines Seascalp, eucalyptus leaf extract, and red raspberry oil to calm itchiness, reduce flaking, and restore moisture without weighing hair down.
Apply it to damp hair right after towel-drying, focusing on the scalp first. The cooling, minty feel signals it’s working — and for fine or sensitive scalps, a little goes a long way.
| Best For | Anyone dealing with a dry, itchy, or flaky scalp — especially those with fine or sensitive hair who want relief between wash days without a heavy or greasy residue. |
|---|---|
| Price | $13.99 |
| Net Volume | 2.4 oz |
| Scalp Benefit | Soothing |
| Cruelty-Free | Not stated |
| Application Type | Leave-in |
| Fragrance | Mint aroma |
| Additional Features |
|
- Tackles dandruff, dryness, and itching fast — many users say flaking disappears with regular use
- Lightweight, leave-in formula that smooths frizz and leaves hair feeling soft without weighing it down
- The cooling, minty sensation feels genuinely soothing, not just cosmetic
- At $13.99 for just 2 oz, you’ll burn through it quickly — and that adds up
- Results can fade over time, particularly for those with oilier scalps
- The scent is a dealbreaker for some — a few reviewers found it off-putting or just plain odd
Build Your Weekly Moisturizing Routine

A good scalp routine isn’t one-size-fits-all, but it does follow a rhythm.
Once you know what your scalp needs, it’s easier to build habits that actually stick.
Here’s how to structure your week so hydration stays consistent from root to end.
Daily Scalp Check for Dryness or Oiliness
Think of your daily scalp check as a one-minute diagnostic. Press clean fingertips gently along your part — fingertip residue tells you a lot. Dryness shows up as scalp tightness, powdery flake appearance, and a matte look between sections.
Sebum shine that returns within 24 hours signals oiliness.
Timing after wash matters most for managing oily vs. dry scalp types and maintaining scalp pH balance.
Wash-day Scalp Hydration Steps
Wash day is your scalp’s reset button — and the order you follow matters more than the products you own. Keep scalp pH balance in mind from start to finish.
- Begin with pre-wash prep: a pre-wash oil treatment technique like SheaMoisture’s masque protects against moisture loss
- Exfoliate gently for scalp exfoliation health benefits and better serum absorption timing
- Wash with lukewarm water, using a water temperature gradient from warm to cool
- Apply scalp masks or serums within three to five minutes post-wash for best post-wash seal
- Choose ingredients for scalp hydration — glycerin, aloe, hyaluronic acid — in the best hydrating pre-wash treatment you can find
Midweek Refresh for Dry Ends
Between wash days, dry ends don’t need a full reset — just a quick, targeted refresh.
A Cold Mist Spray or Silicone-Free Fog lightly misted from midlengths to ends soften without reactivating scalp buildup.
Follow with one to two drops of lightweight hair oil, work it through using the Finger Detangle Technique, then blot with a Microfiber Towel Dry.
Done.
Weekly Exfoliation and Pre-wash Treatment
Once a week, before you shampoo, give your scalp a proper reset. Rotating exfoliants — like the Christophe Robin Hydrating Cream Scrub with Aloe Vera — work well for sensitive types, clearing build-up without disrupting scalp pH optimization.
Follow with a prewash oil as a hydrating prewash treatment, letting it sit 5–15 minutes.
Hydrating post-exfoliation locks moisture back in before cleansing begins.
Adjust Routine for Fine, Straight, Curly, or Coarse Hair
Your hair texture changes everything about how products behave. Porosity adjustments matter most — fine, straight hair requires lightweight hair oil application methods and strict product buildup control near the roots. Curly types benefit from curl-definition boost with richer creams on the ends.
Follow this zone-specific hair care routine:
- Fine hair: Scalp oil balance first, ends second.
- Curly/coarse hair: Heat protection and heavier end sealing.
- All types: Hair type compatibility guides determine product weight.
Increase Hydration During Cold or Dry Weather
Cold and dry weather hits your scalp hard. Heating systems strip indoor air of moisture, directly worsening dry scalp.
Boost humidifier usage at home, try steam showers occasionally, and layer water-rich sprays with hyaluronic acid on damp hair.
Weekly scalp masks help counter the effects of environmental conditions on scalp moisture.
Add nighttime hydration with a silk cap and wear protective headwear outdoors.
See a Dermatologist for Persistent Flakes, Itching, or Redness
If your flakes, itching, or redness don’t respond to consistent at-home care, that’s your signal to stop trialing products and book a dermatologist appointment. Red flag symptoms — like thick scale, spreading redness, or persistent itch — can point to seborrheic dermatitis, eczema, or psoriasis.
Dermatologist-recommended scalp treatments, including prescription steroid use or prescribed antifungals, often outperform anything over-the-counter for lasting itchy scalp relief.
Frequently Asked Questions (FAQs)
Can high cortisol cause dry scalp?
Yes, high cortisol can throw your scalp’s balance off. Cortisol barrier disruption weakens moisture retention, while a decline in sebum production and hormone-driven inflammation trigger cortisol-induced flaking through a stress-hormone feedback loop.
How do I moisturize my scalp and hair?
To moisturize your scalp and hair, apply a water-based serum to your damp scalp within minutes of washing, then work leave-in conditioners through your ends for balanced, lasting hydration.
What is the 3 minute rule for moisturizer?
Timing is everything. Apply your leave-in conditioner or humectant within three to five minutes post-wash — surface moisture supercharges rapid absorption, enabling post-wash sealing before water evaporates and moisture retention drops.
Can diet changes improve scalp moisture levels?
Diet absolutely shapes scalp moisture. Omega‑3 benefits skin barrier function, zinc secretion regulates sebum, and vitamin A supports natural oil production.
Daily water intake and an anti‑inflammatory diet round out your scalp nutrition from within.
How does hair porosity affect product absorption?
Your hair’s cuticle permeability determines how quickly moisture lock‑in happens.
Low porosity hair resists lightweight serums without warmth‑enhanced uptake, while high porosity strands absorb fast but lose hydration just as quickly.
Are scalp moisturizers safe during pregnancy?
Most scalp moisturizers are generally safe during pregnancy when used as directed.
Still, patch testing, avoiding harsh essential oils, and checking with your dermatologist ensures systemic absorption stays minimal and toxicological concerns remain low.
Does scalp hydration slow hair loss progression?
Hydration is the soil, not the seed. A balanced moisturized scalp reduces follicle inflammation and transepidermal water loss, but it won’t stop androgenetic alopecia. See a dermatologist for persistent shedding.
How long before visible hydration results appear?
Immediate relief often shows within hours, but real change takes time. Most people notice early week improvement in softness, while a two-week barrier reset and monthly hydration gains mark lasting progress.
Conclusion
Think of dryness as your hair’s quiet plea for attention—one that speaks differently at the root than at the tip. A consistent scalp and ends moisturizing routine doesn’t just silence that plea; it tackles the underlying imbalance causing it.
When you layer the right humectants, seal with purpose, and adjust for the seasons, you stop chasing symptoms. This approach builds genuine resilience—from the follicle down to every last strand.
- https://zaphiranature.com/blogs/curl-advice/guide-to-the-loc-and-lco-methods?srsltid=AfmBOoo4Grqfy3y4LVENXLDaImKXUlHC_o-ZcXXWUrtXW3mcMpUsOdy4
- https://www.strengthofnature.com/blogs/african-pride-hair/loc-vs-lco-method-and-what-s-best-for-your-hair
- https://carolsdaughter.com/blogs/beauty-blog/what-is-the-loc-method-hair-care-routine?srsltid=AfmBOoqacP7n7BjK0YacGHz945d3zPbs9e8hq1Ek4_FCJh1bDlvpwsFI
- https://cuttingcrewhair.com/news?post=best-ingredients-for-moisturizing-hair
- https://www.allure.com/story/best-hydrating-hair-treatments