This site is supported by our readers. We may earn a commission, at no cost to you, if you purchase through links. This content is for general informational and educational purposes only and is not a substitute for professional medical, dermatological, or nutritional advice.

Grab a spray bottle, mist your hair, and watch what happens. That single droplet tells you more about your strands than any product label ever will. Does the water bead up like rain on a waxed car hood, or vanish into your hair almost instantly?
That reaction reveals your hair’s porosity, how well your cuticle absorbs and holds moisture. Get this wrong, and you’ll keep dumping product on hair that either repels it or drinks it dry in minutes.
The spray bottle hair porosity test costs nothing and takes under five minutes. Grab distilled water and a clip, because you’re about to learn exactly what your hair’s been trying to tell you.
Table Of Contents
- Key Takeaways
- What is The Spray Bottle Porosity Test?
- Preparing Your Hair for Accurate Results
- Step-by-Step Guide to The Spray Test
- Interpreting Your Porosity Test Results
- Adjusting Your Hair Care by Porosity
- Frequently Asked Questions (FAQs)
- How do you test hair porosity with spray water?
- What is the most accurate hair porosity test?
- Does the hair porosity test actually work?
- How can I test my hair porosity at home?
- Can I do the spray test on wigs or extensions?
- Does hair length change how the test results look?
- Is the spray test accurate for gray or white hair?
- Should the spray test be repeated after seasonal weather changes?
- Conclusion
Key Takeaways
- Mist a clean, dry strand from 6-8 inches away and watch the water: beading means low porosity, quick absorption means high, and moderate soaking means medium.
- Prep matters just as much as the test itself, so clarify your hair first and check results at room temperature (around 75°F) to avoid skewed readings.
- Match your products to your results—lightweight gels and glycerin for low porosity, oils and protein for high porosity, and section-specific care for mixed porosity.
- Porosity isn’t fixed, so retest every 3-6 months or after chemical treatments, humidity shifts, or major length changes to keep your routine on track.
What is The Spray Bottle Porosity Test?

Your hair’s porosity controls how it drinks up moisture and holds onto it, and the spray bottle test is the easiest way to check yours at home. No lab equipment needed, just water, a section of hair, and a few minutes of watching. Here’s what actually happens when that mist hits your strands, and why it works.
If the water beads up and sits on top instead of soaking in, you’re likely dealing with low porosity strands, and knowing this changes everything about which products and techniques will actually work, as this guide on how to grow low porosity hair breaks down in detail.
How The Test Works
Since your hair’s cuticle layer tells the real story, this test reads it through water.
Fill a spray bottle with room-temp distilled water, hold it 5-7 cm away, and mist a 5-cm section once for 0.5 seconds.
Watch closely:
- Beading that lingers past 20 seconds
- Water vanishing in 2 seconds flat
- A glossy sheen versus dull absorption
- Droplets rolling off like rain on wax
Why Use a Spray Bottle?
A spray bottle isn’t just handy, it’s the whole point. You need even coverage on a clean strand, and only a fine mist delivers that.
Precise application means controlled misting, not a soaked mess. That controlled dose gives you consistent moisture and gentle distribution, so water absorption reflects your cuticle’s true behavior, not how hard you squeezed the bottle.
A key feature is the adjustable nozzle that allows switching between mist and stream spray patterns for suitable use. adjustable nozzle settings provide flexibility depending on the application need.
Spray Test Vs. Other Methods
That adjustable nozzle earns its keep once you stack the spray test against alternatives.
The water droplet test takes a minute but skips full-head coverage. Strand immersion (the float test) matches spray results only 79% of the time. Digital meters hit 93% accuracy but cost $150-$300.
If you’re unsure which method fits your routine, this guide on curly hair moisturizing tips breaks down how porosity affects the products your strands actually need.
Your $5-$12 bottle wins on cost, speed, and user-friendliness.
Preparing Your Hair for Accurate Results
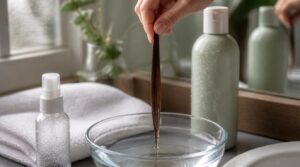
Skip the prep work and your results will lie to you. Product residue, damp strands, even the wrong room can throw off what the water actually shows you. Here’s what you need to lock down before you pick up that spray bottle.
Cleansing and Product Removal
Skip this step and you’re just testing your conditioner, not your hair. Use a clarifying shampoo so surfactants can break down product film and buildup instead of leaving a coating behind. Rinse thoroughly, since leftover residue skews water solubility and blocks absorption.
Skip the clarifying shampoo and you’re just testing your conditioner, not your hair
Shampooed the night before? Good. Clean dry hair gives you a true baseline before spraying.
Drying and Wait Time
Blow dryers lie to your cuticle, so let it air dry completely before spraying anything.
Use room-temperature water and check hair zones immediately, then again at three minutes. That gap reveals bead breakup timing and true drying pace, not just first-splash spread.
Keep consistent wait intervals every retest. Rushed checks only catch surface wetting delay, not what’s really soaking in.
Environmental Factors to Consider
Before you grab that spray bottle, check your room. Humidity control matters more than people think: at 80% humidity, droplets linger 30 seconds; at 30%, they vanish in 5.
Keep the room near 75°F, use room-temperature water with low mineral content, and avoid drafts or dim lighting. These small tweaks protect your hair porosity test from skewed results and false readings.
Step-by-Step Guide to The Spray Test
Your hair’s clean, dry, and ready to talk. Now it’s time to grab that spray bottle and get down to business. Here’s exactly how to run the test, step by step.
Sectioning and Spraying Technique
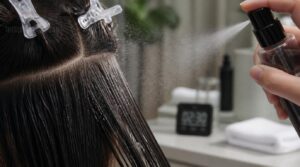
Precision beats guesswork here. Section hair into 2–3 inch grid pieces, clip each with non-conductive clips, then group strands into sets of 3–5 for testing.
Hold your bottle 6–8 inches away, angled 45 degrees, and release 2–3 milliliters per spray. Wait 5 seconds before spraying again. Keep total application under 30 seconds per section for reliable water absorption readings.
Observing Water Behavior

Watch what happens the second water hits the strand. Does it water bead up or vanish fast? Low porosity: droplets sit tight, glossy, slow to soak. High porosity: quick absorption, dull cuticle shine, rough texture.
- Beading vs. absorption speed
- Droplet spread width
- Surface shine or matte look
Room-temperature water reveals the truth—no guessing required.
Documenting Immediate and Delayed Results
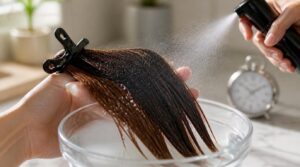
One glance won’t cut it—your notes need two timestamps. Right after spraying, jot down what you see: water beads up or soaks in fast? Then check back at the 3-minute mark. Did those droplets shrink or vanish? That’s time-based absorption in action.
Track each section separately, so crown and nape don’t get lumped together in your results.
Interpreting Your Porosity Test Results

So you sprayed your hair and watched the water do its thing. Now comes the real work: figuring out what it means. Here’s how to read the signs, whether your hair beaded up, soaked in, or did a little of both.
Low Porosity Indicators
Beads sitting on the strand for five-plus minutes? That’s low porosity talking.
Tilt your head and watch for droplet roll-off—water sliding right off tight cuticles. Underneath, the section still feels dry to the touch, even soaked on top.
Rub two wet strands together. Squeaky, slippery sound? That’s your cuticle staying shut. The area also stays cooler longer, since water sits outside instead of soaking in.
High Porosity Signs
No beads, no roll-off—just gone. Water absorption speed tells the story: under 3 seconds per strand, soaked in before you can blink.
Rub it between your fingers—rough, almost bumpy. That’s the cuticle layer standing wide open. Frizz shows up fast too, sometimes within 30 seconds of air drying, and leave-ins rinse out before they even work.
Mixed Porosity Patterns
Some strands soak fast, others bead up—that’s mixed porosity at work. Different hair porosity zones exist on one head, thanks to curl pattern shifts, strand thickness, or product buildup coating certain sections.
Humidity affects absorption rate too, softening or amplifying that patchy look. Retest under the same conditions—same spray bottle method, same distance—to confirm the cuticle layer truly behaves inconsistently, not just once.
Adjusting Your Hair Care by Porosity

Now you know your porosity type, so it’s time to put that knowledge to work. The right products can make or break your results, whether you’re dealing with one porosity type or a mix of both. Here’s how to build a routine that actually matches what your hair needs.
Product Choices for Low Porosity
Water beading means your cuticle layer stays shut tight, so pile on lightweight humectants like aloe vera or glycerin.
Skip heavy creams. Reach for:
- Water-based gels
- Silicone-free serums
- Alcohol-free sprays
These sink in fast, no buildup, no greasy film sitting on top of strands that already resist moisture.
Product Choices for High Porosity
If your spray test showed water vanishing in under 30 seconds, your cuticle’s wide open. Seal fast with oil sealing methods using argan or squalane on mid-lengths and ends.
Balance humectants with moisture: glycerin draws water in, oil locks it down. Choose liquid leave-ins over heavy creams, and limit protein treatments to every 4-6 weeks—your cortex needs filling, not overload.
Routine Tweaks for Mixed Porosity
When your crown drinks water fast but your ends let it sit in beads, you’ve got mixed porosity, and your routine needs section-specific conditioning.
Comb a segment of hair at a time, applying lightweight glycerin near roots where water is immediately absorbed, then layer squalane on thirstier ends. This targeted treatment application keeps moisture balanced without overloading either texture.
When to Retest Hair Porosity
How often should you grab that spray bottle again? Porosity isn’t permanent—retest every 3-6 months, or after chemical treatments, seasonal humidity shifts, or big length milestones.
Spritz the hair, watch how fast water is immediately absorbed, and adjust. Travel to humid climates or finish a keratin treatment? Retest.
Staying consistent keeps your hair care porosity test accuracy sharp year-round.
Frequently Asked Questions (FAQs)
How do you test hair porosity with spray water?
Fill a spray bottle with room-temperature water, section clean hair, and spritz a strand from 6-8 inches away. Watch the water droplet behavior — beading means low porosity, quick absorption means high. Backing with a towel helps you see it clearly.
What is the most accurate hair porosity test?
Honestly, visual observation with room-temperature water beats the float test for accuracy. Consistent testing conditions matter more than the method itself. Spray tests give repeatable, section-by-section results, while floating strands leaves too much room for error.
Does the hair porosity test actually work?
It works as a practical guide, not a lab diagnosis. Real-world reliability depends on clean, product-free strands and consistent technique. Think of it as a starting point for understanding moisture retention, not gospel truth.
How can I test my hair porosity at home?
Grab a spray bottle with water, mist clean, dry strands, and watch closely. Beading signals low porosity hair, quick absorption means high porosity, and moderate soaking points to medium porosity—your simple DIY hair porosity check.
Can I do the spray test on wigs or extensions?
Skip it. Synthetic wig absorption and human hair extensions behave nothing alike, so the spray test won’t give real hair porosity answers on lace front wigs, heat-treated fibers, or acrylic strands—stick to your actual strand test instead.
Does hair length change how the test results look?
Yes—length shifts what you see. Short strands absorb water in 10 seconds flat; 16-inch hair spreads larger droplets and stays damp up to 45 seconds, so length-based interpretation accuracy matters when reading your porosity results.
Is the spray test accurate for gray or white hair?
Not entirely. Low melanin thins the cuticle layer, speeding water absorption and skewing your hair porosity test toward "high" even when strands aren’t. Run it three times, control humidity, and trust patterns over a single reading.
Should the spray test be repeated after seasonal weather changes?
Retest every three months, especially at seasonal shifts. Humidity, temperature, and product buildup all skew moisture retention and spray test accuracy, so don’t trust one reading year-round, your hair porosity changes with the weather.
Conclusion
Water never lies, and now you speak its language fluently. That droplet test just handed you the missing piece: know your porosity, and every product decision gets easier.
Low porosity hair wants heat and lightweight layers. High porosity craves protein and sealants. Mixed patterns need patience and observation, section by section.
Retest every few months, since heat, color, and seasons change your cuticle’s story. Master this five-minute habit, and you’ll never buy blind again.