This site is supported by our readers. We may earn a commission, at no cost to you, if you purchase through links. This content is for general informational and educational purposes only and is not a substitute for professional medical, dermatological, or nutritional advice.

Drop a single strand in a glass of water and watch what happens. It’ll either bob on top, hang in the middle, or sink like a stone, and each outcome tells you something your shampoo bottle never will.
If your strand sinks fast, a rich treatment from this list of deep conditioners formulated for low-porosity hair can restore balance without weighing strands down.
That’s the whole idea behind the float test for hair porosity. Salons charge good money for porosity analysis, but this trick uses stuff already sitting in your bathroom.
Grab a glass, pull a strand from your crown, and get ready to finally understand why your hair drinks up product or lets it all slide right off.
Table Of Contents
- Key Takeaways
- What Hair Porosity Reveals
- Prepare Hair for The Float Test
- Perform The Hair Porosity Float Test
- Interpret Your Float Test Results
- Check Float Test Accuracy
- Frequently Asked Questions (FAQs)
- Is the float test accurate for hair porosity?
- How to do a float test for hair porosity?
- What is the most accurate hair porosity test?
- What’s the worst hair porosity to have?
- How often should you repeat the float test?
- Does hair length change how a strand floats?
- Is the float test reliable for gray or white hair?
- How does water temperature influence float test accuracy?
- Conclusion
Key Takeaways
- Where a strand lands in a glass of water—floating, hovering, or sinking—shows you whether your hair is low, medium, or high porosity, which explains why products either sit on top of your hair or soak in too fast.
- Damage from bleaching, heat, or UV exposure can make even naturally low porosity hair sink like it’s high porosity, so cuticle condition can throw off your results if you don’t account for it.
- Prepping your hair by clarifying buildup, rinsing out hard water minerals, and drying strands completely is essential, since leftover residue or dampness will skew your reading.
- Testing three or more strands from different parts of your head, then confirming with a spray test or slip test, gives you a far more reliable result than trusting one strand alone.
What Hair Porosity Reveals
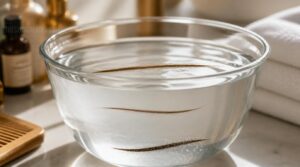
Your hair’s porosity level tells you exactly how it controls moisture, and that changes everything about your care routine. Once you know where you land, product choices stop feeling like guesswork. Here’s what each porosity type means for you.
Building a porosity-based moisture routine helps you match products and layering techniques to how your strands actually absorb and hold hydration.
Low Porosity Hair
Picture shingles on a roof, packed flat and overlapping tight. That’s your cuticle tight packing at work in low porosity hair, blocking water and product alike.
This is why the Float Test matters: strands stay on top instead of sinking. Moisture struggles in, but once it’s there, moisture retention balance locks it in place, leaving behind that telltale product surface buildup you can’t rinse away easily. This also means that drying time is often longer, but using a heat cap for low porosity hair can speed up the process.
Medium Porosity Hair
If low porosity hair is a tight roof of shingles, medium porosity is those same shingles with a little give. In the Float Test, strands hover mid-glass, not floating, not sinking fast.
That’s the sweet spot: good moisture retention balance, strong color uptake, easy styling, and healthy shine most people chase.
High Porosity Hair
Sink fast in the water absorption test, and you’re dealing with high porosity hair. Cuticles sit wide open, so moisture escapes 30-40% within two hours. That’s rapid moisture loss in action, plus faster color fading and frizz in humid air.
Good news: protein absorbs quickly here. Deep conditioning and the right product selection rebuild elasticity fast.
Cuticle Damage and Porosity
Here’s the twist: damage can fake out your Float Test. Bleaching raises porosity roughly 35% per cycle, and heat or UV exposure lifts cuticles too, so a naturally low porosity strand may sink like high porosity hair.
Damage can fool the Float Test—bleaching or heat exposure makes low porosity hair sink like it’s high porosity
That’s why cuticle repair methods like protein treatments matter. They fill gaps, boost moisture retention, and give you a truer read.
Prepare Hair for The Float Test
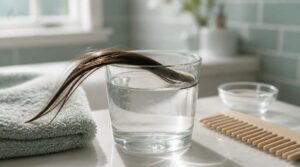
A little prep work makes all the difference between a clear result and a confusing one. Before you drop a single strand in water, your hair needs to be in the right condition to give you honest feedback. Here’s exactly what to check off first.
Clarify Away Product Buildup
Old gel and dry shampoo coat strands, skewing your hair porosity test before it starts. Use a clarifying shampoo to strip buildup so water reaches the cuticle honestly.
- Removes styling residue
- Lifts oil-based buildup
- Balances scalp
- Preps strands for absorption
Follow with light conditioner. This detox step makes your float test trustworthy, not guesswork.
Once your strands are clean and product-free, you’re ready to try this simple hair porosity test at home for results you can actually trust.
Address Hard Water Residue
If your tap water leaves a chalky film, that mineral coating throws off your hair porosity test results.
Try a citric acid rinse, a vinegar prewash, or a chelating shampoo to strip calcium and magnesium buildup. A distilled water rinse works too. A water softener helps long-term. Clean strands give your Float Test a fair shot.
Dry Hair Completely
Damp strands throw off your hair porosity test every time, so patience here really counts.
Skip the blow dryer and let hair air dry, or gently squeeze water out with a microfiber towel first. Wait until strands feel bone-dry before testing.
- No dampness left at the roots or ends
- Strand feels light, not cool to touch
- Skip low heat drying or diffuser shortcuts
- Give it a full Dry Test check
Select Clean Hair Strands
Not every strand tells the same story, so pick wisely.
Grab crown strands from the top of your head, three to five of them. They’re thicker, less damaged, and give a true reading.
| Skip | Choose |
|---|---|
| Split ends | Smooth tips |
| Recent color/keratin | 8+ weeks chemical-free |
| Silicone residue | Rinsed, product-free |
| Uneven strands | 4-6 inch, uniform width |
Use Room-Temperature Water
Grab water straight from the faucet, around 68-72°F, nothing heated or chilled. Extreme temps mess with surface tension and cuticle behavior, skewing your porosity test.
- Fill glass with room-temp water
- Avoid ice or hot water
- Let it sit a moment first
- Keep temp steady for each strand
This prevents temperature drift and keeps your float test conditions consistent, strand after strand.
Perform The Hair Porosity Float Test
Your hair is prepped and ready, so now comes the fun part. This is where you actually get to see your porosity in action, right in front of you. Here’s exactly how to run the test, step by step.
If you’re not sure how sectioning works, this professional hair styling step-by-step guide walks you through it with clear visuals.
Fill a Transparent Glass

Your glass sets the stage for accurate buoyancy readings. Choose borosilicate glass—it resists cracking and shows hair clearly.
Fill it to at least 5cm deep (250-300ml), using room-temperature water between 20-22°C. Mark 2cm intervals for calibration, and set up bright, even lighting so you can actually see where each strand settles during your hair porosity test.
Place Hair on Water
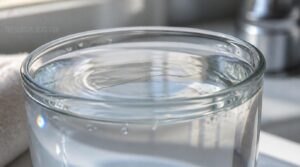
With your glass ready, pick one clean strand, 2-3 inches long, from the mid-shaft area—no oils, no conditioner. Do a quick water temperature check (68-72°F) first.
Lay the strand flat on the surface, not dropped or dunked. Surface tension holds low porosity hair up top; let it settle naturally before judging buoyancy.
Wait Three to Four Minutes

Now comes the hardest part: patience. Set a timer for three to four minutes and resist poking the strand.
This is the Cuticle Opening Time, when water works into the hair shaft. Low porosity hair barely tilts; high porosity hair sinks fast. Rushing this Water Absorption Window skews your hair porosity measurement, so let buoyancy stabilize before you judge anything.
Test Multiple Hair Strands
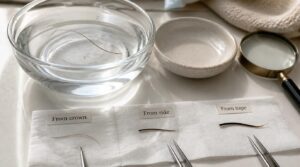
One strand isn’t proof of anything. That’s why you need a real Strand Sampling Strategy:
- Pull hair from crown, sides, and nape (Cross Section Variation)
- Test three strands minimum
- Use mid-shaft hair only
- Watch each one separately
This Multiple Strand Comparison builds your Reliability Check Protocol, giving you Consistent Result Verification before trusting your hair porosity measurement.
Record Each Strand’s Position
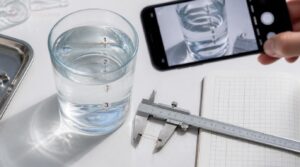
Watching three strands means nothing if you can’t remember which did what. Set up a simple position log with columns for Strand ID, Float Level, Grid Column, and Time. Use a caliper for precise float level measurement, snap a quick photo for photographic documentation, and log timestamps immediately.
This data entry protocol turns guesswork into real hair porosity assessment.
Interpret Your Float Test Results

Your strand landed somewhere in that glass, and now it’s time to figure out what that means. Where it settled tells you a lot about your hair’s true porosity level. Let’s break down each possible outcome, so you know exactly what your results are telling you.
Floating Indicates Low Porosity
A strand riding on top of the water is your cuticle telling you it’s tight and closed. That’s low porosity hair at work: water beads instead of soaking in, absorption stays slow, and full wetting can take the whole float duration.
If it’s still floating after clarifying first, trust it — that’s a true low porosity read.
Mid-Glass Suggests Medium Porosity
Settling around the middle of the glass? That’s your mid-glass float interpretation, and it points to medium porosity, the "just right" zone.
Cuticles show cuticle moderate openness, letting water in without dumping it back out fast.
This balanced moisture retention makes medium porosity hair forgiving and responsive to color, bleach, or relaxers with predictable results.
Sinking Suggests High Porosity
If your strand drops fast, you’re looking at high porosity, raised cuticles that gulp water and cause rapid sinking.
- Rapid water uptake: 25–35% of dry weight in 5 minutes
- Cuticle damage widens gaps, speeding sink time
- Warmer water shortens float time by up to 2 minutes
Thinner strands sink faster too, so factor in diameter.
Compare Inconsistent Strand Results
Ever pull three strands and get three different answers? That’s normal. Strand variation patterns show up even on one head, crown hair often reads higher porosity than nape hair. Test in groups of three, average the results, and note environmental interference like humidity or drafts. If results stay shaky, cross test validation, matching float position with moisture retention, confirms whether it’s real porosity or testing error.
Consider Chemical Hair Damage
If your strand sinks fast, chemical processing is usually the culprit. Relaxers, bleach, and sulfates strip the cuticle and disrupt pH, causing protein denaturation and moisture loss. Bleached hair can jump 2.5 points on the porosity scale.
Sinking doesn’t always mean damage, but paired with dryness or breakage, it confirms chemical hair damage affecting your float test reading.
Check Float Test Accuracy

The float test is simple, but it’s not foolproof. A few sneaky factors can throw off your results without you even noticing. Here’s what to watch for, plus a couple of backup checks to confirm what you’re seeing.
Surface Tension Affects Results
Water isn’t neutral in this test, it’s a variable. Surface tension shifts with temperature, pH, and minerals, changing how strands float.
Cooler, softer water raises tension, helping hair float more. Warmer or hard water lowers it, causing sinks that look like high porosity but aren’t.
That’s surface tension variability at work, not always your cuticle layer’s true moisture retention story.
Product Residue Causes Errors
Your hair care products leave a mark, too. Product film interference from leave-ins or gels can mask true porosity, while mineral deposit weight from hard water sinks strands unfairly.
Watch for:
- Oily coating mask
- Waxy residue buildup
- Silicone slip
- Uneven strand behavior
- Dramatic position shifts
A distilled water rinse and cross check method help confirm if residue skewed your results.
Try The Spray Test
For a second opinion, mist a clean strand from 15 centimeters away using a spray bottle filled with 20–22°C distilled water. Watch the droplets: fine 0.3–0.5mm mist means low porosity, beaded 0.8–1.2mm drops mean medium, and heavy 1.5mm+ pooling means high porosity.
Test three strands, then cross-check against your float results for agreement.
Compare Cuticle Slip Results
Once your spray results are in, run the Slip n Slide test on a fresh strand for a third check. Smooth, instant slip signals low porosity; slight catching means medium; rough dragging means high.
Match this against your float test depth scoring. Agreement across methods confirms true porosity, while mismatches usually point to cuticle slip variability from damage.
Seek Professional Porosity Analysis
Three home tests lining up? Great sign. Still stuck between categories? That’s your cue for professional porosity analysis at a salon.
Stylists use a real porosity meter test and gadgets like vapor sorption or gas adsorption pore analysis for true hair porosity classification. You’ll walk away with a custom care plan, not a guess.
Frequently Asked Questions (FAQs)
Is the float test accurate for hair porosity?
Picture a coin balancing on water, held up by tension alone — that’s your strand’s fate too. It’s a helpful starting point, not gospel, since surface tension, temperature, and buildup can skew results.
How to do a float test for hair porosity?
Fill a clear glass with water, use the Strand Placement Technique to lay clean hair on top, then apply the Observation Time Window of 3–4 minutes to spot low porosity, medium porosity, or high porosity results.
What is the most accurate hair porosity test?
Combining a Digital Porosity Meter, Microscopic Imaging Analysis, and Laboratory Absorption Percentage testing gives the most reliable results. These methods pair well with the float test, correlating 90 percent with lab data when hair is properly prepped beforehand.
What’s the worst hair porosity to have?
Don’t assume any porosity is inherently "bad" — genetics play a role. That said, high porosity hair struggles most: faster moisture loss, more breakage, quicker color fade, and heat damage than low or medium porosity strands.
How often should you repeat the float test?
Retest every 3 months for routine verification, plus after chemical treatments, seasonal humidity shifts, product changes, or growth milestones. Your hair porosity and moisture retention shift with these factors, so retesting keeps product selection accurate and effective.
Does hair length change how a strand floats?
Short strand, long strand—the glass doesn’t care about length; it cares about density. Hair porosity and hair length rarely interact directly. Cuticle condition and trapped air drive buoyancy vs length every time, not how much hair you snipped off.
Is the float test reliable for gray or white hair?
Not entirely. Cuticle tightness in gray strands causes false low porosity readings, since 70% float past four minutes regardless of true porosity. Pigment influence matters too—melanin’s absent, raising surface tension.
Pair with the spray test comparison (92% vs. 68% accuracy) for reliable results.
How does water temperature influence float test accuracy?
As the saying goes, water finds its own level, and so does your reading. Warm water triggers cuticle expansion and buoyancy change, while cold water masks porosity. Stick to room temperature for honest results.
Conclusion
Picture a client who spent years drenching her curls in heavy butters, wondering why they still felt dry by noon. One float test strand sank fast; her cuticles were wide open, guzzling moisture she couldn’t hold onto. That single glass told her more than a decade of guessing.
The float test for hair porosity hands you that same clarity. Grab your strand, watch the water, and let your hair finally speak a language you understand.