This site is supported by our readers. We may earn a commission, at no cost to you, if you purchase through links.
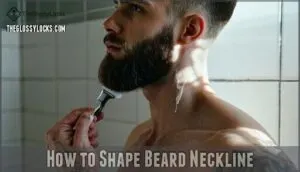
 Trimming beard neckline without mistakes starts with finding your Adam’s apple. Place two fingers above it – that’s your cutting line.
Use a quality beard trimmer to remove hair below this point. Start with a longer guard setting and work shorter if needed.
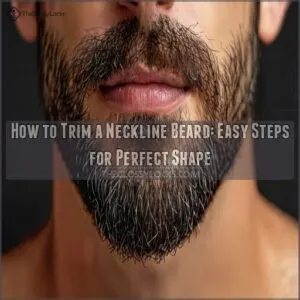
Create a curved line from ear to ear, following your natural jawline. Don’t trim too high or you’ll lose your beard’s fullness.
Use short, controlled strokes and check both sides frequently for symmetry. Clean up stray hairs with precision scissors.
The key is patience and proper technique. Master these fundamentals and you’ll discover advanced shaping methods that transform your entire look.
Table Of Contents
- Key Takeaways
- Finding Beard Neckline
- Defining Neckline Curve
- Trimming Techniques
- Shaping Beard Neckline
- Essential Tools Needed
- Preventing Common Mistakes
- Choosing Right Neckline
- Maintaining Clean Neckline
- Frequently Asked Questions (FAQs)
- How do you trim a beard neckline?
- Should you trim a beard if you have a misshapen or bushy neckline?
- How to trim your neckline properly?
- How to trim a beard without going overboard?
- How do I choose the best beard neckline?
- How do you trim a beard?
- Should you trim your neckline with stubble?
- How often should I trim my neckline?
- What if I make a trimming mistake?
- Can I trim wet or damp beard hair?
- Conclusion
Key Takeaways
- Find your cutting line correctly – Place two fingers above your Adam’s apple to mark where you’ll trim, then create a curved horseshoe shape connecting ear to ear that follows your natural jawline.
- Start conservative with your trimmer – Use a guard setting that’s two levels shorter than your beard length and work gradually shorter if needed, since you can always cut more but cannot put hair back.
- Check symmetry frequently – Use multiple mirrors and step back often to compare both sides of your neckline, marking any uneven spots before making corrections.
- Maintain regularly with quality tools – Trim your neckline every 3-5 days using sharp, clean equipment and always work with completely dry hair to avoid over-trimming mistakes.
Finding Beard Neckline
Your beard’s neckline sits one to two finger widths above your Adam’s apple, creating the foundation for a clean, professional look.
Your beard’s foundation starts with precise neckline placement—get this right, and everything else follows perfectly.
You’ll locate this essential boundary by placing your fingers on your Adam’s apple and marking where your beard should end to avoid the dreaded neckbeard appearance.
Locating Adam’s Apple

Finding Adams apple marks your first step toward beard neckline trimming mastery. Run your fingers along your throat’s center while swallowing to feel this neck landmark move. The Adams prominence becomes more visible when you tilt your head back slightly.
Here’s your palpation method checklist:
- Swallow slowly – Feel the cartilage rise and fall
- Press gently – Use light fingertip pressure only
- Tilt head back – Increases Adams visibility dramatically
- Mark the spot – Note the highest point clearly
- Stay relaxed – Tension makes location harder to find
Measuring Finger Widths

Two fingers become your measuring tools for perfect beard neckline placement. Place your middle finger directly on your Adam’s apple, then position your index finger above it.
This creates the ideal starting point for trimming. Hand size variance affects accuracy, so adjust accordingly. Consistent measurement prevents common beard mistakes when you trim beard at home.
| Finger Placement | Measurement Result | Common Outcome |
|---|---|---|
| Too High Above Apple | Neckline Too Low | Messy Appearance |
| Perfect Two-Finger Gap | Ideal Neckline Position | Clean Professional Look |
| Inconsistent Spacing | Uneven Beard Line | Asymmetrical Results |
| Single Finger Only | Neckline Too High | Unnatural Appearance |
The key to a clean professional look is achieving the perfect two-finger gap, which results in an ideal neckline position. This method helps avoid a messy appearance or unnatural appearance that can come from incorrect finger placement or inconsistent spacing.
Identifying Natural Jawline

Your natural jawline crease becomes visible when you tilt your head downward slightly.
This crease marks where your neck meets your jaw, creating the foundation for your perfect beard neckline.
Use finger placement to trace this natural line, as it varies with different face shapes and beard lengths.
The jawline crease guides your neckline beard trimming decisions effectively, helping you find the natural line.
Defining Neckline Curve
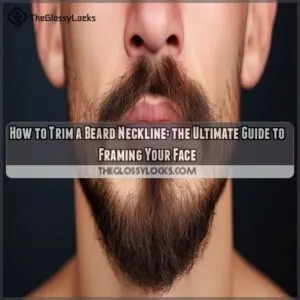
You’ll create a horseshoe-shaped curve that connects the pivot points below each ear to the marked spot above your Adam’s apple.
A perfect horseshoe curve transforms your beard from amateur to professional in one smooth sweep.
This natural curve follows your neck’s contour and prevents the flat, unnatural line that makes even well-groomed beards look awkward, creating a more natural appearance.
Creating Horseshoe Shape

Shape your beard neckline by connecting the points above your Adam’s apple to create a smooth horseshoe curve. This technique guarantees proper symmetry importance and professional appearance.
Follow these essential steps for perfect curve definition:
- Connect the marked point above your Adam’s apple to both ear pivot points
- Create a gentle arc that mirrors your natural jawline curvature
- Check symmetry by comparing both sides of your horseshoe curve
- Adjust the curve to match your face shape and beard length
- Mark the final line before trimming to avoid costly mistakes
Marking Beard Pivot

Where exactly does your beard pivot begin?
Look for the jawline angle below each ear where your beard changes direction.
These pivot points create the foundation for your neckline symmetry.
Use mirror usage to check both sides match perfectly.
Visualizing pivots helps guarantee your beard neckline guide stays balanced.
Mark these spots for pivot enhancement before connecting them to your Adam’s apple.
Connecting Pivots to Adam’s Apple

Drawing smooth lines from each pivot point to your Adam’s apple creates the perfect beard neckline foundation.
This horseshoe shape guide guarantees pivot point accuracy while maintaining symmetry visualization throughout the neckline connection flow.
Adams apple variations don’t affect this technique—you’re creating a natural curve that follows your jaw’s contours.
This method delivers consistent beard trimming tips that help you avoid beard mistakes every time.
Trimming Techniques

You’ll start trimming with your clipper’s guard set two levels shorter than your beard length to create a clean neckline below the marked curve.
This method gives you precise control while preventing accidental over-trimming that can ruin weeks of beard growth, providing a way to maintain your beard with minimal risk.
Using Trimmer Guard
After mapping your neckline curve, you’ll need proper guard settings for clean trimming.
Your beard trimmer becomes your precision instrument here.
Start with a guard that’s two settings shorter than your beard length to create definition without harsh lines.
Here’s your Guard Length Guide for perfect results:
- Gradual Guard Changes – Begin with longer guards and work down incrementally to avoid taking off too much hair at once
- Guard Direction Matters – Always trim downward from your marked neckline to maintain consistent angles and prevent uneven cuts
- Cleaning Trimmer Guards – Remove hair buildup between passes to prevent guard clogging and guarantee smooth, even trimming throughout your session.
Many users find replacement trimmer guard options useful for maintaining hygiene.
Removing Rogue Hairs
After using your trimmer guard, stray hairs will stick out like unwelcome party crashers.
Use tweezers vs. scissors depending on hair thickness—tweezers for single strands, scissors for clusters.
Position a magnifying mirror under bright lighting considerations to spot every rebellious hair.
Some prefer specialized rogue hair removal.
Pluck gently to avoid beard mistakes and prevent ingrowns.
Apply post-removal care with moisturizer to soothe your beard neckline and beard edges.
Finishing With Razor
After trimming your beard neckline with clippers, a razor delivers that crisp, professional finish that separates amateur grooming from expert results.
This final step requires careful preparation and technique to avoid common beard neckline mistakes.
Here’s your razor finishing checklist:
- Apply quality shaving cream to soften hair and protect skin
- Choose between safety, cartridge, or electric razor types based on your skill level
- Shave with the grain to prevent irritation and ingrown hairs
- Use short, controlled strokes along your defined neckline
- Follow up with aftershave balm for proper post-shave care
Consider using a specialized cream formulation for superior results to achieve a well-groomed beard neckline with a razor finishing technique that includes applying quality shaving cream and using the right razor type.
Shaping Beard Neckline

You’ll create a smooth progression from your neckline to your beard using clippers with adjustable settings and careful fading techniques.
This process requires precise trimmer length adjustments and consistent symmetry checks to achieve a professional, polished appearance.
Fading With Clippers
Fading with clippers creates smooth shifts between your beard and neck.
Start with clipper guard settings two numbers lower than your beard length. Work upward from the defined neckline using gradual gradations.
Blend each section by overlapping strokes. Electric clippers with adjustable guards make maintaining fade consistency easier.
Practice these blending techniques slowly until you master the tapered finishes that professionals achieve.
Adjusting Trimmer Length
Starting with longer guard settings prevents disaster when trimming your neckline.
Begin two settings below your beard length, then gradually decrease for blending techniques that create natural gradual shift.
This length progression approach gives you control over the fade.
Your beard trimmer becomes a precision instrument when you master these guard settings.
These beard trimming techniques help avoid beard mistakes completely.
Maintaining Symmetry
Perfect symmetry transforms your beard neckline from amateur to professional.
Use multiple mirrors for thorough visual assessment, checking both sides simultaneously. Mark uneven spots with white eyeliner before correcting asymmetry with precise trimmer adjustments.
Balanced necklines require patience and steady hands. Step back frequently during beard trimming to evaluate your progress.
A well-defined neckline enhances facial harmony. Professional symmetry separates well-groomed beards from sloppy attempts.
Essential Tools Needed

You’ll need the right tools to trim your beard neckline correctly and avoid common mistakes.
A quality beard trimmer with adjustable guards, sharp scissors for detail work, and a reliable razor form the foundation of your grooming toolkit.
Beard Trimmer Types
Your beard trimmer selection determines trimming success.
Electric trimmers offer consistent power, while corded vs. cordless models provide different mobility options.
Rotary vs. foil designs affect cutting precision differently.
Quality blade materials like stainless steel guarantee durability.
Multiple trimmer attachments enable various length settings.
Choose professional-grade electric trimmer with adjustable guards for ideal beard neckline results.
For a balanced option, consider a trimmer with adjustable combs for versatile styling.
Razor Options
Several razor types excel at defining your beard neckline with precision.
Cartridge razors offer multi-blade convenience for smooth lines, while safety razors provide exceptional edge control.
Straight razors deliver unmatched accuracy but require advanced technique.
Electric razors minimize irritation with adjustable settings.
Choose based on your skill level and desired precision.
Apply shaving cream before use, and maintain your razor properly for consistent beard trimming results.
A key step is to achieve a well-defined beard neckline, as it substantially impacts the overall appearance.
Beard Shaping Templates
Professional beard shaping templates eliminate guesswork and deliver consistent results every time.
These precision tools come in various template shapes—curved, straight, and adjustable designs that match your facial structure. Template materials range from durable plastic to stainless steel options.
While DIY templates work temporarily, investing in quality tools pays dividends. Regular grooming can improve beard health overall.
Remember cleaning templates after each use prevents bacteria buildup.
Preventing Common Mistakes

You can avoid the most common beard neckline mistakes by following precise measurement guidelines and using proper trimming techniques.
The key is maintaining the correct distance above your Adam’s apple and resisting the urge to trim too high, which creates an unnatural appearance, by using proper trimming techniques.
Avoiding High Neckline
Many guys trim their neckline too high, creating an unnatural chinstrap effect that screams amateur.
This common mistake happens when you ignore the two-finger rule above your Adam’s apple.
Signs you’ve trimmed too high:
- Visible gap between your jawline and beard edge
- Chinstrap appearance that looks disconnected from facial hair
- Awkward proportions making your face appear longer
- Professional advice needed for neckline regrowth and natural look restoration
To avoid this, remember that neckline definition matters for a polished look.
Letting Neckline Grow
Sometimes you’ll want to skip trimming your beard neckline entirely.
When growing long beards, letting your natural neckline develop adds valuable volume addition that creates a fuller appearance.
This full growth approach prevents the unkempt look that comes from incorrect beard trimming tips.
However, monitor your beard neckline maintenance carefully to avoid crossing into sloppy territory during neckline recovery periods.
Regular Maintenance
Your beard neckline maintenance routine determines long-term success.
Schedule consistent trimming every 3-5 days to prevent overgrowth. Apply beard oil after each trim for skin hydration and healing.
Perform weekly neckline checks using multiple mirrors to catch asymmetry early. Practice proper tool sanitization between uses to prevent infections.
These beard trimming tips guarantee your beard grooming neckline stays sharp while avoiding common beard neckline mistakes.
Choosing Right Neckline

Your face shape, beard length, and personal style determine the best neckline position for your specific needs.
Round faces need lower necklines to add length, while square faces can use higher necklines to accent their strong jawlines.
Face Shape Considerations
Your face shape acts as your beard’s blueprint.
Different facial structures need customized neckline approaches to achieve balanced, flattering results that complement your natural features.
- Round Face: Create higher, more defined necklines to add visual length and structure
- Square Face: Use softer, curved necklines to reduce harsh angular appearance
- Oblong Face: Keep necklines slightly lower with gentle curves to minimize face length
- Heart Shape: Balance wider foreheads with clean, structured neckline definition
- Diamond Face: Soften strong cheekbones using gradual, rounded neckline shifts
Beard Length Influence
Your beard length directly impacts where you should place your neckline.
Short Beard Neckline sits higher, while Medium Beard Style allows more flexibility.
Long Beard Volume benefits from a lower neckline to add fullness.
Full Beard Definition requires careful placement to avoid looking disconnected.
Stubble Neckline needs precision since there’s less hair to hide mistakes in your beard trimming guide.
Personal Style Preferences
Your beard neckline should reflect who you’re and where you’re going.
Different beard neckline styles complement various beard styles and face shape combinations, creating harmony with your overall look.
Consider these personal factors when choosing your beard shape:
- Professional requirements – Corporate environments demand cleaner lines than creative fields
- Lifestyle preferences – Active schedules need low-maintenance beard styles
- Cultural norms – Regional expectations influence acceptable beard length and styling choices
Maintaining Clean Neckline

You’ll need to trim your beard neckline every 3-5 days to maintain its sharp appearance and prevent an unkempt look.
Consistent maintenance with quality tools and proper techniques guarantees your neckline stays clean and professional between full beard trims.
Regular Trimming Schedule
Your beard neckline requires trimming frequency of every 3-5 days to maintain consistent shape.
Seasonal adjustments matter since beard growth accelerates in warmer months, demanding more frequent attention.
Establish a maintenance routine that fits your schedule – Monday mornings work well for most guys.
Regular neckline maintenance prevents beard trimming mistakes and keeps your appearance sharp without constant touch-ups, which is crucial for a well-groomed look that requires regular maintenance.
Using Quality Tools
Quality beard trimmer investments pay dividends through precision matters and tool longevity.
Sharp beard scissors prevent jagged cuts while ergonomic design reduces hand fatigue during detailed work.
Your razor choice affects comfort and results—cartridge models offer safe usage for beginners.
Budget considerations shouldn’t compromise performance since reliable beard shaping tools and beard neckline trimming tools deliver consistent results over cheap alternatives, ensuring tool longevity.
Following Proper Techniques
Having the right tools means nothing without proper execution. Your trimming direction should always move with the hair’s natural growth pattern to prevent irritation. Keep your skin taut by stretching it gently with your free hand while working. Incorporate beard oil to moisturize and soften the skin.
- Start with higher guard settings and work down gradually for seamless blending neckline
- Maintain consistent angles when shaping your beard neckline to avoid uneven patches
- Check your progress frequently in multiple mirrors during beard neckline shaping
- Follow the same beard neckline techniques each time for predictable, professional results
Regular upkeep becomes effortless when you master how to trim neckline with these proven methods.
Frequently Asked Questions (FAQs)
How do you trim a beard neckline?
Place two fingers above your Adam’s apple to find the ideal neckline.
Use a trimmer set two settings below your beard length.
Trim downward in a curved line from ear to ear for a natural, professional look.
Should you trim a beard if you have a misshapen or bushy neckline?
Ever wondered why your beard looks unpolished despite careful grooming?
Yes, you should absolutely trim a misshapen or bushy neckline.
It’s your beard’s foundation—defining it creates structure, enhances your jawline, and transforms scraggly growth into sharp, professional-looking facial hair.
How to trim your neckline properly?
Find your Adam’s apple and place two fingers above it.
This marks your neckline’s lowest point.
Trim everything below this line using clippers, creating a curved horseshoe shape connecting ear to ear.
How to trim a beard without going overboard?
One wrong move can absolutely destroy months of beard growth.
Start with longer trimmer settings, work gradually shorter, and trim small sections at a time.
You can always cut more, but you can’t put hair back.
How do I choose the best beard neckline?
Your ideal beard neckline sits one to two finger-widths above your Adam’s apple.
Create a curved line from ear to ear, following your natural jawline.
This prevents the dreaded "neckbeard" look while maintaining proper proportions.
How do you trim a beard?
Start by washing your beard with warm water to soften hairs.
Use a quality trimmer with adjustable guards, working downward in small sections.
Define your neckline first, then trim gradually for even length throughout.
Should you trim your neckline with stubble?
Yes, you should trim your neckline with stubble. Use a trimmer one setting shorter than your stubble length. This creates definition while maintaining the natural look you’re after.
How often should I trim my neckline?
Trim your beard neckline every 3-5 days to maintain a clean, defined look. Fast-growing hair requires more frequent touch-ups, while slower growth can stretch to weekly maintenance sessions.
What if I make a trimming mistake?
Ninety percent of beard trimming errors happen at the neckline.
If you mess up, don’t panic.
Stop trimming immediately, assess the damage, and trim your entire beard shorter to match the mistake until it grows back evenly.
Can I trim wet or damp beard hair?
You shouldn’t trim damp or wet beard hair because it appears longer when wet, leading to over-trimming mistakes.
Always dry your beard completely first, then comb it into its natural position before making any cuts, to avoid over-trimming mistakes.
Conclusion
Mastering the art of facial hair refinement requires dedication and practice.
You’ve learned the fundamentals of trimming beard neckline without mistakes through proper measurement, curved shaping, and controlled technique.
Remember to start conservatively with longer guard settings and work gradually shorter, and check symmetry frequently.
Maintain your tools for superior results, and with consistent application of these methods, you’ll achieve professional-looking results at home.
Your patience and attention to detail will transform your grooming routine into a skill you’ll confidently use for years.