This site is supported by our readers. We may earn a commission, at no cost to you, if you purchase through links. This content is for general informational and educational purposes only and is not a substitute for professional medical, dermatological, or nutritional advice.
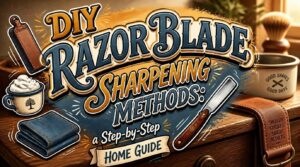
That razor dragging across your cheek isn’t dull from age. It’s dull from thousands of microscopic teeth bending sideways, not wearing down. Most guys toss a blade the moment it tugs, never realizing a strip of denim or a smooth mug could’ve saved it.
Diy razor blade sharpening methods split into two camps: restoring a rolled edge and rebuilding a worn one. Mix them up, and you’ll wreck a blade that only needed a strop. Get them right, and you’ll stretch every shave further while keeping full control over your gear.
Here’s where to start.
Table Of Contents
- Key Takeaways
- Before Sharpening Razor Blades at Home
- How to Strop Razor Blades With Denim or Leather
- How to Sharpen Razor Blades With a Whetstone
- How to Hone Razor Blades With Household Items
- How to Keep Razor Blades Sharp Longer
- Frequently Asked Questions (FAQs)
- How to sharpen a razor blade without a sharpener?
- Does aluminum foil sharpen blades?
- How to make a shaver sharper?
- How to sharpen a blade with household items?
- Does baby oil keep razor blades sharp?
- What can I use to sharpen a razor blade?
- How to make a dull razor sharp again?
- How to sharpen a straight razor at home?
- How to sharpen a single edge razor blade?
- Can I sharpen razor blades with a diamond stone?
- Conclusion
Key Takeaways
- Know the difference before you start: stropping realigns a bent edge without removing metal, while honing on a whetstone actually reshapes the bevel, so don’t hone when a strop would do.
- Match your method to your blade—denim for cartridges and daily touch-ups, ceramic files for safety razors, whetstones for straight razors, and skip sharpening altogether on electric shavers.
- Household items like ceramic mugs, sandpaper, glass, and toothpaste can restore an edge in a pinch, as long as you keep angles light and consistent (usually 10-20 degrees).
- Daily habits matter more than sharpening itself—rinse, dry, and lightly oil your blade after every shave, and replace it immediately if you spot rust or feel tugging.
Before Sharpening Razor Blades at Home
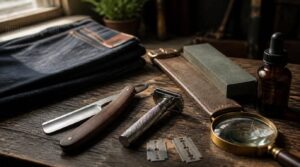
Grabbing a razor and rubbing it on some jeans isn’t the whole story. Before you touch a blade, you need to know your tools, your razor type, and your own safety. Here’s what to sort out first.
If you’re distressing denim for a worn-in look, this guide on preventing post-shave itch and irritation offers smart prep tips worth borrowing before you start.
Sharpening Versus Stropping Razor Edges
Before you touch a blade, know the difference: honing removes metal, stropping doesn’t. Whetstone sharpening rebuilds a worn bevel. Stropping with leather or denim just realigns bent micro-teeth, extending blade life between real sharpenings. Think of honing as surgery, stropping as physical therapy. Strop daily before shaves; hone only every few months, once stropping stops restoring that clean edge. Understanding the distinction between honing and stropping is essential for effective razor maintenance, as each plays a unique role in blade care routines.
Honing removes metal like surgery; stropping just realigns the edge like physical therapy
is honing the same as stropping
Match Methods to Razor Types
Not every blade wants the same treatment. Match the method to the blade:
disposable double-edge razors need stropping to restore the micro bevel.
Cartridge blades respond to gentle denim work.
Safety razor blades like a light ceramic file.
Straight razors demand whetstone precision.
Electric shaver blades? Skip sharpening — replace them when they slow down.
Gather Tools and Protect Hands
Once you know your blade type, gather your gear. You’ll want cut-resistant gloves, safety glasses with side shields, and a stable, non-slip work surface. Clamp blades when possible to keep fingers clear.
Check your workspace: good lighting, no clutter, tools organized in a tray. Protect your hands first — sharp edges don’t forgive rushed setups.
Clean Blades Before Sharpening
Gloves on, now grab a rag. Wipe blades clean to strip oils and skin residue, then rinse under warm water to flush leftover shave gunk. A soft brush dislodges stuck-on grime; dish soap on a damp cloth cuts through buildup without leaving residue.
Dry thoroughly with a lint-free towel. Wet blades sharpen unevenly and rust fast — skip drying, and you’re sharpening trouble.
Know When Replacement is Safer
Sometimes the smartest sharpening move is skipping it. Structural damage doesn’t strop out — cracks, chips, or loose grips mean the blade’s done.
Check these before every session:
- Edge cracks or chips
- Rust you can’t clean off
- Tugging or pulling on skin
- Loosened handle joints
- Irritation despite sharp edges
Ignore these safety risks, and blade lifespan won’t matter — replacement’s the safer call.
How to Strop Razor Blades With Denim or Leather
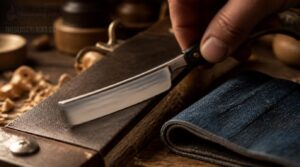
Stropping won’t remove metal, but it will realign a bent edge fast. Denim and leather both work well, each with its own feel and grip. Here’s how to strop like you mean it.
Once your blade’s edge is true again, the real test is technique—since shaving with the grain to prevent ingrown hairs matters just as much as a sharp blade.
Choose Denim or Vegetable-Tanned Leather
Denim or leather? Pick based on how you shave. Denim works best for daily touch-ups—cheap, quick-drying, gentle on fine burrs.
Vegetable-tanned leather suits hobbyists chasing a traditional feel and long-term durability. Denim costs less and wears faster; veg tan runs pricier but resists deformation.
Both are eco-friendlier than you’d guess and easy to find locally.
Lay The Stropping Surface Flat
Before any stropping technique matters, flatness does. Lay your denim or leather on a rigid, level surface—a bench top works better than your knee.
Check three things:
- No sag or warp
- Even material tension
- Clean surface, free of debris
A dipped middle throws off blade edge contact and undoes proper blade care fast.
Move Blades Opposite Cutting Direction
Why does direction matter so much? Pull the blade backward against the cutting edge, never forward, for both denim technique and leather strop work. This angle boosts edge contact, cuts drag, and steadies your grip.
| Direction | Blade Angle Control | Result |
|---|---|---|
| Forward | Unstable | Dulling |
| Backward | Consistent | Sharp edge, longer blade life |
Trust the surface feedback—resistance means you’re doing it right.
Use Light, Even Pressure
Think of pressure like a handshake, not a wrestling move. Light stropping pressure lets denim or leather realign the edge without grinding away metal. Heavy hands cause wobble and uneven wear.
Keep even force application from heel to toe for uniform edge contact. This steadies angle consistency and helps true blade alignment and clean edge realignment.
Repeat, Rinse, Dry, and Test
One pass won’t cut it. Rinse under warm water for 15-30 seconds, clearing hair and cream residue from the bevel.
Pat dry with microfiber—never rub. Then test: glide the edge lightly across your palm or a towel. Feel tugging? Strop again before shaving. This repeat-rinse-dry-test cycle keeps blades cutting clean, shave after shave.
How to Sharpen Razor Blades With a Whetstone
Denim and leather only take an edge so far. For real precision, you need a whetstone and a steady hand. Here’s how to work through the process, step by step.
Select Grit for Razor Type
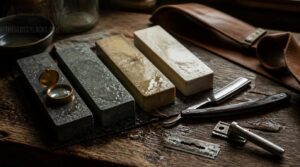
Grit choice depends entirely on your blade. Straight razor grit work follows a coarse-to-fine progression to rebuild the bevel. Safety razor grit and carbon steel grit need mid-to-fine ranges to dodge micro-chipping.
- Straight razors: coarse to fine progression
- Safety razors: finer grits protect plating
- Carbon steel: mid to fine range
- Stainless steel: coarser tolerance, fine finish
- Feather light blades: extra-fine only
Soak and Lubricate The Stone
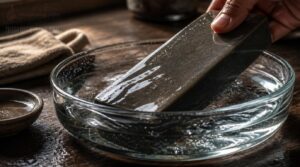
Once you’ve matched grit to blade, prep the stone itself. Submerge it in clean water until bubbles stop, roughly 5-15 minutes for full saturation.
Shake off excess but keep the surface visibly wet. Maintain a thin water film throughout sharpening. This slurry layer carries away metal particles and keeps your stone from glazing over.
Maintain The Correct Blade Angle
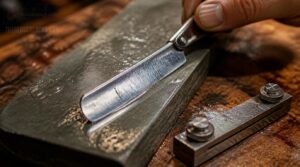
With the stone wet, lock in your angle. Straight razors want 15-20 degrees; general blades run 20-30. A guided jig keeps drift out entirely.
- Watch for an even, thin bevel line
- Check both sides match
- Notice if one edge bites harder
Recheck often. Angle consistency protects the temper and prevents nicks.
Use Light Base-to-Tip Strokes
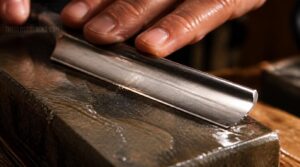
Angle locked, now let the stone do the work. Rest the blade flat at the base and glide toward the tip with light pressure only, short strokes, no forcing.
This isn’t a single long sweep. Small, incremental passes protect the edge and stop heat buildup that dulls steel.
Keep the angle steady start to finish. Consistency here draws the burr evenly, setting up cleaner removal next.
Remove Burrs and Polish Edges
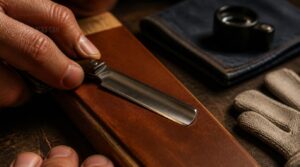
Feel for that tiny wire edge along the blade. That’s your burr, and it has to go before polishing starts.
- Strop on leather 30-50 passes
- Try the denim method for light abrasion
- Check stropping direction runs spine-first
- Inspect edge geometry under light
Wear gloves during deburring safety checks. A polished, burr-free edge reflects light evenly and holds its edge longer.
How to Hone Razor Blades With Household Items
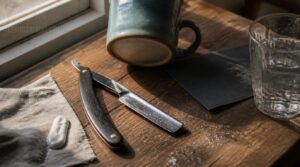
No whetstone on hand? Your kitchen and bathroom already hold what you need. A ceramic mug, sandpaper, glass, even toothpaste can bring an edge back to life. Here’s how to put each one to work.
Ceramic Mug Honing Method
Every kitchen holds a hidden sharpening tool: your coffee mug.
Flip it over and check for an unglazed surface—that rough ring is fine-grit ceramic. Hold your blade at 10 to 15 degrees, alternate sides each pass, and use light pressure.
| Step | Action | Detail |
|---|---|---|
| 1 | Angle blade | 10-15° |
| 2 | Stroke | Heel to tip |
| 3 | Alternate | Each side |
Wipe away ceramic dust when finished.
Fine-Grit Sandpaper Sharpening Method
When denim and mugs aren’t cutting it, grab some fine grit sandpaper—400 to 800 grit—taped over glass or granite.
Hold a 20-degree angle, use light pressure, and stroke consistently:
- Tape paper flat, no wrinkles
- Keep pressure light and even
- Check angle every few strokes
- Wet paper for smoother cutting
- Finish higher grit for burr removal
Wipe swarf, feel the edge—burr-free means done.
Glass Surface Stropping Method
Glass isn’t just for windows—it makes a shockingly good honing surface. Clean the plate with isopropyl alcohol, then apply a thin stropping compound to the center only.
Hold a consistent 20-degree angle and use light stropping pressure for 5-15 passes.
| Step | Action | Detail |
|---|---|---|
| 1 | Prep glass | Alcohol wipe |
| 2 | Apply paste | 0.1-0.3mm |
| 3 | Strop blade | Even strokes |
Toothpaste Method for Electric Shavers
Toothpaste isn’t just for teeth. It works as a mild abrasive on electric shaver blades. Stick to regular paste, not whitening formulas.
Only use this on shavers with replaceable, accessible heads. Spread a thin layer, run the shaver 15-20 seconds, then rinse and dry fully.
Add light oil after. Expect a short-term edge boost, not a full sharpening fix.
Safely Test Blade Sharpness
How do you know your work actually paid off? Skip the guesswork and run the paper slice test — a sharp edge glides through in one pass. Follow with a fingertip edge feel check for bite, then hold the blade to a light test angle to spot burrs. No burrs, no tearing, no dragging.
How to Keep Razor Blades Sharp Longer
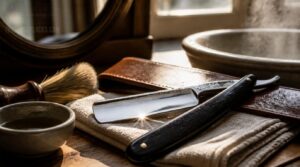
Sharpening gets your edge back, but daily habits keep it there. A blade only stays sharp if you treat it right between shaves. Here’s what that upkeep actually looks like.
Rinse Debris Between Shaving Passes
Between every pass, rinse your blade under warm water. This clears hair, cream, and skin cells that cause drag and tugging.
Rinsing prevents:
- Nicks from trapped debris
- Clogged blade edges
- Uneven, patchy shaves
- Faster blade dulling
No running water? Wipe the blade with a damp cloth instead. It’s a small habit that protects both your skin and your edge.
Dry Blades Immediately After Use
Rinsing clears debris, but a wet blade left sitting starts rusting within minutes in a humid bathroom. Towel pat dry after every shave, don’t just shake it off.
Moisture-free storage stops micro-pitting before it starts. A quick, thorough dry protects the edge and keeps your skin safe from corrosion particles on your next pass.
Apply Mineral Oil Sparingly
Once dry, a thin mineral oil film adds backup protection. Use a lint-free cloth, wipe toe to heel, one pass only.
Carbon steel tolerates oil well; stainless needs less, or residue dulls stropping surfaces. Skip it on ceramic and electric blades entirely.
Coat the edge only, never the whole blade. Pooling or slick spots mean discard before storing.
Store Razors Outside The Shower
Where you keep your razor matters as much as how you dry it. Shower caddies stay damp and breed bacteria fast.
Pick a ventilated spot outside the shower instead — a cabinet, magnetic rack, or open shelf. Airflow drives off leftover moisture and cuts humidity, keeping edges rust-free and sharp between shaves.
Replace Rusty or Tugging Blades
Sharpening only goes so far. Check for rust patches or pitting — if metal fragments could transfer to skin, replace the blade immediately. Tugging during passes signals a warped edge, not a technique problem.
No amount of denim stropping or leather strop work fixes that. Dispose of old blades in a puncture-resistant container, and always dry razors thoroughly after replacing.
Frequently Asked Questions (FAQs)
How to sharpen a razor blade without a sharpener?
No sharpener on hand? Try the denim stropping technique on old jeans, a leather strop method for straight razors, ceramic mug honing, glass surface stropping, or a toothpaste blade polish to keep razor blades sharp.
Does aluminum foil sharpen blades?
No. Foil is too soft to remove metal, so it can’t create a true edge. Any "sharpness" comes from a foil cleaning effect or brief edge realignment — not real razor blade sharpening or honing.
How to make a shaver sharper?
For a cordless electric shaver, run a pea-sized dab of toothpaste across the blades and let it cycle 30-60 seconds. The mild abrasive hones the edge, restoring smoother glide without disassembling the head.
How to sharpen a blade with household items?
Your kitchen’s a hidden sharpening shop in disguise. Try the ceramic mug method, glass surface honing, or sandpaper sharpening—each realigns edges using household grit, no special tools needed for a noticeably sharper blade.
Does baby oil keep razor blades sharp?
Not really. Baby oil builds a moisture barrier effect that fights rust and corrosion, extending blade longevity through better storage. But it won’t restore a dull edge—true sharpness preservation still depends on stropping, honing, and proper blade maintenance routine habits.
What can I use to sharpen a razor blade?
Don’t judge a book by its cover—your everyday household items pack real sharpening power. Try denim fabric, a leather strop, a ceramic mug, a whetstone, or fine sandpaper. Each restores your edge through light, controlled abrasion.
How to make a dull razor sharp again?
Bring dull edges back by stropping on denim or leather at a 20-degree angle, 15-20 strokes per side. This realigns bent micro-burrs without removing metal, restoring smooth, tug-free cutting within minutes.
How to sharpen a straight razor at home?
Set the bevel with a whetstone, working 1000 to 8000 grit at a 15-20 degree angle. Finish with 30-50 strops on leather. Test sharpness on arm hair before shaving.
How to sharpen a single edge razor blade?
Hold your single edge blade at a steady 20-degree angle and strop it against denim or leather, spine-first, away from the cutting edge, 15-20 strokes per side, then inspect for burrs.
Can I sharpen razor blades with a diamond stone?
Yes. Diamond stones cut fast and hold a true flat surface, letting you set a consistent bevel. Start coarse, move to fine grit, keep light pressure, and match the sharpening angle to your blade’s steel type.
Conclusion
A dull blade is like a stubborn knot: force it, and you only tighten the problem. Patience unravels both. These diy razor blade sharpening methods work because they respect the edge instead of fighting it, whether that’s denim, stone, or a ceramic mug.
Master the strop before the stone, and the stone before sandpaper. Do that, and your razor won’t just cut. It’ll glide, blade after blade, shave after shave, for years.