This site is supported by our readers. We may earn a commission, at no cost to you, if you purchase through links. This content is for general informational and educational purposes only and is not a substitute for professional medical, dermatological, or nutritional advice.
That razor sitting in your bathroom cup is growing more than you think. Soap scum, dead skin, and moisture team up to breed bacteria and rust your blades faster than you’d expect. Most guys just rinse and hope for the best, then wonder why their razor feels dull after two shaves.
Here’s the fix: a diy razor blade cleaning solution recipe that costs pennies and takes two minutes to mix. With the right alcohol-to-water ratio, you’ll cut bacteria, stop rust, and stretch every blade’s life like butter on hot toast. Grab your bottle, we’re building it step by step.
Table Of Contents
- Key Takeaways
- Ingredients for DIY Razor Blade Cleaner
- Step-by-Step Razor Cleaning Solution Recipe
- How to Clean Razor Blades Properly
- Alternative Recipes for Different Razors
- Cleaning Solution Safety and Troubleshooting
- Frequently Asked Questions (FAQs)
- How to make your own shaver cleaning solution?
- What to soak razor blades in to clean?
- Is hydrogen peroxide good for cleaning razor blades?
- What is the disinfectant liquid for razors?
- What is a good substitute for shaver cleaning solution?
- Does vinegar clean razor blades?
- Does hydrogen peroxide clean razor blades?
- How do you make a Philips shaver cleaning solution?
- What is the best way to clean shaver blades?
- How do you make your own cleaning solution for a Panasonic shaver?
- Conclusion
Key Takeaways
- Mix equal parts 70% isopropyl alcohol and distilled water to make a cheap, effective razor cleaning solution that kills bacteria and stops rust.
- Soak your blade for 30 to 120 seconds, since 30 seconds kills most bacteria but going past 60 seconds can wear down plastic grips.
- Adjust your recipe based on the razor: use vinegar for mineral buildup, hydrogen peroxide for extra disinfecting, and skip liquid soaks entirely for electric shavers.
- Dry and store your razor upright after each clean to stop rust from forming and keep blades sharp longer.
Ingredients for DIY Razor Blade Cleaner
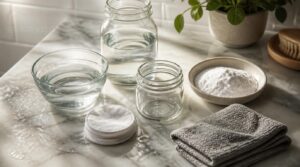
You don’t need a lab coat to build a razor cleaner that actually works. Just a handful of everyday items, most of which are probably already in your bathroom cabinet. Here’s exactly what to grab before you start mixing.
A few household staples can also help disinfect your razor and reduce skin inflammation, keeping nicks and razor bumps from turning into bigger irritations.
70% Isopropyl Alcohol
Grab 70% isopropyl alcohol, the backbone of any DIY razor blade cleaning solution. This concentration nails disinfection properties, wiping out germs fast while evaporation rate stays quick enough to prevent rust.
- Kills bacteria in seconds
- Dries without residue
- Meets purity standards
- Flammable, so watch heat sources
- Extends blade life
Cheap, effective, and built for real razor blade maintenance and cost savings.
Distilled Water
Alcohol needs a clean partner, and tap water isn’t it. Minerals leave deposits that mess with solution stability.
Distilled water hits 99.9% purity, stripping calcium, magnesium, and bacteria, the same lab-grade standard used in real experiments. This purity comes from a distillation process removing impurities, which eliminates dissolved minerals that could otherwise interfere with cleaning solutions.
| Water Type | Result |
|---|---|
| Distilled | Clean, stable mix |
| Tap | Mineral buildup |
| Filtered | Still risky |
Store it airtight. Contamination sneaks in fast otherwise.
Small Sealed Mixing Bottle
Once your alcohol and water are pure, they need a good home. Pick a BPA-free PET or HDPE bottle with a tight screw cap and tamper-evident band, so you’ll know if it’s ever been opened.
Leak-proof storage keeps your DIY razor blade cleaning solution stable, and a spot for labeling and dating means you’ll always know when to swap it out.
Soft Razor Cleaning Brush
Your bottle’s labeled, so now you need a tool that won’t scratch what you just cleaned.
A soft-bristled brush cushions edges, reaching between teeth without nicks. Bonus points for a non-slip grip and water-resistant bristles that outlast repeated dunks.
- Cleans debris gently
- Fits standard solutions
- Extends blade life
Skip harsh vinegar scrubbing here; save that method for mineral buildup, not blade upkeep.
Optional Essential Oils
Want your solution to actually smell good and work harder? Essential oils turn a basic cleaner into a grooming-grade mixture.
A few drops of tea tree or lavender oil not only add a fresh scent but also boost disinfecting power, which pairs nicely with this guide to sanitizing razor blades at home.
- Tea Tree Biofilm Removal clears cartridge grooves
- Lavender Skin Soothing calms irritation
- Peppermint Dust Repellent keeps grips clean
- Rosemary Blade Protection fights corrosion
- Lemon Metal Deposit Cleaning cuts grime
Stick to 3-5 drops per ounce. More isn’t better here.
Step-by-Step Razor Cleaning Solution Recipe
Got your ingredients lined up? Good, now let’s turn them into an actual solution. Follow these five steps and you’ll have a bottle ready to go in about five minutes.
Choose The Alcohol Strength
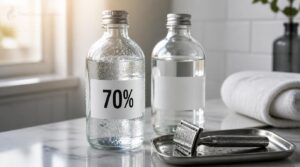
More isn’t always better here. 70% isopropyl alcohol beats 99% for razor hygiene because that extra water slows evaporation, giving the solution time to actually disinfect instead of flashing off in seconds.
That water content also helps break down grime on contact. Stick with 70% and skip the fancy stuff.
Measure Alcohol and Water
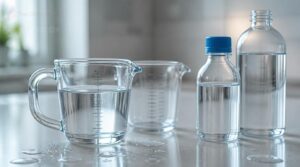
Grab a liquid measuring cup, set it on a flat surface, and pour to eye level for accuracy. Mix equal parts 70% isopropyl alcohol and distilled water, both measured separately before combining.
Skip tap water. Water purity keeps mineral buildup off your blades and keeps the solution stable longer between batches.
Add Oils Sparingly
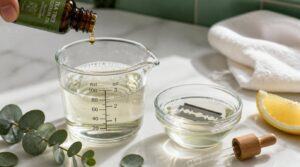
Oils are optional, but they’re where things go wrong fast if you get heavy-handed. Stick to 3-6 drops of tea tree oil per ounce, tops one or two oil types per batch. Tea tree, lemon, or eucalyptus work best for antimicrobial punch.
Do a patch test first, skin sensitivity varies, and skipping it risks irritation near your razor area.
Mix in a Clean Bottle
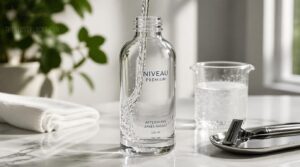
A clean bottle makes or breaks solution stability. Rinse it out, let it dry fully, then pour your alcohol first, water second, right along the container wall to avoid splashing.
Cap it and shake gently, that’s your mixing process done. This small step keeps your homemade grooming product free of residue that messes with blade lubrication later.
Label and Seal Solution
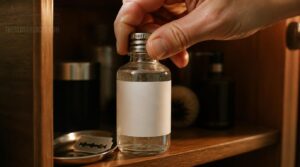
A sloppy label is how you end up dunking your blade in mystery liquid six months from now.
Write the date, contents, and strength right on the bottle, then twist that cap tight for a proper airtight seal.
- Date mixed
- Alcohol strength
- Water ratio
- Any oils added
Store it upright in a cool cabinet. That’s solution stability, locked in.
How to Clean Razor Blades Properly
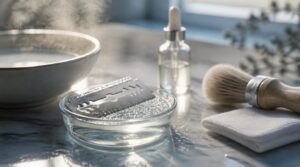
Mixing the solution is only half the job. You still need the right technique to get your blade truly clean. Here’s exactly how to do it, step by step.
Rinse Away Loose Debris
Before that DIY solution ever touches your blade, rinse away loose debris first. Run warm water, 100-120°F, back to front at a 45-degree angle for a solid 10 seconds. Tap the handle against the sink, shake it out. That’s blade sanitation basics, and it beats scrubbing gunk off with vinegar later.
Soak for 30–120 Seconds
Now for the good part. Drop your razor into that DIY cleaning solution and let it sit for 30 to 120 seconds.
Thirty seconds kills 99.9% of bacteria, sixty gets you 99.99%. Ninety dissolves soap scum nicely. Stick to room temp, and skip past 60 seconds if you’ve got plastic grips, that alcohol wears them down over time.
Thirty seconds kills most bacteria, sixty nearly all of it, but past a minute alcohol starts eating plastic grips
Brush Between Blade Edges
Once that soak’s done, grab a soft-bristled toothbrush for cartridge razors, or a stiff-bristle brush for safety razors.
Brush vertically, tip to base, light pressure only. You’re loosening trapped residue between blade edges, not scrubbing dishes. Too much force bends the edge and kills sharpness.
Thirty seconds of gentle brushing clears gunk alcohol alone can’t touch.
Rinse With Warm Water
Once you’ve brushed away the gunk, run the razor under warm water, 100-110°F, for a final rinse.
Warm water dissolves leftover residue 2-3 times faster than cold, clearing cartridge gaps completely.
This step also triggers rust prevention by removing moisture more thoroughly, keeping your blade sharp longer.
Dry and Store Upright
Once rinsed, shake the razor 5-7 times to knock out trapped water, then pat dry with a clean towel.
Airflow optimization matters most now: store it upright, blade-side up, away from bathroom steam.
- Prevents rust from forming between shaves
- Keeps humidity from pooling in blade gaps
- Extends blade sharpness naturally
- Builds a solid razor blade hygiene routine
Cool, dry spots beat steamy bathrooms every time.
Alternative Recipes for Different Razors
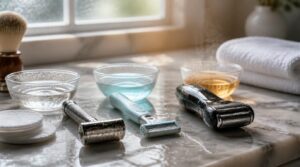
Not every razor plays by the same rules, and neither should your cleaning solution. Sensitive skin, hard water stains, or an electric shaver all call for their own approach. Here’s how to adjust your recipe for whatever’s sitting in your bathroom drawer.
Fragrance-Free Sensitive-Skin Formula
Skin acting up after every shave? Skip the oils entirely. Mix a gentle cleaning mix of 70 isopropyl alcohol and distilled water at a lower ratio (50-70%), with no fragrance added.
| Ingredient | Amount | Purpose |
|---|---|---|
| Alcohol | 50-70% | Gentle disinfecting |
| Water | Rest | Dilutes strength |
| Oils | Skip | Skin safe solution |
Vinegar for Mineral Buildup
Hard water leaving that chalky white crust on your blades? That’s mineral buildup, and vinegar eats it fast. Mix a 1:4 vinegar-to-water ratio, soak 10 minutes. Undiluted vinegar works in 3-5 minutes but skip soaks over 5 minutes, it can etch stainless steel. Weekly soaks stop crust cold and stretch razor blade longevity noticeably.
Hydrogen Peroxide Cleaning Option
Out of vinegar? Grab the brown bottle from your medicine cabinet instead.
Use straight 3% hydrogen peroxide, no dilution needed. Soak blades 5-10 minutes, letting it bubble away grime.
- Skip stronger concentrations
- Check surface compatibility first
- Store in original brown bottle
- Rinse and dry fully after
Bonus antimicrobial benefits keep razor blade cleaning simple and boost blade sharpness between shaves.
Safety and Cartridge Razors
Cartridge razors need gentler care. That pivoting head flexes to your jawline but traps grime between blades fast.
| Do | Skip |
|---|---|
| Soak cartridge tip only | Full vinegar dunk |
| Reuse handle indefinitely | Reusing dull cartridge |
| Swap every 5-10 shaves | Ignoring bacteria buildup |
| Air dry upright | Sealed storage |
Blade exposure sits around 0.5-0.8mm, so clean carefully to protect edges and stretch blade life.
Electric Shaver Cleaning Precautions
Electric shavers hate liquid. Never dunk the head, and skip the DIY isopropyl alcohol soak entirely unless your model’s rated splash-proof.
Instead, use the little brush that came in the box, plus a quick alcohol wipe on the foil only. Always unplug first, work in a ventilated spot, and keep the charging port bone dry.
Cleaning Solution Safety and Troubleshooting
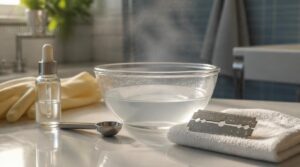
Mixing up your own razor cleaner is easy, but a few smart habits keep it safe and effective. Skip these steps and you risk skin irritation, ruined blades, or a solution that just stops working. Here’s what you need to watch for.
Ensure Proper Ventilation
Mixing isopropyl alcohol releases fumes fast, so crack a window or run a fan while you work.
Good airflow keeps vapors from building up and protects indoor air quality.
Skip small, closed bathrooms. Fumes linger there and can irritate your lungs or eyes, especially with essential oils in the mix. A few minutes of fresh air exchange makes mixing safer and keeps your blade-sharpening station smelling clean, not chemical.
Keep Away From Heat
Once you’ve got fresh air flowing, think about where you store the bottle. Keep it 10 feet from stoves or open flames, since vapors ignite fast. Stick to 15-25°C storage, use amber glass for heat resistance, and if it hits 35°C, move it somewhere cooler right away and watch for extra fumes.
Never Mix Cleaning Chemicals
Temperature’s sorted, now let’s talk chemical reaction risks. Never combine your isopropyl solution with bleach, vinegar, or other cleaners. Stick to one product at a time:
- Read label warnings first
- Rinse residue before switching
- Store chemicals separately
- Skip random essential oil blends
- Call emergency services if fumes hit
Mixing creates hazardous fumes fast, so keep it simple.
Replace Cloudy Used Solution
Solid safety habits, now check the bottle itself. A milky white film means minerals and debris have taken over, and evaporation only concentrates the mess. Adding alcohol won’t fix heavy clouding, so toss it.
Swap in a fresh batch, or try a vinegar razor cleaner instead. Store sealed and upright for lasting clarity.
Prevent Residue and Rust
Since rust is just oxide forming on wet steel, your best defense is keeping blades dry. Shake off water, pat with a clean cloth, and store the razor upright so it drains instead of pooling.
A light oil film adds another barrier against moisture. Rinse residue immediately too, that eco-friendly habit alone can double your blade’s lifespan.
Frequently Asked Questions (FAQs)
How to make your own shaver cleaning solution?
Like sharpening an old tool instead of tossing it, making your own solution keeps your kit running clean. Mix 70% isopropyl alcohol with distilled water in equal parts, add a drop of oil, and bottle it up.
What to soak razor blades in to clean?
Go with an Alcohol Soak: equal parts 70% isopropyl alcohol and distilled water. For mineral gunk, try a Vinegar Clean, or a quick Peroxide Sanitize to zap germs. Add an Oil Additive like tea tree for extra punch.
Is hydrogen peroxide good for cleaning razor blades?
An ounce of prevention beats a pound of cure. Yes, a diluted 3% solution disinfects well, but keep contact time short, around a minute, to avoid corrosion risk on blades and metal residue.
What is the disinfectant liquid for razors?
Your go-to option is 70% isopropyl alcohol, though Barbicide (diluted 1:16), hydrogen peroxide, and even vinegar for buildup all work. Commercial disinfectant sprays offer a fast, no-mix alternative when you’re short on time.
What is a good substitute for shaver cleaning solution?
Try a vinegar solution (1:4 with warm water), soap water, or an alcohol mix of isopropyl and distilled water. Add essential oils for scent, or hydrogen peroxide for extra disinfecting power and real cost savings.
Does vinegar clean razor blades?
Vinegar vanquishes mineral buildup fast. A quick 3-minute soak in undiluted 5% vinegar dissolves deposits, but longer soaks risk oxidation and grey patina. Rinse under cold water for 30 seconds, then dry completely to prevent rust.
Does hydrogen peroxide clean razor blades?
Yes. A 3% hydrogen peroxide solution disinfects and dissolves gunk through oxidation, causing visible surface bubbling as it reacts. Soak blades 10-15 minutes, then rinse residue-free. It’s gentle on metal compatibility while boosting germ reduction and preserving blade sharpness.
How do you make a Philips shaver cleaning solution?
Skip the DIY mix here, it’s a whole different beast. Philips shavers need the SmartClean cartridge system, which rinses and lubricates the head automatically. For manual touch-ups, dab contacts with 70% isopropyl alcohol, then air dry fully before storing.
What is the best way to clean shaver blades?
Blades work like teeth: skip cleaning and performance drops fast. Soak in your alcohol solution for 30–120 seconds, brush gently along the edge, rinse warm, then air-dry completely upright to stop rust and keep blades sharp.
How do you make your own cleaning solution for a Panasonic shaver?
Like a barber’s straight razor meets your electric shaver: mix a 50/50 alcohol water ratio using 70% isopropyl, then add a drop of clipper oil instead of essential oils for smoother Panasonic shaver maintenance and blade lubrication.
Conclusion
That razor cup is basically a bacteria nightclub, and it’s time to shut it down.
Your diy razor blade cleaning solution recipe is mixed, labeled, and ready to work overtime. Two minutes of soaking beats two weeks of dull, rusty shaves every single time. Keep the ratio right, brush the edges, and store blades upright. Small habit, big payoff. Your face will thank you, and so will your wallet.