This site is supported by our readers. We may earn a commission, at no cost to you, if you purchase through links.

Your hair tells you when it’s hungry for protein—you just have to know how to listen. Strands that stretch like taffy before snapping, ends that fray after minimal styling, or that strange spongy feel after washing are all distress signals from a weakened keratin structure.
The good news? Your kitchen already holds most of what your hair needs. Eggs, gelatin, rice water, and coconut milk each deliver targeted amino acids that temporarily patch and reinforce damaged cuticles—no salon appointment required.
Knowing which DIY protein hair mask ingredients to combine and how to use them correctly makes the difference between a treatment that works and one that backfires.
Table Of Contents
Key Takeaways
- Your hair signals protein deficiency through stretchy, mushy strands and mid-shaft breakage—not just shedding—so catching these signs early lets you treat damage before it spreads.
- Eggs, gelatin, yogurt, rice water, and coconut milk are your most effective protein bases, each targeting a different type of damage, so matching the ingredient to your hair’s specific needs gets you better results faster.
- Blend your mask in the right order—liquid base first, then protein, oils last—apply from mid-lengths to ends, and rinse after 15–30 minutes with cool water to seal the cuticle properly.
- More protein isn’t always better: dry or damaged hair benefits from weekly treatments, while normal hair only needs one or two per month, and overdoing it leads to brittle, straw-like strands.
Signs Your Hair Needs Protein

Your hair has a way of telling you when something’s off — you just have to know what to look for.
From texture changes to unexpected shedding, the factors behind sudden hair growth shifts can help you decode what your strands are actually trying to say.
Protein loss shows up in a few very clear ways, and once you spot them, the fix becomes much simpler.
Here are the signs that your strands are ready for a protein boost.
Breakage, Split Ends, and Shedding
When your hair snaps mid‑shaft or frays at the tips, that’s mechanical stress doing real damage — not just shedding. True hair fall shows a bulb at the root; breakage doesn’t.
UV damage, heat tools, and aggressive brushing all weaken your cuticle over time.
A DIY protein hair mask can help slow that cycle before split ends spread and trimming becomes your only fix.
Limp, Stretchy, or Mushy Strands
Breakage isn’t the only only red flag. If your wet strands stretch way too far — then go limp instead of snapping back — that’s elasticity imbalance talking.
It usually points to protein deficiency or moisture overload causing hygral fatigue, where repeated cuticle swelling weakens each strand over time.
A protein hair mask helps restore protein vs moisture balance, so your hair feels firm again, not mushy. Maintaining proper protein moisture balance is key to preventing spongy hair.
Dry, Porous, or Color-treated Hair
Dry, porous hair tells a similar story.
When your cuticle layer has gaps, moisture slips right back out — leaving strands frizzy, rough, and dull fast.
Color-treated hair faces this double: faster color fade, more dryness, less Protein Balance.
An Egg Yolk–Honey Hair Pack or Avocado–Coconut Milk Hair Pack targets Cuticle Repair, helps Moisture Retention, and brings real Frizz Control back.
Best DIY Protein Ingredients

Your kitchen probably holds most of what your hair actually needs. The best protein masks start with simple, whole ingredients that work with your hair’s natural structure.
Here are the ones worth reaching for.
Egg for Strengthening and Shine
Think of an egg as a two-in-one treatment sitting right in your fridge. The egg white protein firms and strengthens each strand, while egg yolk fats — including lecithin smoothing agents — add serious shine and softness.
- Biotin boost helps stronger-looking strands
- Lecithin smoothing reduces frizz noticeably
- Egg white protein targets damage and roughness
- Egg yolk fats deliver a glossy, conditioned finish
- Mask timing matters — rinse after 15–30 minutes
Yogurt for Softening and Repair
Plain yogurt does double duty as both a hair repair agent and a hair softness booster. Its lactic acid exfoliation gently dissolves rough buildup, while dairy protein coating temporarily smooths each strand.
Probiotic scalp balance keeps your scalp calm, and creamy fat conditioning makes spreading easy.
For best results, try an egg-yogurt hair pack or yogurt-cream-egg hair pack twice weekly on dry hair.
Gelatin for Concentrated Protein
Unflavored gelatin is one of the most concentrated protein sources you can add to a DIY protein hair mask — nearly pure protein by weight. Its unique amino acid profile, rich in glycine and proline, drives the gelatin gelation process that coats each strand with hydrogel strength.
Here’s why it works:
- Concentration impact — even a small amount delivers a powerful protein treatment for hair
- Hydrogel strength — it wraps strands in a flexible, protective layer that aids hair repair
- Amino acid profile — glycine and proline rebuild structure from the outside in
- Application safety — a gelatin and apple cider vinegar protein treatment helps balance pH while sealing the cuticle
Try it in your DIY protein hair mask recipes once weekly.
Coconut Milk for Light Conditioning
Coconut milk brings something gentle to DIY protein hair masks — a slip boost that makes detangling feel easy. It’s lightweight conditioning without the grease of straight oil.
The fatty acids handle frizz smoothing, moisture lock, and shine enhancement all at once.
Try a coconut milk hair treatment, a coconut milk and banana hair pack, or even a coconut milk aloe vera protein mask for soft, manageable results.
Rice Water for Amino Acids
Rice water might look like leftover cooking liquid, but it’s quietly one of the best amino acids for hair that you can make at home. The amino acid benefits come from glutamic acid, arginine, and other compounds that coat each strand, reducing friction and breakage.
Here’s what makes it work:
- Starch slip effect smooths roughened cuticles for easier detangling
- Fermented rice water delivers more hydrolyzed proteins than plain soaked versions
- Scalp microbiome support improves when the pH balance impact stays gentle and consistent
Use it as a rice water rinse or blend it into your natural protein hair masks and DIY hair mask recipes for a lighter protein boost.
Avocado and Banana for Moisture Support
Think of avocado and banana as your hair’s personal moisture shield. Avocado’s fatty acids create film‑forming benefits that lock in hydration, supporting longer hydration duration between washes. Banana adds slip & detangling ease through its natural water-binding gel. Together, this BananaAvocado Hair Pack balances oil‑fatty balance beautifully.
| Ingredient | Key Benefit |
|---|---|
| Avocado | Moisture retention via surface film |
| Banana | Slip & detangling support |
| Combined | Hair moisture balance for dry strands |
Apply mid-lengths to ends with scalp light contact only — these natural ingredients work best in DIY hair mask recipes for dry hair.
Top 5 Product Picks
The right add-ins can take your homemade mask from basic to genuinely effective. A few key products make that easier, whether you’re boosting growth, locking in moisture, or getting a solid protein base.
Here are five worth keeping on your shelf.
1. Aura Cacia Organic Peppermint Essential Oil
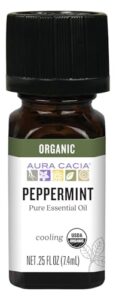
Peppermint oil does more than smell invigorating — it boosts scalp circulation, helping nutrients reach your hair follicles where they matter most. Aura Cacia’s Organic Peppermint Essential Oil is steam-distilled from certified organic Mentha piperita and verified pure through GC/MS testing, so you know exactly what you’re putting on your scalp.
Add 3–5 drops to your protein mask blend for a cooling tingle that signals it’s working. Always dilute it in a carrier oil first — never apply it straight to skin.
| Best For | Anyone who wants a clean, organic peppermint oil for aromatherapy, DIY skincare blends, or scalp treatments and doesn’t mind paying a little more for certified purity. |
|---|---|
| Volume | 0.25 fl oz (7 mL) |
| Purity | 100% pure, USDA Organic |
| Dilution Required | Yes, before skin use |
| DIY Compatible | Yes |
| Artificial Additives | None |
| Hair & Scalp Use | Yes, topical blend |
| Additional Features |
|
- USDA Certified Organic and GC/MS-tested, so you know it’s the real deal — no mystery ingredients
- Super versatile: diffuse it, mix it into a carrier oil, add it to lotions, or use it to keep bugs away
- That cooling, minty scent is genuinely refreshing and works great in massage or post-sun blends
- The bottle is tiny (just 7 mL), so frequent buyers will go through it fast
- Glass packaging means it can show up broken — not ideal when you’re paying a premium
- It costs more per mL than non-organic options, which adds up if you use it regularly
2. Aura Cacia Rosemary Essential Oil
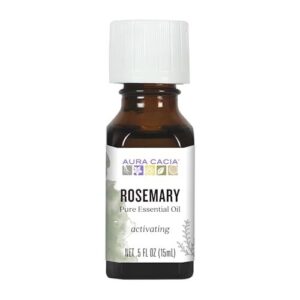
circulation support a step further — it’s long been trusted for promoting scalp health and strengthening hair from the root.
Aura Cacia’s Rosemary Essential Oil is steam-distilled from Rosmarinus officinalis and GC/MS tested for purity, so there’s no guesswork.
Add 3–5 drops to your protein mask alongside a carrier oil for an activating scalp massage.
Its fresh, herbaceous scent is bold, so a little goes a long way.
| Best For | Anyone looking to boost scalp health and hair strength with a clean, pure essential oil that can easily blend into DIY treatments or aromatherapy routines. |
|---|---|
| Volume | 0.5 fl oz (47 mL) |
| Purity | 100% pure, vegan |
| Dilution Required | Yes, before skin use |
| DIY Compatible | Yes |
| Artificial Additives | None |
| Hair & Scalp Use | Yes, scalp stimulation |
| Additional Features |
|
- 100% pure rosemary oil with no synthetic additives — what you see is what you get
- Versatile enough for diffusing, scalp massages, skincare, and homemade cleaners
- Affordable at $9.95 for a solid starter size
- The scent is intense — not ideal for small rooms or anyone with a sensitive nose
- Must be diluted before putting it on your skin, which adds an extra step
- The small dropper bottle can be tricky to pour from when you need more than a few drops
3. Pure Clary Sage Essential Oil
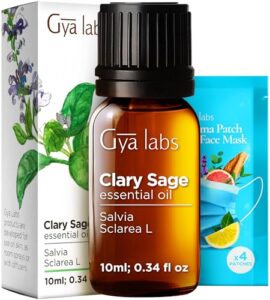
Rosemary manages circulation, but what about scalp balance? That’s where clary sage steps in.
Steam-distilled from Salvia sclarea, this 100% pure oil carries a warm, herbal scent that’s calming without being overpowering. It’s especially useful if you deal with oily roots or dandruff — it helps regulate the scalp environment rather than just masking symptoms.
Add 3–4 drops to your next protein mask. The small dropper bottle makes precise dosing easy, so you won’t accidentally overdo it.
| Best For | Anyone dealing with oily scalp, dandruff, or hormonal skin concerns who wants a versatile, affordable essential oil for hair care, skincare, or DIY projects. |
|---|---|
| Volume | 0.34 fl oz (10 mL) |
| Purity | 100% pure, natural |
| Dilution Required | Yes, before skin use |
| DIY Compatible | Yes |
| Artificial Additives | None |
| Hair & Scalp Use | Yes, added to shampoo |
| Additional Features |
|
- Pure clary sage with a dropper — easy to measure out just what you need without wasting a drop
- Works across a bunch of uses: diffuser, scalp care, skin massage, candles, soap — one bottle goes a long way
- At $9.99 for a concentrated oil, it’s a low-risk way to try clary sage without a big commitment
- 10 mL goes fast if you’re using it regularly — you’ll be reordering sooner than you’d like
- No returns on Amazon, which is a bit of a gamble if the scent isn’t what you expected
- The therapeutic claims (hormone balance, labor support) are anecdotal — don’t count on them as anything more than that
4. NuNaturals Unflavored Beef Gelatin Powder
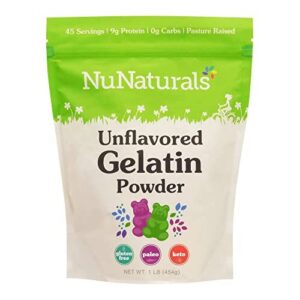
Essential oils add plenty of support, but sometimes your hair needs something more concentrated — a true protein hit. That’s where NuNaturals Unflavored Beef Gelatin Powder earns its spot.
Each serving delivers 9 grams of protein, plus collagen and amino acids that your strands can actually use. It’s flavorless and dissolves cleanly into any mask recipe without changing the texture. It’s also keto, paleo, and gluten-free, so it fits most routines. Just bloom it in cool water first — that one step makes all the difference.
| Best For | Anyone looking to add a clean, flavorless protein boost to DIY hair masks or wellness routines — especially those following keto, paleo, or gluten-free lifestyles. |
|---|---|
| Volume | 1 lb (454 g) |
| Purity | Single-ingredient, grass-fed |
| Dilution Required | No, dissolves in liquid |
| DIY Compatible | Yes |
| Artificial Additives | None |
| Hair & Scalp Use | Yes, collagen support |
| Additional Features |
|
- Pure single-ingredient gelatin with 9g of protein per serving — no fillers, flavors, or additives getting in the way
- Dissolves cleanly into masks, smoothies, or broths without clumping or changing texture
- Sourced from grass-fed, pasture-raised cattle and works across a ton of uses, from hair care to homemade gummies
- Not an option for vegetarians or vegans since it’s 100% bovine-derived
- You have to bloom it in cool water first — skip that step and you’ll end up with a grainy, uneven gel
- Tends to cost more per pound than generic or plant-based alternatives
5. Aura Cacia Lavender Essential Oil
Now, if gelatin takes care of the heavy lifting on protein, lavender brings the calm — and a little more than just a nice scent.
Aura Cacia’s 100% pure Lavandula angustifolia oil adds real function to your mask.
Its linalool content has a calming effect on scalp irritation, making it a smart add-in for sensitive or stressed scalps.
Just 2–3 drops blended into your base are enough.
It pairs especially well with coconut milk or egg-based recipes.
| Best For | Anyone who wants a clean, pure lavender oil to add a calming, skin-soothing boost to DIY hair masks, massage oils, or aromatherapy routines. |
|---|---|
| Volume | 0.5 fl oz (15 mL) |
| Purity | 100% pure, GC/MS tested |
| Dilution Required | Yes, before skin use |
| DIY Compatible | Yes |
| Artificial Additives | None |
| Hair & Scalp Use | Yes, diluted topical |
| Additional Features |
|
- 100% pure Lavandula angustifolia oil, GC/MS tested so you know exactly what you’re getting
- A few drops go a long way — great for blending into masks, carrier oils, or diffusers
- Works well for sensitive scalps thanks to its natural linalool content, which helps ease irritation
- The 15ml bottle is small, which can feel pricey per milliliter if you use it often
- Scent can vary slightly from batch to batch — a small number of buyers found it smelled different than expected
- Glass bottle means there’s always a breakage risk during shipping
How to Mix Your Mask

Mixing a protein mask at home is simpler than it sounds—you just need to follow a few key steps in the right order. Getting the ratios and texture right makes a real difference in how well your hair absorbs the treatment.
Here’s exactly how to put it together.
Choose One Protein Base
Your protein base sets the tone for everything else. Each one works differently — so pick based on what your hair actually needs:
- Egg — coats strands with albumin protein for shine and a smooth texture and hold
- Yogurt — delivers casein protein plus pH adjustment through lactic acid for softer feel
- Gelatin — a concentrated keratin‑like protein boost with strong coating mechanism
- Coconut milk — a lighter protein for gentle conditioning
- Rice water — amino acid rinse with great cost efficiency and long shelf life
These DIY protein hair masks all strengthen differently — your hair type decides the winner.
Add One Moisturizing Ingredient
Once your protein base is chosen, pair it with one moisturizing ingredient for balance. Think of it as moisture matching — protein firms, moisture softens.
For humectant choice, honey draws water into strands. For emollient boost, avocado or olive oil fills gaps and smooths. For occlusive seal, coconut oil locks hydration in.
Barrier fatty acids in these natural ingredients support long-term moisture retention in any protein hair mask.
Blend Until Smooth
Blending your ingredients the right way makes all the difference.
Temperature control matters — room-temperature ingredients combine far more easily.
Follow this ingredient order for the smoothest DIY protein hair masks:
- Liquid base first
- Egg yolk or protein next
- Oils last to prevent separation
Use a blender or whisk at medium speed.
Proper mixing speed and texture consistency guarantee no lumpy strands remain.
If needed, run the mix through a straining process.
Thin or Thicken as Needed
Consistency matters more than you’d think. If your DIY protein hair mask feels too thick, add water one teaspoon at a time — this simple water ratio adjustment keeps runoff management in check.
Too runny? A pinch of gelatin adjusts thickness tuning quickly through temperature gelation.
Your Egg Yogurt Hair Pack or Mayonnaise-Avocado Hair Pack should cling, not drip.
Make Only One-use Portions
Mix only what you’ll use in one sitting. For shoulder-length hair, that’s about 2–4 tablespoons of prepared mixture; longer hair needs 4–6 tablespoons. This keeps your portion size guidelines on point, locks in freshness timing, and maintains ingredient ratio accuracy.
Egg and dairy spoil fast — don’t risk it. Smaller batches mean better temperature safety, less waste, and a smoother mask every time.
How to Apply Hair Protein Mask
Mixing your mask is only half the job—how you put it on matters just as much. Few simple steps make the difference between a treatment that actually works and one that just makes a mess.
Here’s exactly how to apply your protein mask for the best results.
Dampen and Section Hair

Start with damp hair preparation — not soaking wet, just lightly misted. Damp hair spreads your protein hair mask more evenly and helps scalp moisture retention.
Use a wide-tooth comb for detangling comb work, removing knots root to tip.
Then try the quadrant sectioning method: divide hair into four parts, securing each with clip placement tips in mind.
Keep a small bowl nearby.
Apply From Mid-lengths to Ends

Now that your hair is sectioned, grab a small amount of mask and work it through each section using a sectioned downward application — mid-lengths first, then drag it toward the ends. This root gap strategy keeps roots from getting weighed down.
Focus on mid-length saturation, then improve end slip by adding a touch more product where needed.
Uniform strand coverage means stronger results throughout your hair care routine.
Massage The Scalp Lightly

Once the mask coats your strands, use your fingertips — not your nails — to work a scalp massage for nutrient absorption. This boosts scalp circulation and encourages scalp nourishment right where your DIY protein hair mask matters most.
- Use gentle pressure with flat, relaxed fingertips
- Move in slow circular motions for 2–5 minutes
- Keep timing within mask wear time
- Practice friction reduction by letting the mask provide slip
- Run safety checks — stop if burning or sharp pain occurs
Cover With a Shower Cap

After your scalp massage, seal in all that work with a shower cap.
A snug fit is your best Cap Fit Tips move — it locks in Heat Trapping warmth and boosts Moisture Retention while Preventing Drips onto your clothes.
| Feature | Good Cap | Poor Cap |
|---|---|---|
| Material Choices | Reusable plastic or fabric | Thin disposable |
| Fit | Snug elastic edge | Loose or slipping |
| Coverage | Full scalp to hairline | Gaps at crown |
| Drip control | Sealed edges | Open sections |
| Comfort | Stays put 30+ min | Shifts constantly |
Rinse After 15–30 Minutes
Once the timer hits, step into the shower and rinse with lukewarm water — not hot, which can rough up the cuticle and undo your protein work. Use a steady flow and glide fingers through your strands to clear any scalp residue.
Finish with a cool water splash to seal things smooth.
If hair still feels stiff, a light conditioner brings softness right back.
How Often to Use It

How often you use a protein mask matters just as much as what’s in it. Too little, and your hair won’t see real results; too much, and it can turn stiff and brittle.
Here’s how to find the right rhythm** for your hair type.
Weekly for Dry or Damaged Hair
Dry or damaged hair is thirsty work — it loses moisture faster and needs consistent support to stay flexible.
Once a week is your sweet spot for a protein hair treatment. That weekly rhythm helps cuticle smoothing, keeps protein-moisture balance in check, and gives your DIY hair care recipes time to work without overloading strands.
Consistent use makes damage repair feel manageable, not overwhelming.
1–2 Times Monthly for Normal Hair
Normal hair doesn’t need weekly protein sessions — once or twice a month keeps things balanced.
Think of it as a Scalp Recovery Break between treatments.
Here’s your Monthly Application Timing guide:
- Apply your DIY protein hair mask every 2–4 weeks.
- Check Elasticity Assessment after each wash cycle.
- Follow a Conditioning Ratio — always pair protein with moisture.
- Track Protein Buildup Monitoring if hair feels stiff or strawlike.
- Adjust frequency and usage guidelines for hair masks based on how your hair’s strength and hair moisture balance respond across two to three washes.
Avoid Overuse and Brittleness
Too much protein is just as damaging as too little. When Timing Controls slip and treatments stack up too often, you’ll notice brittle hair, snapping strands, and the classic protein overload symptoms — stiffness and zero flexibility. Keep your Protein-Moisture Ratio balanced by Alternating Treatments with deep conditioning sessions.
Too much protein damages hair just as much as too little — balance it with deep conditioning
Always use a cool Rinse Temperature, and remember Scalp Protection means giving your hair genuine recovery time between masks.
Patch Test Before First Use
Before you coat your hair in any new DIY protein hair mask, a quick patch test can save you from real discomfort. Skin Preparation matters — clean a small area behind your ear or on your inner forearm.
Apply your mixture using simple Patch Test Tools like a cotton swab. Your Observation Period is 24 hours.
Essential Oil Safety is especially important here, since these ingredients can irritate sensitive skin. Watch for redness or itching — that’s your Result Interpretation signal to reformulate before your full protein treatment.
Wait After Coloring Before Treatment
Just colored your hair? Hold off on that protein treatment.
After permanent dye, your cuticles need up to 72 hours to fully seal — jumping in too soon disrupts cuticle sealing timing and speeds up color fade prevention failure.
Hot water risks make early rinsing even worse.
For post-dye conditioning and mask compatibility, wait at least 48–72 hours to protect your color, porosity, and protein and moisture balance in hair.
Frequently Asked Questions (FAQs)
How to make protein powder at home for hair?
You can’t really make true protein powder at home, but you can use kitchen staples like eggs, yogurt, or gelatin as your natural protein treatment base — no special equipment needed.
Can protein masks help with scalp dandruff?
Protein masks strengthen hair strands but don’t treat scalp dandruff. Dandruff stems from yeast overgrowth and inflammation — issues protein can’t fix.
Mask residue buildup may even irritate your scalp and worsen flaking.
Which masks work best for oily hair?
Silky strands start with smart choices.
For oily hair, stick to light protein bases like egg white or yogurt, focus on mid-lengths, and finish with a lemon rinse to keep roots fresh.
How do essential oils enhance protein treatments?
Essential oils act as a shield. Through barrier formation and cuticle smoothing, they lock in protein retention and support loss reduction.
Synergistic oils like lavender, rosemary, and tea tree make every mask work harder.
Can banana masks be difficult to fully rinse?
Yes — banana masks can be sticky to rinse out. Starch residue and fiber graininess cling to strands. Use warm water, longer rinse time, and a clarifying shampoo to finish clean.
Do protein masks affect hair color or bleaching?
protein masks don’t change your actual hair color.
But cuticle coating and porosity impact can cause a color perception shift—your hair may look glossier or slightly duller depending on texture.
Conclusion
They say the best tools are the ones already in your hands—and your kitchen proves that true.
The right diy protein hair mask ingredients don’t require a prescription or a salon budget.
Eggs, rice water, gelatin, coconut milk—each one speaks directly to what weakened strands are missing.
Mix thoughtfully, apply consistently, and give your hair the balance of protein and moisture it’s asking for.
Strong hair isn’t luck. It’s a habit.