This site is supported by our readers. We may earn a commission, at no cost to you, if you purchase through links. This content is for general informational and educational purposes only and is not a substitute for professional medical, dermatological, or nutritional advice.
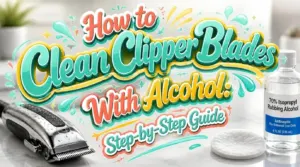
Hair, skin oils, and product residue build up on your clipper blades faster than you’d think. Within a few cuts, that film dulls the edge, tugs at hair, and gives bacteria a place to settle.
Wiping the blades with a damp cloth won’t fix it. Using alcohol to clean clipper blades effectively dissolves the grease and kills surface microbes on contact, so every cut starts clean and smooth. It also protects your blades from the corrosion that shortens their life.
You don’t need special skills or expensive gear. Here’s the safe, simple routine, from unplugging your clippers to oiling the teeth.
Table Of Contents
- Key Takeaways
- How Alcohol Cleans and Disinfects Clipper Blades
- 3 Clipper Blade Cleaning Tools and Supplies
- Prepare Clippers Safely Before Alcohol Cleaning
- Clean Clipper Blades With Alcohol Step-by-Step
- Dry, Oil, Reassemble, and Store Clipper Blades
- Set Your Clipper Cleaning and Disinfection Schedule
- Frequently Asked Questions (FAQs)
- Conclusion
Key Takeaways
- Unplug or remove the battery, take off any detachable blades, and brush out loose hair first, because alcohol can only disinfect the metal it actually touches.
- Use 70% isopropyl alcohol and keep the blades visibly wet for about 30 to 60 seconds, since wiping alone won’t kill microbes without enough contact time.
- Soak the blades only if your manual allows it; otherwise wipe them with a damp (not dripping) cloth or swab so no liquid gets into the motor.
- Let the blades dry completely and add a few drops of manufacturer-recommended oil, because alcohol strips protective oil and leftover moisture leads to rust.
How Alcohol Cleans and Disinfects Clipper Blades
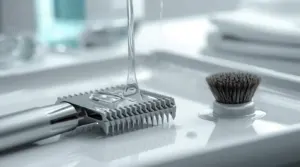
Isopropyl alcohol works fast because it attacks microbes in two ways at once. It dissolves their fatty membranes and denatures the proteins inside, so bacteria and viruses on your blades are inactivated on contact.
For best results, soak the blades in 70% isopropyl alcohol for 5-10 minutes and let them air-dry, as these razor blade cleaning methods explain.
A 70% concentration is the sweet spot. The water content helps the alcohol soak into cells and coagulate proteins, which is why it beats stronger blends. Give it about a minute on bare metal and you’ve got solid surface disinfection.
It also cuts through oil and styling product, and it evaporates without residue. For detachable blades, soaking blades for 10–30 seconds while scrubbing with a brush removes trapped hair and buildup, and the alcohol then evaporates within seconds.
3 Clipper Blade Cleaning Tools and Supplies
You don’t need a full grooming kit to get your clippers truly clean. Three simple picks cover the brushing, wiping, and scrubbing that keep blades running smoothly. Here’s what to gather before you start so every step feels easier and safer.
1. Aquasonic Black Series Electric Toothbrush
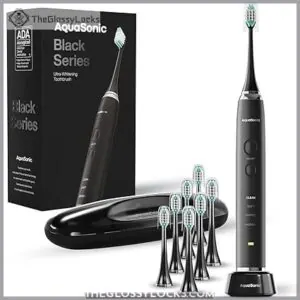
A slim electric toothbrush is one of the handiest tools you can keep on your clipper bench. Its 40,000 VPM motor does the scrubbing for you, so you can work dried hair and oily residue out from between blade teeth without tiring your hand.
Dip the brush head in alcohol, then let it do the work. Because the handle is IPX7 waterproof, you can rinse it clean afterward.
Use one of the 8 included heads, and keep it for cleaning only.
| Best For | Barbers and groomers who want an easy, waterproof way to clean dried hair and oily residue from between clipper blade teeth without tiring their hands. |
|---|---|
| Product Type | Electric toothbrush |
| Included Items | 8 brush heads, travel case |
| Dimensions | 8.5 x 3.27 x 2.83 in |
| Power Source | Lithium-ion battery |
| Material | DuPont-engineered bristles, BPA-free case |
| Main Limitation | Reported failure after 6 months |
| Additional Features |
|
- The 40,000 VPM motor does the scrubbing for you, so you can work hair and residue out from between blade teeth without hand fatigue.
- The IPX7 waterproof handle can be rinsed clean after you dip the brush head in alcohol.
- It comes with 8 brush heads, so you can keep one dedicated to cleaning only.
- Some customers report the device failing after about 6 months of use.
- The battery claim of up to 4 weeks is based on 2 minutes of use twice daily, so actual life may vary.
- Brush heads need replacing every 3-4 months, even with 8 included.
2. WoldoClean 99.9% Isopropyl Alcohol 33.8 oz
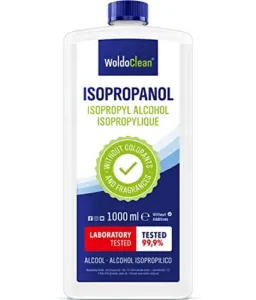
Now give that brush something to work with. WoldoClean 99.9% isopropyl alcohol is a pure, fast-evaporating formula with no colorants or fragrances, so it won’t leave a film on your blades.
Once the debris is gone, a quick wipe-down keeps your tools ready, and these tips for safely trimming ear hair show how to put a clean blade to good use.
It removes grease, adhesives, and ink from tools and metal surfaces.
The 33.8 fl oz bottle has a precision spout, so you can control every drop. Keep it away from flames and sparks, work in a ventilated space, and wear gloves if you’re handling it for a while.
| Best For | Hobbyists, tech builders, and DIY enthusiasts who need a residue-free cleaner for electronics, tools, and metal surfaces. |
|---|---|
| Product Type | Isopropyl alcohol |
| Included Items | 1000 ml bottle |
| Dimensions | 33.8 fl oz (1000 ml) |
| Power Source | N/A |
| Material | High-purity isopropyl alcohol |
| Main Limitation | Highly flammable |
| Additional Features |
|
- Pure 99.9% formula with no colorants or fragrances, so it evaporates fast and leaves no film
- Removes thermal paste, adhesives, grease, ink, and flux from electronics, tools, and metal
- Precision spout gives you control over how much you pour
- Highly flammable, so it must be used away from sparks, heat, and open flames
- Needs a well-ventilated workspace and a cool, tightly closed container away from sunlight
- Can irritate skin during long handling, so gloves and eye protection are recommended
3. Holikme 6-Piece Drill Brush Set
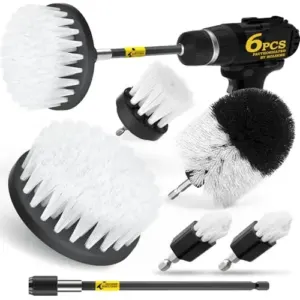
When the hair is packed deep between the teeth, a drill brush gives you more muscle. The Holikme 6-Piece Drill Brush Set includes five brush sizes and one extension rod, so you can match the brush to the job. Its white nylon bristles are gentle on clipper blades and stay stiff when wet with alcohol.
Run your cordless drill at low to medium speed so the bristles don’t flare, and rinse the brushes thoroughly after use. Your drill isn’t included.
| Best For | Homeowners and car owners who already have a cordless drill and want to power-scrub grout, tile, tubs, and tight spots with less effort. |
|---|---|
| Product Type | Drill brush set |
| Included Items | 5 brushes, extension rod |
| Dimensions | 0.1″L x 0.1″W x 1″H |
| Power Source | Cordless drill (not included) |
| Material | Stainless steel, nylon bristles |
| Main Limitation | Bristles may wear quickly |
| Additional Features |
|
- Five brush sizes and an extension rod let you match the tool to the job.
- Reaches tight spaces like stove grates, drip pans, crevices, and corners.
- Gentle white nylon bristles allow controlled scrubbing on finished surfaces.
- A cordless drill is not included in the 6-piece package.
- Customers report the bristles may not hold up well over time.
- Reviews on effectiveness and durability are mixed.
Prepare Clippers Safely Before Alcohol Cleaning
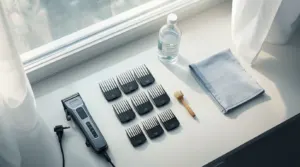
Unplug corded clippers before you touch a single blade, or pop the battery out of cordless models. This stops shocks and short circuits, so you can clean with confidence.
Next, disassemble the clippers as far as your manufacturer’s instructions allow. Take off the blades, guards, and any detachable parts. You’ll reach every corner, and you’ll keep liquid away from the motor and housing.
Pick a spot that’s well ventilated, away from open flames, sparks, and heat. Isopropyl alcohol is flammable, so a clear space keeps you safe.
Clean Clipper Blades With Alcohol Step-by-Step
Your clippers are unplugged and ready, so now you can clean the blades with alcohol. Follow these five steps in order to get a spotless, disinfected blade without harming the motor. Each one builds on the last, so you’ll feel in control the whole way through.
Brush Away Loose Hair and Debris
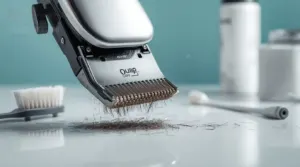
Alcohol can’t disinfect what it can’t touch. Hair packed between the teeth blocks it, so clear the blade first.
- Tilt the clippers downward so hair falls out.
- Use a toothbrush or cotton swab between the teeth.
- Brush away from the blade opening.
- Blow out crevices with compressed air.
You’ll get a cleaner, safer blade, and your alcohol will work better.
Select Manufacturer-Compatible Alcohol and Concentration
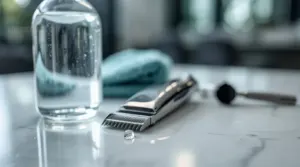
Picture a bottle of clear liquid that dries in seconds and leaves steel gleaming. Choose 70% isopropyl alcohol, the strength Wahl, Andis and Oster favor. It balances germ-killing power with enough contact time before evaporating.
| Option | Verdict | Why |
|---|---|---|
| 60–90% | Acceptable | Effective range |
| Below 50% | Skip | Weak, leaves water |
| Acetone | Avoid | Dissolves coatings |
Check your manual first, then you’re all set.
Wipe Fixed Blades; Soak Only if Approved
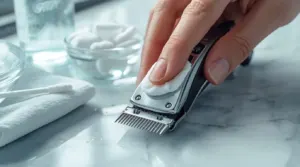
Some blades come off for a soak, but most stay put, and that difference decides your method.
If your guide doesn’t approve detaching the blade, wipe fixed blades instead. Dampen a cloth or cotton swab with 70% isopropyl alcohol, never dripping, so liquid stays out of the motor.
- Check your manual first.
- Use a damp swab, not a soak.
- Let the blade dry fully.
Soak only when the manufacturer says so.
Clean Carefully Between Blade Teeth
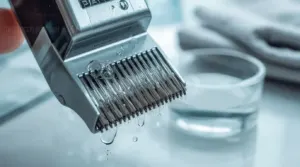
Those tight gaps between the teeth are where hair and gunk love to hide, so give them extra attention.
Dip a thin, stiff brush in isopropyl alcohol and scrub side to side, hitting the underside and cutting edges of each tooth. Wet bristles reach deeper, and the alcohol lifts debris loose. Then wipe everything away, and your blades will cut smoother.
Follow The Disinfectant Label’s Contact Time
Wiping alone isn’t disinfecting. The alcohol has to stay wet on the blade long enough to do its job, and that’s where most people cut corners.
Disinfecting only happens when the alcohol stays wet on the metal long enough to work, and rushing that step is the most common mistake
Check your product label for the label contact time, then keep the blades visibly wet for that full duration. With 70% isopropyl alcohol, expect roughly 30 to 60 seconds. If the surface dries early, reapply. You’ll get reliable blade sanitation every time.
Dry, Oil, Reassemble, and Store Clipper Blades
Once the last teeth are clean, your blades need a little care before they go back to work. Here’s the order that protects them: A few drops of clipper blade oil along the teeth will cut friction, keep heat down, and help your blades stay sharp between cleanings.
- Shake off the excess alcohol and wipe the surfaces with a clean towel.
- Let the blades air dry completely, since trapped moisture causes rust.
- Apply a lubricant, using only manufacturer-recommended blade oil, to the corners and teeth.
- Reassemble the clippers once every part is dry, and don’t force anything.
- Store dry in a case, away from bathrooms.
Set Your Clipper Cleaning and Disinfection Schedule
Now that your blades are dry and stored, set a rhythm so you never have to guess. Matching your cleaning frequency recommendations to how you use your clippers keeps them safe and sharp.
| User type | Routine |
|---|---|
| Professional barber | Clean and disinfect after each client |
| Daily home user | Clean and disinfect after every use |
| Weekly home user | Clean after use, disinfect weekly |
Sharing clippers? Disinfect between every person. Stick with your routine and you’ll prevent bacteria buildup and extend their lifespan.
Frequently Asked Questions (FAQs)
Can alcohol damage or dull clipper blades?
Think of alcohol as a gentle scrub, not a villain. Used briefly and followed by a drop of oil, it won’t dull your blades. Dullness comes from neglect, so keep that lubrication for clippers routine going.
What causes rust on clipper blades after cleaning?
Rust sneaks in like a quiet thief once your blades go bare. Alcohol strips away protective oil, and leftover moisture, often from lower-concentration alcohol, reacts with steel. Dry thoroughly, then oil lightly for solid rust prevention on blades.
Is rubbing alcohol safe for ceramic clipper blades?
Yes, it’s safe. Isopropyl alcohol won’t harm ceramic clipper blades, so you can disinfect them with confidence. Wipe gently, since ceramic chips if dropped, and avoid contact with eyes. Let the blades dry fully before oiling.
Can alcohol wipes replace liquid alcohol for cleaning?
A wipe is a whisper; a pour is a tide.
Wipes can handle quick touch-ups and wipe down the exterior, but they leave blades damp too briefly. For real disinfecting, soak your blades in liquid.
How often should clipper blades be replaced?
Ceramic blades can run up to 75% cooler than steel, and that heat difference shapes how long they last. Replace blades every 3 to 6 months if you cut daily, or every 6 to 12 months at home.
What do barbers use to disinfect clippers?
Most barbers reach for EPA-registered disinfectants, not plain alcohol. Liquid immersion solutions like Barbicide handle blades between clients, while sprays such as Clippercide or Andis Cool Care give you a fast, rinse-free turnaround.
Conclusion
Unplug them, brush them, wipe them down. Those three habits take minutes, and they keep your clippers sharp, safe, and ready.
Using alcohol to clean clipper blades effectively comes down to a simple rhythm: clear the hair, wipe with the right concentration, let it dry, then add a drop of oil. Stick to your cleaning schedule and your blades will glide, stay hygienic, and last longer.
You’ve got this. Go enjoy a smoother, cleaner cut.