This site is supported by our readers. We may earn a commission, at no cost to you, if you purchase through links. This content is for general informational and educational purposes only and is not a substitute for professional medical, dermatological, or nutritional advice.
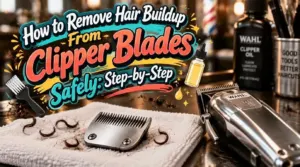
A clipper blade clogged with packed hair and oil doesn’t just cut badly. It pulls, snags, and runs hot enough to burn skin. Ignore it long enough, and rust pits the steel for good.
Most buildup comes from skipping one thing: a quick brush-out and drop of oil after every cut. Barbers who stick to that habit keep blades sharp for years, not months.
Removing hair buildup from clipper blades safely takes the right tools, a dry workflow, and a few minutes. Here’s the exact process, from unplugging the clippers to storing blades rust-free.
Table Of Contents
- Key Takeaways
- Prepare Hair Clippers for Safe Cleaning
- Gather Clipper Blade Cleaning Tools
- Remove Hair Buildup From Clipper Blades
- Disinfect and Oil Clean Clipper Blades
- Avoid Common Clipper Blade Cleaning Mistakes
- Set a Cleaning and Rust-Prevention Routine
- Frequently Asked Questions (FAQs)
- Can I use hydrogen peroxide to clean my clipper blades?
- Can I use rubbing alcohol to clean my clipper blades?
- What do barbers use to clean clippers?
- How to clean hair out of clippers?
- Why do my clippers pull hair after cleaning?
- Can ultrasonic cleaners safely clean clipper blades?
- How long do clipper blades typically last?
- What causes clipper blades to overheat during haircuts?
- How do I know when blades need replacing?
- Conclusion
Key Takeaways
- Brush out hair and add a drop of oil after every cut, because that quick habit keeps your blades sharp for years instead of months.
- Unplug your clippers first, then work in order: brush dry, loosen stubborn residue with an approved solvent, wipe, and let everything dry fully.
- Disinfect with a metal-safe spray, follow the label’s contact time, and never oil damp blades, since oil over moisture traps water against the steel and causes rust.
- Skip soaking non-waterproof clippers and avoid bleach, Lysol, and household oils, and replace blades right away if you see nicks, chips, rust, or bent teeth.
Prepare Hair Clippers for Safe Cleaning
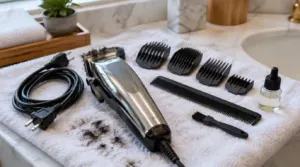
Power down your hair clippers before you touch a single blade. Unplug corded models. Switch cordless ones off. This one step removes the risk of shocks and accidental starts.
Once the power is off, a step-by-step guide to using hair clippers can walk you through attaching guards and cutting safely, even if it’s your first time.
Let the clippers cool if you’ve just used them. Hot metal burns fast, and you’ll handle those blades a lot.
Next, pull off every guard, comb, and attachment. Now you can see the blade housing and reach the spots where hair packs in.
Lay a towel over your sink or counter. It catches stray hair and keeps debris out of your grooming routine’s next step.
Pro tip: Check the manual before you plan any blade removal. Then scan the blades for rust, chips, or heavy wear. Damaged blades need a pro, not a brush. Good debris removal starts with a safe setup.
Gather Clipper Blade Cleaning Tools
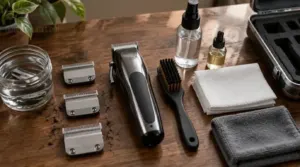
Your setup is ready, so grab your tools before you start. Having everything within reach keeps your hands steady and your focus on the blades.
Here’s what you need:
- A Blade Brush or other Cleaning brush with firm nylon or brass bristles
- Clipper Blade Cleaning Solution, preferably an EPA-registered, alcohol-based spray, plus blade oil
- Soft Cloth or Paper Towels, lint-free if possible
Pro tip: Pick StiffBristle Brushes that fit your clipper model. Some brands ship a specialized brush for detachable blades. Those reach tight spots without scratching metal.
Add a small jar if your manual allows soaking, and a hard-sided case for storage. Keep oils and disinfectants away from clean blades until you need them. Everything stays organized and safe.
Cleaning your blades after every use also prevents skin irritation and keeps your clippers running smoothly by clearing away hair, dirt, and debris.
Remove Hair Buildup From Clipper Blades
Your clippers are cool, unplugged, and ready, so now it’s time to clear out the buildup. Follow these four steps in order to protect your blades and keep every cut sharp. Each one builds on the last, so don’t skip ahead.
If you’re still choosing a set that’s gentle on little heads and easy to clean, this guide to hair clippers for kids is a helpful place to start.
Brush Away Loose Hair First
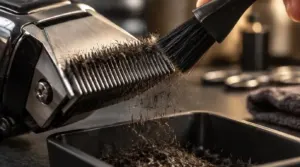
Picture a tiny forest of clippings packed between your blade teeth. Brush Away Loose Hair First before you attempt a deep clean.
Your cleaning brush makes removing hair buildup quick and prevents hair pulling.
| Do | Why |
|---|---|
| Use dry brush | Avoids moisture |
| Brush base to tips | Clears gaps |
| Use light strokes | Protects edges |
| Tap over bin | Releases clippings |
Never force it.
Detach Blades Only When Manufacturer-Approved
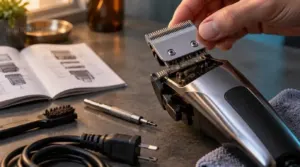
Once your cleaning brush clears the loose hair, check your manual before you touch a single screw. Some models allow detachment. Others don’t.
Follow these steps:
- Unplug the clipper or switch it off.
- Confirm your model allows blade removal.
- Lift the blade gently, never forcing it.
Pro tip: Skip detaching for routine cleanings. Save it for a monthly deep clean.
Loosen Trapped Hair and Oily Residue
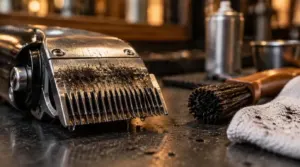
Dab approved solvent onto the stubborn hair buildup, then wait 30 to 60 seconds. This softens oily residue so it lifts easily.
Scrub gently with a soft-bristle cleaning brush in small circles, focusing on the teeth and guide rails. Finish with short bursts of compressed air, held two inches away. Catch loosened debris on a soft cloth or paper towels.
Wipe Blades and Dry Thoroughly
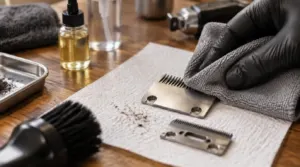
Before you reach for the oil, wipe blades downward, away from the housing, with a dry microfiber cloth. Finish with a paper towel flush between the teeth.
Pro tip: Let the blades air dry on a paper towel for several minutes. Check by sight and touch. Disinfectant spray and oil won’t work over moisture. Good blade maintenance always starts dry.
Disinfect and Oil Clean Clipper Blades
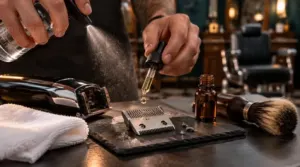
Clean blades aren’t safe until they’re disinfected and oiled. Follow three quick steps in order, and your clippers will cut smoother and last longer. Here’s what to do after the brush-out.
Choose a Manufacturer-Compatible Tool Disinfectant
Not every disinfectant belongs near your blades. Pick a Manufacturer-Compatible Tool Disinfectant with isopropyl alcohol, quats, or phenolics that’s safe on metal.
A Disinfectant Spray like Clippercide also lubricates, cools, and fights rust. Barbicide works for combs, but never submerge electric clippers. Spray or wipe blades only.
Pro tip: Check your manual first, then build your Disinfection Protocol around it.
Follow Label Directions and Contact Time
Imagine this: you spray your blades, wipe them after ten seconds, and call it clean. They’re not. The label says otherwise.
Follow your Disinfectant Spray label exactly. Apply it six to eight inches away. Keep blades visibly wet for the full contact time, which varies by product. Time it.
Pro tip: great Hair Clipper Hygiene starts with a pre-cleaned blade. Skip that step, and the kill rate drops.
Dry Before Applying Clipper Blade Oil
Oil over water won’t protect your blades. It traps moisture against the steel.
Oil applied over water protects nothing, because it only traps moisture against the steel
Dry Before Applying Clipper Blade Oil, every time. Wipe the blades with a soft cloth or paper towels, then focus on cleaning between clipper blade teeth and around the hinge. Let them air-dry fully.
Pro tip: dry-looking blades can still hide damp gaps. Only then add a thin film of clipper blade oil.
Avoid Common Clipper Blade Cleaning Mistakes
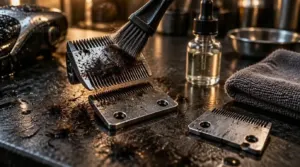
One careless move can ruin a great set of blades.
Removing hair buildup sounds simple, but small errors cost you cutting power and money. Avoid these three:
- Soaking non-waterproof clippers and watching the motor die
- Using compressed air and jamming debris deeper instead of grabbing a blade brush
- Dropping a blade and nicking teeth that pinch your client’s skin
Cleaning between clipper blades demands a gentle hand. Never force blades apart, and never reassemble them wet. Dry every part with a soft cloth or paper towels, then check alignment.
Skip bleach, Lysol, and random household oils. They corrode metal and gum up blade movement.
Pro tip: Deep cleaning hair clippers works best when you always brush first, then add liquid.
Set a Cleaning and Rust-Prevention Routine
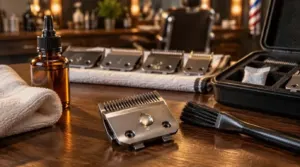
Avoid those mistakes by turning good habits into a routine. A routine keeps your blades sharp, your motor safe, and your cuts clean.
After every haircut, grab your blade brush and sweep out trapped hair. Then add a drop of clipper blade oil across the contact surfaces, run the clipper for a few seconds, and wipe off the excess. That’s your basic lubrication schedule.
Do a deep cleaning routine after each session, or sooner if hair starts slowing the blades. Disinfect between clients, dry everything, and re-oil.
For rust prevention, store blades completely dry, away from damp bathrooms.
Pro tip: Inspect stored blades before use. Catching rust early saves you a replacement.
Frequently Asked Questions (FAQs)
Can I use hydrogen peroxide to clean my clipper blades?
Picture orange rust creeping across a steel blade.
Hydrogen peroxide can cause that, so skip it for routine blade cleaning. Use 3% briefly, ten minutes max, then dry fully. Pro tip: choose isopropyl alcohol instead.
Can I use rubbing alcohol to clean my clipper blades?
Picture fine hair clinging to dry steel, then a clean, wet shine as alcohol sweeps it away. Yes, use isopropyl alcohol at 70% or higher. Unplug first, wet the teeth, wait a minute, dry, then oil.
What do barbers use to clean clippers?
Want clean clippers that cut like new? Grab a blade brush to sweep hair away. Add a disinfectant spray labeled for blades, then finish with blade oil. Pro tip: schedule a deep clean weekly.
How to clean hair out of clippers?
Your clippers cut hair all day, yet they choke on it. Unplug them first. Hold them blade-down and tap out the loose clumps. Then use a Blade Brush to sweep between the teeth, back to front.
Why do my clippers pull hair after cleaning?
Imagine this: you scrub your blades spotless, then your clippers tug on the first pass. Check for packed hair buildup between the teeth, then add fresh blade lubrication, confirm blade alignment, and test blade sharpness.
Can ultrasonic cleaners safely clean clipper blades?
Picture a barber dropping a detached blade into an ultrasonic bath after a busy Saturday. Yes, ultrasonic cleaners can safely handle detached metal blades, if your manufacturer approves immersion. Brush off hair buildup first, dry thoroughly, then oil.
How long do clipper blades typically last?
A blade is a clock, and every cut ticks it forward. Daily pros get 6 to 12 months. Weekly home users get 12 to Removing hair buildup, plus blade lubrication, can boost blade longevity by 50%.
What causes clipper blades to overheat during haircuts?
Feel that hot, gritty blade against your palm? That’s friction at work. Hair buildup and dry metal cause overheating, so skip blade lubrication and blade cleaning, and you’ll push clippers harder through coarse hair.
How do I know when blades need replacing?
Your clippers tell you when it’s time. If they pull or snag hair, or you need multiple passes, the blades are dull. Nicks, chips, rust, or bent teeth mean replacing worn clipper blades right away.
Conclusion
Clean blades are the quiet backbone of every good cut. Treat them that way. Removing hair buildup from clipper blades safely comes down to a simple rhythm: unplug, brush, loosen, wipe, disinfect, dry, and oil.
Make it a habit after every cut, not a rescue mission once a month. Pro tip: keep your brush and oil within arm’s reach of your station. Your blades stay sharp, your clients comfortable, and your tools last for years.