
This site is supported by our readers. We may earn a commission, at no cost to you, if you purchase through links. This content is for general informational and educational purposes only and is not a substitute for professional medical, dermatological, or nutritional advice.
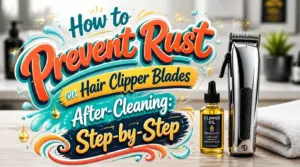
You cleaned your clippers, wiped them down, and tucked them away. Two weeks later, orange freckles are creeping across the teeth.
Water droplets react with oxygen and start rusting steel within minutes to hours. Tap water makes it worse, since chlorides strip the protective layer your blades came with. Rust dulls the edge, snags hair, and gives bacteria somewhere to hide.
The fix isn’t complicated. Preventing rust on hair clipper blades after cleaning comes down to drying, oiling, and storing them right. Here’s the exact routine that keeps your blades sharp and spotless.
Table Of Contents
- Key Takeaways
- Why Clipper Blades Rust After Cleaning
- 4 Clipper Blade Cleaning and Oiling Supplies
- Dry Clipper Blades Completely After Cleaning
- Reassemble and Oil Blades Before Storage
- Store Clippers Away From Moisture and Humidity
- Address Rust Before Using Clippers Again
- Frequently Asked Questions (FAQs)
- Conclusion
Key Takeaways
- Rust starts when water, tap-water chlorides, or humid storage meet bare steel, so a blade can look clean and dry and still rust within hours.
- Your rust-prevention routine is simple: dry the blades fully right after cleaning, add a few drops of clipper oil, and wipe off the excess.
- Store your clippers somewhere dry, like a bedroom closet with silica gel packs, and never in a steamy bathroom or damp drawer.
- You can remove light surface rust with a short vinegar soak and gentle brushing, but blades with pitting or rust covering more than 10% of the surface need replacing.
Why Clipper Blades Rust After Cleaning

Why do blades you just cleaned show orange spots a day later? Because clean doesn’t mean protected.
A drop of blade oil after drying seals out moisture, which is worth doing on the fine blades of beard trimmers for detailed shaping.
Water is the main culprit. Any droplet left behind reacts with oxygen and forms rust within minutes to hours. Tap water makes it worse, since chlorides and skin salts strip the blade’s natural protective layer. Moisture also hides around the teeth and hinge, so a blade can look dry and still be wet.
Then there’s lack of oiling. Without a thin film of oil, tiny scratches in the metal hold water. Add improper storage in a humid bathroom, and you’ve built a rust factory.
The good news? Every cause is fixable. Once you know what’s happening, moisture avoidance becomes surprisingly simple and routine. Even stainless steel isn’t corrosion-proof, so stainless steel limitations matter when blades face continuous moisture or chemical exposure.
4 Clipper Blade Cleaning and Oiling Supplies
You don’t need a shelf full of products to keep your blades rust-free. Four simple supplies cover cleaning, deep rust, and oiling, and each one earns its spot. Here’s what to grab and what each one does for you.
1. Top Performance Blade Rinse 32oz
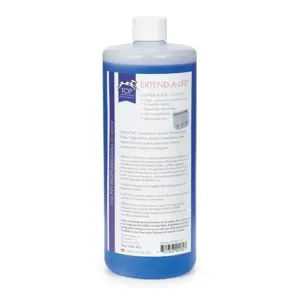
Convenience is the big win here. This 32-ounce rinse cleans your blades without taking them off the clipper.
Run the clipper while the blade sits in the solution for 5 to 6 seconds. Stubble settles at the bottom of the reusable container.
The mineral oil conditions the metal, and 0-Phenylphenol disinfects it. Still, wipe and dry the blades fully before storing them.
Keep the bottle upright in a cool, dry spot, away from heat or open flame. Don’t puncture it.
| Best For | Anyone who clips hair regularly, such as groomers, barbers, or pet owners, and wants a quick, low-cost way to clean and maintain blades without taking them off the clipper. |
|---|---|
| Volume | 32 ounces |
| Dimensions | 9 x 3.3 x 3.3 inches |
| Model Number | N/A |
| Primary Use | Blade cleaning and conditioning |
| Key Ingredients | 0-Phenylphenol, light mineral oil |
| Storage Notes | Upright, cool, dry place |
| Additional Features |
|
- Cleans blades in just 5 to 6 seconds of clipper operation without removing them
- Conditions the metal with mineral oil to help keep blades sharp
- Offers economical maintenance, with stubble settling at the bottom of a reusable container
- Must be stored upright in a cool, dry place
- Needs to be kept away from heat or open flame
- Container can’t be punctured or crushed, and blades still need to be wiped and dried fully before storage
2. Andis Blade Care Plus Spray 16 oz
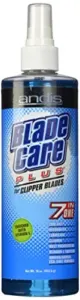
Think of this one as your rust insurance policy. The formula leaves a thin protective coating on the metal, so moisture has a harder time settling in.
If you want a few more ways to protect exposed metal, this guide on how to keep a shower caddy from rusting covers easy habits that pair well with a protective coating.
Here’s how to use it. With the blades running, spray from about 6 inches away. Then wipe off the excess with a clean cloth. That last step matters, since the coating does its job without any pooling.
It’s unscented and enriched with Vitamin E. It cools, lubricates, cleans, and sanitizes in one pass, so your shelf stays a little less crowded.
| Best For | Groomers and pet owners who want one unscented spray to cool, lubricate, clean, and sanitize their clipper blades and shears between uses. |
|---|---|
| Volume | 16 ounces |
| Dimensions | 2.5 x 2.5 x 9.25 inches |
| Model Number | 12590 |
| Primary Use | Cleansing, lubricating, sanitizing |
| Key Ingredients | Vitamin E formula |
| Storage Notes | N/A |
| Additional Features |
|
- Cools, cleanses, lubricates, and sanitizes in a single spray, so you need fewer products on your shelf.
- Removes bacteria, hair, and build-up from clipper blades and shears.
- Unscented, Vitamin E enriched formula that comes in a 16-ounce spray bottle.
- At 1.02 pounds and 9.25 inches tall, the bottle is on the bulky side for a travel kit.
- It ranks 371 in Dog Grooming Clipper Replacement Blades, so it is not a top seller in that category.
- You need to wipe off the excess with a cloth after spraying, which adds an extra step.
3. Lucys Distilled White Vinegar 1 Gallon
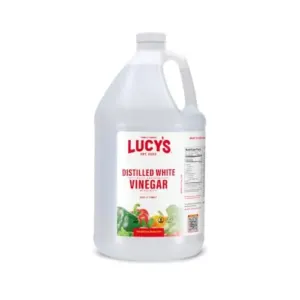
Vinegar is the budget player here. A gallon of 5% acidity distilled white vinegar costs next to nothing and cuts through hair and product buildup.
Pop the blades off and soak them for no more than 60 seconds. Longer, and the acid can etch the metal.
Then rinse with warm water. That stops the acid and washes off loosened debris.
Unlike the spray before it, vinegar leaves no protective coating, so don’t expect rust insurance. Skip it on pitted blades.
| Best For | Budget-minded people who want an inexpensive, multipurpose vinegar for cleaning grime and hair-product buildup off tools like clipper blades, and for adding tang to sauces and recipes. |
|---|---|
| Volume | 1 gallon (128 fl oz) |
| Dimensions | N/A |
| Model Number | N/A |
| Primary Use | All-purpose cleaning |
| Key Ingredients | Distilled white vinegar, water |
| Storage Notes | N/A |
| Additional Features |
|
- Very low cost for a full gallon of 5% acidity distilled white vinegar
- Cuts through grease, grime, and hair and product buildup, and doubles as a tangy flavor booster in dipping sauces
- Biodegradable, so it doesn’t add to environmental pollution
- Leaves no protective coating, so it offers no rust protection and should be skipped on pitted blades
- Soaking blades longer than 60 seconds can etch the metal, and poor dilution can leave residue
- Some customers report spilling or leakage, and it isn’t suitable for natural stone like marble or travertine
4. Wahl Hair Clipper Blade Lubricating Oil
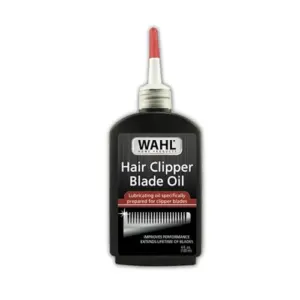
Oil is the step that keeps rust from ever getting a foothold. This one is plain white mineral oil with a rust-resistant additive, and it leaves a thin film that pushes moisture off the metal.
It’s made for Wahl blades but works on other brands, plus trimmers, shavers, and scissors. The 4 oz bottle (model 3310-300A) lasts a long time.
Go easy. A few drops at the blade corners, run the clipper, wipe off the extra.
Reapply every few haircuts.
| Best For | Home haircutters and barbers who use Wahl or other brand clippers, trimmers, shavers, or scissors and want a simple way to keep their blades rust-free and running smoothly. |
|---|---|
| Volume | 4 oz |
| Dimensions | 1.1 x 5 x 2.4 inches |
| Model Number | 3310-300A |
| Primary Use | Rust-preventing lubrication |
| Key Ingredients | N/A |
| Storage Notes | N/A |
| Additional Features |
|
- Helps prevent rust on blades with a rust-resistant mineral oil that leaves a thin, moisture-repelling film
- Reduces friction and heat during use, which helps blades stay sharp longer and cut better
- Works on Wahl and other brands, plus trimmers, wet/dry shavers, and scissors
- Needs to be reapplied every few haircuts to stay effective
- Must be used sparingly, since too much oil leaves excess residue
- Does not replace blade sharpening or repair
Dry Clipper Blades Completely After Cleaning
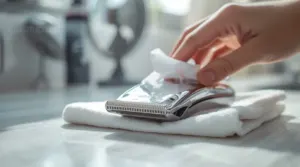
Grab a lint-free cloth and wipe your blades the second you finish rinsing. Don’t wait. Water sitting on bare steel starts working against you fast.
Then give them a few minutes of air time somewhere dry. This is also your low-humidity case, so skip the steamy bathroom.
Here’s the routine:
- Wipe with lint-free towel, pressing gently into the teeth.
- Blast the hinge and screw points with compressed air or a cool blow dryer.
- Set the blades in front of a fan for a few minutes.
- Check them under bright light for spots, streaks, or condensation.
- Slip a dry tissue between the teeth. If it looks damp after 30 seconds, keep drying.
Drying blades after every use takes five minutes. It’s cheap insurance.
Reassemble and Oil Blades Before Storage
Ever notice how a clean blade rusts the fastest? Bare steel is thirsty for moisture, and oil is its raincoat. A light, purpose-made clipper blade oil spreads thin across the steel and keeps that raincoat intact between grooming sessions.
A freshly cleaned blade is defenseless against moisture, so a thin film of oil is the only armor it has
Once the blades are bone dry, line them up before you touch a screw. Tighten, then ease the screws back a hair so the blades can move and the oil can spread. Check for minimal play.
Now grab professional clipper oil. Put a drop on the left corner, right corner, and center of the teeth, plus one at each heel of the top blade. A few drops on the screws and hinge help. More isn’t better. Excess attracts debris. If you’re unsure which oil to use, the step-by-step blade cleaning guide for hair clippers explains why sticking to your brand’s own blade oil matters.
Run the clipper 10 to 15 seconds, wipe off the extra, then store the blades while the oil film is fresh.
Store Clippers Away From Moisture and Humidity
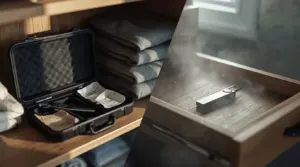
Picture a freshly oiled blade sitting in a steamy bathroom drawer. Every hot shower breathes a fine mist over it. Overnight, tiny beads form on the steel. By morning, the rust has started.
So pick a drier home for your clippers.
- Choose a bedroom closet over any bathroom shelf.
- Drop silica gel packets into the case.
- Wrap loose blades in lightly oiled paper or a towel.
- Skip basements, laundry rooms, and sink-side drawers.
- Swap out saturated desiccant packs when they feel heavy.
Before the lid goes on, make sure the blades are bone-dry and carry a thin coat of oil. That film repels moisture.
Check the case now and then for condensation. Catch it early, and you’ve saved yourself a headache.
Address Rust Before Using Clippers Again
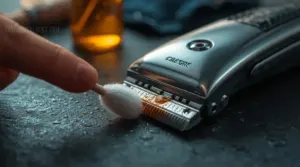
Spotted rust on your blades after all that careful cleaning? Don’t panic, because you’ve got two ways to handle it, and the right one depends on how bad the damage looks. Here’s how to figure out whether you can save your blades or need to swap them out.
Remove Surface Rust Without Damaging Blades
Spotted a little orange? Don’t panic.
A short vinegar soak of 30 to 60 minutes lifts light rust without abrasion. Rinse, then dip in baking soda solution to stop the acid working.
Skip the steel wire brush. Use brass or a soft toothbrush, light strokes along the blade, never circles. Dry fully, oil, and keep drying blades after every use.
Replace Pitted or Severely Corroded Blades
Some rust you can fix. Some you can’t.
Run a fingernail across the cutting edge. If it catches on pits, or the blade feels rough after cleaning, it’s done.
Replace it when you see:
- Rust covering more than 10% of the surface
- Dark stains that spread after cleaning
- Pitting that harbors bacteria in crevices
Don’t gamble on skin.
Frequently Asked Questions (FAQs)
Can I use WD-40 on hair clipper blades?
Ironically, the can that fixes squeaky hinges can leave your clippers worse off.
WD-40 is a water-displacing solvent, not proper clipper oil. Skip it. It’s flammable, so residue near a running motor is a bad idea.
How often should clipper blades be deep cleaned?
Here’s a number worth knowing: a weekly deep clean takes just 10 to 15 minutes.
Do it once a week if you cut daily or every few days. High-volume use means every one to two weeks.
Do stainless steel blades rust less than carbon steel?
Picture two barbers rinsing their blades after a long Saturday. One uses stainless steel, the other carbon steel. By Monday, only one has orange spots.
Yes, stainless steel rusts less. Its chromium fights moisture, though not completely rust-proof.
Can ceramic clipper blades rust or chip?
Ceramic blades are basically immortal. Well, almost.
The ceramic itself won’t rust, but the steel comb underneath can. It’s also brittle, so one drop on the floor can chip that edge.
Does using clippers on wet hair cause rust?
Picture a damp sponge sitting on a steel counter overnight. That’s your blade after a wet cut.
Yes, wet hair can cause rust. Water clings to steel, and moisture plus oxygen turns it orange fast.
Conclusion
Picture a clipper drawer in a humid July, holding blades someone dried "mostly." By September, they’re speckled orange.
Don’t let that be yours. Preventing rust on hair clipper blades after cleaning takes about two minutes: dry them fully, add a drop of oil, and store them somewhere dry.
Skip one step and moisture wins. Nail all three and your blades stay sharp and ready for the next fade. Dry, oil, store is the whole game.