This site is supported by our readers. We may earn a commission, at no cost to you, if you purchase through links. This content is for general informational and educational purposes only and is not a substitute for professional medical, dermatological, or nutritional advice.

Your electric shaver spends every morning pressed against your face, and by Friday it’s carrying a gritty paste of skin oil, stubble dust, and old shaving cream. Most people never notice until the shave starts pulling.
Cleaning an electric shaver with water and soap takes about two minutes and works better than the little brush alone. But one wrong move can wreck a foil, fry a charging port, or void a warranty. Check the seals first, power it off, and know what your model can handle.
Here’s how to get a clean head, a smooth glide, and zero regrets.
Table Of Contents
Key Takeaways
- Check your manual or IPX rating before water touches your shaver, since a tap symbol means rinse only, a shower symbol means wet shaving is fine, and a crossed-out tap means keep it dry.
- Power the shaver off, knock out loose hair, and brush it before washing, then run it for 10 to 30 seconds with a few drops of mild liquid soap and rinse with lukewarm water while keeping the handle dry.
- Dry every part completely in a shaded spot without heat, because leftover moisture causes smells, corrosion, and power loss, then add one drop of shaver oil before reassembling.
- Treat foils gently and clean rotary blades one cutter-and-comb pair at a time so parts don’t get mixed up, and plan to replace blades every 12 to 18 months.
Confirm Your Electric Shaver is Washable
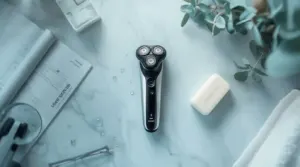
Grab your user manual before you let a single drop of water near your shaver. Look for a tap symbol, which means you can rinse the shaver but shouldn’t shave with it in the shower. A shower or bath symbol means a fully waterproof design made for wet shaving. See a crossed-out tap? Keep water away completely and clean it dry.
A fully waterproof wet and dry electric shaver can be used in the shower and rinsed clean under the tap.
No manual handy? Check the IPX rating. IPX5 controls a tap water rinse from any angle, while IPX7 survives a brief dunk. The IPX7 rating means survives immersion up to one meter for 30 minutes, which is what makes shower use safe. Symbols vary by brand and model, so trust your exact manual over guesswork.
Glance over the seals around the buttons and charging port. Gaps or exposed contacts? Skip the water, friend. Safety wins here, every time.
Remove Loose Hairs Before Wet Cleaning
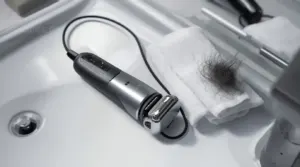
So your shaver passed the water test. Before you turn on the tap, though, deal with the dry mess first.
Wet hair turns into a gummy paste that clogs the drain and clings to the cutting head. Skip this step and you’ll fight it all through the wash.
Make sure the shaver is powered off and unplugged. Then tap the head gently over a sink to knock out the loose bulk. Don’t whack it on a hard surface, because foils dent easily.
Next, grab the included brush and sweep out the leftover strands. Foil shaver? Open the head and brush the cutter block. Rotary? Handle shaver disassembly one blade-and-comb pair at a time so parts don’t get mixed up.
For a step-by-step walkthrough of both foil and rotary models, see this guide to cleaning an electric razor, which covers brushing out hair and keeping parts organized.
Wash Your Electric Shaver With Liquid Soap

Once the loose hair is gone, you’re ready for the fun part. Hold the shaving head under warm tap water for a few seconds to wet it.
Now add a few drops of mild liquid soap. Hand soap, dish soap, or shower gel all work fine. Skip anything harsh or gritty, because abrasive cleaners can scratch the foils and dull the cutters.
Switch the shaver on for 10 to 30 seconds. The motion works the soap into a lather that lifts oils and tiny hair bits off the cutting surfaces. Here’s what you should see:
- Foamy suds building across the head.
- Cloudy, slightly gray water running off.
- A faint change in motor sound as the lather loosens buildup.
Never submerge the handle unless your model’s manual says you can.
For rotary shavers, this Philips Norelco 6100 review explains how a quick tap rinse keeps the head clean without soaking the handle.
Rinse The Shaving Head and Removable Parts

Now the soap has done its job, so let’s send it down the drain.
Hold the head under lukewarm running water. Not hot, since heat can warp seals and plastic over time. Turn the head around as you go so water reaches the undersides and inner crevices, where hair loves to hide. Give it 10 to 15 seconds. You’ll know you’re done when the water runs clear and the suds are gone.
If your shaver has removable parts, like a foil cassette or a trimmer, rinse those too, inside and out. Leftover soap can gum up the blades and irritate your skin later.
Keep the pressure gentle. A hard blast can bend delicate foils, and the handle should never get wet.
Shake off the excess water.
Dry Completely and Lubricate Before Reassembly
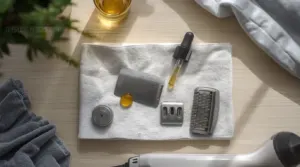
After rinsing, wipe every part with a lint-free cloth to remove surface moisture. Then air dry everything in a shaded spot, because direct sunlight can degrade plastics and rubber. Detach the shaving head so air reaches the tucked-away corners. And put the hair dryer down. Heat can warp seals and damage internal parts.
Drying completely matters more than you’d think. Leftover water dilutes your lubricant and invites corrosion.
Once everything’s dry, add one drop of light machine oil or shaver oil to each foil or cutting surface. Switch the shaver on for 5 to 20 seconds to spread it, then wipe off any excess with a soft cloth.
Reassemble after drying and oiling, never before. Check that seals sit snugly.
Deep-Clean Foil and Rotary Shavers
A quick rinse keeps your shaver running, but a deep clean is what keeps it running well. Foil and rotary models need different care, so you’ll want to follow the right method for yours. Here’s how each one works, and you’ll see it’s easier than it sounds.
Foil Cassette and Blade Care

Your foil shaver’s cassette is delicate, so treat it like a thin metal eggshell. Tap the plastic frame on the sink edge, not the mesh. Add a drop of liquid soap, run the shaver for 15 seconds, then rinse under warm tap water while it’s running.
A foil shaver’s mesh is fragile as an eggshell, so handle it gently, keep any knocks to the frame, and let soapy water do the work
Skip brushing the foil. Dry fully, then oil just the cutter block, never the foil. A single drop of light electric shaver lubricant oil on the cutter block every few weeks keeps the blades gliding smoothly and quietly.
Rotary Cutter-and-Comb Pair Cleaning

Imagine this: you swap one rotary cutter into the wrong comb and your shaver suddenly tugs and rattles. Annoying, right?
Clean one comb pair at a time:
- Pop off one retainer ring.
- Rinse in warm water with liquid soap.
- Pat dry, then add one oil drop.
- Reassemble and turn clockwise to lock.
Good blade hygiene keeps your shaves super smooth.
Frequently Asked Questions (FAQs)
Why does my shaver smell after washing?
Funny how you wash a shaver to make it fresh, and it comes out smelling worse. Blame the trapped moisture. A damp head sealed in a case breeds funky smell fast, so always air dry.
What causes a shaver to lose power after cleaning?
I once panicked when my shaver sputtered after a rinse. The culprit was trapped moisture. Damp parts corrode contacts, and stripped lubricant makes blades drag. Dry everything, add a drop of oil, and clear debris.
Can I use isopropyl alcohol to clean my electric shaver?
Yes, but sparingly. Isopropyl alcohol at 70% or higher disinfects blades and cuts through skin oils. Check your manual first, though. Philips says no, and too much can crack plastic or leave the cutting block dry.
How often should I replace my shavers blades?
Blades dull quietly, like a pencil you never notice shrinking. Plan on replacing them every 12 to 18 months. Daily shavers with thick stubble should swap sooner, while light beards can stretch to two or three years.
Conclusion
Check the seals, power it down, rinse it well. Those three habits turn cleaning an electric shaver with water and soap from a risky gamble into a two-minute routine.
Skip shortcuts. Dry every part completely before you reassemble, and add a drop of lubricant now and then. Your shaver will glide smoother, last longer, and pull less. Treat it like the tool it is, and it’ll treat your face kindly. Clean blades, happy skin, no regrets.