This site is supported by our readers. We may earn a commission, at no cost to you, if you purchase through links. This content is for general informational and educational purposes only and is not a substitute for professional medical, dermatological, or nutritional advice.
Salon appointments cost time, money, and a standing reservation you always forget to cancel. More people are skipping the chair entirely, and honestly, the results they’re getting at home are genuinely impressive.
The difference between a patchy dye job and a professional-looking finish usually comes down to a few smart prep habits most tutorials skip. Things like sectioning your hair before you open the box, or knowing why you should coat mid-lengths before roots.
These tips for hair dyeing at home will walk you through every step, from picking the right shade to locking in your color afterward.
Table Of Contents
- Key Takeaways
- Top 7 Products for Dyeing Hair at Home
- 1. Unisex Hair Salon Capes Snap Closure Waterproof Hairdressing
- 2. Revlon ColorSilk Dark Brown Hair Color
- 3. Burts Bees Moisturizing Lip Balm Two Pack
- 4. PCS Disposable Clear Gloves Powder Free Safety Protective Cleaning Gloves
- 5. Salon Hair Coloring Dye Mixing Kit With Bowl Comb Brush
- 6. Neutrogena Fragrance Free Makeup Remover Cleansing Face Wipes
- 7. Reusable Shower Cap Large Hair Lengths Waterproof Lined
- Choose The Right Hair Dye Type and Shade
- Prepare Your Hair, Skin, and Workspace Safely
- How to Dye Your Hair Evenly at Home
- Maintain Hair Color and Touch Up Roots
- Frequently Asked Questions (FAQs)
- What are the best tips for coloring hair at home?
- What are common mistakes with at home hair coloring?
- When dying hair, do you start at top or bottom?
- Is it best to dye hair wet or dry?
- Can I dye over previously highlighted or bleached hair?
- How long should I wait between coloring sessions?
- Is it safe to dye hair while pregnant?
- What should I do if color turns out wrong?
- Can I mix two different box dye shades?
- Conclusion
Key Takeaways
- Prep work — patch testing — patch testing 48 hours ahead, skipping the pre-dye shampoo, and sectioning your hair before you open the box — matters more than the dye brand you choose.
- Apply color to your mid-lengths first and save the roots for last, because scalp heat naturally speeds up processing and starting at the roots risks uneven results.
- Choosing between permanent and semi-permanent dye isn’t just about longevity — semi-permanent is the safer starting point whenever you’re trying a new shade or working over bleached hair.
- Protecting your color after the session is what makes the results last: switch to a sulfate-free shampoo, cap heat styling at 350°F, and touch up roots at the 1 cm mark every 4–6 weeks.
Top 7 Products for Dyeing Hair at Home
Before you crack open a single box of dye, the right tools make all the difference. These seven products will protect your skin, smooth out your application, and help you get salon-worthy results without the salon price tag. Grab what you need, and let’s get set up.
If you’re new to DIY color, brushing up on a complete hair dyeing walkthrough first will help you understand exactly why each tool on this list earns its spot.
1. Unisex Hair Salon Capes Snap Closure Waterproof Hairdressing
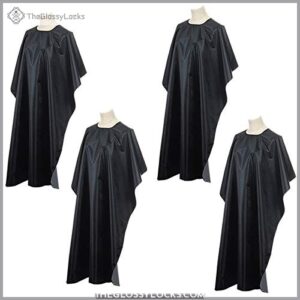
Before you crack open that dye bottle, slip on a cape first.
The OBTANIM unisex cape is made from lightweight, anti-static nylon that won’t cling or weigh you down, even through a long coloring session. At 59 x 47 inches, it covers you from neck to lap, and the adjustable black metal snaps let you dial in the fit whether you’re a kid or a full-grown adult.
It washes easily, dries quickly, and folds flat for storage. Just know the fabric runs thin, so it catches drips but isn’t your best defense against heavy dye soaks.
| Best For | Anyone who colors, cuts, or styles hair at home or in a salon and wants a lightweight, easy-care cape that fits the whole family. |
|---|---|
| Material | Nylon |
| Item Count | 1 piece |
| Reusable | Yes |
| Easy Cleanup | Yes |
| Usage Setting | Home & salon |
| Size/Capacity | 59 x 47 in. |
| Additional Features |
|
- Generous 59 x 47-inch coverage keeps clothes protected from neck to lap during cuts and color sessions
- Adjustable metal snap closure fits neck sizes from kids to adults with no fuss
- Lightweight nylon dries fast, resists wrinkles, and folds flat for easy storage
- Fabric runs thin and mesh-like, so heavy dye soaks may bleed through to clothing
- Stitching has been reported to come apart after only a few washes
- Mixed reviews on waterproofing mean it’s better suited for light touch-ups than full dye jobs
2. Revlon ColorSilk Dark Brown Hair Color
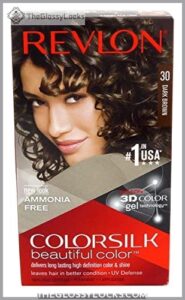
Cape on? Good. Now let’s talk color.
Revlon ColorSilk Dark Brown is a solid pick for dyeing your hair at home. It’s ammonia-free, so you skip the harsh chemical smell without sacrificing coverage. The formula includes vitamin E and silk proteins that condition as the hair dye works, leaving your hair soft, not straw-like.
It covers gray fully in about 30 minutes. The dark brown shade reads natural, not muddy or red-toned. For root touchup and hair color maintenance, it holds 4 to 6 weeks.
| Material | N/A |
|---|---|
| Item Count | N/A |
| Reusable | N/A |
| Easy Cleanup | N/A |
| Usage Setting | N/A |
| Size/Capacity | N/A |
| Additional Features |
|
3. Burts Bees Moisturizing Lip Balm Two Pack
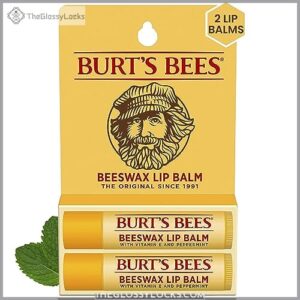
Your color is sorted. Now think about your lips. Hair dye fumes and developer can dry out everything nearby, your mouth area included.
Burt’s Bees Moisturizing Lip Balm keeps lips soft and comfortable with beeswax, Vitamin E, and peppermint oil, and the cooling peppermint sensation is honestly a nice bonus mid-session. The formula skips parabens and petrolatum.
Just don’t apply it near your hairline before dyeing, since the oils can block absorption. The two-pack means you’ve always got a backup.
For a deeper look at why skipping that pre-dye shampoo actually protects your scalp, safe hair coloring tips for at-home use walk you through the science behind your scalp’s natural barrier.
| Best For | Anyone coloring their hair at home who wants a clean, simple lip balm to keep lips comfortable and hydrated during and after the process. |
|---|---|
| Material | Beeswax blend |
| Item Count | 2-pack |
| Reusable | No |
| Easy Cleanup | N/A |
| Usage Setting | Home coloring |
| Size/Capacity | N/A |
| Additional Features |
|
- Made with beeswax, Vitamin E, and peppermint oil for effective moisture without harsh ingredients like parabens or petrolatum
- The cooling peppermint sensation makes it pleasant to use, especially during long dye sessions
- Comes as a two-pack in eco-conscious packaging made from 70% recycled and plant-based plastic
- Hydration doesn’t last all day, so you’ll need to reapply every few hours
- No explicit gluten warning on the packaging, which is a concern for anyone with wheat or gluten sensitivities
- Oils in the formula can block hair dye absorption if applied too close to the hairline
4. PCS Disposable Clear Gloves Powder Free Safety Protective Cleaning Gloves
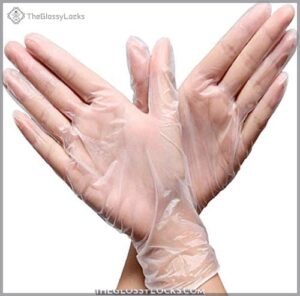
Lips covered. Now let’s talk hands.
Powder-free nitrile gloves are the go-to for hair dye safety because they resist oxidizers and dye chemicals better than latex, and they won’t trigger allergies if your skin runs sensitive. Always do an allergy patch test before dyeing your hair at home, but disposable gloves are your second line of defense.
Grab a few extra pairs, swap mid-session when things get messy, and never reuse a single torn pair.
| Material | N/A |
|---|---|
| Item Count | N/A |
| Reusable | N/A |
| Easy Cleanup | N/A |
| Usage Setting | N/A |
| Size/Capacity | N/A |
| Additional Features |
|
5. Salon Hair Coloring Dye Mixing Kit With Bowl Comb Brush
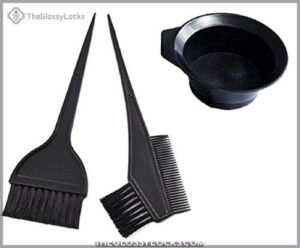
Dye mixing shouldn’t feel like guesswork. This three-piece kit keeps things precise and tidy. The bowl holds up to 200ml and features four measurement scales (50ml, 80ml, 100ml, and 200ml), so you’re not eyeballing your ratios. That matters more than you’d think.
The 7.87-inch brush-comb combo doubles as a tail comb for clean sectioning and an applicator for root-to-tip coverage. Fair warning: the bristles are on the stiffer side, so use a light hand. A little patience goes a long way.
It’s plastic, yes, but easy to clean and genuinely gets the job done.
| Best For | Anyone who colors their hair at home or in a salon and wants precise, mess-free mixing without guessing at ratios. |
|---|---|
| Material | Plastic |
| Item Count | 3-piece set |
| Reusable | Yes |
| Easy Cleanup | Yes |
| Usage Setting | Home & salon |
| Size/Capacity | 200ml bowl |
| Additional Features |
|
- Four measurement scales (50ml, 80ml, 100ml, 200ml) take the guesswork out of mixing dye
- The brush-comb combo handles both sectioning and application, so you need fewer tools
- Easy to clean up after use, making the whole process faster and less messy
- Bristles are stiff and plasticky, which can make application feel less smooth
- Comb teeth durability is hit or miss, with some users reporting breakage
- All-plastic construction feels less premium and may not hold up with heavy regular use
6. Neutrogena Fragrance Free Makeup Remover Cleansing Face Wipes
Few things trip up a home dye job faster than skipping skin prep. These wipes are fragrance-free and hypoallergenic, so they’re gentle enough for sensitive skin and safe to use around your eyes. No alcohol means no stinging on broken skin.
Swipe one along your hairline and brows before applying color to prevent staining and clear away the oil buildup that can throw off even color uptake.
Then follow up with a lightweight moisturizer to keep your skin barrier happy.
| Best For | Anyone with sensitive skin who wants a gentle, no-sting option for prepping their hairline and brows before at-home hair coloring or for quick makeup removal around the eyes. |
|---|
- Fragrance-free and hypoallergenic formula is safe for sensitive skin and gentle enough to use close to the eyes without irritation
- Alcohol-free so they won’t sting broken or already-irritated skin along the hairline
- Clear away oil buildup before dye application, helping color absorb more evenly across the scalp edge
- Single-use wipes generate more waste than a reusable cloth or micellar water setup
- May leave skin feeling slightly stripped after use, making a follow-up moisturizer a necessary extra step
- Likely not strong enough on their own to fully remove heavy or waterproof makeup in one pass
7. Reusable Shower Cap Large Hair Lengths Waterproof Lined
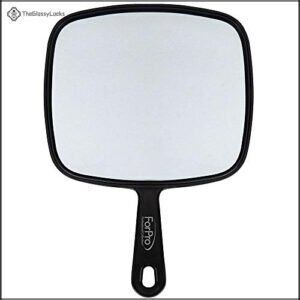
Imagine finishing your color session only to pull off your cap and find dye everywhere. A good shower cap prevents exactly that.
This one’s waterproof and lined, protecting your hair from seepage during processing. It fits hair up to 24 inches without compressing roots, and the elastic edge and snap closures keep it snug through your entire session. It stays effective for up to 90 minutes, so you’re covered whether you’re doing a quick refresh or a full color job.
| Best For | Home users and salon professionals who need a portable, handheld mirror for checking hard-to-see areas like the back of the head during grooming or styling. |
|---|
- Single-sided glass mirror delivers a clear, distortion-free reflection for accurate grooming
- At just 9 ounces with a long handle, it’s easy to hold and light enough to pack for travel
- Hang hole makes it simple to store without taking up counter space
- The plastic handle has been reported as flimsy and prone to breaking under regular use
- The glass can shift or wobble inside the frame, making it feel unstable during use
- Some customers report inconsistent clarity, with images appearing blurry rather than sharp
Choose The Right Hair Dye Type and Shade
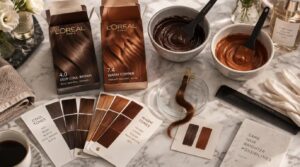
Picking the wrong shade feels like a real risk. Fair. But most color mistakes happen before the box is even open.
Permanent vs semipermanent dye serve very different purposes. Permanent hair color lifts and deposits, lasting 4-6 weeks. Semipermanent only deposits, fading in 12-24 washes. Testing a new tone? Go semipermanent first.
Going one shade lighter than your target gives warmer results, especially if your hair is over 50% gray, where an exact match reads flat. Factor in skin tone too: cool browns suit fair and olive complexions; warm coppers flatter deeper ones.
Here’s what catches people:
- Too dark on fine hair looks harsh immediately
- Skipping a strand test is just guessing
- Warm tones on gray always kick up brassiness fast
Prepare Your Hair, Skin, and Workspace Safely
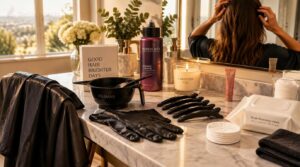
Getting this step wrong means stained counters, patchy color, and an irritated scalp. Before anything else, do an allergy patch test 48 hours ahead; skip it and you’re gambling.
Skip the allergy patch test and you’re not saving time—you’re gambling with your scalp
When you prep your hair, hold off on shampooing. Natural oils create built-in scalp protection from the chemicals. Keep your color-preserving shampoo nearby for after.
| Prep Step | Why It Matters |
|---|---|
| Allergy patch test | Catches reactions before full application |
| Skip the shampoo | Oils naturally buffer scalp irritation |
| Lip balm at hairline | Stops skin from staining |
| Gloves, cape, wipes within reach | No touching bare surfaces mid-process |
| Color-preserving shampoo on hand | Ready for immediate post-dye care |
Plan your hair sectioning before opening the kit. Clips set, workspace cleared, nothing in the way. That’s control.
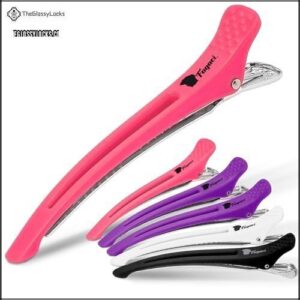
Sturdy hair sectioning clips for dyeing keep each part cleanly separated so color goes exactly where you want it.
How to Dye Your Hair Evenly at Home
Getting the color right comes down to technique, not luck. A few key steps make the difference between a result that looks professional and one that screams box dye gone wrong. Here’s exactly how to work through the process from start to finish.
Divide Hair Into Sections
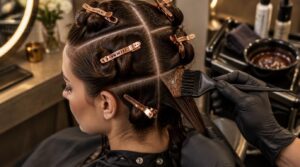
You don’t want a patchwork head. Start with dry, detangled hair, then create clean part lines down the middle and across the top. Work from the back upward, securing each section with clips so nothing shifts or gets re-exposed. Think of it as building a grid. Keep subsections thin so dye penetrates every strand instead of just sitting on top.
A wide tooth detangling comb glides through knots without breaking strands, giving you that smooth, even canvas before you ever pick up a brush.
Mix and Apply Color
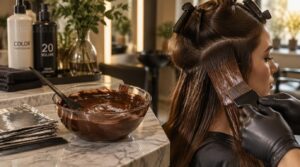
With your gridlike sections clipped, mix color and developer in a non-metal bowl. Room temperature keeps things manageable; warm mixtures over-process fast.
Load your applicator brush and coat mid-lengths first, then move to the roots. Scalp heat naturally speeds root processing, so starting at mid-shaft gives you even color distribution without rushing the ends when dyeing your hair at home.
Prevent Uneven Color Banding
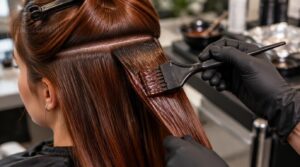
Once your color’s loaded on the brush, hair color banding becomes your biggest risk. Keep horizontal sections the same width on each side, and you’ll maintain even color distribution across every scalp zone.
At the crown, ease up on pressure so color doesn’t stack at that boundary. Run a strand test if you’re tweaking your hair dye processing time mid-session.
Process, Rinse, and Condition

Once your sections are done, set a timer. Follow your hair dye processing time exactly as listed in the hair dye instructions. No guessing.
When time’s up, rinse your hair with lukewarm water for 2-5 minutes until it runs completely clear. Cool water after your conditioner seals the cuticles shut. A deep conditioning mask weekly keeps your color vibrant longer.
Maintain Hair Color and Touch Up Roots

You’ve nailed the application. Now keep it looking that way. Hair color maintenance is what separates a fresh result from one that fades out fast.
Swap to a color-preserving shampoo right away. Sulfates strip pigment fast, so avoid them. Cap heat styling at 350°F and always use a protectant.
Follow these five habits to stretch every color session:
- Touch up your roots every 4-6 weeks at the 1 cm regrowth mark
- Apply a gloss or glaze to boost shine and add 2-3 more weeks
- Use purple or blue shampoo weekly for cool tone upkeep
- Stick to the same brand line for a root touchup to avoid shade drift
- Practice color fading prevention by keeping sun exposure low, especially in summer
Frequently Asked Questions (FAQs)
What are the best tips for coloring hair at home?
The best home dye results come down to prep, patience, and the right tools. Strand test first, apply mid-lengths before roots, rinse thoroughly with cool water, and use a color-safe shampoo to keep fading minimal.
What are common mistakes with at home hair coloring?
Skipping the patch test risks allergic reactions. Big, uneven sections will cause hair color banding. Leaving dye on too long will overprocess your hair. Hair damage prevention honestly starts before you even open that box.
When dying hair, do you start at top or bottom?
Start at the top. Work crown sections down, roots to ends, so every strand gets equal time. This hair dye application technique, paired with hair clips, keeps your coverage perfectly even and your results consistent.
Is it best to dye hair wet or dry?
Think of dry soil absorbing rain evenly. Dry hair behaves the same way.
Too much water dilutes pigment and causes patchy results, so always check your product’s instructions before you dye your hair at home.
Can I dye over previously highlighted or bleached hair?
Yes, you absolutely can. Relaxed bleached or highlighted hair soaks up color fast, but hair porosity varies across sections. Do a strand test first and use deposit-only or semi-permanent dye for the most predictable result.
How long should I wait between coloring sessions?
Wait at least 4 to 6 weeks between permanent color sessions. Your hair cuticle needs time to fully recover. High porosity or bleached hair? Stretch it even longer to protect moisture retention and color longevity.
Is it safe to dye hair while pregnant?
Most doctors consider hair dye safety low-risk during pregnancy when products are used correctly. Opt for ammonia-free dye, use a lower developer strength, and keep your scalp free of irritation. Ventilate well and wear gloves.
What should I do if color turns out wrong?
Don’t panic. If it’s too dark, clarifying shampoo pulls excess pigment fast within 24 hours. Too brassy? A purple toner easily fixes that. Always do a strand test before correcting to avoid making things worse.
Can I mix two different box dye shades?
Absolutely. Mixing two box dye shades can totally work, but keep them within the same brand line and color family. Use equal parts, stick to the shorter processing time, and always strand test it first.
Conclusion
A client once told me she’d given up on at-home color after a disaster that left her hair two different shades. A few small adjustments later, she never went back to the salon.
These tips for hair dyeing at home aren’t about nailing the perfect result on the very first try. They’re about building a repeatable process that actually works every time. Section, protect, and apply with patience. Your best color is a few good habits away.