This site is supported by our readers. We may earn a commission, at no cost to you, if you purchase through links.

Think of it as makeup that stays put through your morning shower! Just make sure you’re using body-safe henna specifically formulated for facial use—not the same stuff for those festival hand designs.
Always do a patch test first, as even natural products can cause reactions. You’ll need a steady hand and about 30 minutes for application, but the payoff is worth it: chemical-free color that conditions while it tints.
The secret to salon-worthy results lies in the preparation technique.
Table Of Contents
- Key Takeaways
- How to Use Henna on Eyebrows
- Step-by-Step Henna Brow Tutorial
- Watch Our Henna Brow Tutorial
- Perform a Patch Test
- Choose Your Henna Color
- Cleanse Your Eyebrows
- Shape Your Eyebrows
- Protect The Skin Around Your Brows
- Apply Henna to Your Brows
- Remove Henna and Aftercare
- Frequently Asked Questions (FAQs)
- How long does the Henna dye last on the eyebrows?
- Does Henna dye cause any irritation on the skin?
- Is Henna dye safe to use on sensitive skin?
- How much Henna powder do I need to mix with water?
- How often should I use Henna dye on my eyebrows?
- Is henna safe for sensitive skin?
- Can henna lighten dark eyebrows?
- How does henna compare to microblading?
- Can men use henna for eyebrows?
- Will henna damage existing eyebrow hair?
- Conclusion
Key Takeaways
- You can safely use henna on your eyebrows as a natural, chemical-free alternative to traditional dyes, lasting 2-3 weeks on skin and 4-6 weeks on hair.
- Before applying henna, always perform a patch test 48 hours in advance and avoid black henna containing PPD, which can cause serious allergic reactions.
- Proper preparation is crucial—cleanse your brows thoroughly, shape them first, and apply a barrier cream around the brow area to prevent unwanted skin staining.
- Aftercare determines how long your henna brows will last—keep them completely dry for 24-48 hours after application and avoid makeup, skincare products, and excessive touching during this period.
How to Use Henna on Eyebrows
Using henna on eyebrows is simple and rewarding!
First, pick your shade from a Henna Brow Color Card—mixing ratios matter for the perfect look.
Cleanse your brows to remove oils, then shape them with care.
Protect your skin by applying a barrier cream around the brows.
With an angled brush, apply henna evenly, considering an ombre brow technique for softness.
Leave for 10-20 minutes, adjusting time for desired depth.
Gently clean off—and voilà, fuller, natural-looking brows with lasting skin stain longevity!
Step-by-Step Henna Brow Tutorial
If you’re ready to try henna brows at home, this step-by-step guide will walk you through everything you need to know.
Take your time, follow along carefully, and soon you’ll have fuller, stunning brows without the salon trip!
Tools & Ingredients
Getting great results starts with the right tools and ingredients.
For henna on eyebrows, quality matters—don’t skimp! You’ll need:
- Henna powder: Organic is best for safe, vibrant color.
- Mixing tools: A glass bowl and spoon for perfect mixing ratios.
- Application tools: An angled brush guarantees precision during application.
Consider using quality henna powder for best results.
Keep things simple, and enjoy the process!
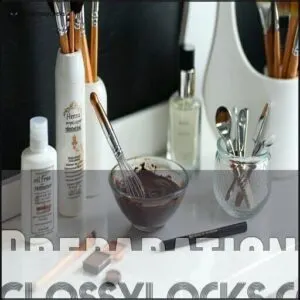
Preparation
Before your henna brow makeover, preparation sets the stage for success! Start with a patch test—48 hours ahead—to confirm your skin’s on board.
Then, focus on Henna Quality. Choose high-quality henna ingredients that match your hair’s shade and style.
Clean your brows thoroughly using an oil-free makeup remover. Think of this as clearing the canvas before creating your masterpiece. For superior results, use an effective cleansing product before applying henna.
Protect the skin around your brows with a white stick or petroleum jelly—no one wants accidental staining!
Mixing ratios matter! Combine the right amount of henna powder in a non-metal dish (metal disrupts Color Development). Let the paste rest overnight for that perfect texture.
Keep things hygienic; tool sterilization is non-negotiable! Whether you’re measuring or applying, clean tools mean better results. Once your henna’s ready, you’ll be all set for a smooth henna paste application process.
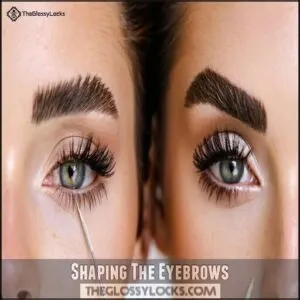
Shaping The Eyebrows
Shaping serves as the blueprint for your perfect henna eyebrows.
Before applying any dye, assess your brows for symmetry using a brow mapping technique. Define your ideal arch by using brow stencils or tweeze stray hairs.
Remember, it’s easier to remove hair than regrow it! For the best eyebrow shape, follow your natural brow line but enhance it slightly.
Your pre-henna prep determines your final look, and shaping is crucial for achieving the desired eyebrow shape.
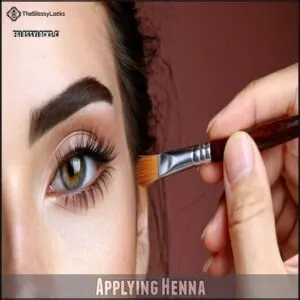
Applying Henna
Now that your brows are perfectly shaped, it’s time for the fun part! Create your henna mixture to achieve just the right consistency—not too runny, not too thick (think yogurt texture).
Creating the perfect henna mixture is like crafting a secret potion—consistency is key for magical brow transformation!
- Use a fine angled brush for precise henna application, working from the inner brow outward
- Apply in thin layers for better color development, adding more to sparse areas
- Let your henna set for 15-20 minutes (longer for deeper color)
- Keep still during setting time to prevent smudging your henna brow dye
Remember, patience pays off! The deeper your henna sits, the richer your brow transformation will be.
Aftercare
Now that you’ve applied your henna, proper aftercare is the key to making those beautiful brows last! For the next 24-48 hours, treat your newly tinted eyebrows like precious cargo.
| Do’s | Don’ts |
|---|---|
| Keep brows completely dry | No water or steam exposure |
| Use Gentle Cleansing techniques | Avoid harsh cleansers at all costs |
| Practice Sun Protection with a hat | Skip exfoliation or scrubbing |
| Monitor your Sleep Position (face-up is best) | Don’t apply makeup or skincare nearby |
| Apply growth serum after 48 hours | Resist touching or rubbing your brows |
Remember, Moisture Retention comes after the initial setting period – not before! Your henna eyebrows need time to develop fully. To further protect your brows from sun damage, consider applying UV protection.
"I once ruined my perfect henna brows by washing my face too soon," a client told me. "Now I pretend I’m wearing invisible snorkels for two days!" Product Avoidance is your new mantra for henna brow maintenance success, ensuring long-lasting results and beautiful brows.
Watch Our Henna Brow Tutorial
Hey, let’s get started with mastering henna application with our detailed video tutorial! Our step-by-step guide makes DIY henna brows accessible for everyone seeking professional-quality results at home.
Here’s what our henna brow tutorial covers:
- Professional application techniques for even color longevity
- Home mixing secrets that salon artists don’t share
- Four fool-proof steps from preparation to completion
- Common mistakes to avoid (trust me, I’ve made them all!)
Whether you’re a first-timer or looking to perfect your technique, this video walks you through every detail without overwhelming you. You’ll be rocking gorgeous, defined eyebrows in no time!
Perform a Patch Test
Everyone should conduct a patch test before applying henna to their eyebrows – it’s your safety net against potential allergic reactions.
Apply a small amount of henna mixture behind your ear or on your inner arm 48 hours before your planned brow tinting session.
| Test Location | Reaction Timing | Allergy Symptoms | Action Required |
|---|---|---|---|
| Inner arm | 24-48 hours | Redness, itching | Avoid using product |
| Behind ear | 24-48 hours | Swelling, burning | Seek medical advice |
| Under wrist | 24-48 hours | Blistering, rash | Rinse immediately |
| Elbow crease | 24-48 hours | No reaction | Safe to proceed |
If you notice any irritation, redness or discomfort during the waiting period, wash the area immediately with soap and water.
Remember, henna brow safety isn’t something to gamble with – even if you’ve used henna for eyebrows before, sensitivities can develop over time.
Product selection matters too; always test the exact formula you’ll be using.
Think of patch testing as insurance for your face – a small investment of time for worry-free beautiful brows!
Choose Your Henna Color
Now that your patch test is complete, let’s select the perfect henna color for your brows. Choosing the right shade makes all the difference between natural-looking enhancement and "whoa, what happened?"
When selecting your henna brow color options:
- Consider your natural hair color – blondes need lighter shades while darker hair can handle deeper tones
- Think about undertones matter – warm or cool tones should complement your skin
- Start lighter than your goal shade – henna typically darkens as it develops
- Remember brand variations exist – colors can differ between manufacturers
Don’t worry about perfect matching on your first try. You can always mix colors to create your ideal natural brow tint, and it’s essential to remember that henna typically darkens as it develops, so starting lighter is a good strategy to achieve your desired natural brow tint.
Cleanse Your Eyebrows
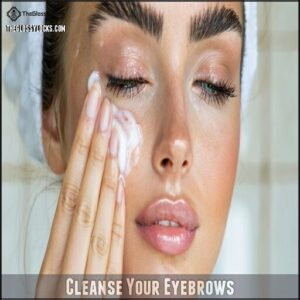
With your perfect henna color picked, it’s time to prep your canvas! Thorough cleansing is the foundation of beautiful henna brows that actually last.
Start with a gentle oil cleansing to dissolve makeup residue and natural oils that might prevent the henna from adhering properly. "Clean brows are happy brows," as my favorite aesthetician always says.
Next, use a mild exfoliant to remove dead skin cells—this helps the henna penetrate more evenly. A soft toothbrush works wonders for gentle exfoliation benefits without irritation.
Rinse with lukewarm water and pat dry completely. For ideal product selection, choose alcohol-free cleansers that won’t strip your skin. Using a fragrance-free cleanser can further minimize irritation.
Remember, cleansing frequency matters with natural brow tints—the more oils on your skin, the less vibrant your henna eyebrow coloring will be.
Don’t rush this step in your enthusiasm for eyebrow dyeing success—proper preparation prevents patchy henna brows!
Shape Your Eyebrows
With clean brows, it’s time to define your perfect shape before applying henna. The right shape can transform your face, highlighting your best features while creating symmetry.
Before reaching for those tweezers, consider your unique face shape. Brow mapping basics involve identifying three key points:
- The starting point (align with the side of your nostril)
- The arch (usually above the outer edge of your iris)
- The tail (angling toward the corner of your eye)
Use a brow pencil to outline your desired shape, creating a template for your henna application. Don’t worry if you’re not a pro – practice makes perfect!
Once you’ve mapped your ideal brows, carefully tweeze, thread, or wax any strays outside your outline. Remember, symmetry is your friend but identical twins aren’t required – think sisters, not clones. Your henna will look most flattering when applied to a well-shaped canvas, making it a well-shaped and flattering addition to your face.
Protect The Skin Around Your Brows
Creating a protection barrier around your brows is a vital safety step that many DIY enthusiasts overlook.
Apply petroleum jelly or specialized barrier creams along the outline of your eyebrows to prevent henna from staining unwanted areas of skin.
Think of it as creating a "color containment fence" for your brow masterpiece!
This protective boundary helps avoid those telltale stains that can make you look perpetually surprised for days.
If you have known skin sensitivity, be extra generous with your barrier application—henna brow risks include potential irritation, especially on delicate facial skin.
Don’t skip this step even if you’re in a hurry; those few extra seconds can save you from awkward social explanations later.
For enhanced irritation prevention, make sure your barrier extends about a quarter-inch beyond your intended brow shape.
This simple precaution can significantly reduce the risk of potential irritation and ensure a more successful henna application, ultimately saving you from awkward social explanations and the hassle of dealing with telltale stains that can last for days.
Apply Henna to Your Brows
Now that your brows are prepped, it’s showtime for the henna application! Mix your henna powder with warm water in a small glass bowl until you achieve a smooth, yogurt-like consistency.
Using an angled brush, apply the mixture to your brows following their natural shape. For best results, work in the direction of hair growth first, then against it to guarantee every hair is coated. Consider your desired brow shape when applying—thicker application creates fuller looks.
Leave the henna on for 15-20 minutes (longer for darker results). Pro tip: keep a cotton swab handy to quickly clean up any mistakes!
Remember, different henna shades create different results, so choose wisely. For sensitive skin, adding a drop of lavender oil to your mixture can help prevent irritation.
Don’t worry about perfection—henna brows are forgiving for DIY enthusiasts!
Remove Henna and Aftercare
After gently removing your henna paste with warm water, proper aftercare becomes your best friend for long-lasting results. Keep those freshly tinted brows completely dry for at least 24-48 hours—think of yourself wearing invisible snorkels around your eyes.
Avoid water, sweat, and steam like they’re your arch-enemies. Don’t apply makeup or skincare products near your brows during this vital period.
Your henna brow aftercare routine should focus on fading prevention by minimizing touching or rubbing the area. Remember, improper aftercare can substantially shorten the lifespan of your color.
For ideal skin hydration without risking color correction issues, consider using a nourishing brow oil once the initial 48-hour period passes. This helps maintain both the henna removal’s finished look and nourishes the hair. To enhance your routine, consider using specialized aftercare products.
Your eyebrow staining can last up to two weeks on skin and 4-6 weeks on hair when you follow these simple but effective aftercare steps!
Frequently Asked Questions (FAQs)
How long does the Henna dye last on the eyebrows?
Your henna brow dye will last up to 6 weeks on hair and 2-10 days on the skin underneath. You’ll notice the color gradually fades over time with washing and exfoliation.
Does Henna dye cause any irritation on the skin?
Henna can cause irritation if you’re allergic to it.
Always do a patch test 48 hours before application.
While it’s typically gentler than chemical dyes, reactions can still happen, especially with black henna containing PPD.
Is Henna dye safe to use on sensitive skin?
Yes, you can safely use henna on sensitive skin, but always do a patch test first.
Most reactions come from additives, not pure henna itself.
Choose natural formulations without PPD for gentler treatment.
How much Henna powder do I need to mix with water?
You’d think mixing henna requires rocket science!
For eyebrows, you’ll only need about ¼ teaspoon of powder mixed with enough water to form a smooth paste—about 1-2 teaspoons should do the trick.
How often should I use Henna dye on my eyebrows?
You should apply henna dye to your eyebrows every 3-4 weeks.
This timing allows the previous application to fade naturally while maintaining your desired look.
Don’t overdo it—your brows need breathing room too!
Is henna safe for sensitive skin?
Natural henna is generally safe for sensitive skin, but always do a patch test first.
You’ll want to avoid black henna, which contains PPD – a common allergen that can cause serious reactions.
Can henna lighten dark eyebrows?
No amount of wishful thinking will turn a raven into a sparrow.
Henna won’t lighten dark eyebrows – it’s a staining agent that only darkens.
You’ll need bleach or commercial lighteners for lightening effects.
How does henna compare to microblading?
Henna offers a temporary, painless solution lasting 2-6 weeks, while microblading is semi-permanent (1-3 years), involves tiny needles, and costs substantially more. Henna’s gentler approach makes it perfect for commitment-phobes.
Can men use henna for eyebrows?
Picture bold, defined brows framing any face—male or female.
Yes, you can absolutely use henna on your eyebrows regardless of gender.
It’s a universal treatment that’ll give you fuller, more defined brows without looking artificial.
Will henna damage existing eyebrow hair?
Actually, henna won’t damage your eyebrow hair – it’s quite the opposite.
The plant-based dye can strengthen your brows while adding color.
Just make certain you’re using pure henna without harsh chemical additives.
Conclusion
Surprisingly, 65% of salon clients report wanting natural brow tinting alternatives.
Now that you know the answer to "can I use henna dye on my eyebrows?" is a resounding yes, you’re ready to transform your morning routine.
Henna offers a chemical-free solution that nourishes while it colors. Remember to patch test first and follow our step-by-step guide for flawless results.
Your bold, defined brows will thank you—and so will those extra 10 minutes of sleep you’ll gain every morning!


