This site is supported by our readers. We may earn a commission, at no cost to you, if you purchase through links.
 You’ll save serious cash making your own razor blade cleaning solution with just three household staples.
Mix equal parts 70% isopropyl alcohol and distilled water in a small bottle. Add 2-3 drops of tea tree oil for extra antimicrobial punch.
This DIY razor blade cleaning solution recipe costs pennies compared to $10+ store brands, works on any razor type, and cuts through soap scum like butter.
Simply soak your razor for 30 seconds, rinse with warm water, and pat dry. Your homemade concoction kills 99% of bacteria while extending blade life substantially.
There’s actually a specific alcohol concentration that works best for different razor materials.
Table Of Contents
- Key Takeaways
- Why Make a DIY Cleaning Solution
- Ingredients and Supplies Needed
- Mixing The Cleaning Solution Recipe
- How to Use a DIY Cleaning Solution
- Safety Precautions and Troubleshooting
- Frequently Asked Questions (FAQs)
- What is a good substitute for shaver cleaning solution?
- Does vinegar clean razor blades?
- Does hydrogen peroxide clean razor blades?
- How do you make a Philips shaver cleaning solution?
- What is the best way to clean shaver blades?
- How do you make your own cleaning solution for a Panasonic shaver?
- Can a DIY solution damage razor blades?
- How often should the solution be replaced?
- What storage methods extend solution lifespan?
- Are there advantages over commercial solutions?
- Conclusion
Key Takeaways
- You’ll save serious money making your own razor cleaning solution with 70% isopropyl alcohol, distilled water, and a few drops of tea tree oil—costing under $0.10 per use versus $2-$5 for commercial brands.
- Mix equal parts 70% isopropyl alcohol and distilled water for the perfect balance of cleaning power and safety, then add 2-3 drops of essential oils for antimicrobial benefits and pleasant scent.
- Simply soak your razor for 30 seconds to 2 minutes, brush gently with an old toothbrush if needed, rinse with warm water, and air dry completely to prevent rust and extend blade life.
- You’ll avoid harsh chemicals found in store-bought cleaners while customizing strength and fragrance to match your specific razor type and skin sensitivity needs.
Why Make a DIY Cleaning Solution
You’re probably tired of spending a fortune on those tiny bottles of commercial razor cleaning solutions that disappear faster than your morning coffee.
Making your own cleaning solution saves serious cash, cuts down on plastic waste, and lets you control exactly what goes on your skin without harsh chemicals, which also means you can avoid using products with harsh chemicals.
Take control of what goes on your skin—ditch the mystery chemicals and save money with simple DIY solutions.
Cost Savings and Environmental Benefits
Building a homemade razor cleaner delivers serious cost savings compared to commercial options. DIY Economics show homemade solutions cost under $0.10 per use versus $2-$5 for store brands.
Natural alternatives reduce environmental impact through waste reduction. DIY enthusiasts might also consider reusing old clothing for effective hair removal.
Key benefits of DIY razor cleaners:
- Long-term savings from readily available household ingredients
- Ecofriendly formula eliminates plastic waste from disposable cartridges
- Ingredient availability means no special trips to the store
- Customizable strength and fragrance for your preferences
- DIY razor cleaner extends blade life by preventing rust and maintaining sharpness
Avoiding Chemicals and Toxins in Commercial Solutions
Beyond cost savings lies a bigger win—protecting your skin from toxin exposure. Commercial cleaners pack harsh chemicals that trigger chemical sensitivities and irritation.
Skip the store-bought chemicals and protect your skin with simple ingredients you trust.
Your homemade razor cleaner uses simple ingredients you trust.
Here’s what makes natural alternatives smarter:
- Isopropyl alcohol cleans without mystery additives
- Vinegar dissolves buildup naturally
- Hydrogen peroxide disinfects safely
- Ingredient research becomes unnecessary—you know exactly what’s inside
Safer shaving starts with your natural razor cleaner.
Convenience of Having a Customizable Formula
You control every aspect of your homemade cleaning solution.
Adjust strength for delicate or tough razors.
Pick your favorite scent personalization with essential oils.
Mix weaker solutions for daily use or stronger ones for deep cleaning.
This experimentation freedom means your DIY cleaning formula matches your specific needs perfectly, using readily available ingredients you already own.
| Feature | Store-Bought | Customizable Formula |
|---|---|---|
| Scent Options | Limited choices | Any essential oil combo |
| Strength Level | Fixed concentration | Adjustable for your razor |
| Cost Control | Set pricing | Use what you have |
| Ingredient Knowledge | Unknown chemicals | You know everything inside |
| Availability | Store-dependent | Readily available at home |
Ingredients and Supplies Needed
You’ll need just a few common household items to create an effective razor cleaning solution that rivals expensive commercial products.
The basic recipe requires isopropyl alcohol, distilled water, and a drop of dish soap – ingredients you probably already have in your medicine cabinet and kitchen.
Isopropyl Alcohol Concentration Options (50-91%)
Selecting the right alcohol concentration makes all the difference for effective razor cleaning. 70% isopropyl alcohol hits the sweet spot for Alcohol Effectiveness – it penetrates cell walls better than higher concentrations while providing excellent Rust Prevention.
The balanced alcohol-water ratio in 70% IPA is why it’s often preferred for disinfection.
- 50-70%: Best balance of Skin Sensitivity and cleaning power
- 70%: Ideal disinfection with slower evaporation for thorough contact
- 91%: Quick-drying but less effective germ-killing
- Higher concentrations: Risk coagulating proteins, reducing antimicrobial action
Choose 70% for reliable results.
Water Purification and Distillation
Water quality impacts your cleaning solution’s performance.
Tap water contains minerals that create buildup on razor blades, reducing cleaning effectiveness.
| Water Type | Mineral Content | Best Use |
|---|---|---|
| Tap Water | High minerals | Avoid for cleaning |
| Filtered Water | Some minerals | Acceptable option |
| Distilled Water | Zero minerals | Ideal choice |
Distillation methods remove all impurities, ensuring your DIY solution works perfectly every time.
Using distilled water can also help prevent mineral buildup issues on the blades, which is the ideal choice for cleaning, as it helps to avoid mineral buildup.
Essential Oils and Fragrance Options
Two drops of essential oils transform your DIY razor cleaner into a personalized grooming experience.
Essential oil scents offer aromatherapy benefits while providing natural fragrance combinations that last longer than synthetic alternatives.
- Lemon extract cuts through soap buildup while delivering fresh citrus scent intensity
- Lavender oil soothes skin sensitivity concerns with calming aromatherapy benefits
- Tea tree oil adds antibacterial properties plus clean, medicinal fragrance options
- Peppermint oil provides cooling sensation with excellent scent longevity and oil benefits
Tea tree oil is available for purchase online.
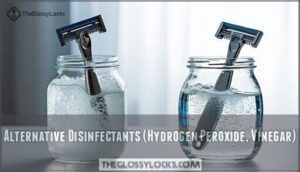
Alternative Disinfectants (Hydrogen Peroxide, Vinegar)
Several household alternatives pack serious disinfecting power for razor blade cleaning.
Hydrogen peroxide’s oxidizing strength kills 99.9% of bacteria with peroxide effectiveness that rivals commercial cleaners.
White vinegar’s natural vinegar acidity dissolves mineral buildup while providing gentle antimicrobial action.
Both offer excellent material compatibility with stainless steel razors, and solution stability remains consistent, and disinfectant safety is higher than harsh chemicals—perfect for disinfecting razors affordably.
Regular cleaning helps maintain razor performance.
Mixing The Cleaning Solution Recipe
Creating your cleaning solution is easier than you think, and getting the ratios right makes all the difference.
You’ll mix these ingredients in the right proportions to create a powerful cleaner that won’t damage your razor blades.
Ratio of Isopropyl Alcohol to Water
Getting your alcohol-to-water ratio right is like finding the sweet spot on your favorite razor. You want enough punch to clean effectively without going overboard.
Here’s what works best:
- 90% isopropyl alcohol to 10% distilled water – This ideal ratio delivers maximum cleaning power while maintaining solution stability
- 70% alcohol minimum – Lower concentrations won’t cut through buildup effectively, compromising corrosion prevention
- Water purity matters – Distilled water prevents mineral deposits that can mess with your blade’s performance.
This alcohol-based recipe balances cleaning strength with safety considerations for your razor’s delicate parts.
Adding Essential Oils and Fragrances
Once you’ve got your alcohol-to-water ratio down pat, it’s time to add some personality to your cleaning solution. Essential oil blends can transform your basic cleaner into something that actually smells good while you work.
Start with just 2-3 drops per cup of solution. Scent intensity matters more than you think – nobody wants their razor smelling like a perfume bomb. Tea tree oil fights bacteria naturally, while peppermint gives you that fresh kick. For skin sensitivity, stick with gentler options like lavender or eucalyptus.
Here’s your quick reference for oil types and their benefits:
| Essential Oil | Scent Strength | Best For |
|---|---|---|
| Tea Tree | Medium | Antibacterial properties |
| Peppermint | Strong | Fresh, cooling sensation |
| Lavender | Mild | Sensitive skin, relaxation |
| Eucalyptus | Medium | Clean, spa-like experience |
| Lemon | Light | Natural deodorizing |
Blending oils lets you create custom aromatherapy experiences. Mix citrus with mint for morning energy, or combine lavender with eucalyptus for evening wind-down sessions. Fragrance longevity isn’t huge here since you’re rinsing anyway, but the brief moment of pleasant scent beats harsh chemical smells every time.
Mixing Methods for a Uniform Solution
Three essential mixing methods guarantee your cleaning solution recipe works perfectly every time.
Start with proper ingredient order – alcohol first, then water to prevent separation.
- Gentle stirring techniques – Use circular motions with a plastic spoon for 30 seconds
- Temperature effects – Mix at room temperature for better solution stability
- Agitation techniques – Shake sealed containers vigorously to achieve uniform dilution ratios
Glass container material works best for consistent mixing methods.
Adjusting The Formula for Specific Razor Types
Different razors need tweaked formulas for best results.
Safety razors handle stronger solutions, while disposable razors need gentler mixes to protect plastic housing.
Electric shaver needs vary – Philips shaver cleaning works with alcohol-heavy formulas, but Panasonic shaver cleaning prefers milder blends.
Sensitive skin formulas require lower alcohol concentrations. Beard density factors matter too – thicker beards need stronger razor cleaning solution for effective razor blade maintenance.
For ideal hygiene, consider using alcohol based solutions for disinfection.
How to Use a DIY Cleaning Solution
Now that you’ve mixed your cleaning solution, it’s time to put it to work on those dull, gunked-up blades.
The key is using the right technique – too little effort won’t clean properly, but too much can damage your razor’s delicate edge.
Proper Dilution Ratios for Effective Cleaning
Creating the perfect DIY razor blade cleaner hinges on nailing your alcohol percentage and water purity balance.
Here’s your mixing blueprint:
- 70% isopropyl rubbing alcohol to 30% distilled water for maximum disinfection
- Add one drop soap usage per ounce for cutting through grime
- Include 2-3 drops essential oil addition for antimicrobial boost
Try ratio experimentation with 50/50 mix for sensitive skin.
Always use distilled water purity to prevent mineral buildup on blades.
Soaking and Rinsing Techniques
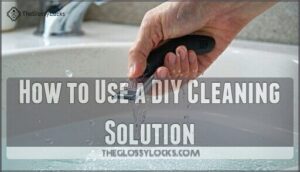
Now that you’ve mixed your DIY razor blade cleaner, proper soaking techniques make all the difference. Submerge your razor in the solution for 1-2 minutes—this soaking duration breaks down stubborn buildup without damaging the blade.
| Step | Duration | Result |
|---|---|---|
| Soak | 1-2 minutes | Softens debris |
| Rinse | 30 seconds | Removes residue |
| Air dry | 5 minutes | Prevents rust |
After soaking, rinse with warm water at moderate rinsing temperature. This residue removal step clears away loosened grime and cleaning solution remnants, leaving your razor spotless and ready for action.
Brushing and Scrubbing Methods
After soaking your razor, grab a stiff-bristled toothbrush for effective stain removal.
Use gentle scrubbing pressure—firm enough to dislodge debris, light enough to protect blade edges. The bristle stiffness should tackle buildup without damaging metal.
Brush types matter: old toothbrushes work perfectly for razor cleaning methods. You can find a variety of options online.
Cleaning frequency of weekly brushing keeps blades sharp and extends lifespan through proper scrubbing.
Drying and Storing Razors
After thorough cleaning, air dry your razor completely before storage.
Water droplets spell trouble for blade protection and rust prevention.
Place your razor in upright storage with good air circulation – a razor stand works perfectly.
Skip humid bathrooms if possible; your storage environment makes all the difference.
Smart razor maintenance means keeping blades away from moisture that kills their sharpness.
Safety Precautions and Troubleshooting
While DIY cleaning solutions are generally safe, you’ll want to handle chemicals properly and know how to fix common problems.
Working with isopropyl alcohol requires good ventilation, and testing your mixture first prevents nasty skin reactions.
Handling Isopropyl Alcohol and Other Chemicals Safely
Handling isopropyl alcohol safely protects you from Fume Inhalation and accidents. This stuff’s flammable and potent, so respect it:
- Work in a well-ventilated area to avoid breathing vapors
- Wear gloves and safety gear for Skin Protection
Store bottles away from heat following Storage Guidelines. Keep solutions away from kids for Child Safety.
Proper Solution Disposal and smart handling isopropyl alcohol habits keep everyone safe.
Avoiding Skin Irritation and Allergic Reactions
Protecting sensitive skin starts with smart choices.
Patch testing your cleaning solution on a small skin area prevents nasty surprises later.
Use lower alcohol strength variations for delicate skin—50% instead of 91%.
If you notice skin irritation after shaving, your solution strength might be too harsh.
Switch to gentler alternatives like diluted hydrogen peroxide to avoid razor burn and practice proper allergen avoidance.
Troubleshooting Common Issues (Stubborn Stains, Clogged Razors)
Even the best DIY cleaning solutions sometimes face tough opponents. When dealing with stubborn stains or clogged razors, you’ll need smart strategies that go beyond basic cleaning.
Here’s your troubleshooting toolkit:
- Stubborn stains: Soak blades in hot water first, then apply full-strength solution with gentle brushing
- Clogged razors: Increase solution strength or extend soaking time for better residue buildup removal
- Blade corrosion: Check cleaning frequency – daily users need stronger solutions to prevent rust removal issues
- Poor results: Adjust your razor blade care routine based on water hardness and shaving cream type
To prevent this, rinse the razor regularly during shaving.
Frequently Asked Questions (FAQs)
What is a good substitute for shaver cleaning solution?
Skip expensive commercial cleaners! You can easily make your own with isopropyl alcohol and distilled water.
Mix 90% alcohol with 10% water, add a drop of dish soap, and you’ve got a powerful substitute that’ll keep your shaver running smoothly.
Does vinegar clean razor blades?
Yes, vinegar effectively cleans razor blades by dissolving soap scum and mineral buildup.
Mix equal parts white vinegar and water, soak blades for 10-20 minutes, then rinse thoroughly to prevent corrosion.
Does hydrogen peroxide clean razor blades?
Like a superhero for your blades, hydrogen peroxide works wonders.
You’ll find it effectively disinfects razor blades by killing bacteria and removing buildup.
It’s gentler than alcohol but still powerful enough to maintain blade cleanliness and extend their lifespan substantially, making it a great option to effectively disinfect and extend their lifespan.
How do you make a Philips shaver cleaning solution?
Mix 1 part 70% isopropyl alcohol with 1 part distilled water, add a few drops of dish soap and light machine oil.
This homemade blend cleans effectively while lubricating your Philips shaver’s components perfectly.
What is the best way to clean shaver blades?
Think of blades like teeth – neglect them, and performance plummets.
Soak your shaver in isopropyl alcohol solution for two minutes, brush gently, rinse thoroughly, then air-dry completely to prevent rust and maintain sharpness.
How do you make your own cleaning solution for a Panasonic shaver?
Creating your own Panasonic shaver cleaning solution is straightforward and budget-friendly.
Combine equal parts water and 70% isopropyl alcohol, then add a few drops of clipper oil for lubrication and performance enhancement.
Can a DIY solution damage razor blades?
DIY solutions can damage blades if you’re careless with concentrations or timing.
Too much acid, leaving blades soaking too long, or skipping the rinse creates corrosion.
Stick to gentle ratios and proper technique.
How often should the solution be replaced?
You should replace your cleaning solution every 2-3 weeks for best performance. Fresh solution works better at dissolving buildup and preventing bacterial growth that could irritate your skin.
What storage methods extend solution lifespan?
Store your solution in airtight containers away from light and heat. Keep it in cool, dark places like cabinets. Label with dates and replace every 2-3 weeks to maintain effectiveness.
Are there advantages over commercial solutions?
Why settle for overpriced commercial cleaners when you can make your own?
DIY solutions cost under $10 per use versus $2-$5 for store-bought options.
You’ll customize fragrance, avoid harsh chemicals, reduce plastic waste, and extend blade life by preventing rust buildup effectively, which helps to reduce plastic waste.
Conclusion
Research confirms that 70% isopropyl alcohol provides maximum antimicrobial effectiveness while being gentler on razor materials than higher concentrations .
Your DIY razor blade cleaning solution recipe delivers professional results at a fraction of the cost.
With proper mixing ratios and essential oil additions, you’ll eliminate 99% of bacteria while extending blade sharpness substantially, proving that sometimes the simplest solutions work best for maintaining razor hygiene and performance, beating expensive commercial cleaners every time.
- https://blog.gotopac.com/2017/05/15/why-is-70-isopropyl-alcohol-ipa-a-better-disinfectant-than-99-isopropanol-and-what-is-ipa-used-for/
- https://alliancechemical.com/blogs/articles/70-vs-91-isopropyl-alcohol-the-expert-guide-for-medical-amp-general-disinfection
- https://shavercheck.com/braun-ccr-alternative/
- https://www.phonesoap.com/blogs/news/how-to-sanitize-razor
- https://www.reddit.com/r/askscience/comments/l76ep/rubbing_alcohol_or_hydrogen_peroxide/


