This site is supported by our readers. We may earn a commission, at no cost to you, if you purchase through links.

Remove loose hairs with the included brush, then rinse waterproof models under warm running water while the motor runs for 10-15 seconds.
This distributes soap throughout the cutting system and flushes out stubborn debris.
For non-waterproof razors, use compressed air and specialized cleaning sprays.
Pat dry with a soft cloth and apply a drop of lubricating oil to the blades weekly.
Deep clean monthly by disassembling the shaving head and soaking components in warm, soapy water.
The difference between a razor that lasts two years versus ten often comes down to these simple maintenance habits.
A well-maintained razor can last significantly longer, making these habits a crucial part of razor care, involving regular use of warm running water and potentially compressed air.
Table Of Contents
- Key Takeaways
- Essential Supplies for Electric Razor Cleaning Routine
- Quick Daily Cleaning After Each Shave
- Deep Cleaning Process for Rotary Shavers
- Cleaning Non-Waterproof Electric Razors
- Maintaining Electric Razor Performance and Longevity
- Cleaning Routine for Clippers and Trimmers
- Frequently Asked Questions (FAQs)
- How do you clean an electric razor?
- Do electric razors need to be cleaned?
- Should you clean your electric shaver?
- How often should you clean a rotary razor?
- How do you keep a razor clean?
- How often should you wash an electric razor?
- Do electric razors need cleaning?
- How to clean an electric shaver after shaving pubes?
- How to clean electric razor blades?
- How long does it take to clean an electric razor?
- Conclusion
Key Takeaways
- Clean daily after each shave – You’ll extend your razor’s life dramatically by rinsing waterproof models under warm water while running the motor for 10-15 seconds and brushing away loose hairs immediately.
- Lubricate weekly to prevent friction – Apply a drop of lubricating oil to your blades every week to reduce wear, maintain sharpness, and keep your razor running smoothly for years longer.
- Deep clean monthly for optimal performance – Disassemble your shaving head once a month and soak components in warm, soapy water to remove stubborn buildup that daily cleaning can’t reach.
- Use proper methods for non-waterproof razors – You’ll need compressed air and specialized cleaning sprays instead of water to maintain non-waterproof models without causing permanent damage to internal components.
Essential Supplies for Electric Razor Cleaning Routine
You’ll need five essential supplies to keep your electric razor in top condition and guarantee a clean, comfortable shave every time.
Having the right tools makes the cleaning process quick, effective, and helps extend your shaver’s lifespan substantially.
Cleaning Brush for Hair and Debris Removal
When maintaining your electric razor, the cleaning brush serves as your primary tool for hair clippings removal.
This small brush, whether included with your shaver or an alternative tool like an old toothbrush, effectively removes debris from blades and crevices. The brush material and bristle stiffness determine cleaning effectiveness.
Use gentle brushing technique to brush off loose hairs without damaging components. Many users also find it helpful to source a dedicated electric razor brush.
Store your razor cleaning brush in a dry location to maintain its condition and guarantee superior electric razor cleaning performance.
Lubricating Oil for Blade Maintenance
Proper lubricating oil keeps your electric razor’s blades sharp, smooth, and corrosion-free.
Apply a few drops weekly to reduce friction and extend blade life substantially. Choose manufacturer-recommended oil types for best results.
Consider using specialized razor products to enhance the lubrication process.
This simple oil application prevents wear, maintains blade sharpness, and guarantees your electric razor cleaning routine delivers peak performance every time.
Cleaning Solution or Mild Soap
With your blades properly lubricated, choosing the right cleaning solution becomes your next priority.
You’ll find plenty of options, but don’t overthink this decision.
Here are your three main cleaning solution alternatives:
- Specialized electric razor cleaners – Formulated specifically for your device, though pricier
- Mild soap and warm water – Simple, effective, and budget-friendly for most cleaning needs
- Gentle dish soap mixture – Proper dilution creates an excellent homemade cleaning solution.
Consider skin sensitivity when selecting cleaning products, as harsh chemicals can cause residue concerns that irritate your face later.
Consider purchasing specialized cleaning products for superior hygiene.
Soft Cloth for Wiping and Drying
Your soft cloth makes the difference between a quick wipe-down and proper electric razor cleaning routine.
Choose a lint-free cloth for streak-free results. Microfiber works best, absorbing moisture without leaving residue. Cotton cloths are gentler but may shed fibers.
Focus on gentle drying techniques after cleaning—pat, don’t rub. This cleaning technique prevents water damage and extends your shaver’s life. Store your cloth in a clean, dry place for future use, ensuring a proper electric razor maintenance habit.
Compressed Air for Hard-to-Reach Areas
Beyond the obvious surfaces, compressed air reaches your electric razor’s intricate inner parts where debris loves to hide.
This powerhouse tool transforms stubborn cleaning challenges into quick victories.
- Air Duster Types: Choose between canned compressed air or electric blowers for different cleaning frequency needs
- Nozzle Attachments: Precision tips target specific areas while wide nozzles handle broader surfaces effectively
- Safe Usage: Hold cans upright, use short bursts, and maintain proper distance for ideal electric shaver maintenance
For electric razor cleaning routine success, compressed air serves as your secret weapon against trapped hair and dust.
Quick Daily Cleaning After Each Shave
A quick daily cleaning routine after each shave takes less than a minute and keeps your electric razor performing at its best.
This simple habit prevents hair buildup, maintains hygiene, and extends your shaver’s lifespan substantially.
Removing Loose Hairs From Shaving Head
After gathering your cleaning supplies, start by giving your shaving head a firm tap to shake loose any stubborn hair clippings.
The shaking technique works better than you’d think.
Next, grab your cleaning brush and sweep away remaining debris with short strokes.
For thorough brush cleaning, use compressed air to blast out particles hiding in tight spots.
This simple step prevents hair clippings safety issues and keeps your shaver running smoothly before moving to soap and water, which is an important part of maintaining your shaver’s performance and preventing safety issues.
Applying Soap and Water to Shaving Head
After removing loose hairs, start your soap application process. Apply a small amount of liquid soap directly to the damp shaving head, ensuring even coverage across all surfaces.
Follow this simple process:
- Select mild liquid soap or specialized cleaning solution
- Apply warm tap water to wet the shaving head thoroughly
- Add soap directly onto the wet cutting surfaces
- Work the soap gently with fingertips to create light suds
This water temperature and soap combination effectively prepares your razor for the next cleaning step. For a deeper clean, consider soaking shaver heads in a vinegar mix.
Activating Shaver to Distribute Soap
After applying your shaver cleaning solution, turn on your electric razor for ten seconds.
This shaver activation creates ideal coverage, allowing the liquid soap to reach every blade and cutter. The cleaning mode guarantees even application throughout the mechanism.
This technique refinement maximizes your cleaning electric razor routine’s effectiveness. The electric razor cleaning spray distributes evenly, preparing your device for thorough rinsing, which is a key part of the cleaning process and ensures effective results.
Thorough Rinsing With Warm Water
After soap activation, hold your electric razor under warm running water for 10-15 seconds.
The water temperature should be comfortably warm, not hot.
Focus the rinsing duration on flushing out all soap residue from blade chambers and crevices.
Proper rinsing prevents mineral buildup that dulls blades.
This electric razor cleaning step guarantees your shaver cleaning routine removes all cleaning agents, maintaining peak performance.
Drying and Proper Storage
After thorough rinsing, proper air drying prevents water damage and extends your shaver’s life.
Shake off excess water, then let it dry completely in a well-ventilated area away from humidity.
- Air drying naturally eliminates moisture without damaging delicate components
- Moisture prevention stops rust formation and bacterial growth in hard-to-reach areas
- Storage location should be dry, clean, and away from bathroom steam
- Protective cases shield your shaver from dust, impacts, and environmental damage
- Rust avoidance through proper drying maintains blade sharpness and motor function
Never rush this step—complete drying guarantees your shaver stays reliable for years.
Deep Cleaning Process for Rotary Shavers
Rotary shavers need monthly deep cleaning to maintain peak performance and prevent buildup that daily rinsing can’t reach.
This thorough process involves disassembling the shaving unit to clean each component individually, ensuring your razor stays sharp and hygienic.
Disassembling The Shaving Unit
Once you move past daily cleaning, shaving unit disassembly becomes your pathway to thorough maintenance.
Start by powering off your rotary shaver completely. Grip the shaving unit firmly, then twist counterclockwise to release it from the main body. This step requires gentle pressure to avoid damaging the connection mechanism.
| Component | Action |
|---|---|
| Power Switch | Turn off completely |
| Shaving Unit | Twist counterclockwise |
| Connection Points | Handle with care |
| Cutter and Comb Pairs | Keep organized |
Proper shaving unit disassembly sets the foundation for effective cutter separation and comb cleaning while minimizing reassembly risks.
Removing Retaining Rings
With the shaving unit open, you’ll find retaining rings securing each cutter-comb assembly.
Most rotary shavers use twist-off rings, requiring counterclockwise rotation for removal. Some models feature press-and-slide retainer rings instead.
For stubborn rings, needle-nose pliers provide better grip and control. Different retainer ring types demand specific safe removal techniques.
Always check your manual for model-specific instructions to prevent ring damage. This careful approach protects delicate components during your cleaning procedure.
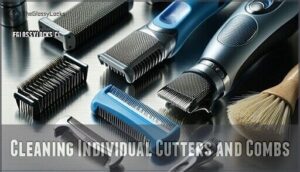
Cleaning Individual Cutters and Combs
Once retaining rings are removed, handle each cutter and comb with care during the cleaning process:
- Separate cutter and comb pairs carefully – mark or remember which pieces belong together for proper reassembly tips
- Brush debris thoroughly – use specialized brushes to remove hair and buildup from all surfaces during comb cleaning
- Soak in warm soapy water – let components sit for 3-5 minutes before rinsing to dissolve oils and residue
Proper cutter disassembly requires keeping matched pairs together, as mixing components affects razor cleaning performance and reduces blade lifespan substantially.
Regular lubrication helps to reduce friction effectively.
Applying Lubricant to Cleaned Components
Now you’ll apply lubricant to your freshly cleaned components.
This step guarantees smooth operation and extends blade life substantially.
Application Technique
After each use
Apply lubricant sparingly to each cutter and comb surface.
Let excess oil drain before reassembly to prevent residue buildup.
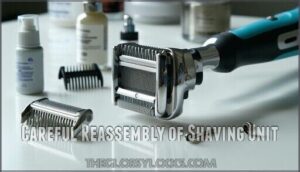
Careful Reassembly of Shaving Unit
After lubricating your cleaned components, shaving unit assembly begins with proper retainer alignment.
Match each cutter with its original comb – never mix pairs, as this affects performance.
Verify comb placement sits flush before securing retainer ring cleaning results.
Engage locking mechanisms firmly but gently.
Complete shaver reassembly by testing functionality with a brief activation.
Proper blade adaptation requires patience, so take your time aligning each component correctly.
Cleaning Non-Waterproof Electric Razors
Non-waterproof electric razors require special care since water exposure can cause permanent damage to their internal components.
You’ll need to rely on dry cleaning methods and specialized products to maintain hygiene and performance without risking moisture infiltration, which can lead to permanent damage.
Using Compressed Air for Debris Removal
Compressed air becomes your go-to tool for tackling gunk buildup in non-waterproof razors.
Compressed air blasts away stubborn debris without risking water damage to sensitive components.
This targeted airflow method removes stubborn debris without moisture damage, making it perfect for your electric razor cleaning routine.
- Safe Pressure: Hold the nozzle 2-3 inches away, using short bursts to prevent component damage
- Nozzle Attachments: Use precision tips for hard-to-reach areas where hair accumulates
- Environmental Impact: Choose refillable cans over disposables for sustainable cleaning techniques
Applying Specialized Spray Cleaner and Lubricant
Most electric shavers benefit from specialized spray cleaners and lubricants designed for blade maintenance.
These products offer dual-action cleaning and lubrication in one step.
Apply the spray cleaner directly to blades, focusing on areas with visible residue.
The solution dissolves mineral deposits while providing corrosion prevention.
Follow with lubricant application using short bursts for even coverage.
This shaver cleaning routine guarantees effective blade disinfection and maintains peak performance through proper spray application tips and residue removal.
Dissolving Mineral Deposits on Blades
Hard water deposits can turn your razor blades chalky and dull.
Vinegar soaks work wonders here. Soak blades in undiluted white vinegar for fifteen to thirty minutes, letting the acid dissolve calcium buildup.
For stubborn mineral deposits, try a baking soda paste applied gently with a soft brush.
Regular cleaning can extend the razor blade’s life by up to 67%.
Professional solutions designed for electric razor deep clean offer stronger dissolving power without damaging blade coatings. Always rinse thoroughly afterward.
Alternative Dry Cleaning Methods
When mineral deposits won’t budge, several dry cleaning methods can save your nonwaterproof shaver.
These Brush Alternatives work wonders without risking water damage:
- Fabric Cleaning wipes trap 80% of fine stubble with anti-static properties
- Vacuum Attachments extract embedded hair through gentle suction, proving 15% more effective than air
- Sticky Solutions like lint rollers grab loose debris from foil surfaces
- Rice Method involves shaking dry rice in the shaver head to absorb oils
- Tapping cleaning combined with compressed air cleaning blasts away stubborn particles
Spray cleaner usage with isopropyl alcohol dissolves grease quickly, evaporating in minutes without corroding metals.
Cross-brushing between foil slots captures missed stubble effectively.
Proper Drying and Storage Techniques
Airing Importance becomes clear once you’ve cleaned your non-waterproof shaver. Gently pat the shaver head with a soft cloth, then let it air dry completely.
Moisture Prevention protects internal components from damage. Store your razor in a Storage Location that’s cool and dry, preferably using Protective Cases for cabinet storage.
This Rust Avoidance strategy keeps your shaver performing like new. Proper shaver storage and case storage guarantee your shaver cleaning and storage routine delivers lasting results.
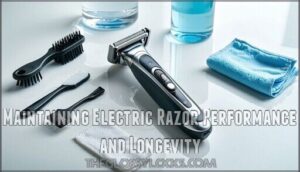
Maintaining Electric Razor Performance and Longevity
Keeping your electric razor in top condition requires more than just regular cleaning—it needs ongoing maintenance to perform at its best.
These simple care practices will extend your shaver’s life, protect your investment, and guarantee consistently smooth shaves for years to come.
Regular Lubrication to Reduce Friction
Once you’ve mastered non-waterproof cleaning methods, blade lubrication becomes your next priority for friction reduction.
Apply light oil or specialized spray lubricant twice weekly for non-soap users, or before each shave for soap users.
This simple lubrication frequency prevents blade friction reduction issues while optimizing performance.
Choose proper oil type selection for electric razor care – manufacturer-recommended lubricants work best.
Regular lubricant application methods guarantee smooth operation, extending blade life through consistent shaver maintenance and performance optimization.
Proper Battery Care and Charging Practices
Following proper battery care extends your electric razor’s lifespan substantially.
Keep your shaver battery between 30-80% charge, avoiding complete discharge cycles. Store your razor unplugged at room temperature, away from moisture and extreme heat.
- Charging habits: Charge when needed, not constantly plugged in
- Battery storage: Store at 50% charge during long periods of inactivity
- Replacement timing: Replace when runtime drops below 60% of original capacity
Smart charging habits prevent overcharge damage while maintaining ideal voltage levels.
Checking for Blade or Foil Damage
While regular maintenance keeps your razor running smoothly, blade wear and foil replacement needs require constant vigilance.
Check your razor blades monthly for Damage Indicators like dull edges, cracks, or bent foils. Foil Integrity directly affects Performance Impact – damaged components cause tugging and irritation.
| Damage Indicators | Performance Impact | Replacement Frequency |
|---|---|---|
| Dull, nicked blades | Poor cutting, tugging | 12-18 months |
| Cracked foils | Skin irritation, cuts | 12-24 months |
| Bent screens | Uneven shave quality | As needed |
Blade Sharpness deteriorates gradually, making shaver inspection essential for ideal results.
Handling and Storage Best Practices
Handle your electric razor with care, avoiding drops and impacts. Store it in a cool, dry location using a protective case to prevent moisture damage.
Keep charging cords organized and untangled. For travel storage solutions, invest in a hard case.
Regular cleaning prevents bacterial and clogs ensuring ideal shaver functionality. Rotate blade positioning during cabinet storage to distribute wear evenly across cutting surfaces.
Scheduling Routine Professional Maintenance
Beyond good storage habits, your shaver needs Expert Shaver Care from professionals every 12-18 months. Think of it like your car’s tune-up schedule. Technicians perform Specialized Cleaning, check blade alignment, and guarantee Warranty Maintenance Compliance.
This Professional Lubrication Service catches problems you’d miss at home.
Here’s what professional maintenance delivers:
- Component Replacement based on precision measurements maintains peak performance
- Ultrasonic cleaning removes stubborn debris your cleaning routine frequency can’t reach
- Motor diagnostics detect issues before they affect your electric razor cleaning routine
- Safety testing verifies electrical components meet manufacturer standards
Professional maintenance extends shaver longevity substantially while following cleaning routine best practices.
Cleaning Routine for Clippers and Trimmers
Clippers and trimmers need regular cleaning to prevent hair buildup and maintain cutting performance. This routine keeps your grooming tools hygienic and extends their lifespan substantially.
Brushing Off Blades After Use
Grab your blade brush after each trim to sweep away hair clippings from your electric shaver.
Use gentle brush technique with light pressure applied – firm bristles handle residue removal without damaging delicate components.
Brush frequency matters: make this cleaning routine step automatic after every use.
The bristle material effectively clears debris, keeping blade cleaning simple and shaver cleaning steps manageable for peak performance.
Applying Specialized Spray Cleaner
After brushing off loose hairs, apply specialized spray cleaner to disinfect and maintain your clipper blades.
These cleaning solutions offer significant spray cleaner benefits for non-waterproof cleaning tasks.
- Eliminates bacteria and germs through effective disinfection lubrication
- Removes mineral deposits that dull blade edges over time
- Extends blade lifespan by preventing corrosion and wear
- Lubricates moving parts for smoother operation
- Maintains cutting precision with regular use
Hold the spray cleaner six inches from blades, apply evenly, and let it penetrate for thirty seconds.
This simple step transforms your shaver cleaning supplies routine into professional-grade maintenance.
Ensuring Complete Drying of Components
Once you’ve finished with the spray cleaner, focus on drying your clipper parts.
Moisture prevention is key for rust avoidance and component integrity.
Choose from air drying, towel drying, or compressed air—each has pros and cons.
Let’s compare:
| Drying Method | Safety Benefit |
|---|---|
| Air Drying | Air drying safety |
| Towel Drying | Damp shaving head safety |
| Compressed Air | Irreversible damage safety |
| Proper Storage | Water damage safety |
| Patience | Cleaning routine steps |
Take your time—your clipper will thank you, as patience and proper storage are crucial for maintaining its condition and ensuring moisture prevention.
Lubricating Blades With Clipper Oil
Once your components dry completely, proper blade lubrication becomes your next priority.
Regular clipper oil application keeps your blades running smoothly, prevents rust formation, and reduces friction that can dull cutting edges over time.
Oil Types matter for ideal performance:
- Specialized clipper oil provides the best lubrication and protects against corrosion while maintaining blade sharpness
- Light machine oil works as an alternative, offering similar friction reduction safety benefits for regular maintenance
- Natural oils like jojoba require more frequent application but suit users with sensitive skin concerns
Apply oil every few uses for heavy users, monthly for occasional use.
Sanitizing Attachments and Combs
Clean those attachments and combs properly to prevent 99.9% of bacteria buildup. Soak them in 70% isopropyl alcohol for ten minutes, ensuring complete disinfection.
EPA-registered disinfectant sprays work faster for daily cleaning routines. UV sanitizers eliminate microbes effectively without residue concerns.
Air-dry completely before storage to prevent mold growth and maintain your electric razor hygiene standards.
Frequently Asked Questions (FAQs)
How do you clean an electric razor?
Surprisingly, most people don’t realize dirty razors harbor bacteria that cause skin infections.
Rinse your waterproof razor under warm water after each use, brush away hair debris, and apply lubricating oil weekly.
Do electric razors need to be cleaned?
Yes, you’ll definitely need to clean your electric razor regularly. Daily rinsing after each shave prevents bacteria buildup, skin irritation, and poor performance that comes from accumulated hair and oils.
Should you clean your electric shaver?
Your shaver’s like your kitchen sink: ignore it, and things get messy fast.
You absolutely should clean your electric shaver regularly, as proper maintenance prevents bacteria buildup, skin irritation, and guarantees peak performance.
How often should you clean a rotary razor?
You’ll want to give your rotary razor a quick clean after every use, and perform a deep clean weekly. Monthly disassembly for thorough maintenance keeps it running smoothly.
How do you keep a razor clean?
Like knights of old polishing their armor, you’ll rinse your razor under warm water after each shave, brush away hair debris, and apply lubricating oil weekly to keep blades sharp.
How often should you wash an electric razor?
You should rinse your electric razor after every use and perform a deep cleaning weekly. Daily users need more frequent cleaning to prevent buildup and maintain performance.
Do electric razors need cleaning?
Absolutely, your electric razor craves regular attention to stay sharp and hygienic. Daily cleaning prevents bacteria buildup, skin irritation, and poor performance. You’ll extend its lifespan substantially.
How to clean an electric shaver after shaving pubes?
Immediately disassemble your shaver, rinse all parts thoroughly with warm soapy water, brush away hair debris, spray with disinfectant cleaner, then air-dry completely before reassembling.
How to clean electric razor blades?
Don’t beat around the bush – remove hair clippings with the cleaning brush, rinse waterproof blades under warm water, apply lubricating oil, and air dry completely.
How long does it take to clean an electric razor?
Quick cleaning takes just 30 seconds—rinse under warm water and shake dry. Deep weekly cleaning requires 3-5 minutes for thorough brushing, soaking, and lubrication to maintain peak performance.
Conclusion
Research shows that properly maintained electric razors last five times longer than neglected ones, transforming a two-year investment into a decade-long companion.
Your electric razor cleaning routine doesn’t require perfection, just consistency. These simple daily and weekly habits prevent costly repairs, maintain peak performance, and guarantee comfortable shaves.
Whether you own a waterproof rotary or non-waterproof foil shaver, following these proven steps protects your investment and delivers reliable results every morning.


