This site is supported by our readers. We may earn a commission, at no cost to you, if you purchase through links.
 You’ll want to use lukewarm water for mixing henna – it’s the Goldilocks temperature that gets everything just right.
Hot water or cold water for mixing henna each has its quirks: scalding water speeds up dye release but can leave you with orangey tones, while cold water takes its sweet time but keeps your paste’s integrity intact.
Think of it like brewing tea – too hot and it’s bitter, too cold and you’re waiting forever.
For that rich, deep color you’re dreaming of, stick to comfortably warm water, about the temperature of a relaxing bath.
There’s actually a fascinating science behind why temperature makes such a difference.
Table Of Contents
- Key Takeaways
- Henna Mixing Techniques and Considerations
- Hot Water Vs Cold Water for Mixing Henna
- Henna Paste Sitting Time and Color Enhancement
- Enhancing Henna Color With Essential Oils or Lemon Juice
- Using Coffee or Tea to Enhance Henna Color
- Choosing The Right Liquid for Henna Recipes
- Preparing and Applying Henna Paste
- Safety Precautions and After Care for Henna
- Tips for Optimal Henna Results
- Frequently Asked Questions (FAQs)
- Can henna be mixed with hot water?
- Is cold water preferable than hot water for hair?
- Should henna powder be used cold water?
- What happens if you mix henna with boiling water?
- Can You Add Water to Henna dye?
- Does hot water affect henna color?
- How do you mix henna for the best results?
- Does henna work better with heat?
- Does heat make henna darker?
- Is it better to mix henna with water or lemon?
- Can I reheat cooled henna paste before applying?
- How long does mixed henna paste stay usable?
- Does water temperature affect hennas natural scent?
- Will ice-cold water prevent proper dye release?
- Can I mix henna with lukewarm water instead?
- Conclusion
Key Takeaways
- Use lukewarm water (bath temperature) for mixing henna to achieve rich, deep color and optimal dye release without compromising the paste’s integrity.
- Hot water speeds up dye release but can result in orangey tones, while cold water slows the process but helps maintain color longevity.
- Let your henna paste sit for 2-3 hours minimum before application, and you can extend this to 12 hours for deeper color development.
- You’ll get better results by adding essential oils or lemon juice to your mix, but use caution with acidic additives if you have sensitive skin.
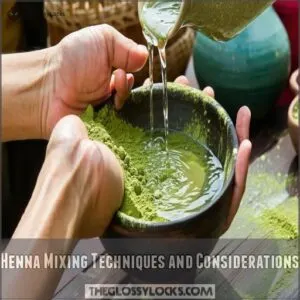
Henna Mixing Techniques and Considerations
When mixing henna, you’ll find that the temperature of the water can make all the difference between a vibrant stain and a subtle tint.
Choosing hot or cold water influences dye release but also depends on how finely your henna powder is ground, so get ready to experiment like a mad scientist in the kitchen!
Impact of Water Temperature on Dye Release
Water temperature is like the secret sauce in mixing henna.
Using hot water can turbocharge dye release, giving you a bolder color but with a hint of orange.
On the flip side, cold water takes its sweet time, resulting in a subtler, longer-lasting hue.
Whether you choose hot or cold, your henna adventure starts with the right water!
Effect of Henna Powder Fineness on Mixing
Henna powder’s texture impacts how it mixes. Finely sifted powder, with its smaller particle size, absorbs water differently than coarse powder.
This affects your henna paste’s consistency.
- Fine powder needs less water, creating a smoother paste quickly.
- Coarse powder needs more, resulting in a thicker mix.
- Experiment to find the perfect balance for your henna powder.
Choosing The Right Water Temperature for Desired Color
Imagine you’re crafting the perfect henna paste: choose your water temperature wisely for the desired shade.
Hot water can speed up dye release, intensifying henna color, but might pull a surprise orange hue.
Cold water, on the other hand, works slower, keeping the stain’s depth.
Tailor your mixing technique to match the henna water temperature and your powder type.
Hot Water Vs Cold Water for Mixing Henna
If you’re mixing henna, using hot water can speed up dye release, giving you a darker stain faster, but it might end up looking a bit orange.
Cold water takes its time, creating a lighter but longer-lasting paste, perfect if you’ve ever wished for your henna to last through that endless math class.
Speeding Up Dye Release With Hot Water
You’ve got a henna recipe brewing, and you’re keen for that rich, vibrant stain.
Try hot water to speed up the dye release, but be cautious—it can lead to unintended orange tones.
For a more controlled approach, consider using a high-quality henna powder from a reputable source like everysimply henna products.
Balancing the right amount of heat can supercharge the color intensity, but don’t rush; different henna powder types might respond uniquely.
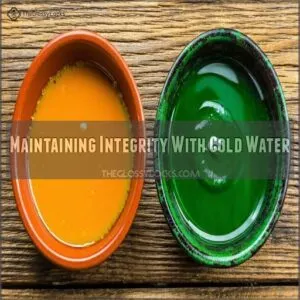
Maintaining Integrity With Cold Water
While hot water might fast-track your dye release, giving that power-packed color, cold water‘s your go-to for longer-lasting henna.
Savor the rich color intensity without worrying about altering your paste’s consistency or ending up with an unexpected orange tone.
Utilizing cold water is especially beneficial when considering the potential hazards of over-dyeing, which can occur when leaving henna on for too long Should I Keep Henna Overnight.
Cold water benefits include preserving the henna paste texture and boosting its longevity, making your masterpiece stick around longer.
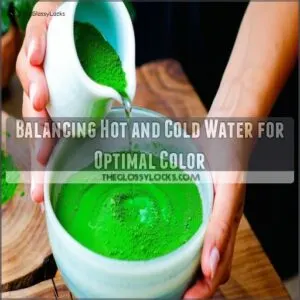
Balancing Hot and Cold Water for Optimal Color
Striking a balance between hot and cold water can help you achieve the best henna color. Here’s how to harness the benefits:
- Henna color depth: Mix warm for vivid shades.
- Water temperature impact: Cold keeps stability.
- Dye release control: Alternate temps for smooth paste.
- Henna paste consistency: Adjust with care.
- Ideal henna color: Enjoy rich, enduring hues.
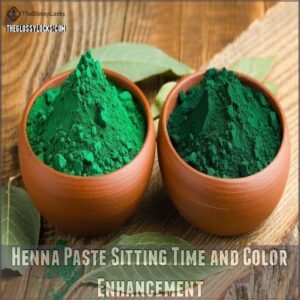
Henna Paste Sitting Time and Color Enhancement
You might think mixing henna is where the magic ends, but letting the paste sit is just as important for vibrant color.
Give it at least a few hours to let the dye release, or experiment with longer times for deeper hues; just don’t let it dry out or you might end up with more crunch than color.
Minimum Sitting Time for Proper Dye Release
So, you’ve mixed your henna—great job! Now, before you get your hands messy, let that paste sit. A minimum of two to three hours is key for proper dye release. Think of it as letting the henna magic brew. This helps create vibrant color and a long-lasting stain.
It’s also important to think about the optimal henna application time to achieve the best results, as the recommended time to leave henna on hair ranges from 1-4 hours.
The henna paste consistency should be smooth, like pudding, not lumpy. Depending on your henna powder type, you might need to adjust this time slightly.
Experimenting With Longer Sitting Times for Deeper Color
Feeling adventurous with henna?
Let your paste sit longer, from three to twelve hours.
This lets the dye reveal its magic, giving your henna stain deeper color intensity.
Sure, you might feel like a waiting wizard, but optimizing sitting time can enhance shades unique to your hair type.
Tweak it and find what color wonders you discover!
Importance of Sifting Henna Powder for Smooth Paste
Imagine trying to paint with lumpy glue—frustrating, right?
That’s why sifting henna powder is your best friend.
It makes sure a smooth, lump-free paste, important for even application and vibrant color.
Without those pesky lumps, your henna mixing adventure feels seamless.
The right consistency also enhances dye release and color depth, especially when balancing water temperature to darken henna.
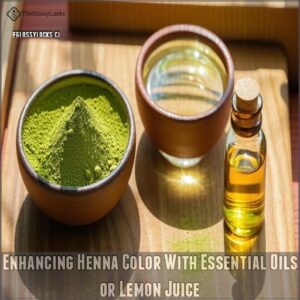
Enhancing Henna Color With Essential Oils or Lemon Juice
You can boost your henna color by adding essential oils like eucalyptus, which help activate the dye for a richer hue.
Lemon juice is another favorite, giving you a longer-lasting stain, but proceed with caution if your skin is sensitive, to avoid irritation.
Activating Dye Release With Essential Oils
After letting the henna paste sit for the perfect dye release, spice things up with essential oils for a boost in color vibrancy.
Consider exploring online marketplaces like henna essential oils to find the perfect blend for your mix.
A few drops can do wonders:
- Lemon Eucalyptus—citrusy zing energizes your mix.
- Tea Tree—keeps things fresh and lively.
- Lavender—offers calming tones, like a hug for your hair.
Boosting Dye Longevity With Lemon Juice
Lemon juice is the secret sauce that extends your henna’s color life, bringing out vibrant hues.
It’s like giving henna a caffeine boost without the jitters.
When mixing your henna paste, this citrusy kick enhances dye longevity, but remember its drying nature.
Balancing warm water and lemon juice benefits helps you get the rich, lasting color you crave.
Precautions for Sensitive Skin or Scalp
If you’ve got sensitive skin or a finicky scalp, watch out for henna allergies.
Here’s a quick checklist:
- Patch test on a small area before full use.
- Opt for natural alternatives like coconut milk instead of acidic juices.
- Use gentle cleansing products post-henna.
- Avoid irritants like harsh shampoos.
Control henna discomfort with these savvy tips!
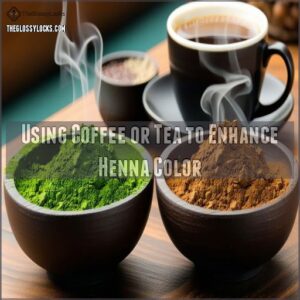
Using Coffee or Tea to Enhance Henna Color
Want a richer henna color?
Try brewing up some coffee or tea; the tannins in them can help boost the color intensity, giving you that gorgeous, deep shade you’ve always dreamed of!
Lemon juice is still needed for an acidic reaction.
It won’t replace the need for an acid like lemon juice, but it’ll definitely give your henna that extra oomph.
Tannins in Coffee and Tea for Deeper Color
Ever considered adding coffee or tea to your henna mix?
These beverages are packed with tannins, nature’s own color boosters.
Picture your henna paste getting a rich, deep hue as tannins work their magic.
It’s like giving your hair a gourmet treat!
Just imagine the depth and vibrance of your henna color with a simple brew.
Experimenting With Different Types of Coffee or Tea
Curious about using coffee vs. tea to boost your henna color?
Try different tea types or coffee strengths to add unique shades.
Here’s a quick list to guide you:
- Black tea: Deepens brown tones.
- Green tea: Subtly enhances highlights.
- Espresso: Rich, dark hues.
- Herbal teas: Offer mild, unexpected results.
Experiment for that perfect hue!
Combining Coffee or Tea With Lemon Juice or Apple Cider Vinegar
Mixing coffee or tea with lemon juice or apple cider vinegar can add some tannin-boosting magic to your henna mix.
This combo balances acidity, enhancing the color impact of your henna paste.
A little imagination in your recipe variations can work wonders, but remember safety concerns: too much acidity might irritate sensitive skin.
Enjoy the beautiful colors responsibly!
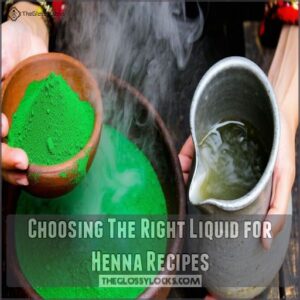
Choosing The Right Liquid for Henna Recipes
When picking the right liquid for your henna recipe, consider whether you want to enhance color or improve moisture.
You wouldn’t want your hair to feel like straw, so opt for moisturizing liquids if your hair is dry.
Color Focus Vs Moisture Focus Recipes
Crafting henna recipes involves balancing color focus and moisture focus based on your hair type and individual needs.
To boost color, use liquids that enhance dye vibrancy, while for moisture, opt for creamy additions like coconut milk.
Don’t let henna mixing water temperature fool you; whether it’s hot or cold water, each choice impacts your henna paste in unique ways.
Liquids for Boosting Red, Golden, or Brown Tones
For boosting red henna tones, try hibiscus or red rooibos tea.
Want golden henna? Chamomile tea’s your go-to, although it shines more in cassia mixes.
To amplify brown henna shades, dark teas or brewed coffee fit the bill.
Remember, choose your liquid like picking a spice—you add depth, not just a splash of flavor!
Avoiding Drying Liquids for Normal to Dry Hair
So, you’ve boosted those red or brown tones? Awesome! Now, let’s talk about keeping your dry hair happy.
Some liquids can be a bit harsh. Here’s what you should avoid for your Henna for Dry Hair: By the way, don’t forget to use the right Henna water temperature to get the best results.
- Lemon juice—it’s a color booster, but it can suck the moisture right out.
- Caffeinated drinks—they’re drying, like a desert wind.
- Strong teas or coffee—they can make your hair feel brittle and dry.
Instead, opt for gentler options in your Hydrating Henna recipes for a happy, healthy head of hair. Remember, the goal is to get those gorgeous colors without turning your hair into straw!
Preparing and Applying Henna Paste
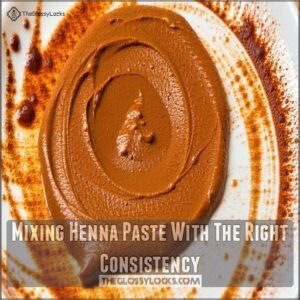
When you’re ready to prepare your henna paste, getting the right consistency is key; think pancake batter or toothpaste.
For a smooth application, use a henna cone or bottle, and if you’re like me who can’t draw a straight line, grab a stencil for those perfect designs.
Mixing Henna Paste With The Right Consistency
The magic’s in the mix! Achieving the right henna paste consistency is like finding the perfect pancake batter—smooth, creamy, and lump-free.
Use hot water or cold water based on your desired effect; just make sure it’s free of clumps.
Too thick, and it won’t spread; too runny, and it’ll drip everywhere. Aim for a manageable texture that stays put.
Applying Henna Paste With a Cone or Bottle
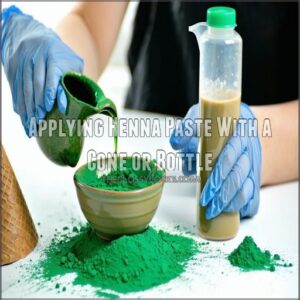
Applying henna with a cone or bottle gives you control and freedom to create intricate designs.
Henna cone technique shines for:
- Fine lines and detailed artwork
- Consistent paste flow
- Easy maneuverability for curves
Using a henna bottle suits:
- Beginners needing steady control
- Large area coverage
Choosing the right tool? Go with what feels natural. Happy henna-ing!
Using Henna Stencils for Perfect Designs
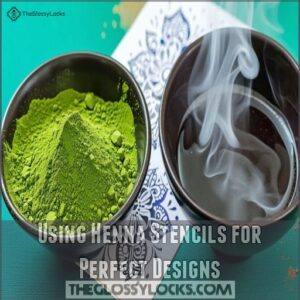
Ever wonder how henna stencils give you that perfect design? They guide your hand, keeping the application neat and precise.
To achieve the best results, consider that hair porosity affects henna development, so choose a henna product that suits your hair type.
Grab your stencil, apply the henna paste evenly, and let it dry. Stencil removal is a breeze, revealing intricate patterns that inspire.
Here’s a handy cheat sheet:
| Step | Description | Tips |
|---|---|---|
| Choose Stencil | Select a design that excites you | Browse online options |
| Secure Stencil | Hold firmly in place on your skin | Use tape if necessary |
| Apply Paste | Spread henna evenly over the stencil | Make sure the consistency is right |
| Remove Stencil | Gently peel away after drying | Admire your creation |
Safety Precautions and After Care for Henna
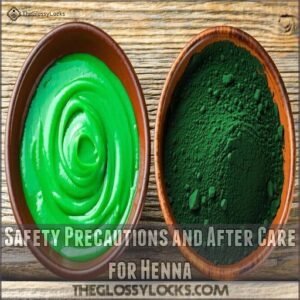
When using henna, avoid exposing the hennaed areas to water and soap to help preserve the vibrant color.
Once the paste is removed, gently massage in some essential oils and dip your hands in cold water to lock in the design and enhance the color, making sure your artwork stands out and lasts longer.
Avoiding Water and Soap on Hennaed Areas
To make sure henna stain longevity, steer clear of water and soap on hennaed areas immediately after application.
This precaution preserves the vibrant color you love.
Get creative and use gloves for washing dishes or showers, if needed.
It’s all about those henna aftercare tips—keeping your masterpiece dry boosts its staying power and beauty!
Locking in Color With Cold Water
Okay, so you’ve kept your henna masterpiece away from water and soap.
Smart move!
Now, let’s lock in that gorgeous henna color.
A quick dip in cold water after removing the paste helps seal the deal.
Think of it as a final rinse to set your vibrant henna color.
Here’s what you do:
- Submerge your henna’d skin in cold water briefly.
- Pat gently, don’t rub.
- Admire your amazing henna art!
This cold water technique boosts henna color longevity.
Massaging With Essential Oils for Enhanced Color
In the quest for richer henna color, essential oils are your secret weapon.
Gently massage them onto your skin post-henna removal.
Think of it like buffing in a bit of magic.
Oils like eucalyptus or lavender boost color and lock in vibrancy, adding an aromatic touch to your experience.
Trust this simple technique for enhanced, lasting color.
Tips for Optimal Henna Results
To achieve the best henna results, start with high-quality henna powder to guarantee vibrant color.
Gradually increase your application time and don’t hesitate to seek expert advice for personalized tips—after all, everyone loves a good hair day story!
Quality of Henna Powder for Desired Color
You’ve taken care of your hennaed skin, now think about the henna powder’s quality. Great henna color comes from:
- Henna Powder Fineness: Choose finely sifted for smooth application.
- Organic Henna Powder: Skip harmful chemicals.
- Henna Powder Sourcing: Buy from trusted vendors.
- Henna Powder Testing: Test small batches before full use.
Pick wisely for vibrant henna stains!
Gradually Increasing Application Time for Best Results
Finding the right henna powder is key, but getting the application time right can deepen your henna color depth.
However, when applying henna to bleached hair, it’s essential to consider the risks, such as uneven coloring on bleached hair. Gradually increasing henna application time lets the stain intensity build without overwhelming your hair.
When choosing a henna powder, look for a 100% natural henna powder free of metallic salts as recommended for dry and damaged hair mix.
| Henna Mixing | Henna Application |
|---|---|
| Fine powder | Longer time |
| Cold water | Gradual color |
| Sifted paste | Prolonged time |
| Consistent mix | Even application |
Take a controlled approach for stunning results!
Seeking Expert Assistance for Customized Advice
If you’re thinking about mixing henna, professional advice can make all the difference between good and spectacular results.
Consider consulting with experienced henna artists who’ll analyze your hair type, skin sensitivity, and color goals.
They’ll guide you through water temperature choices, sitting times, and recipe customization.
Plus, they’re pros at troubleshooting common issues and can share insider tips for achieving your dream henna results.
Frequently Asked Questions (FAQs)
Can henna be mixed with hot water?
Yes, you can mix henna with hot water to speed up dye release and achieve darker stains.
However, hot water might create an orange tone, so consider using lukewarm water for a balanced result.
Is cold water preferable than hot water for hair?
Though you might think hot water speeds up the process, cold water‘s actually better for your hair.
It’ll release dye more slowly, creating longer-lasting color, especially when combined with natural dyes like carrot juice hair dye, which can nourish and strengthen hair strands.
Should henna powder be used cold water?
Cold water creates a gentler dye release that preserves henna’s integrity and gives you a lighter stain.
Control over the color development is better with cold water.
This makes it perfect for beginners or precise applications.
What happens if you mix henna with boiling water?
Using boiling water with henna isn’t your best move – it’ll speed up dye release too quickly, potentially creating an orange tone and reducing the paste’s effectiveness.
You’ll get better results with warm or lukewarm water instead.
Can You Add Water to Henna dye?
Yes, you can add water to henna dye – it’s actually essential for creating the paste.
paste.
Mix until you’ve got a smooth, yogurt-like consistency, but don’t overdo it or you’ll end up with runny paste.
Does hot water affect henna color?
Like steeping tea, hot water accelerates henna’s dye release, giving you a deeper orange tone.
You’ll get faster results, but the stain may not last as long as when using cooler temperatures.
How do you mix henna for the best results?
Mix your henna powder with lukewarm water until it reaches a smooth, yogurt-like consistency.
Let it sit for 2-3 hours before application, and consider adding essential oils or lemon juice for better dye release.
Does henna work better with heat?
Heat enhances henna’s dye release, giving you darker, richer stains.
Warm water (around body temperature) for mixing and keeping the paste in a warm spot during processing will give you better results.
Does heat make henna darker?
Yes, heat can make your henna stain darker.
Using warm temperatures during application and development helps release more dye molecules, resulting in deeper, richer color that’ll last longer on your skin or hair.
Is it better to mix henna with water or lemon?
You’ll get the best results using lemon juice for better dye release and longer-lasting color.
However, if you’ve got sensitive skin or a dry scalp, stick with water to avoid irritation.
Can I reheat cooled henna paste before applying?
Like reheating yesterday’s coffee, warming up cooled henna paste isn’t recommended.
It can disrupt the dye release process and reduce staining effectiveness.
Instead, mix fresh paste when you’re ready to apply.
How long does mixed henna paste stay usable?
Mixed henna paste typically stays fresh for 24-48 hours at room temperature.
You’ll want to store it in an airtight container and keep it away from direct sunlight.
For longer shelf life, refrigerate it up to 5 days.
Does water temperature affect hennas natural scent?
Water temperature affects henna’s natural earthy aroma noticeably.
Hot water intensifies the scent, releasing stronger herbal notes.
Cold water keeps the fragrance more subtle and manageable for your mixing experience.
Will ice-cold water prevent proper dye release?
Though chilly temperatures won’t completely stop dye release, you’ll want to avoid ice-cold water.
It’ll considerably slow down the process, making your henna less effective.
Room temperature or slightly cool water works best.
Can I mix henna with lukewarm water instead?
Lukewarm water creates an ideal balance for your henna mix, promoting steady dye release while maintaining paste consistency.
Reliable color development without risking premature oxidation or slow activation from temperature extremes.
Conclusion
Picture a steaming cup of herbal tea – that’s the sweet spot for mixing your henna paste.
Whether you choose hot water or cold water for mixing henna, remember it’s all about finding your perfect balance.
Lukewarm water offers the best of both worlds: quick dye release and rich color development.
Start with room temperature water and adjust as needed based on your desired results.
With practice and patience, you’ll master the art of mixing henna to achieve those stunning, long-lasting designs you’re dreaming of.

