This site is supported by our readers. We may earn a commission, at no cost to you, if you purchase through links.

Your body’s natural healing process kicks in immediately—blood clots form, inflammation begins cleaning the wound, and new skin cells start rebuilding.
Deeper cuts naturally take longer since there’s more tissue to repair.
Keep your cut clean and avoid picking at scabs, which only delays healing.
Age, overall health, and wound care also affect how long does it take for shave cuts to heal.
The good news? Simple techniques can speed up recovery and prevent those annoying nicks from happening again.
Table Of Contents
- Key Takeaways
- How Long Does It Take for Shave Cuts to Heal?
- Shaving Cut Healing Time
- Helping Shaving Cuts Heal Faster
- Stopping Shaving Cuts From Bleeding
- Preventing Shaving Cuts and Nicks
- Understanding Wound Healing Stages
- Preventing Scarring From Shaving Cuts
- Frequently Asked Questions (FAQs)
- How long does it take for a cut to heal?
- How long does a shaving cut take to heal?
- Can You shave over a healing cut?
- How long does a deep razor cut take to heal?
- How long does it take a shave to stop bleeding?
- Do shaving cuts leave a scar?
- How long do cuts from shaving take to heal?
- How long do shaving cuts down there take to heal?
- Does after shave heal cuts?
- How to heal blade cuts quickly?
- Conclusion
Key Takeaways
- Most shave cuts heal within 3-7 days – Minor nicks typically close up in just 24-48 hours, while deeper cuts may take up to two weeks, depending on severity and your body’s natural healing pace.
- Keep cuts clean and avoid picking scabs – Clean wounds immediately with warm water, apply antibiotic ointment, and resist the urge to pick at scabs, since this restarts the healing process and increases infection risk.
- Use proper bleeding control techniques – Apply firm pressure with a clean cloth for 2-3 minutes, use a styptic pencil or alum block for quick results, and bandage the cut to protect it from bacteria.
- Prevention beats treatment every time – Use sharp razors, prep your skin with cleansing and pre-shave oil, create quality lather, and shave with the grain to avoid cuts in the first place.
How Long Does It Take for Shave Cuts to Heal?
Most shave cut healing time depends on cut severity and healing factors.
Minor nicks typically recover within three to seven days, while deeper razor cuts may take two weeks or longer.
Your body’s natural healing pace, proper wound care, and infection prevention all influence shaving nick healing time.
Good news? With the right approach, you can speed up minor cut recovery and reduce scarring prevention concerns substantially.
To avoid these cuts, exfoliating before shaving can help, promoting a faster healing process.
Shaving Cut Healing Time
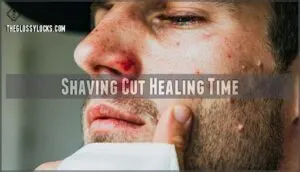
You’ve probably wondered how long that annoying shaving cut will take to disappear from your face.
The good news is that most minor shaving cuts heal within just 3-7 days, though several factors can speed up or slow down this process, including the healing time.
Minor Nicks and Cuts
Those annoying nicks happen to everyone, but here’s the good news: superficial cut depth means quick healing.
Minor shaving cuts typically heal within 3-7 days with proper shaving wound care.
Here’s your shave cut healing game plan:
- Clean immediately – Rinse with warm water for effective immediate first aid
- Create the right healing environment – Keep moist, not dry
- Protect sensitive skin – Apply antibiotic ointment to minimize scarring potential
Most minor cut recovery happens faster than you’d think!
Deeper Cuts and Wounds
While minor nicks heal quickly, deep cuts present a different challenge altogether.
These wounds typically require several days to over a week for proper healing, depending on cut depth and your body’s natural repair mechanisms.
Deep cuts often heal through secondary intention, meaning the wound edges don’t align perfectly, leading to more prominent scarring and extended recovery time.
Laceration closure becomes critical for deeper wounds—you might need stitches if the cut is gaping or won’t stop bleeding.
Health conditions like diabetes can substantially slow wound healing time, sometimes extending recovery to a month or more.
Without proper care, these injuries risk developing into chronic wounds that persist beyond twelve months.
Deep infections pose serious risks, so watch for persistent redness, swelling, or unusual discharge.
Advanced remedies like collagen-enhanced wound care products can accelerate healing, while proper scar prevention techniques minimize long-term cosmetic concerns.
If a cut causes tingling or numbness, seek prompt medical treatment.
Factors Affecting Healing Time
While deeper cuts demand more attention, several key factors determine your shaving cut healing time.
Your body’s repair system doesn’t work the same for everyone, and understanding these variables helps set realistic expectations.
Here’s what influences how quickly your skin bounces back:
- Age factors: Your skin’s regeneration slows as you get older, meaning cuts that healed overnight in your twenties might stick around longer now.
- Health conditions: Diabetes, autoimmune disorders, and poor blood flow can extend wound healing time from days to weeks by impairing your body’s natural repair mechanisms.
- Cut depth: Shallow nicks seal up within hours, while deeper shaving cuts may need several days to properly close and strengthen.
- Skin hydration: Well-moisturized skin heals faster than dry, cracked surfaces that struggle to regenerate effectively.
Optimal skin moisture is essential for preventing infection and promoting healing, according to experts at Wound Care Solutions.
Your lifestyle choices also matter—smoking restricts blood flow, certain medications slow healing, and proper wound care makes all the difference in your skin healing time.
Helping Shaving Cuts Heal Faster
While you can’t rush the natural healing process, you can definitely speed things up with the right care techniques.
Simple steps like keeping your cut clean and using the proper treatments will get you back to smooth skin faster than letting it heal on its own, which involves the proper use of treatments.
Keeping The Scab Clean
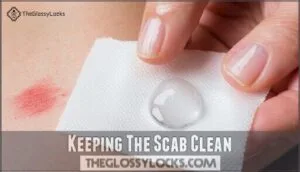
Keeping your scab clean creates the perfect healing environment for shaving cuts.
Gentle cleaning with warm water removes bacteria while reducing infection risk. Pat dry softly, then apply protective dressings if needed.
A quality balm can offer antiseptic properties to protect against infections and promote faster recovery.
This scab hydration method supports proper shaving nick treatment, ensuring your shaving cut care routine promotes healing without complications, using the right shaving cut care and protective dressings.
Avoiding Scab Picking
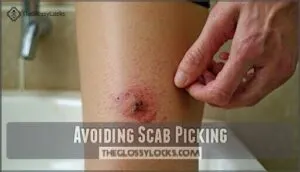
Your healing interference kicks in every time you pick at that scab covering your shaving cuts.
Don’t scratch when itch relief becomes tempting – you’ll restart the wound healing process and increase infection risk.
Leave scabs alone for proper skin healing and scarring prevention.
Your patience prevents scar formation and keeps cut healing on track.
Moisturizing The Wound
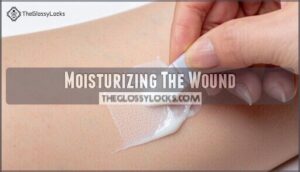
Proper moisturizing keeps your skin supple and supports faster wound healing. Dry skin can crack around cuts, slowing recovery and increasing discomfort.
Choose the right moisturizer to accelerate your skin’s natural healing process.
Here’s how to moisturize shaving cuts effectively:
- Apply fragrance-free moisturizer twice daily to maintain skin hydration without irritating the wound
- Use products with healing ingredients like aloe vera or ceramides that support skin repair
- Gently pat the area rather than rubbing to avoid disrupting the healing process
The hydration importance can’t be overstated—well-moisturized skin heals substantially faster than dry, tight skin.
Antibiotic Cream for Wounds
Antibiotic cream works like a protective shield for your shaving cuts, delivering infection prevention while boosting healing acceleration.
Apply a thin layer once daily after cleaning the wound—this cream application helps prevent bacteria from setting up camp.
You can find various antibiotic creams online.
However, watch for side effects like redness or itching, and avoid overuse to prevent resistance risks that could make future treatments less effective.
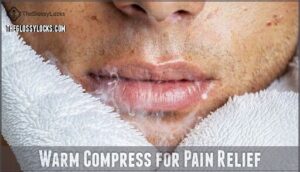
Warm Compress for Pain Relief
Beyond antibiotic cream, you can use a warm compress for pain relief and faster healing. Heat works like a gentle boost to your body’s natural repair system, making those annoying shaving cuts more bearable.
Here’s how warm compresses help your healing time:
- Increased circulation: Heat opens blood vessels, delivering oxygen and nutrients that speed recovery for minor cuts
- Natural pain relief: Compress temperature around 100-104°F provides soothing comfort without medication
- Infection fighting: Better blood flow helps your immune system tackle bacteria before problems start
Apply your compress for 10-15 minutes using clean cloth or compress materials. This simple shaving cut remedy beats many alternative therapies for effectiveness.
Stopping Shaving Cuts From Bleeding
When you nick yourself shaving, your first priority is stopping the bleeding quickly and effectively. The right techniques can halt bleeding within minutes and set you up for faster healing.
Using a Styptic Pencil or Alum
A styptic pencil or alum block acts like your personal bleeding-control superhero when shaving cuts strike.
These handy tools contain astringent ingredients like aluminum sulfate or potassium alum that quickly constrict blood vessels and stop bleeding shave wounds.
Simply dampen the pencil tip or block, then gently dab it onto your cut.
Styptic ingredients work fast, making application techniques straightforward.
More information about styptic pencil shaving can be found online.
While alum benefits include rapid bleeding control, those with skin sensitivity might prefer gentler alum alternatives like cold compresses for their shaving cuts.
Cleaning The Face and Wound
Clean your hands thoroughly before touching any shaving cuts to prevent infection. Gently rinse the wound with warm water to remove debris, then pat dry with a clean towel.
Avoid scrubbing or using harsh facial cleansers that could irritate the cut.
- Use lukewarm water for wound disinfection without causing additional trauma
- Apply sterile technique by washing hands first, then cleaning the wound area
- Choose gentle post-shave care products that won’t sting or delay wound healing
Applying Pressure to Stop Bleeding
Once you’ve cleaned the wound, grab a clean washcloth and apply firm pressure directly on the cut.
This blood vessel constriction stops bleeding within minutes by promoting clot formation.
Maintain pressure duration of 2-3 minutes without peeking – checking too soon increases re-bleeding risks.
| Compress Type | Pressure Duration | Expected Result |
|---|---|---|
| Clean washcloth | 2-3 minutes | Bleeding stops completely |
| Gauze pad | 3-5 minutes | Clot formation begins |
| Paper towel | 1-2 minutes | Temporary shaving bleeding stopping |
Bandaging The Cut for Protection
After applying pressure, you’ll want to protect the cut with proper bandaging.
Choose small adhesive bandages for minor shaving cuts, ensuring they’re clean and dry before application. Change bandages daily or when they become wet or dirty.
Watch for infection signs like increased redness, warmth, or pus. For deeper wounds, consider gauze pads with medical tape as bandage alternatives, and be aware of infection signs.
When to Seek Medical Attention
While most shaving cuts heal naturally, certain situations demand medical attention.
Recognizing when to visit a healthcare provider can prevent complications and facilitate proper wound healing.
Watch for these warning signs that require medical care:
- Infection signs: Red streaks spreading from the cut, pus discharge, or worsening redness indicate potential infections
- Excessive bleeding: Bleeding that won’t stop after 10-15 minutes of direct pressure needs immediate attention
- Deep wounds: Cuts exposing fat, muscle, or requiring stitches shouldn’t be ignored
- Slow healing: Wounds not improving after 7-10 days may need professional evaluation
- Spreading redness: Increasing inflammation around the cut suggests developing infection
Trust your instincts—if something feels wrong, seek medical attention promptly.
Healthcare providers can prescribe antibiotic cream or other treatments to prevent serious complications.
Preventing Shaving Cuts and Nicks
Prevention beats treatment every time in the case of shaving cuts.
You’ll save yourself pain and healing time by following a few simple techniques that keep your razor gliding smoothly across your skin, and prevention is key to achieving this.
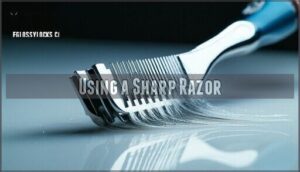
Using a Sharp Razor
Dull blades are the enemy of smooth shaving cuts prevention. Razor Sharpness Levels matter—sharp blades slice cleanly through hair without tugging your skin.
Multi-Blade vs. Single blade systems both work, but Blade Material Impact affects longevity. Replace cartridges every 5-7 shaves for peak performance.
Razor Maintenance Tips include rinsing thoroughly after use and storing dry to prevent corrosion that dulls edges. Understanding different blade grades is also very important.
Cleansing and Exfoliating The Skin
Before diving into your shaving routine, proper skin preparation sets the stage for a smoother, safer experience.
Clean skin creates the foundation for effective shaving exfoliation and reduces your risk of irritating shaving cuts.
Your skin care approach should include:
- Skin Cleansing: Wash with warm water and gentle cleanser to remove dirt and oils
- Exfoliation Benefits: Use a scrub 2-3 times weekly to lift dead skin cells
- Product Selection: Choose non-comedogenic products that won’t clog pores
This technique matters because clean, exfoliated skin allows your razor to glide smoothly without catching on debris or rough patches.
Applying Pre-Shave Oil
Think of pre-shave oil as your skin’s best friend before the razor makes contact.
This simple step transforms your shaving routine from potentially hazardous to smooth sailing, substantially reducing your risk of shaving cuts through proper preparation.
Pre-shave oils work by creating a protective barrier between your skin and blade.
Quality preshave oils contain natural ingredients like jojoba, argan, or coconut oil that suit various skin types.
Here’s how these products deliver oil benefits:
- Enhanced lubrication – Reduces friction and razor drag that causes nicks
- Moisture retention – Keeps skin hydrated throughout your shave
- Protective coating – Forms a barrier that shields sensitive areas
- Improved glide – Allows smoother blade movement across contours
Application techniques matter too.
Massage a few drops into damp skin before applying shaving cream.
This shaving technique advice guarantees maximum protection.
If you don’t have dedicated shaving oil, alternative products like beard oil work similarly for effective shaving cut prevention.
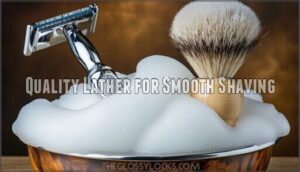
Quality Lather for Smooth Shaving
Your shaving lather quality acts as a protective barrier between your razor and skin.
Rich, creamy lather consistency from quality shaving cream or shaving soap provides essential lubrication that prevents nicks.
When you apply shaving lather with proper brush type technique, you’re creating ideal skin hydration.
Focus on lather ingredients that moisturize while ensuring smooth lather application for maximum protection.
Many prefer using hypoallergenic shaving foam to avoid irritation.
Shaving With The Grain of Hair
Following the grain of your hair’s natural growth pattern works like swimming downstream instead of fighting the current.
When you shave with the grain, you’ll experience reduced irritation and better ingrown prevention since the razor angle aligns with hair growth direction.
This shaving technique respects your skin sensitivity, substantially lowering your risk of shaving cuts and promoting faster wound healing, using methods that work with the natural growth pattern, providing better ingrown prevention, and respecting your skin sensitivity.
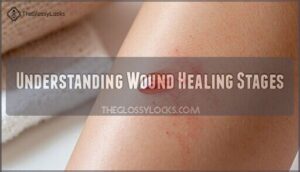
Understanding Wound Healing Stages
Understanding how your body heals shaving cuts helps you know what to expect during recovery.
Your skin goes through four distinct stages to repair itself, and each stage plays a vital role in getting you back to smooth, healthy skin.
Hemostasis – Stopping The Bleeding
Within seconds of shaving cuts breaking your skin, your body kicks into high gear with hemostasis.
Vasoconstriction effects narrow blood vessels while platelet activation triggers clot formation.
Fibrin production strengthens the blood clot, dramatically reducing bleeding duration.
Most shaving cuts stop bleeding within minutes, though deeper wounds may require a styptic pencil or alum for faster results.
Inflammation – Cleaning and Healing
Once bleeding stops, inflammation begins—your body’s natural cleaning crew gets to work.
Blood vessels widen, bringing oxygen-rich blood and infection-fighting white blood cells to your shaving cuts. This increased blood flow causes the familiar redness, warmth, and slight swelling around the wound.
Here’s what your body accomplishes during this healing phase:
- White blood cells eliminate bacteria that might’ve entered through the cut, preventing infection before it starts
- Increased circulation delivers nutrients and healing ointments more effectively to damaged tissue
- Natural antiseptic compounds flood the area, creating an environment where healthy tissue can rebuild
Don’t panic if your cut looks angry—that redness signals proper wound healing in action. Inflammation duration typically lasts 2-4 days for minor shaving irritation healing. Using gentle cleaning methods and applying topical antiseptic helps support this process while reducing scarring risks.
Proliferation – Rebuilding The Wound
During proliferation, your body’s construction crew gets to work rebuilding damaged tissue.
Oxygen-rich red blood cells deliver essential nutrients while new tissue forms through collagen formation and granulation tissue development.
This critical wound healing stage focuses on tissue growth and skin repair, creating the foundation your cut needs to become whole again.
Maturation – Strengthening The Wound
The maturation stage marks wound healing’s final chapter, where your body strengthens the newly formed tissue.
During this phase, collagen remodeling occurs as your skin reorganizes fibers to improve tensile strength.
Scar tissue gradually transforms, becoming less visible over months, and this long-term appearance depends on proper care, minimizing visibility requires patience as scarring naturally fades and flattens through continued tissue growth.
Factors Affecting Wound Healing
Several key factors determine how quickly your shaving cuts heal, and understanding them helps you manage expectations.
Your body’s healing timeline isn’t just about the cut itself—it’s influenced by your unique circumstances.
Here are the main factors affecting wound healing:
- Cut Depth: Deeper wounds naturally take longer to close and rebuild tissue
- Age Factors: Older skin heals more slowly due to reduced blood flow and cellular activity
- Health Conditions: Diabetes, poor circulation, and compromised immune systems delay recovery
- Blood Flow: Better circulation delivers oxygen and nutrients faster to healing tissue
- Wound Care: Proper cleaning and moisturizing create ideal healing conditions
Your skin healing process works best when these factors align favorably.
Preventing Scarring From Shaving Cuts
While most shaving cuts heal completely without leaving permanent marks, taking preventive steps can help you avoid scarring altogether.
You’ll want to focus on proper wound care, sun protection, and early intervention to keep your skin smooth and unmarked after those inevitable nicks happen, which is crucial for achieving smooth skin.
Antibiotic Ointment for Infection Prevention
Antibiotic-ointment protection acts as your first line of defense against bacterial invaders that threaten proper wound healing. Apply a thin layer to clean shaving cuts, following package directions carefully to prevent resistance concerns and guarantee effective ointment application.
| Infection Symptoms | Ointment Application | Alternative Antiseptics |
|---|---|---|
| Increased redness | Clean hands first | Hydrogen peroxide |
| Pus or discharge | Thin, even layer | Rubbing alcohol |
| Warmth around cut | 1-3 times daily | Iodine solutions |
| Swelling that worsens | Don’t overuse | Tea tree oil |
| Red streaking | Pediatric use varies | Witch hazel |
This simple step transforms your shaving cuts from potential infection sites into healing success stories, dramatically reducing scarring risks.
Sunscreen for Damaged Skin
After your shaving cut has stopped bleeding and you’ve applied antibiotic ointment, protecting the damaged skin from harmful UV rays becomes essential for proper healing.
Sun exposure can darken scars and delay the small cut healing process, making sunscreen ingredients like zinc oxide and titanium dioxide your best allies. For those with sensitive skin, mineral-based formulations are often recommended.
SPF levels of 30 or higher provide adequate protection, but application techniques matter just as much as the product itself. Apply sunscreen generously over the nick healing area, ensuring complete coverage of the shaving wound healing time zone.
Picture these scenarios where sun protection proves essential:
- Beach days when saltwater and intense UV rays can irritate healing cuts
- Outdoor workouts where sweat might wash away protection from vulnerable skin
- Daily commutes through sunny windows that still expose your face to damaging rays.
Reapplication frequency should follow the two-hour rule, especially for damaged skin types that heal more slowly. Remember, how long heal times take often depends on consistent protection from environmental stressors like UV radiation.
Early Treatment for Minimizing Scars
You can prevent permanent scarring from shaving cuts by acting fast and taking proper care.
Early treatment makes all the difference between a barely visible mark and a lasting reminder of your morning mishap.
Here’s your scar prevention game plan:
- Clean immediately: Rinse with mild soap and water to remove bacteria and debris that worsen scarring
- Apply petroleum jelly: Keep the wound moist to promote healthy collagen production and prevent scab formation
- Protect from sun: Cover healing cuts to avoid pigmentation changes that make scars more noticeable
- Don’t pick scabs: Let natural healing occur to minimize inflammation and tissue damage
Frequently Asked Questions (FAQs)
How long does it take for a cut to heal?
Most cuts heal within 3-7 days, though deeper wounds may take 1-2 weeks. Your body’s healing timeline depends on the cut’s depth, location, and how well you care for it.
How long does a shaving cut take to heal?
Most shaving cuts heal within 3-7 days with proper care.
Deeper cuts may take 1-2 weeks, while minor nicks typically close within just a few days, depending on your skin’s natural healing speed.
Can You shave over a healing cut?
Don’t put all your eggs in one basket—avoid shaving over healing cuts.
You’ll risk reopening wounds, introducing bacteria, and prolonging recovery.
Wait until the cut completely heals before resuming your normal shaving routine for superior skin health.
How long does a deep razor cut take to heal?
Deep razor cuts typically take 7-14 days for initial closure, but you’ll need several weeks for complete healing.
Deeper wounds require more time as your body rebuilds tissue layers, especially if you’ve got underlying health conditions that slow recovery.
How long does it take a shave to stop bleeding?
When you nick yourself while shaving, don’t panic—most minor cuts stop bleeding within minutes.
Your body’s natural clotting process kicks in fast, usually stopping the flow in 2-5 minutes with gentle pressure applied.
Do shaving cuts leave a scar?
Most shallow shaving cuts won’t leave permanent scars if you care for them properly. Don’t pick at scabs, keep the area clean, and they’ll typically fade completely within weeks.
How long do cuts from shaving take to heal?
Like when you accidentally press too hard while rushing through your morning routine, most shaving cuts heal within 3-7 days with proper care.
Minor nicks close quickly, while deeper cuts may need up to two weeks.
How long do shaving cuts down there take to heal?
Shaving cuts in sensitive areas typically heal within 3-7 days, just like other minor cuts.
However, the warm, moist environment down there can slow healing slightly, so you’ll want to keep the area clean and dry for ideal recovery.
Does after shave heal cuts?
After shave doesn’t heal cuts—it can actually sting and irritate open wounds.
Most aftershaves contain alcohol, which delays healing by drying out skin and causing inflammation.
You’ll want to skip aftershave on fresh cuts.
How to heal blade cuts quickly?
Clean cuts immediately with warm water and soap, then apply antibiotic ointment. Keep wounds moist with bandages, avoid picking scabs, and use cold compresses to stop bleeding faster.
Conclusion
Recovery works like a well-oiled machine, with your body efficiently repairing damage from those inevitable nicks.
Understanding how long does it take for shave cuts to heal empowers you to make informed decisions about your grooming routine.
Most minor cuts disappear within 24-48 hours, while deeper wounds need 3-7 days.
You’ll speed up healing by keeping cuts clean, avoiding scab picking, and using proper wound care techniques.
Remember, prevention beats treatment every time.
- https://www.bombayshavingcompany.com/blogs/shaving/tips-to-avoid-cuts-nicks-and-ways-to-treat-them
- https://www.uchealth.org/today/wound-healing-after-everyday-cuts-and-scrapes/
- https://www.clinikally.com/blogs/news/10-effective-ways-to-stop-shaving-cut-bleeding
- https://www.healthline.com/health/skin/stages-of-wound-healing
- https://journals.lww.com/aswcjournal/fulltext/2011/04000/checklist_for_factors_affecting_wound_healing.10.aspx

