This site is supported by our readers. We may earn a commission, at no cost to you, if you purchase through links.
 To blend your beard into your hair, you’ll need to gradually fade the beard length from longest at the bottom to shortest at the top.
Use a quality beard trimmer with adjustable guards, starting with the longest guard at the bottom and working your way up with shorter guards.
Incorporate scooping and flicking motions for a smooth, natural shift.
Avoid abrupt contrasts by gradually tapering the beard into your hairstyle.
Complement your hair texture and facial shape for an enhanced overall appearance.
With practice, you’ll master this technique for a seamless look.
Want to learn more expert tips for achieving the perfect fade?
Table Of Contents
Key Takeaways
- The key to mastering that seamless beard-to-hair fade is all in the technique, my friend. Gradual guard changes, scooping motions, and patience – it’s an art form, like sculpting a masterpiece out of your facial hair.
- Think of your beard as a rugged canvas, and that trimmer as your brush. With the right tools and a steady hand, you can create a natural, flowing gradient that blends those grizzly whiskers right into your ‘do. It’s all about finding that perfect balance between control and letting your hair’s natural texture shine through.
- Don’t be afraid to experiment, my friend! Every man’s beard is unique, like a snowflake or a fingerprint. You might have to try out a few different approaches before you nail that signature look that flatters your handsome mug to a tee. The journey of a thousand trims begins with a single snip, as they say.
- Remember, consistency is key when maintaining that fresh fade. Mark your starting lengths, get into a grooming routine, and don’t be shy to enlist a professional barber’s guidance every now and then. With some dedication, you’ll be rocking that blended beard like a veritable lumberjack meets Renaissance painter vibe in no time.
How to Blend Beard Into Hair?
To blend your beard into your hair, start by fading the hair on your cheeks gradually shorter as it gets closer to your beard line. Then use scissors or trimmers to blend the longest beard hair into the shorter facial hair for a seamless transformation.
Beard Fade Definition

A beard fade involves gradually blending your beard hair length, creating a smooth change that enhances your look.
This technique suits all beard lengths, promoting a tidy sideburn appearance and neat cheek areas. It gives your beard length variation, supporting natural beard growth and reducing frequent trimming.
Start by estimating hair removal, then trim from bottom to top for a clean fade.
The key to a successful fade lies in seamless blending, resulting in a polished and aesthetically pleasing beard.
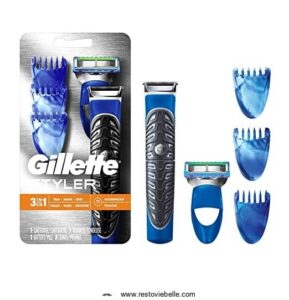
Tools Required
To blend your beard into your hair seamlessly, you’ll need a beard trimmer with adjustable guards and a quality beard comb . These tools will help you achieve a smooth and professional-looking fade, enhancing the overall appearance of your beard and hairstyle .
Beard Trimmer
 View On Amazon
After grasping how to create a flawless beard fade, you’ll require a dependable beard trimmer. Choose a model with adjustable length combs and various attachments for precision. Guarantee the trimmer is maintained regularly to avoid problems. A well-maintained trimmer not only enhances beard styles but also ensures even blending of your beard into your hair (Source).
Beard Guards
Beard guards are essential for controlled, even fades. Start by verifying you have multiple beard guard lengths available.
- Beard guard selection: Choose the right lengths for a gradual fade.
- Beard guard attachments: Fit securely on your trimmer.
- Beard guard shape: Contours to match your face.
- Beard guard spacing: Ensure even cuts.
- Beard line-up and neckline: Keep them sharp.
Beard Comb
Choose a beard comb with the right length and material. A sturdy wood or metal comb works well to maintain your beard’s style. When using it, align your hairs for a clean cut with your electric beard trimmer. Make sure you clean your comb regularly for hygiene. Quality beard products make a difference.
Preparation Steps

First, wash and detangle your beard to make sure it’s clean and manageable. Then, trim it to a uniform length and establish clean neck and cheek lines for a polished foundation .
Wash and Detangle
Before trimming, wash your beard thoroughly to remove any dirt or oils, ensuring it’s clean for precise grooming. Apply a quality conditioner to soften the hair, then gently detangle using a wide-toothed comb. This essential step in beard care prevents snagging and promotes even trimming, setting the stage for a smooth fade.
Trim to Uniform Length
Trim your beard to an even length using a high-quality beard trimmer set to a uniform setting. This simplifies the fading process and guarantees consistency.
- Beard wash and detangling comb: Wash your beard and use a detangling comb to smooth it out.
- Sectioned brushing: Brush your beard in sections for better control.
- Uniform trim: Trim the entire beard evenly.
Establish Clean Lines
After trimming your beard to a uniform length, it’s time to establish clean lines. Use a transparent shave gel and razor to create sharp neck lines and cheek lines. For precision, run your razor along the desired outline lines. Crisp razor lines will define your beard’s shape, ensuring a polished, professional appearance.
Fading Techniques

To blend your beard into your hair for a natural look, start with the largest guard at the bottom and gradually decrease the guard size as you move up. Use techniques like a scooping motion and flicking the trimmer upwards to create a smooth [changeover] .
Start High, Go Low
To achieve a smooth beard fade, start with the highest guard setting at the bottom of the ear, working upward to shorter settings.
- Begin with high numbers
- Gradually decrease guard length
- No abrupt changes
- Consistent movement
- Check results frequently
Scooping Motion
To achieve a natural appearance and enhance your beard, use a scooping motion while trimming. This blending technique creates smooth connections between lengths, creating a gradient that looks seamless rather than abrupt, for a polished look. (Source).
Flicking Motion
Incorporate a flicking motion with your beard trimmer for precision. Focus on your wrist angle and finger movement, using a quick, fluid action. Position your hand comfortably and practice the right wrist movement for smoother shifts.
Gradual Guard Lowering
Incorporate gradual guard lowering for a smooth changeover and natural look. Start with the longest guard, subtly decreasing sizes as you fade upward to achieve a refined gradient. Seek professional guidance for mastering this technique.
Freehand Fading
Freehand fading without guards requires precision. Start by using scissors or your trimmer for blending long beards. Gradually work upwards, ensuring a smooth changeover. This advanced technique provides flexibility, allowing you to achieve a seamless, natural fade (Source).
Blending Into Hair

Blending your beard into your hair avoids abrupt contrasts and enhances your overall appearance, creating a smooth and natural look. Follow graduated techniques observed in celebrities, starting with longer guard settings and moving to shorter ones for a seamless [changeover] .
Avoid Abrupt Contrast
To guarantee a seamless blend, start with the longest guard at the top of your beard and gradually use shorter ones as you approach your hairline. This method prevents abrupt contrast and contributes to a natural look, improving your beard maintenance and faded hairstyle‘s overall appearance.
Enhance Overall Appearance
To enhance your overall appearance when blending your beard into hair, guarantee that the beard length complements your hair texture and facial shape. Select styles that flatter your skin tone and desired look, creating a harmonious passage that suits your unique features and preferences.
Graduated Look
For a graduated look, you’ll need to start with the longest guard. Gradually decrease the guard size as you move up, creating a smooth progression of lengths. This natural fade enhances your overall appearance, providing a flattering look with a seamless blend.
Celebrity Examples
Look at James Harden for inspiration. His beard seamlessly fades into buzzed hair, creating a smooth gradient. He uses one or two additional clipper settings, starting with a longer length and moving to shorter ones. This technique enhances the beard’s overall aesthetic .
Fading Direction

To achieve a seamless beard gradation, start trimming from the bottom and work your way up, using the longest guard first and gradually decreasing. Always move from sideburns to cheeks to secure an even flow without abrupt contrasts.
Bottom to Top
Starting at the base of your beard and moving up is essential for a natural fade. Use the longest guard at the base, then gradually decrease the guard size. Incorporate a scooping technique for a smooth change. If your beard’s long, try freehand fading for more control. Remember your starting point to maintain consistency .
Sideburns to Cheeks
Move smoothly from your sideburns to cheeks by tapering sideburns for an appearance that’s both natural and stylish. Start with longer settings and use gradual fading to achieve even cheek length. Effective blending techniques include working with the fade direction to guarantee a seamless transition, enhancing your beard’s overall aesthetic and keeping it tidy .
Longest to Shortest Guard
To achieve a polished fade, start with the longest guard size at the bottom of the sideburn, then gradually move to shorter guards as you move upwards. This method guarantees a smooth shift in hair length and a natural appearance.
- Begin at ear level
- Decrease guard sizes incrementally
- Aim for seamless blending
- Utilize shorter guards near temples
- Seek barber guidance if unsure
Maintenance and Practice

Regular trimming is essential to maintain your desired beard fade. Track your starting point for each trim to easily follow and improve your fading technique with consistent practice.
Regular Trimming
Regular trimming is essential for maintaining your faded beard’s flow into hair. Use a quality trimmer and keep the guards accessible. Work systematically from cheeks to sideburns, gradually merging longer hair into shorter. Tackle the fade’s directionality—cheeks rise, sideburns descend. Frequent trimming guarantees a seamless blend customized to your facial shape.
Track Starting Point
You’ll need to track your beard’s starting gradient length as you practice fading. Note where the longest beard hair begins for a seamless natural look. As you trim, use this starting point to establish the gradient and blend smoothly from maximum to minimum beard length. Marking your starting point simplifies maintaining consistent fades between trims.
Improve With Practice
While tracking your starting point helps maintain consistency, the key to seamless fading lies in regular practice. With each trim, you’ll develop a better feel for:
- Ideal fading frequency for blended shifts
- Appropriate guard progression for gradual length changes
- Natural motions for smooth scooping and flicking
- Technique refinement to showcase your personal style
Mastering the beard fade takes dedication, but the rewards are worth it – an expertly blended, confidence-boosting look.
Benefits of Fading

By blending your beard into your hair through fading, you’ll achieve a seamless, natural look that enhances your beard’s aesthetic appeal. Fading reduces the need for frequent trimming as the change between lengths appears more gradual and intentional.
Natural Look
Fading creates a natural blend between your beard and hair textures. This seamless connection enhances your unique facial shape and features.
| Hair Length | Beard Shape | Fading Technique |
|---|---|---|
| Short | Full | Gradual Guards |
| Medium | Tapered | Freehand Blending |
| Long | Sculpted | Expert Skill |
Adapt the fade to complement your beard and hair for a polished yet effortless look.
Enhances Beard Aesthetic
Strategically fading your beard length enhances its overall aesthetic. By gradually blending shorter and longer hair, you create clean lines and definition around your cheek areas. This polished look requires less frequent trimming for maintenance, allowing your natural beard growth pattern to shine through confidently.
Reduces Trimming Frequency
You’ll trim less frequently with a faded beard. Fading allows for:
- Gradual beard growth without a messy appearance
- Less frequent upkeep for a consistent style
- More time between trims to maintain your desired look
Mastering the fading technique provides versatility, reducing the need for constant trimming while keeping your beard fresh and polished.
Professional Guidance

For professional guidance, consult an experienced barber who can teach you proper fading techniques and provide personalized advice based on your facial features and beard growth patterns. Regular visits to a skilled barber will also help maintain your beard’s health and guarantee your desired style looks its best.
Consult Barber
If you’re unsure about fading your beard, consult a professional barber for guidance.
They can assess your facial hair growth pattern and recommend the right fading technique for your beard style.
Barbers excel at freehand fading and shaping thicker beards that require expert trimming.
Consider getting a proper beard trim and shaping once every 4-6 weeks to maintain a polished, faded look between self-trims.
Beard Health and Style
Regular beard maintenance promotes healthy growth and allows for stylistic experimentation. Strive for:
- Trimming every 2-3 weeks
- Utilizing beard oils/balms
- Brushing daily
An untended beard can appear unappealing and unsanitary. With proper care, you’ll attain a luxuriant, vibrant beard that can be reshaped at your discretion. Seek professional advice for flattering styles that complement your facial features. Achieving the optimal beard length and shape enhances self-confidence.
Experimenting With Styles

Don’t be afraid to experiment with different beard styles to find the most flattering look for your facial features and individual style. Trying various lengths, shapes, and fading techniques will help you discover the perfect beard aesthetic that enhances your unique appearance.
Find Flattering Look
Find a look that flatters your features! Experiment with different beard shapes and lengths to complement your face shape, skin tone, and hair texture. A shorter, cropped beard can make a round face appear slimmer, while a fuller beard balances strong jawlines. Consider your beard color too – a contrast can add depth. Ultimately, you want a style that makes you feel confident!
| Beard Style | Face Shape | Recommendation |
|---|---|---|
| Short Boxed | Round | Slimmer look |
| Full Beard | Square | Softens angles |
| Goatee | Oval | Balances length |
Enhance Facial Features
You know how some looks just click, and others fall flat? Finding the right beard style to enhance your facial features is key. Try different:
- Beard shapes (angular, rounded, etc.) to complement face shape
- Beard fullness to balance areas like a strong jawline
- Beard colors to soften or accentuate skin tone
- Beard textures for ruggedness or polish
- Beard lengths to elongate or widen
Experiment until you nail that magnetic, confident vibe. An expert barber can guide the way, too—they’ve seen what works on countless faces. The right beard style makes you a showstopper.
Frequently Asked Questions (FAQs)
How often should I trim the beard line?
Like a craftsman shaping a masterpiece, you’ll want to trim your beard line every 2-3 days for a clean, faded look. Regular maintenance keeps stray hairs tamed and your style on point.
What guard size works best for thick beards?
For thick beards, start with a #4 or #5 guard. Gradually reduce the size as you move up the sideburn area. Use a #2 or #3 closer to the hairline for a seamless blend into your hair.
Can I fade a patchy or uneven beard?
Yes, you can fade a patchy beard. Start with longer guards, gradually decrease length toward patchy areas. Carefully blend uneven sections for a smooth changeover.
How do I avoid skin irritation while fading?
Use a gentle touch and lubricate your skin with a moisturizing shave gel. Apply the trimmer slowly, avoiding harsh strokes or pressing too hard against your face. Proper preparation and technique prevent irritation during fading.
What products help maintain a faded beard style?
Unleash the power within – invest in a quality beard balm or wax to control stray hairs while defining those crisp fades. Combined with regular trims, these styling elixirs will elevate your rugged charm effortlessly.
Conclusion
Ultimately, blending your beard into your hair enhances your overall appearance. Nearly 60% of men feel more confident with a well-groomed beard. Master the art of fading by using appropriate tools, gradually changing lengths, and incorporating scooping motions. With regular practice, you’ll perfect how to blend beard into hair for an impeccably natural look that flatters your features.