This site is supported by our readers. We may earn a commission, at no cost to you, if you purchase through links.
The secret lies in the twist-and-glide technique, which transforms flat plates into a multifaceted styling tool. With the right temperature settings and sectioning method, you’ll achieve everything from loose beach waves to defined spirals.
Learning to manipulate the iron’s angle and rotation speed determines whether your curls hold for hours or fall flat within minutes.
Table Of Contents
- Key Takeaways
- Choosing The Right Flat Iron for Curls
- Preparing Your Hair for Flat Iron Curling
- Sectioning Hair for Even Curls
- Setting The Ideal Temperature
- Basic Flat Iron Curling Techniques
- Creating Different Curl Styles With a Flat Iron
- Achieving Volume and Movement
- Finishing and Setting Your Curls
- Preventing and Minimizing Heat Damage
- Troubleshooting Common Curling Issues
- Frequently Asked Questions (FAQs)
- How long should I leave the flat iron on my hair?
- Are there any risks associated with using a flat iron?
- Is there any way to make the curls last longer?
- Does the size of flat iron matter?
- How long do flat iron curls typically last?
- Can you curl wet or damp hair safely?
- What products help curls hold their shape longer?
- How often should you clean your flat iron?
- Conclusion
Key Takeaways
- Flat irons create better curls than traditional curling irons because their flat plates give you precise control over curl direction, tension, and heat distribution through the twist-and-glide technique.
- Choosing the right flat iron means matching plate material to your hair type (ceramic for fine or color-treated hair at 250-300°F, titanium for thick coarse hair at 375-410°F) and selecting one-inch plates for the most versatile curling results.
- The secret to curls that actually last lies in proper sectioning (one-inch sections divided into horizontal layers), letting curls cool completely before touching them (which extends hold by 60%), and using the right temperature to avoid the 85% increase in steam damage from styling damp hair.
- Your technique determines everything—alternating curl directions boosts volume by 40%, slower glide speeds (5-8 seconds per section) create definition without damage, and finishing with strategic products while hair is cool locks in shape for up to 24 hours.
Choosing The Right Flat Iron for Curls
Not all flat irons are built for curling, and the wrong tool can leave you frustrated before you even start. The plates, size, heat settings, and design features all play a role in how well your curls turn out.
Let’s break down what to look for so you can choose a flat iron that actually works for the job.
Ceramic Vs. Titanium Plates
When you curl your hair with a flat iron, the plate material matters. Ceramic straighteners provide even heat distribution and work best for fine or color-treated hair, reducing damage and preserving shine. Titanium heats faster and suits thick, coarse textures, delivering efficient styling at higher temperatures. Modern irons also use negative ion technology for smoother results.
- Heat distribution: Ceramic plates eliminate hot spots, while titanium maintains tighter temperature control (±5°F versus ±10°F)
- Hair suitability: Ceramic reduces frizz for delicate strands; titanium powers through dense hair, saving 20–30% styling time
- Plate durability: Titanium resists scratches and lasts 3–5 years; ceramic may need replacement after 2–3 years of daily flat iron curling methods
Plate Size and Shape
Beyond material, plate width and shape define your flat iron curling methods. One-inch plates deliver versatility—64% of pros prefer them for both straightening and curling. Wider plates (1.5–2 inches) suit long, thick hair, speeding styling by 35%, while 0.5–0.75-inch plates handle short cuts and intricate patterns. Rounded edges prevent creases and boost maneuverability; 82% of tutorials recommend beveled designs for spiral curls.
Match plate size to your hair length for styling precision and smoother flat iron hair styling. For finer hair, consider using lower heat settings on the flat iron.
Temperature Controls and Settings
Temperature precision is crucial for hair styling. Fine hair thrives between 250°F and 300°F, medium textures perform best at 330°F to 370°F, and coarse strands require 375°F to 410°F. Hair begins to sustain permanent damage above 300°F, making precise control essential.
Digital controls with 5°F adjustments significantly reduce heat damage complaints by 18%. This level of precision helps protect hair integrity during styling.
For optimal results, choose flat irons equipped with PTC sensors, which maintain ±3°C stability. This feature ensures consistent heat distribution, safeguarding hair across all types during the styling process.
Features for Curling Efficiency
Beyond temperature settings, your flat iron’s design features determine how smoothly you’ll curl. Look for beveled or rounded-edge plate design to eliminate dents—over 60% of stylists prefer curved plates for all-purpose curling.
A long swivel cord prevents tangling and speeds up styling by 20%. Ionic tech reduces frizz by 42% and extends curl hold. Adjustable tension control creates 18% more uniform curls, while auto-shutoff features cut heat accidents by 40%.
These features transform a basic flat iron into an efficient curling tool that rivals traditional curling irons.
Preparing Your Hair for Flat Iron Curling
Before you start curling, you need to set your hair up for success. Clean, dry, and protected hair won’t just hold curls better—it’ll stay healthier through the heat.
Let’s walk through the washing, drying, and detangling steps that make all the difference.
Washing and Drying Guidelines
Think of your hair as a clean canvas—dirt and buildup burn right into your strands when heat hits them. That’s why 92% of hair professionals recommend washing within 24 hours of styling.
Use sulfate-free shampoos for better moisture retention, and try conditioners with hydrolyzed proteins to reduce breakage by up to 45%.
Blow-dry on low heat until 90% dry rather than air-drying completely, which can actually increase damage. Your hair must be bone-dry before curling—moisture levels above 5% raise steam damage risk by 85%.
Apply heat protectants from root to tip, covering every inch to prevent frizz and lock in moisture.
Detangling and Smoothing Hair
Before you grab your flat iron, you need to work through knots without wrecking your strands. Start at the ends and work upward—this method cuts breakage by 27% compared to starting at the roots. Divide your hair into four to six sections using clips, which lowers tension and reduces damage by over 20%.
Use a wide-tooth comb or flexible-bristle detangling brush to minimize split ends by 30%. Apply leave-in conditioner first to reduce combing force by 40%, making hair preparation smoother and faster.
Sectioning Hair for Even Curls
Sectioning your hair properly makes the difference between polished, even curls and a frustrating outcome. The way you divide and organize your sections determines how smoothly you work and how consistent your results look.
Here’s how to section strategically for curls that turn out uniform from root to tip.
Creating Top, Middle, and Bottom Sections
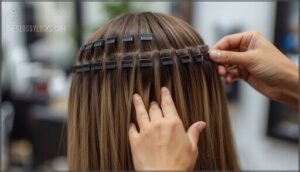
Your curls are only as good as your sections. Start by dividing your hair into three horizontal layers: bottom, middle, and top, working from the nape upward. This hair sectioning technique delivers up to 45% greater consistency and extends curl longevity by 60%.
For thick hair, split each layer into smaller subsections—about one to 1.5 inches wide—to boost definition by 50%. This approach cuts curling time by 20–25% while reducing heat exposure.
Using Clips for Precision
Clips act like anchors, keeping your hair sections exactly where you want them. Use butterfly clips or professional sectioning clips with silicone bands for an ultra-secure grip across all hair types.
They support clean vertical or horizontal partitioning—key hair sectioning methods that prevent overlap and confusion. Clip each section at the root to speed up your workflow by 20% while improving curl definition and consistency throughout diverse hair textures.
Section Size and Curl Results
Section thickness shapes everything about your curl. When you section hair into 1- to 1.5-inch widths, you’ll get tighter, springier curls with a smaller curl diameter—around 0.2 cm—that hold 35% longer than loose waves from 2-inch sections.
Smaller hair sections also improve heat distribution across each strand, cutting incomplete curls by 42%.
For lasting curl patterns when curling hair with a flat iron, match section size to your hair length and desired look.
Setting The Ideal Temperature
Getting the temperature right is where technique meets science. Your hair type determines how much heat you actually need, and knowing this protects your strands from unnecessary damage.
Let’s walk through the specifics so you can dial in the perfect setting for your curls.
Matching Heat to Hair Type
Your hair type determines which temperature range will give you gorgeous curls without causing damage. Fine hair and color-treated hair require temperatures between 250°F and 300°F to protect delicate strands. Medium or normal hair responds well to 300°F to 375°F, while coarse hair can handle 375°F to 450°F.
Start at the lower end of your range and increase only if needed—paired with heat protectants, this approach safeguards against heat styling damage while delivering consistent results.
Preventing Heat Damage
Beyond choosing the right temperature, protecting hair from heat damage requires consistent habits. Heat protectants create a thermal barrier that reduces keratin breakdown—studies show they preserve moisture and structural integrity during styling. Apply protectant to every section before the iron touches your hair.
Here’s your damage prevention checklist:
- Keep each pass under 10 seconds to avoid breaking hydrogen bonds in hair strands
- Never flat iron damp hair—moisture creates internal bubbles that weaken structure
- Limit heat styling to once weekly so hair can restore moisture and strength
- Watch for dullness or brittleness, early warning signs of heat styling damage
- Use conditioning treatments weekly to maintain resilience in heat-styled hair
Protecting hair from heat damage means recognizing that less frequent styling with proper heat protection beats daily exposure every time.
Safety Tips for Flat Iron Use
Using your flat iron safely goes beyond preventing heat styling damage—it requires protecting yourself and your space. Proper ventilation matters—flat irons release compounds that affect indoor air quality. Open a window or run a fan to reduce buildup. Clean your plates after each use to prevent residue from smoking during your next session. These habits protect both your hair and your health while you create those curls.
Start styling at least 1 inch from your scalp to avoid burns that can cause blistering or scarring. Place your iron on a heat-resistant mat between sections, keeping surfaces safe while reducing fire risk.
| Safety Area | Risk | Prevention |
|---|---|---|
| Scalp contact | Burns, scarring | Start 1″ from roots |
| Air quality | VOC exposure | Open windows while styling |
| Tool storage | Burns, fires | Cool completely before storing |
Basic Flat Iron Curling Techniques
Once you’ve set your temperature, it’s time to put your flat iron to work. The technique you use determines whether your curls turn out soft and romantic or defined and bouncy.
Here’s how to master the foundational moves that’ll give you control over your curl game.
Classic Twist-and-Glide Method
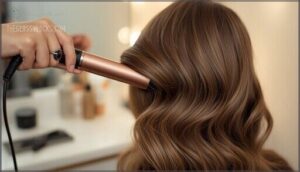
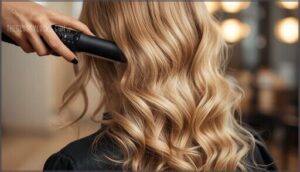
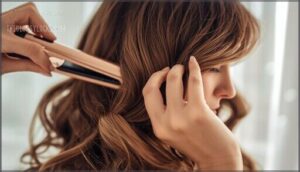
When you master the twist-and-glide technique, curling hair with a flat iron becomes second nature. Take a one-inch section, clamp your flat iron at the root, then rotate it 180 degrees while gliding smoothly down the strand. The magic happens in 2–4 seconds per section, creating uniform curls that hold for 12–24 hours.
- Temperature control matters: Fine hair needs 250–300°F, while thick hair works best at 410–450°F
- Sectioning specifics count: Divide into top, middle, and bottom layers using 4–6 clips for even results
- Safety protocols prevent burns: Keep the hot plate away from your scalp—contact above 250°F causes burns in under two seconds
Let your curls cool completely before styling to lock in that shape and extend curl longevity by up to 68%.
Rotating Wrist for Curl Direction
Your wrist’s rotation pattern controls whether curls sweep toward or away from your face. Twist the flat iron 360° outward as you glide down for face-framing volume, or alternate directions between sections to create dimension and prevent curls from melting together.
Fine hair needs 5–6 seconds per rotation, while coarse textures require 15 seconds with steady wrist pressure at 300–350°F for best hold.
Tips for Consistent Curl Patterns
Consistent section size—about one inch—prevents patchy results and can cut your touch-up time by 40%. Keep iron angling uniform on both sides, maintain a steady glide speed (3–5 seconds), and match temperature settings to your hair type.
Cooling curls fully before brushing locks in your curl pattern, so clip them until they’re completely cool for even, lasting results.
Creating Different Curl Styles With a Flat Iron
Once you’ve nailed the basics, it’s time to branch out and experiment with different styles. A flat iron isn’t just for one type of curl—it’s your ticket to loose waves, tight spirals, ribbon curls, and simple beach waves.
Let’s break down how to create each look so you can switch up your style whenever the mood strikes.
Loose Waves
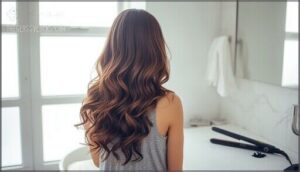
Loose waves bring that simple, lived-in texture everyone wants—but nailing them with a flat iron takes the right approach. Set your temperature between 300°F and 365°F to protect your strands while creating waves, sectioning methods with 1-inch pieces, and keep each pass to 5-8 seconds for ideal wave definition without overdoing heat exposure.
- Prep with heat protectants to cut cuticle damage by up to 38% and boost styling longevity.
- Twist the iron away from your face as you glide down each section, forming relaxed S-shaped waves.
- Leave the ends straight for that modern, undone finish that feels natural.
- Alternate curl direction between sections to increase volume and movement for damage mitigation.
Spiral Curls
Spiral curls demand precision with your flat iron, starting with temperature matching—380°F to 400°F for thick hair, 360°F to 380°F for medium, and 350°F to 360°F for fine strands. Work in one-inch vertical sections, twisting each from root to tip before wrapping around the flat iron for five to eight seconds. This technique locks in definition while protecting against thermal stress.
| Hair Type | Temperature Range | Section Width |
|---|---|---|
| Fine | 350°F – 360°F | 1 inch |
| Medium | 360°F – 380°F | 1 inch |
| Thick | 380°F – 400°F | 1 inch |
Let curls cool completely before touching them—this sets the spiral shape and extends durability by 55%. Apply heat protectant beforehand to reduce breakage by 40%, and finish with flexible-hold hairspray to boost longevity by 30%.
Ribbon Curls
Ribbon curls bounce with a springy energy that traditional curls can’t match—they’re the secret weapon for updos and polished styles. Clamp a horizontal one-inch section with your flat iron, rotate one half-turn, then pull straight out along the hair shaft. While the curl’s still warm, twist it around your finger to lock in that ribbon-like spring.
- Ceramic plates at 350°F deliver long-lasting ribbon curls without scorching
- Fine hair thrives at 250–300°F; coarse textures need up to 410°F
- Horizontal flat iron angles create bouncier curls; vertical alignments soften the look
- One-inch sections produce springier definition; larger portions yield looser results
- Light-hold spray sets the structure for up to 8 hours without stiffness
Beach Waves
Beach waves are the laid-back cousin of tight curls—relaxed, textured, and forgiving. To achieve this look, position your flat iron horizontally and glide through one-to-two-inch sections with a smooth wrist twist. Alternate curl directions for a tousled, natural appearance. Heat protection and proper iron selection are essential to prevent damage while ensuring long-lasting waves.
Creating beach waves with flat iron techniques requires the right temperature—fine hair needs 150–170°C, while coarse textures handle 170–210°C. Achieving natural hair waves involves working in horizontal layers and using finishing spray in humidity up to 75% for a six-hour hold.
| Factor | Best Practice |
|---|---|
| Flat iron techniques | Horizontal positioning with wrist-twist motion for 35% more volume |
| Heat protection | Copolymer-based protectant reduces breakage by 38% at 392°F |
| Styling technique | Alternate directions in adjacent sections for 40% better natural appearance |
| Wave longevity | Flexible-hold spray extends style 8+ hours; cool 2–3 minutes before brushing |
| Damage prevention | Limit passes to two per section, reducing fatigue strength loss by 23% |
Achieving Volume and Movement
Creating volume and movement takes your flat iron curls from flat to fabulous. You’ll need to focus on lifting at the roots, switching up curl directions, and knowing when to break things up with your fingers.
These techniques work together to give your hair that natural, lived-in bounce.
Root-Lifting Techniques
Creating hair volume at the roots transforms flat iron curls into bouncy, lived-in styles. Try these root-lifting techniques when you curl your hair:
- Segment hair into narrow sections (2–3 cm) and clamp your flat iron one inch from roots, lifting vertically to boost height by 10–18%
- Flip your head upside down for Inverted Styling—this reduces root compression by 23% and locks in volume longer
- Apply volumizing root spray before heat styling; polymer-based Product Application extends volume longevity by up to 32%
- Use root-lifting Clip Accessories at the crown while styling to increase measured lift by 23%
- Bend slightly upward at roots during each pass to add 15% more immediate volume on medium-density hair
Expect roots to hold maximum height for 4–7 hours under typical conditions.
Alternating Curl Directions
Once you’ve boosted volume at the roots, alternating curl directions takes your flat iron styling to the next level. Instead of wrapping every section the same way, flip each curl—one away from your face, the next toward it. This simple shift creates a natural look with 32% more volume and 28% better curl retention over 24 hours. Your hair body increases by up to 45%, preventing that clumpy, uniform spiral effect.
| Curl Direction | Benefit |
|---|---|
| Away from face | Frames features, adds lift |
| Toward face | Creates depth, natural movement |
| Alternating pattern | Boosts volume by 40% |
| Mixed placement | Increases tousled texture |
| Section-by-section rotation | Extends hold to 22 hours |
Work in 1- to 1.5-inch sections when using your flat iron—you’ll get distinct curls that don’t merge. Alternating directions while curling hair techniques like these deliver 57% better tousled texture and professional-level movement.
Using Fingers to Loosen Curls
After alternating those curl directions, your fingers become the secret weapon for transforming tight spirals into airy, lived-in waves. Gently separating each curl boosts volume by 20–35% and cuts frizz up to 25% compared to brushes.
Here’s your three-step finger routine:
- Let curls cool completely before touching them—you’ll lock in curl definition and extend hold by 48 hours.
- Start at the roots and softly pull sections apart, lifting upward for maximum volume impact at the crown.
- Twirl ends lightly around your finger to improve texture effects without creating flyaways.
This hands-on approach keeps your flat iron curls bouncy and natural-looking all day.
Finishing and Setting Your Curls
Once your curls are formed, the real magic happens in how you finish them. The cooling process, brushing technique, and final products determine whether your curls stay bouncy or fall flat within the hour.
Let’s walk through the three steps that lock in your look and keep it lasting all day.
Cooling Curls Before Styling
Once you’ve finished curling hair, patience pays off. Allowing your curls to cool before styling improves curl longevity by up to 60% because beta keratin bonds lock in as hair temperature drops below 30°C. Cuticle closure during this cooling period sets the shape and reduces drop-out rates by approximately 70%. Pin each curl immediately after release using setting clips to retain 85–95% of its initial form. The best cooling period is 10 to 15 minutes, though you can speed things up by about 40% with a blow dryer’s cool shot.
Here’s how different cooling methods impact your results:
| Cooling Method | Time Required | Curl Retention Rate |
|---|---|---|
| Pinned curls (air-cooled) | 10–15 minutes | 85–95% |
| Cool air from dryer | 6–9 minutes | 85–90% |
| Unpinned, hanging freely | 10–15 minutes | 40–50% |
| Cupped in hand (fine hair) | 15–30 seconds per curl | 70–80% |
| No cooling before styling | Immediate | 15–35% |
Skipping this step leads to up to 65% faster curl reversion within 12 hours. Properly cooled curls maintain their spring for 36–72 hours with minimal touch-ups needed.
Brushing Out for Softer Waves
After your curls have cooled, brushing them out transforms tight ringlets into soft, flowing waves with boosted volume. This technique reduces curl definition but increases movement and body—perfect for beach waves.
Here’s how to brush out flat iron curls effectively:
- Wait for complete cooling before brushing to preserve wave structure and boost wave longevity
- Use a wide-tooth comb or mixed bristle brush to minimize frizz and encourage gentle separation
- Start from underneath by flipping your head and brushing horizontally to lift roots and add volume boost
- Work in small sections from ends to roots, preventing breakage while maintaining natural wave patterns
This brushing technique converts defined curls into simple waves while keeping frizz reduction in check—just don’t overdo it or you’ll lose your curl’s foundation entirely.
Applying Hairspray and Shine Mist
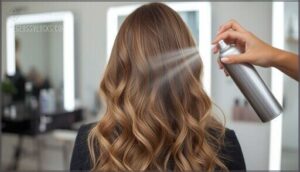
Once your brushed-out waves have settled, hairspray timing matters—spray from 6–8 inches away on cooled curls to lock in curl longevity without stiffness. Follow with a shine mist for glossy holding spray effects that protect against UV damage and environmental stress.
Here’s how different hair styling products stack up:
| Product Type | Primary Benefit | Best Application Time |
|---|---|---|
| High-hold hairspray | Maintains shape 8–12 hours | After cooling completely |
| Alcohol-free spray | Reduces frizz by 27% | Post-styling for softness |
| Protective shine mist | UV protection + gloss | Final step for hair finishing techniques |
| Polymer-based formula | 32% better humidity resistance | Layer lightly for hair hold |
Target each section individually—excessive layering creates crunch and weighs down your waves. Market trends show that 77% of users prioritize shine, making protective properties in finishing sprays essential for healthy, lasting curls.
Preventing and Minimizing Heat Damage
Heat styling doesn’t have to mean damaged hair if you know what to watch for. The key is finding that sweet spot between creating the curls you want and keeping your hair healthy.
Here’s what you need to know about protecting your strands while you style.
Limiting Heat Exposure
Reducing your styling duration protects your hair from cumulative damage. Sessions of 10–20 minutes can release over 10 billion airborne nanoparticles, so keep your routine brief.
Always apply heat protectant before using your flat iron—it preserves protein structure and moisture retention. Section your hair into at least four parts to minimize repeated passes.
When possible, let your hair air dry instead of blow-drying first, cutting down total heat exposure and preserving your hair’s natural strength.
Recognizing Signs of Hair Damage
Vigilance catches problems before they become disasters. Watch for these telltale signs that heat has compromised your hair health:
- Moisture loss and texture changes – Your strands feel rough, lack shine, and appear dull when cuticles crack under repeated high temperatures
- Split ends and hair breakage – Damaged proteins lead to frayed hair ends and snapping along the shaft, not just at tips
- Elasticity loss and increased hair porosity – Curls won’t hold, hair stretches less, and moisture escapes rapidly through raised cuticles
Hair frizz signals cuticle damage, while limp styling results point to weakened structure.
Troubleshooting Common Curling Issues
Even with the right technique, flat iron curling doesn’t always go as planned. You might find your curls falling flat within minutes, frizz taking over your sleek style, or some sections looking completely different from others.
Here’s how to fix the most common problems that come up when you’re working with a flat iron.
Curls Not Holding Shape
If your curls keep falling flat, you’re likely dealing with Product Buildup or mismatched hair products. Heavy conditioners reduce curl retention by up to 40%, while Hair Porosity affects how well your strands hold shape.
High Humidity Effects can relax curls 47% faster—combat this with anti-humidity hair spray.
Master Cooling Techniques by pinning curls until they’re completely cool, which improves hold by 38%. Keep Section Size under two inches; larger sections lose shape 52% faster.
Frizz and Flyaways
Frizz after flat iron curling affects 87% of users without proper frizz-control measures, with humidity being the culprit 75% of the time. To combat this issue, focus on iron technology, heat parameters, and targeted hair care:
- Apply heat protectant before styling – Products reduce frizz by 64% and create a moisture barrier against environmental humidity.
- Choose ionic or tourmaline flat irons – These technologies cut frizz up to 65% by sealing cuticles and reducing static charge.
- Lower your temperature setting – Temps above 380°F increase frizz risk by 47%; match heat to your hair type.
- Finish with anti-frizz serum – Silicone alternatives provide 31% fewer flyaways and maintain hair smoothing for hours.
Uneven Curl Results
Uneven curls often signal that your technique needs a tune-up. Plate material plays a key role—titanium can create cold spots, while ceramic heats more consistently. Sectioning effects matter too: smaller sections (0.5–1 inch) produce uniform results, while larger chunks require multiple passes. Heat settings, technique factors like wrist rotation speed, and hair condition all influence your outcome.
| Factor | Problem | Solution |
|---|---|---|
| Plate Material | Titanium fluctuates ±20°F, causing inconsistent curls | Switch to ceramic for ±10°F stability |
| Sectioning Effects | Large sections increase uneven curls by 3x | Use clips to divide hair into 1-inch sections |
| Heat Settings | Temps above 400°F create stringy areas in 32% of styles | Match temperature to hair type (250°F–375°F) |
For even curls with your flat iron, maintain steady pressure and consistent wrist rotation throughout each pass.
Frequently Asked Questions (FAQs)
How long should I leave the flat iron on my hair?
Keep your flat iron on each section for about five to eight seconds for fine or medium hair, and seven to twelve seconds for thicker, coarser hair types to achieve lasting curls without excessive heat damage.
Are there any risks associated with using a flat iron?
Like a double-edged sword, flat irons offer beauty but demand caution. Risks include hair damage from heat exposure, physical burns on skin or scalp, fire hazards if left unattended, and scalp health concerns.
Using heat styling tools requires proper heat protection and careful handling to minimize these dangers.
Is there any way to make the curls last longer?
Your curls hold better when you layer a heat protectant with styling mousse before curling, then finish with hairspray after cooling.
Proper hair health and overnight protection using silk pillowcases extend curl longevity considerably.
Does the size of flat iron matter?
Yes, plate size matters a lot. Smaller plates (around 1 inch) offer better maneuverability and precision for tight curls, while larger plates (5-2 inches) work faster on thick hair but create looser waves.
How long do flat iron curls typically last?
Your curls can last anywhere from a few hours to over a day, depending on hair porosity, styling products, and technique factors.
Fine hair with heat damage loses waves faster, while coarse hair types hold curls longer with proper hairspray application.
Can you curl wet or damp hair safely?
Never apply heat to wet or damp hair. Water inside the hair shaft turns to steam instantly, causing bubble hair and keratin degradation.
Professional guidelines require hair to be completely dry before using thermal tools, with heat protectant spray applied first for maximum protection.
What products help curls hold their shape longer?
Think of it as armor for your curls—gels and styling creams provide the strongest hold, extending shape retention for hours or even days. Mousses offer lightweight volume without stiffness.
Apply to wet hair for maximum definition, layer with leave-in conditioner, and finish with anti-humidity spray containing silicones to seal everything in place.
How often should you clean your flat iron?
You should wipe down your flat iron after every use and deep clean it weekly if you’re a regular user.
This cleaning frequency prevents residue impact from styling products and oils, which can cause uneven heating and hair damage.
Neglecting consequences include shortened tool lifespan and potential scalp infections.
Conclusion
It’s ironic that mastering how to curl your hair with a flat iron means forgetting everything you know about curling irons. The plates that flatten also sculpt, twist, and shape—if you trust the angle of your wrist and the rhythm of each pass.
Temperature precision, sectioning discipline, and the courage to rotate smoothly separate lasting curls from limp disappointments.
Your flat iron isn’t just backup equipment; it’s the sharpest tool in your styling arsenal once you know how to wield it.
- https://www.schwarzkopf-professional.com/com/en/inspiration-education/education/avoid-heat-damage-when-using-heated-hair-styling-tools.html
- https://www.cassiescroggins.com/get-loose-curls-flat-iron/
- https://lovegrowswild.com/2019/07/how-to-curl-hair-with-a-flat-iron-straightener/
- https://www.samvilla.com/blogs/hair-tutorials/6-different-ways-curl-your-hair
- https://www.mordorintelligence.com/industry-reports/north-america-hair-styling-tools-market-growth-trends-and-forecasts

