This site is supported by our readers. We may earn a commission, at no cost to you, if you purchase through links.

Professional colorists treat these measurements like a recipe, because even a small miscalculation can mean the difference between stunning results and serious damage. Getting the balance right controls how aggressively the bleach works, how evenly it processes, and whether your hair stays intact through the transformation.
Once you understand the science behind mixing developer and bleach correctly, you’ll stop guessing and start getting consistent, salon-quality lightening every single time.
Table Of Contents
- Key Takeaways
- What is Developer and Bleach Used For?
- How to Choose The Right Developer Strength
- What Ratio of Developer to Bleach Should You Use?
- Which Products Work Best for Mixing?
- How to Safely Prepare for Bleaching
- Step-by-Step Guide to Mixing Developer and Bleach
- Best Practices for Applying Bleach Mixture
- How Long Should You Process Bleach?
- What to Do After Bleaching Hair
- How to Care for Hair Post-Bleach
- Frequently Asked Questions (FAQs)
- How long should I leave the developer and bleach mixture on my hair?
- What are the possible side effects of using developer and bleach?
- Can I mix developer and bleach without a bowl or brush?
- Is there a difference between permanent and semi-permanent developer and bleach?
- Is developer and bleach suitable for all hair types?
- Can you reuse leftover bleach and developer mixture?
- How do you fix bleach thats too thick?
- What happens if bleach sits too long before applying?
- Can you mix different bleach brands with any developer?
- How do you know when bleach mixture is expired?
- Conclusion
Key Takeaways
- The standard 1:2 ratio (one part bleach powder to two parts developer) works for most bleaching situations, but you’ll need to adjust based on hair type—fine or damaged hair needs a gentler 1:2.5 or 1:3 ratio, while coarse hair might require a stronger 1:1 mix for serious lift.
- Developer strength (10, 20, 30, or 40 volume) directly controls how much lift you’ll get and how fast it happens—20 volume is your workhorse for most jobs, 30 volume tackles 3-5 levels of lift on lengths, and you should always use lower volumes near the scalp to prevent burns and breakage.
- Processing time varies by hair type and should never exceed 30-45 minutes—check progress every 10 minutes and watch for warning signs like gummy texture, excessive heat, or snapping strands, which all mean you need to rinse immediately.
- Post-bleach care is non-negotiable for keeping your hair healthy—use bond-building treatments like Olaplex to rebuild broken protein links, skip heat styling for 72 hours, apply purple shampoo weekly to prevent brassiness, and deep condition regularly to restore what bleaching stripped away.
What is Developer and Bleach Used For?
Before you start mixing, you need to understand what these two products actually do to your hair. Bleach and developer work as a team, and each has a specific job in the lightening process.
Let’s break down how they work together to lift your natural color.
How Bleach Lightens Hair
Think of bleach as the supreme hair eraser—it doesn’t just lighten your color, it literally breaks down the pigment molecules inside each strand until they’re so small they can’t reflect color anymore.
This pigment removal happens through bleach penetration, which forces cuticle opening so the lightening agents can reach deeper into your hair.
You’ll see a color shift from dark to light as hair bleaching progresses, but the bleach to developer ratio you use controls how fast and effective that transformation becomes.
Role of Developer in Hair Coloring
Developer is the activator that makes bleach actually work—without it, that powder just sits there doing nothing. Mix them together, and the developer cracks open your hair’s protective cuticle layer, so the bleach can get inside and strip out pigment.
The developer chemistry creates the chemical reaction needed for bleach activation, and the volume you choose determines how aggressively it lifts color. That’s why getting your bleach-to-developer ratio right matters so much for pigment removal.
Common Uses in Hair Lightening
Now that you’ve got the chemistry down, you’re probably wondering where bleach and developer actually come into play—whether you’re going full platinum, adding highlights, or just correcting a color mishap. Here’s where you’ll actually use this duo:
- All-over lightening for dramatic transformations, like going from brunette to blonde
- Highlights and balayage to add dimension without coloring every strand
- Color correction when you need to lift out old dye before applying a new shade
- Root touch-ups to match regrowth to previously bleached lengths
- Pre-lightening dark hair before toner application for pastel or vivid colors
Getting your bleach-to-developer ratio right matters for every single one of these hair-lightening techniques—mess it up, and you’re looking at patchy results or unnecessary damage repair down the road.
How to Choose The Right Developer Strength
Developer strength isn’t a one-size-fits-all choice; it’s directly tied to how much lift you’re aiming for and where you’re applying it. The volume number tells you how aggressive the lightening will be, and picking the wrong one can leave you with patchy results or fried hair.
Let’s break down what each volume does and how to match it to your specific lightening goals.
Understanding Volume Numbers (10, 20, 30, 40)
Those numbers on your developer bottle—10, 20, 30, 40—aren’t random, they’re your control panel for how much lift you’ll actually get from your bleach. Higher volume levels mean stronger lifting power and faster processing times.
Think of 10 Vol as a whisper, 20 Vol as your workhorse for most bleaching techniques, 30 Vol for serious lift on lengths, and 40 Vol as the heavy hitter you’ll rarely need.
Getting your developer strength right directly impacts your bleach to developer ratio success.
Matching Developer Strength to Hair Goals
Your hair goal—whether it’s a subtle sun-kissed glow or a platinum transformation—dictates exactly which developer volume you need to grab off the shelf. Matching developer strength to your hair goals keeps you in control, prevents unnecessary damage, and gets you predictable lift every single time.
- Going 1-2 levels lighter? Stick with 20 Vol on roots and fine hair for gentle lift and damage control
- Chasing 3-5 levels of lift? Use 30 Vol on lengths, but watch hair porosity closely to avoid over-processing
- Dark to blonde transformation? Expect multiple sessions with strategic bleach and developer mixing, never rushing platinum
- Regrowth touch-ups? Always use 20 Vol near the scalp—higher volumes risk burns and breakage
- Fragile or previously colored hair? Lower developer strength protects integrity while the bleach to developer ratio does the heavy lifting
Recommended Brands and Formulas
When you’re mixing bleach and developer, pairing the right formulas makes all the difference in your color results. Ion Brilliance Cream Bleach with matching developer is a go-to for at-home lighteners, while L’Oreal Quick Blue Powder Lightener remains budget-friendly and reliable.
For bond repair during lifting, Knight & Wilson PurePlex Bleach Kit and Olaplex No.1 protect hair structure. Always follow the recommended bleach to developer ratio—usually 1:2—for controlled, even lift without compromise. Understanding the correct bleach developer ratio is essential for achieving the desired color results.
What Ratio of Developer to Bleach Should You Use?
Getting the ratio right is the difference between a smooth, even lift and a patchy disaster. The standard 1:2 mix works for most situations, but your hair type and goals might need a tweak.
Here’s what you need to know about mixing bleach and developer in the right proportions.
Standard Mixing Ratios (1:2)
The golden rule in bleach mixing isn’t complicated—it’s a simple 1:2 ratio, meaning one part bleach powder to two parts developer. This standard formula works for most hair bleaching techniques because it creates the right consistency while opening the cuticle effectively.
Here’s what that looks like in practice:
- 1 scoop bleach powder + 2 scoops developer
- 30g bleach formulas + 60g developer types
- 1 oz bleach your hair powder + 2 oz developer to bleach ratio
- Always measure carefully—eyeballing throws off mixing techniques and safety precautions
This balanced blend gives you enough working time without drying out too fast.
Adjusting Ratios for Hair Type and Desired Lift
Not all hair plays by the same rules—fine strands respond differently than coarse ones, and lift levels matter just as much as hair texture.
For fine or damaged hair, you’ll want a gentler 1:2.5 or even 1:3 developer to bleach ratio to keep damage control front and center. Coarse, resistant hair might need a stronger 1:1 mix for serious lift levels, but that’s risky territory best left to pros.
When you’re working with healthy hair and chasing 3+ levels of lightening, stick with the standard 1:2 bleach strength paired with 30 volume developer. Understanding the right developer volume levels is essential for achieving the desired hair color lift.
Consequences of Incorrect Ratios
Get this wrong, and you’re not just wasting product—you’re walking into a minefield of brassy, patchy, or seriously damaged hair.
Here’s what happens when your developer-to-bleach ratio goes sideways:
- Too much developer dilutes bleach and developer strength, leaving you with uneven hair lightening and stubborn dark patches that won’t budge
- Too much bleach powder creates a thick paste that causes over-processing, scalp irritation, and brittle strands that snap like twigs
- Inconsistent mixing leads to color damage in some sections while others barely lift—think leopard print, but way less cute
- Wrong volume pairing with incorrect ratios fast-tracks hair breakage and chemical burns, turning your hair lightening safety plan into a disaster zone
Which Products Work Best for Mixing?
Not all bleach powders and developers are created equal, and picking the right combo can make the difference between a smooth lift and a disaster. You want products that lighten effectively without frying your hair, and ideally, ones that include some level of protection.
Here’s what works best when you’re mixing at home.
Top Bleach Powders for At-Home Use
Choosing the right bleach powder makes all the difference between a brassy disaster and salon-worthy blonde. For at-home results, look for dust-free formulas with bond-protecting technology to control bleach damage while maximizing lift.
Here’s how the top performers stack up for DIY bleaching safety:
| Bleach Powder | Lift Capability | Key Feature |
|---|---|---|
| 9+ | Up to 9 levels | Amino acids + wheat protein for hair resilience |
| L’Oreal Quick Blue | Up to 7 levels | Dust-free, widely available for consistent at-home hair care |
| Oligo Blacklight Extra Blonde | Up to 9 levels | Ionic bonding technology protects cuticle structure |
| 9 Powder Lightener | Up to 9 levels | Compatible with Plex additives, reduces breakage by 83% |
These hair bleach formulas pair perfectly with the correct developer-to-bleach ratio, giving you professional hair lightening tips without the salon price tag.
Recommended Developers for Best Results
Your bleach powder is only as good as the developer you pair it with, so you’ll want a formula that lifts evenly without frying your hair halfway through processing. Here’s what works best for reliable hair lifting and damage control:
- AGEbeautiful Ultra Bond Developer – Creamy consistency prevents bleach ratios from drying out mid-process
- Ugly Duckling Developer – Pairs perfectly with powder lightener for color correction without hotspots
- Wella Welloxon Perfect – Stabilized formula keeps bleach and developer active through full processing time
- Ion Sensitive Scalp Developer – Gentler option that still delivers lift when you’re working near regrowth
Bond-Building Additives to Minimize Damage
Beyond picking the right developer, you’ll want bond-building additives like Olaplex or formulas with Bond Protect to minimize damage control during bleaching. These additives work by restoring broken protein links in your hair, which directly improves breakage prevention and keeps your strands from turning into straw.
When you’re mixing your developer-to-bleach ratio, adding a bond repair treatment can boost hair strength by up to 15%, giving you serious additive benefits without compromising your lift. Think of it as insurance for your hair—you’re still getting the lightening power you need, but with built-in hair fortify protection that’ll help you maintain healthier, stronger hair post-bleach.
How to Safely Prepare for Bleaching
Before you mix anything, you need to set yourself up for success—and safety. The right tools and a few smart precautions will protect your hair, your skin, and your workspace from bleach damage.
Here’s what you need to gather and how to create a safe bleaching environment.
Gathering Tools and Non-Metallic Bowls
Before you even think about lifting color, you need to round up the right gear—and trust me, that mixing bowl matters more than you’d think. Always use a non-metallic bowl—plastic or glass works great—since metal can mess with the cosmetic chemistry and throw off your developer to bleach ratio.
Grab a digital scale for precise measuring, a tint brush, gloves, and sanitize everything before bowl preparation to keep your mixing techniques clean and reliable.
Protecting Your Skin and Workspace
Once your tools are lined up and ready, it’s time to make sure bleach stays where it belongs—on your hair, not your skin or countertop. Throw on nitrile gloves before you even open the developer, and drape an old towel over your shoulders for solid skin protection.
Work in a well-ventilated space—crack a window or flip on a fan—because chemical management gets dicey without fresh air.
Apply petroleum jelly along your hairline to prevent scalp sensitivity and stop bleach application from staining skin during processing.
Step-by-Step Guide to Mixing Developer and Bleach
Getting your bleach mixture right comes down to three things: measuring accurately, mixing thoroughly, and steering clear of rookie mistakes. You’ll need the right tools in hand before you start, and knowing how to blend everything into a smooth, lump-free paste makes all the difference.
Let’s walk through each step so your mixture works exactly the way it should.
Accurate Measuring and Tools
Precision isn’t just a good idea when measuring bleach and developer—it’s the difference between gorgeous blonde and a patchy disaster. You’ll need digital scales or measuring cups to nail that 1:2 ratio every time.
Grab non-metallic mixing bowls (metal reacts with bleach), application brushes for even saturation, and precision tools to keep your bleach wash consistent. These basics make hair lightening predictable instead of stressful.
Proper Mixing Techniques for Smooth Consistency
Mixing isn’t just stirring—it’s about getting a lump-free, creamy blend that spreads like butter and lightens evenly.
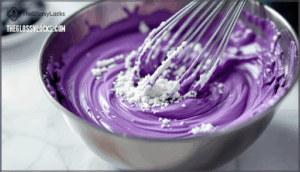
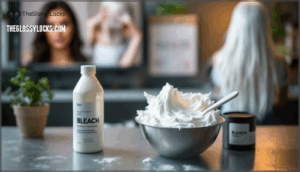
Pour your developer into a non-metallic bowl first, then slowly add your powder lightener while whisking constantly. Keep stirring until you’ve got a smooth, yogurt-like consistency—no clumps means better hair saturation and predictable hair lightening every time.
Common Mixing Mistakes to Avoid
Most bleaching disasters don’t happen from bad products—they happen from three easily avoidable mixing mistakes that throw off your entire formula. Using incorrect ratios makes the bleach too runny or too thick, overmixing introduces air bubbles that cause uneven lifting, and adding developer to powder instead of the reverse creates clumps.
These developer errors lead directly to hair breakage and hair damage prevention nightmares—so measure carefully, stir gently, and always pour powder into liquid for smooth, safe bleaching hair results.
Best Practices for Applying Bleach Mixture
Mixing your bleach is just the beginning—how you apply it makes all the difference between patchy, uneven color and a gorgeous, consistent lift. The way you section, saturate, and strategize your application will determine whether you end up with salon-worthy results or a DIY disaster.
Let’s walk through the best practices that’ll help you apply your bleach mixture like a pro.
Sectioning Hair for Even Application
Think of sectioning as creating a roadmap—without it, you’re basically working blind and hoping for the best. Proper hair sectioning guarantees even saturation and prevents those dreaded patchy results that scream "DIY disaster." Here’s how to break it down:
- Divide into four quadrants using horizontal and vertical parts from ear to ear and forehead to nape
- Create smaller subsections within each quadrant (about ½-inch partings) using clip techniques for strand division control
- Work systematically through each layer, securing unbleached sections away to maintain your bleaching hair workflow
This layering method isn’t just about organization—it’s your best defense against hair damage and uneven bleach wash results.
Saturation Tips for Consistent Results
You could drench every strand in bleach and still end up with streaky, uneven color if you’re not saturating correctly—coverage isn’t just about quantity, it’s about technique.
Use your brush to work the developer and bleach mixture through each subsection from both sides, confirming bleach penetration reaches every angle. Apply generously enough that hair looks thoroughly coated—skimping here creates inconsistent lightening and ruins your platinum blonde dreams before you even get to hair toning.
Where to Start Application (Roots Vs. Lengths)
Start with the lengths—yes, really—because your roots process faster thanks to body heat, and applying bleach there first is a one-way ticket to hot roots and regret.
Work your way through the lengths and mid-lengths first, prioritizing sectioning techniques that keep your hair color application organized:
- Apply bleach mixture to ends first, where hair’s most porous and resistant
- Move toward mid-lengths, maintaining thorough hair saturation throughout
- Save root application for last (usually 10-15 minutes before processing ends)
This length prioritization strategy prevents uneven platinum blonde results and keeps regrowth management under control during the bleaching process.
How Long Should You Process Bleach?
Processing time can make or break your bleach job—leave it on too long, and you’re looking at fried hair, but rinse too early and you won’t get the lift you need. The key is checking your hair every 10 minutes and knowing exactly what you’re watching for.
Let’s break down how to time it right, what to expect based on your hair type, and the warning signs that tell you it’s time to rinse.
Monitoring Hair Lightening Progress
Watching your hair lighten is a bit like monitoring a cake in the oven—you can’t just set it and forget it, or you’ll end up with a burnt disaster instead of the golden result you were hoping for.
Check your lift levels every 10 minutes during processing time. Look at your color results closely, focusing on damage control signs like stretching or brittleness.
This hair check helps you rinse at the right moment for safe hair lightening without over-bleaching.
Recommended Processing Times by Hair Type
Different hair types react to bleach at their own pace, so timing matters just as much as your developer strength. Fine hair usually processes in 10-20 minutes, while thicker, coarser strands might need 30-45 minutes for the same lift. Hair texture and hair porosity directly affect how fast you’ll see results, and ignoring these factors can lead to hair damage or uneven color.
Here’s a quick breakdown by hair type:
- Fine or blonde hair: 15-20 minutes (watch closely for hair breakage prevention)
- Medium brown hair: 20-40 minutes depending on desired lift
- Dark brown or black hair: 30-45 minutes, sometimes requiring multiple sessions
- Previously bleached hair: 20-30 minutes max—damaged hair lifts faster and needs shorter processing limits
Always check every 10 minutes during bleaching to stay within safe processing limits and avoid hair breakage. A strand test before you start gives you the best read on bleach timing for your specific hair type.
Signs of Over-Processing and When to Rinse
Over-processing sneaks up fast, and catching it early is the difference between bright, healthy hair and fried, gummy strands that snap off in your hands. Watch for these warning signs: a sticky, mushy texture when you touch the hair, excessive heat on your scalp sensitivity areas, or that telltale chemical smell getting stronger. Rinse immediately if you see any of these—damage control starts with rinse timing, not wishful thinking.
| Warning Sign | What It Means | Action Needed |
|---|---|---|
| Gummy, stretchy texture | Hair bonds breaking down | Rinse now—you’re past safe bleaching limits |
| White or translucent ends | Severe hair damage from over toning | Stop processing; focus on hair care after bleaching |
| Burning scalp sensation | Chemical irritation, possible scalp sensitivity | Rinse with cool water immediately |
| Hair snapping when wet | Hair breakage from weakened structure | End session; prioritize hair breakage prevention treatments |
| Uneven patchiness | Needs color correction, not more processing | Rinse and assess—don’t keep bleaching |
What to Do After Bleaching Hair
Once your hair reaches the right level of lift, your work isn’t over—what happens next determines whether you end up with healthy, beautiful results or a damaged, brassy mess.
The minutes after rinsing are just as important as the bleaching process itself. Here’s how to finish strong and protect everything you just worked for.
Rinsing and Neutralizing Bleach
Once your hair hits that pale yellow shade you’ve been watching for, it’s time to rinse immediately—waiting even a few extra minutes can push bleach from lightening into damaging.
Here’s how to manage bleach removal properly:
- Use cool water to rinse thoroughly until water runs completely clear, preventing scalp sensitivity prevention issues
- Apply a neutralizing shampoo to restore hair pH balance and stop the bleaching process
- Gently massage while rinsing to verify complete bleach wash methods coverage
- Follow with a deep conditioning hair treatment for post bleach care
- Pat hair dry softly—no rough towel-rubbing that stresses fragile strands before color locking
Applying Toner for Desired Shade
Toner is the bridge between brassy yellow and the cool, ashy blonde you’ve been picturing—skip it, and you’ll look like a highlighter instead of a hairstylist’s dream.
Toner selection depends on your hair’s current shade and hair porosity after bleaching—choose purple-based formulas for yellow tones, blue for orange undertones in your color correction process.
| Current Hair Tone | Toner Type Needed |
|---|---|
| Pale yellow | Violet/purple toner |
| Golden yellow | Ash/blue-violet blend |
| Light orange | Blue-based toner |
| Brassy warm tones | Cool ash toner |
Apply your hair toner on damp, towel-dried hair using 10 or 20 volume developer—start at your regrowth where hair color processes faster, then work through your lengths using proper toning techniques for even shade-matching results.
First Wash and Conditioning Tips
After rinsing away the bleach, your strands are fragile, thirsty, and sitting at their most vulnerable—what you do in that first wash can either lock in your results or send you straight into damage control mode.
Use sulfate-free, gentle shampoos to avoid stripping moisture balance, then follow with deep conditioning hair masks or hair treatment options that rebuild bonds.
Your hair care routine now becomes your lifeline—skip the heavy styling and focus on restoring what bleaching took away.
How to Care for Hair Post-Bleach
You’ve just put your hair through a lot, and now it needs some serious TLC to stay healthy and vibrant. The work doesn’t stop once you rinse out the bleach—what you do in the days and weeks after matters just as much.
Here’s how to protect your freshly lightened hair and keep it looking its best.
Using Bond-Building and Repair Treatments
Bond repair treatments are non-negotiable after bleaching—they literally rebuild the broken disulfide bonds that hold your hair together. Think of them as structural reinforcements for weakened strands, boosting tensile strength by up to 82% and preventing the breakage that comes with damage control neglect.
- Olaplex or K18: Apply bi-weekly for protein rebuilding and hair strengthening—these bond protect formulas integrate into your hair’s keratin matrix
- AGEbeautiful Ultra Bond treatments: Use weekly on fragile, highly processed hair to increase moisture retention by 33%
- Leave-in bond builders: More effective than shampoos due to longer exposure time, reducing visible split ends by 45% after three months
- Consistency matters: Peak trichology and hair health benefits appear after 4–6 weeks of regular hair treatment options
- Pair with hydrating masks: Combine bond repair with deep conditioning for all-encompassing hair care and maintenance post-bleach
Preventing Breakage and Dryness
Breakage and dryness don’t just happen overnight—they’re the slow-burning aftermath of weakened cuticles and stripped moisture that’ll haunt you weeks after bleaching if you don’t lock in protective habits right now.
Skip heat styling for 72 hours post-bleaching to prevent further damage control emergencies. Use silk pillowcases to reduce friction-induced breakage repair needs.
Deep condition weekly with bond protect formulas, focusing on hair moisture and strengthening. Your trichology and hair health depend on consistent care and maintenance, not one-time fixes after developer and bleaching sessions.
Maintaining Tone With Purple Shampoos
Purple shampoo isn’t just a trendy bathroom accessory—it’s your weekly insurance policy against the brassy, yellow undertones that creep back into bleached hair like uninvited guests.
Use it once or twice weekly for tone correction and brass prevention—the violet toning agents neutralize unwanted warmth in blonde hair.
Lather for 3-5 minutes, focusing on color maintenance after bleaching, and you’ll keep that salon-fresh hair color correction looking intentional, not accidental.
Frequently Asked Questions (FAQs)
How long should I leave the developer and bleach mixture on my hair?
Most hair can tolerate 30 to 40 minutes max with developer and bleach before risking serious damage. Check your color lift every 10 minutes—blonde hair shows progress faster than darker shades, and overlapping bleach onto previously lightened sections can cause breakage even within safe processing limits.
What are the possible side effects of using developer and bleach?
Bleaching can cause hair breakage, scalp irritation, and dry texture if misused. Brittle strands, color damage, and chemical burns are possible with improper developer ratios or overprocessing.
Always use bond protect additives with powder lightener to minimize damage.
Can I mix developer and bleach without a bowl or brush?
Think of mixing bleach like baking a cake—you wouldn’t skip the bowl and whisk, right? Technically possible, but you’ll regret it.
Without a non-metallic bowl and brush, you risk uneven application, chemical burns from hand application, and wasted product. Always use proper tools.
Is there a difference between permanent and semi-permanent developer and bleach?
Developer volume doesn’t come in "permanent" or "semi-permanent" versions—it’s all the same hydrogen peroxide. What changes is the dye formula itself.
Permanent Hair Dye opens your cuticle with Developer and deposits Color permanently. Semi Dye just coats your hair without lifting.
Powder Lightener (bleach) always needs Developer for Bleaching, regardless of Bleach Types. Hair Damage risk stays consistent across all Toning and lightening processes.
Is developer and bleach suitable for all hair types?
Not all hair types manage developer and bleaching equally. Fragile strands with high porosity levels face greater damage risk, while coarse hair texture often tolerates lifting better.
Bond protect formulas in powder lightener help minimize breakage across all types.
Can you reuse leftover bleach and developer mixture?
No, you can’t reuse leftover bleach mixture. Once powder lightener and developer mix, they start reacting immediately.
The mixture loses strength within minutes and becomes ineffective. Always mix fresh bleach for each session to avoid uneven lightening and wasted effort.
How do you fix bleach thats too thick?
If your mixture turns out like cake batter, just add more developer—a teaspoon at a time—until it reaches a creamy yogurt consistency.
Thick bleach won’t spread evenly, causing patchy lightening and wasting powder lightener.
Proper bleach dilution fixes mixing errors instantly without compromising lift power.
What happens if bleach sits too long before applying?
If your bleach mixture sits too long, oxidation kicks in and the chemical instability weakens its lifting power.
The developer loses potency, reducing bleaching effectiveness and potentially causing uneven lightening or brassiness when applied.
Can you mix different bleach brands with any developer?
Yes, you can mix different bleach brands with any developer—bleaching chemistry is universal. Just stick to the 1:2 ratio, confirm bleach compatibility with 20-30 volume developer, and avoid mixing safety concerns by checking consistency before application.
How do you know when bleach mixture is expired?
Once opened, your mixture has minutes—not hours. Spot these expiration signs: weird separation, foul smell, or loss of that creamy consistency. Mixture freshness matters for safe bleaching results.
Conclusion
Measure twice, cut once—that old adage applies perfectly when you’re learning how to mix developer and bleach. The difference between beautiful, even lightening and patchy disaster comes down to precision: accurate ratios, the right developer strength, and controlled processing times.
You’ve got the technical knowledge now, so trust your measurements, watch your timing, and don’t rush the process. When you respect the chemistry, your hair will show it—healthy, lifted, and exactly the shade you envisioned.
- https://mirellamanelli.com/best-hair-bleach-on-dark-hair-ranked-in-2025/
- https://www.reddit.com/r/FancyFollicles/comments/1itnv3z/bleaching_my_hair_at_home_for_the_first_time_need/
- https://www.youtube.com/watch?v=uPcXbp--8us
- https://us.wella.professionalstore.com/en-US/blog/hair-color/2025-hair-color-trend-report
- https://www.cosmoprofbeauty.com/hair-color/bleach-lighteners


