This site is supported by our readers. We may earn a commission, at no cost to you, if you purchase through links.

Your shower caddy crashes to the floor at 6 a.m., and suddenly shampoo bottles are everywhere. It’s one of those small annoyances that feels bigger than it should—mostly because it keeps happening no matter what you try.
The real problem isn’t the caddy itself. It’s usually a slippery pipe, too much weight on one side, or a suction cup that never had a fighting chance against a wet tile wall.
A few targeted fixes—hose clamps, zip ties, or a smarter mounting spot—can stop the falling for good and keep everything exactly where you left it.
Table Of Contents
Key Takeaways
- A slippery pipe, too much weight, or a wet wall is almost always the real reason your caddy keeps falling—fix the root cause and the problem stops.
- Hose clamps and zip ties are your most reliable options: position them just below the showerhead neck, pull them tight, and check them monthly for rust or cracking.
- Suction cups only hold when the tile is bone-dry, clean, and smooth—press them with petroleum jelly around the rim and don’t load the caddy for 24 hours.
- Keep your heaviest bottles low and centered, and don’t hang the caddy anywhere near direct spray or on a sloped wall section.
Why Shower Caddies Keep Falling

Your shower caddy doesn’t fall by accident — something specific is causing it. A few common culprits show up again and again in most bathrooms. Here’s what’s actually working against you.
Understanding those culprits — from soap scum buildup to poor ventilation — is the first step, and keeping your shower caddy rust-free long-term comes down to fixing the environment, not just the hardware.
Slippery Showerhead Neck
The showerhead neck is often the main culprit. Most necks have chrome or coated surfaces that turn slick the moment soap film builds up.
Constant water spray and heat softening the material cause your caddy to lose its grip fast.
A hose clamp, zip tie, or dab of petroleum jelly can restore that friction quickly. choose rust‑proof clamps help avoid corrosion in humid environments.
Wet Wall Surfaces
Wet walls are just as sneaky. Even between showers, moisture retention keeps tile surfaces damp enough to kill a suction cup’s grip.
Ceramic tile resists water well, but tile grout wicking through cracked grout lines quietly undermines any mount.
Clean your tile regularly, and seal porous surfaces so suction cups and nonslip mounting hardware actually have something solid to hold onto.
Loose Caddy Fit
A loose fit is sneakier than it sounds. If your caddy wiggles even slightly on the showerhead neck, every movement sends it sliding down.
- A loose hook catches nothing to hold
- Plastic fittings warp with heat over time
- Humidity slowly loosens screws and anchor points
- Narrow arms reduce contact and allow wobble
- Mismatched sizing creates a fit gap instantly
Too Much Product Weight
A caddy that wobbles from a loose fit isn’t the only culprit. Too much product weight can quietly push any caddy past its limit.
Most standard caddies have a weight limit of around 20 lbs — and a shelf full of shampoo, conditioner, and body wash adds up faster than you’d think.
Overloading your shower caddy causes sagging, and sagging causes sliding.
Uneven Shower Walls
Even a perfectly secured caddy can fail if your shower walls aren’t flat. A bowed or sloped surface tilts the caddy forward, and no clamp or suction cup can fully compensate.
Watch for these common wall problems:
- Visible bowing or curves that misalign brackets
- Uneven tile edges that catch fasteners at odd angles
- Hidden dips under paint or waterproofing coats
Wall surface prep and simple tile leveling solutions — like adhesive shims or adjustable mounting feet — can restore flat contact and keep your caddy stable.
Choose The Right Caddy Spot

Where you hang your caddy matters just as much as how you hang it. A bad spot sets you up for problems no clamp or rubber band can fully fix. Here are the key placement rules to get it right from the start.
Avoid Direct Water Spray
Where you hang your caddy matters more than you think. Direct water spray is one of the sneakiest reasons suction cup adhesion fails — constant moisture weakens mounting pads and loosens clamps over time.
Angle your showerhead 15 to 30 degrees away from the caddy. That simple adjustment keeps moisture barriers intact and helps prevent falling before it starts.
Use Smooth Tile Areas
Smooth tile is your best friend here. Non-porous glaze gives suction cups and mounting hardware a clean, stable surface to grip — textured or bumpy walls simply won’t hold.
- Tile surface prep: clean with isopropyl alcohol and dry completely
- Stay 2 inches from grout lines to avoid uneven contact
- Mount only on smooth nonporous surfaces — no cracks or chips
- Always check load rating before hanging products
Check Showerhead Clearance
Before you mount anything, measure your showerhead neck height — it should sit at least 60 inches from the floor. Keep 6 inches of clear space directly below the head so the caddy doesn’t block your spray path.
If you have an adjustable handheld head, extend it fully first and confirm it clears the caddy’s top shelf without hitting it.
Keep Weight Centered
Think of your caddy like a seesaw — weight distribution on caddy matters more than most people realize. Place your heaviest bottles, like conditioner and shampoo, on the lower shelves and toward the center.
Load your heaviest bottles low and centered — a balanced caddy grips the wall and stays put
This stable center placement keeps your caddy from tilting and helps it grip the wall more evenly, which goes a long way to keep your shower caddy from falling off.
Avoid Sloped Wall Sections
A sloped shower surface works against you before you even hang anything. If your wall angles even slightly, your caddy will naturally pull away from it over time.
- Do a quick Wall Angle Assessment before mounting
- Skip sloped sections for any suction cup or adhesive suction technique
- Use Adjustable Mounting Brackets if flat spots aren’t available
- Plan your Drainage Path Planning to avoid water pooling behind the caddy
Secure It With Hose Clamps
A hose clamp is one of the most reliable ways to stop a shower caddy from sliding down the pipe. It wraps around the showerhead neck and holds the caddy firmly in place, even when things get wet. Here’s how to use one the right way.
Match Clamp to Pipe

Start by measuring your showerhead neck with a ruler or calipers to get the exact pipe outer diameter. This tells you which clamp size to buy. A clamp that’s too loose won’t grip — and too tight can crush the fixture.
Choose an adjustable clamp range that matches your pipe snugly, and look for rubber liner protection inside the clamp to keep chrome safe while you tighten the clamp.
Use Rust-resistant Clamps

Once you’ve matched your clamp size, the next step is material.
Rust-resistant clamps — stainless steel grade 304 or 316 — won’t corrode in a humid shower.
Standard steel clamps can lose up to 50% of their holding strength once rust sets in, which means your caddy starts falling again fast.
Rustproof hose clamps keep that grip locked in for years.
Tighten Behind Caddy Hook

Once you have a rust-resistant clamp in place, tighten the behind caddy hook so it sits flush against the showerhead neck with zero wobble. Use narrow pliers for a final quarter-turn after hand-tightening. Follow this simple Hook Tightening Method:
- Clean the mount with isopropyl alcohol
- Hand-tighten first, then add a quarter-turn
- Recheck hook alignment monthly for caddy stability
Protect Chrome Fixtures

Once your clamp is tight, protect the chrome beneath it. Wrap a small piece of rubber or felt padding between the clamp and the fixture before tightening. This simple buffer provides scratch protection and keeps the chrome finish intact.
After installing, wipe the area dry and apply a chrome protector wax to guard against moisture and rust prevention in humidity.
Check Monthly for Corrosion

Once a month, give your clamp a quick look. Check for any surface pitting, rust spots, or coating wear on both the clamp and the showerhead neck. Keep a simple corrosion log — just a note on your phone with the date and what you saw. Catch a corroded bracket early and replace it before it fails.
Stop Slipping With Zip Ties

Zip ties might seem like a garage fix, but they work surprisingly well in the shower. They’re cheap, easy to use, and they won’t let your caddy budge once they’re locked in place. Here’s how to do it right.
Choose Heavy-duty Zip Ties
Not all zip ties are built the same. For a falling shower caddy, you need heavy-duty strength — specifically nylon zip ties rated at 120 to 175 pounds tensile strength.
- UV resistant ties won’t crack in humid showers
- Heavy-duty nylon stays flexible from cold to hot
- Multiple lengths let you find the right fit
- Plastic zip ties won’t rust or corrode
- Ideal for reliable caddy stabilization
The zip tie method only works when you use a strong enough zip tie.
Loop Around Showerhead Neck
Once you’ve got the right zip tie, it’s time to wrap them around the showerhead neck. Thread the tie just below the head, where the neck narrows slightly. This spot gives the best locking grip and keeps the caddy from sliding down.
| Step | What to Do |
|---|---|
| 1 | Measure your showerhead neck diameter |
| 2 | Thread the zip tie fully around the neck |
| 3 | Slide the tip through the clasp locking mechanism |
| 4 | Check neck loop materials for flexibility and fit |
Pull Tight for Grip
Now pull the zip tie firmly until it locks. The pull tight mechanism works by constricting under tension — the harder you pull, the stronger the grip.
Smooth showerhead surfaces need extra force, so don’t stop at snug. You want zero wobble.
Give the caddy a firm tug downward to test it. If it shifts even slightly, tighten more.
Trim Excess Plastic
Once the zip tie is locked, that dangling tail is more than an eyesore — it’s a snag waiting to happen. Trim the excess plastic flush using a sharp hobby knife or fine-tooth blade.
- Score before snapping to avoid jagged edges
- Sand any burrs smooth with a fine-grit sponge
- Keep the trim uniform behind the mounting area to maintain friction grip
Replace When Brittle
Even a brand-new zip tie won’t last forever in a steamy shower. Heat and moisture make plastic brittle over time.
When a tie starts to crack or feels stiff, replace it immediately — a snapped tie means your caddy drops. Check monthly and swap any that show visible cracking to keep your grip strong.
Improve Grip With Rubber Bands

Rubber bands might be the simplest fix you haven’t tried yet. A few bands wrapped around the showerhead pipe can stop your caddy from sliding without any tools or hardware. Here’s how to do it right.
Wrap Pipe Before Hanging
Before hanging your caddy, wrap the showerhead pipe with closed-cell polyethylene foam insulation. This creates a cushioned, grippy surface that locks the caddy hook in place.
Use ½ to ¾ inch thick foam and start at the pipe base, wrapping upward with 50% overlap to seal any gaps. Press firmly and secure the ends with weatherproof adhesive tape.
Use Two or Three Bands
Once the foam is in place, add two or three rubber bands over the pipe for extra grip.
Two bands handle lightweight caddy loads well. For heavier caddies, three bands spaced evenly around the neck give triple band stability and stop the caddy from falling. Space them apart to distribute tension evenly across the hang point.
Create a Friction Barrier
Those rubber bands aren’t just holding on — they’re building a friction barrier between the pipe and your caddy hook. Rubber grips wet metal far better than smooth plastic ever will.
That’s the whole idea: create a textured contact zone that resists sliding under load, even when everything’s soaking wet.
Replace Stretched Bands
Stretched bands stop gripping long before they snap. Once a band loses its elasticity, your caddy can shift under even a light load.
- Silicone bands outlast natural rubber in wet showers
- Replace bands every 6 to 12 months with daily use
- Swap in pairs to keep tension even on both sides
- Clean bands monthly to slow soap-scum buildup
Best for Lightweight Caddies
Most rubber bands work best with lightweight caddy designs — frames made from aluminum or slim plastic that weigh between one and two and a half pounds. If your caddy has a compact shelf layout and ventilated drainage slots, it won’t pull bands out of shape.
Heavier caddies need a hose clamp or suction cups instead.
Make Suction Cups Hold Longer

Suction cups can hold strong — but only if you set them up the right way from the start. A few simple steps before you even hang the caddy make all the difference. Here’s what to do to keep those cups locked in place.
Clean Tile Before Mounting
Think of your tile surface as a handshake — the cleaner it is, the stronger the grip. Before you even think about sticking anything, clean the tiles first. Here’s how:
- Vacuum off loose dust and debris
- Wipe with a damp microfiber cloth
- Apply a pH-neutral tile cleaner to remove soap scum and residue
This prep step maximizes adhesive strength and prevents air pockets from forming under the suction cup.
Dry Surface Completely
Once the tiles are clean, dry every surface completely before pressing anything on. Even a faint moisture sheen will break the suction seal.
Wipe the tile with a lint‑free cloth and wait at least 15 minutes for air circulation to do its work. High moisture in the shower stall is the number one reason adhesive strength fails fast.
Add Petroleum Jelly Seal
A thin layer of petroleum jelly around the suction cup rim works like a soft gasket, filling tiny surface gaps that let air sneak in.
Here’s how to apply it right:
- Dab a thin, even film around the cup’s outer edge only
- Avoid the center — excess buildup attracts soap scum
- Test compatibility on a small patch first
- Reapply after cleaning to keep the seal active
Wait 24 Hours Before Loading
Once the petroleum jelly is applied, leave the cup for 24 hours before placing anything on the caddy. This Seal Development Period gives suction cups and moisture-resistant adhesives time to form a full vacuum bond.
| Step | What It Does |
|---|---|
| Hour 1–6 | Adhesive Cure Time begins; bond starts forming |
| Hour 6–12 | Air pockets settle under the cup |
| Hour 12–18 | Weight Distribution Wait stabilizes pressure |
| Hour 18–24 | Seal reaches full strength |
| After 24 hrs | Safe to load items |
Early Detachment Prevention starts with patience — rushing this step is the most common reason suction cups fail on the first day.
Re-press Cups After Showers
Every shower loosens suction cups a little — steam, splashes, and shifting weight all work against the seal. That’s why an immediate re-press after each shower matters.
Unload the caddy first, then use the center pressure technique: push firmly in the middle to force out air pockets and restore the vacuum.
Cold, wet walls make rubber stiffer, so dry the surface before pressing.
Top 3 Shower Caddy Fixes
Some fixes work better than others, and three products stand out for actually keeping your caddy in place. Each one covers a different weak point — slipping, sliding, or poor suction. Here are the top picks worth trying.
1. EesTeck Adjustable Stainless Steel Duct Clamp
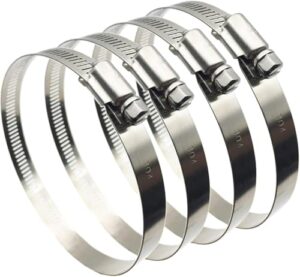
The EesTeck Adjustable Stainless Steel Duct Clamp is one of the most reliable ways to stop your caddy from sliding down the showerhead neck. Made from 304 stainless steel, it won’t rust or weaken in a humid shower.
The clamp adjusts from 3.5 to 4 inches and tightens with a standard screwdriver. Just position it behind your caddy’s hook and snug it down.
Each pack includes four clamps, so you’ll have spares ready.
| Best For | Anyone who needs a sturdy, rust-proof clamp for HVAC ducts, automotive hoses, marine fittings, or similar connections in wet or high-humidity environments. |
|---|---|
| Material | 304 Stainless Steel |
| Color | Silver |
| Package Quantity | 4 clamps |
| Indoor Use | Yes |
| Outdoor Use | Yes |
| Reusable | Yes |
| Additional Features |
|
- Made from 304 stainless steel, so it holds up in moisture-heavy settings without rusting or corroding over time.
- Easy to adjust between 3.5" and 4" with just a regular flat-head screwdriver — no special tools needed.
- Comes in a four-pack, so you’ve got extras on hand for other projects.
- Only works with a flat-head screwdriver, which some people find a little less convenient than Phillips.
- Maxes out at 4 inches, so if your hose or duct runs larger than that, you’ll need a different clamp.
- A few buyers have reported receiving fewer than four clamps, so it’s worth counting them when the package arrives.
2. Karoka 12 Inch Heavy Duty Zip Ties
If hose clamps feel like too much hardware, Karoka 12 Inch Heavy Duty Zip Ties are a simpler fix. Loop one around the showerhead neck, thread it through your caddy hook, and pull it tight. The 0.3-inch-wide nylon band grips firmly and won’t rust in a wet shower.
Each tie holds up to 120 lb tensile strength — far more than any caddy needs. Trim the tail once locked and you’re done.
| Best For | Anyone who needs a strong, no-fuss way to secure heavy items like fencing, shade cloth, or outdoor gear without dealing with bulky hardware. |
|---|---|
| Material | Nylon |
| Color | Black |
| Package Quantity | 100 ties |
| Indoor Use | Yes |
| Outdoor Use | Yes |
| Reusable | No |
| Additional Features |
|
- Four-tooth ratchet latch locks tighter than standard ties, so things actually stay put
- 120 lb tensile strength handles real-world heavy loads with plenty of headroom
- Nylon resists rust and chemicals, making them solid for wet or outdoor use
- Once locked, that’s it — you’ll need to cut them off, so they’re single-use only
- Black only, which is a problem if you rely on color-coding for organization
- Long-term sun exposure can weaken the nylon over time, so not ideal for permanent outdoor installs
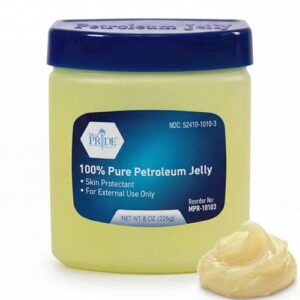
3. Med Pride Pure White Petroleum Jelly
Zip ties lock your caddy in place, but suction cups need a different trick. Med Pride Pure White Petroleum Jelly is the secret. Before pressing your suction cup to the tile, dab a thin layer of petroleum jelly around the rim. It creates an airtight seal that holds far better than bare plastic on tile.
Clean and dry the tile first, apply the jelly, press firmly, and wait 24 hours before loading anything onto the caddy.
| Best For | Anyone who needs a simple, no-fuss moisturizer or skin protectant for the whole family — from babies to adults. |
|---|---|
| Material | Petroleum Jelly |
| Color | White |
| Package Quantity | 1 jar |
| Indoor Use | Yes |
| Outdoor Use | Limited |
| Reusable | Yes |
| Additional Features |
|
- Pure, fragrance-free formula is gentle enough for sensitive skin and everyday use
- Works on pretty much everything — dry hands, cracked heels, chapped lips, minor cuts, and diaper rash
- Great value at $5.79 for an 8 oz jar that lasts a long time
- It’s greasy — expect residue on clothes, sheets, or anything it touches
- Won’t do much for serious skin conditions; it’s not a medicated treatment
- The occlusive barrier traps heat, so it’s not something you’d put on a deep or infected wound without checking with a doctor first
Frequently Asked Questions (FAQs)
Can shower caddies work with rainfall showerheads?
Yes, shower caddies can work with rainfall showerheads. Choose an open-wire caddy, place it outside the direct spray zone, and secure it with zip ties or rubber bands to keep it steady.
How do I stop caddy rust from staining tiles?
Rust stains sneak up on you. Dry metal parts after every shower and coat caddy joints with clear nail polish. Swap corroded hardware before it touches your tiles.
Are tension pole caddies more stable than hanging ones?
Tension pole caddies are more stable. They press between floor and ceiling, holding firm under 20–40 pounds. Hanging caddies shift easier and need more re-tightening over time.
Can I use a caddy on a glass shower door?
A glass shower door can absolutely hold a caddy. Over-door hangers hook over the top edge and need no drilling. Suction cups work on clean, dry glass too, but re-press them often.
How do I childproof a shower caddy safely?
Keep the caddy low and out of reach. Don’t overload shelves with sharp razors or heavy bottles. Secure it tightly so kids can’t pull it down.
Conclusion
Old-school hose clamps and a few zip ties—tools your grandfather probably kept in your workshop—turn out to be the most reliable way to solve a very modern bathroom headache.
Once you know how to prevent your shower caddy from falling, the fix takes minutes and holds for months.
Pick the method that fits your setup, secure everything properly, and your mornings stay quiet.
No more crashes, no more mess—just a shelf that stays put.