This site is supported by our readers. We may earn a commission, at no cost to you, if you purchase through links.

But don’t worry – mastering how to section hair for dying isn’t as hard as you may think. In this article, we’ll walk through the process step-by-step so you can get salon-worthy color from the comfort of your own bathroom (without breaking a sweat).
Table Of Contents
- Key Takeaways
- Do You Really Need to Section Your Hair Before Coloring It?
- How to Section Hair for Dyeing
- Benefits of Sectioning Hair Before Coloring
- How to Begin Applying Hair Color
- How to Section Short Hair for Color
- How to Section Hair to Dye Roots
- FREE How to Dye Your Hair at Home Guide
- Watch and Learn: How the Professionals Do It
- Parting Words
- Conclusion
Key Takeaways
- Proper sectioning is crucial for achieving even and professional results when dyeing hair.
- Start the sectioning process by parting the hair down the center and creating horizontal and vertical parting lines.
- Use the right products, such as color-safe shampoo and conditioner, for maintenance.
- Sectioning helps minimize damage, provides color control, and ensures consistent and even color coverage.
Do You Really Need to Section Your Hair Before Coloring It?
You may be wondering if it’s really necessary to take extra steps when coloring your hair at home – the answer is yes! Properly sectioning your strands ensures that you get an even, professional look with minimal damage.
There are a number of benefits to separating sections before dyeing, such as making sure each part gets evenly saturated and preventing overlapping color. Knowing the right techniques for sectioning also makes it easier to apply the dye in specific areas without getting too close or applying too much product on one area.
To ensure perfect results every time, start by creating horizontal and vertical parting lines with a tint comb or brush followed by clipping up lower sections so they don’t interfere while working on top parts.
For best results, use small clips instead of larger ones which can leave dents in wet hair after removal from heat styling tools like blow dryers or curling irons during the styling process afterwards.
Finally, follow these tips for regular maintenance: use color-safe shampoo and conditioner; avoid frequent washing; opt for lukewarm water over hot temperature settings; trim regularly to prevent split ends and damage caused by over processing colored tresses – all this will help you maintain a vibrant hue longer!
How to Section Hair for Dyeing
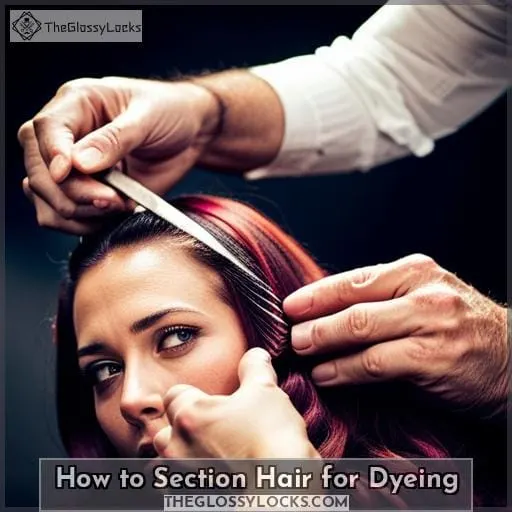
Dyeing your hair at home can be a fun and rewarding experience, but you need to ensure that the dye is applied evenly. To do this, begin by parting your hair down the center from forehead to neck. Then, part horizontally from ear to ear over the crown of your head and clip each section into two parts.
Create two more sections below the crown for a total of four sections before applying color for even coverage.
Part Your Hair Down the Center
Start by parting your hair down the center for an even application of color. Use a tint comb or brush and part from the forehead to the neckline. Hair length, face shape, and trends all influence how you section your hair when dyeing it at home.
Experiment with different techniques to find what works best for you! Face-framing layers are always on-trend; avoid over-parting for better results when coloring large sections of hair.
Part From Ear to Ear and Over the Crown
Draw a horizontal line from one ear to the other, then add a parting over your crown to create four distinct sections. Appreciate the masterpiece you’ve created! Parting your hair this way before coloring ensures even dye coverage and prevents overlapping colors.
Additionally, it keeps color away from damaged or fragile ends that may tangle during application.
Clip Into Two Sections
Divide the top part of your head into two sections and clip each one separately. This step is key to achieving even color application when dyeing hair at home. Clipping also helps keep the different parts neat and easy to manage when it’s time to apply hair color.
Create Two More Sections Below the Crown
Next, create two additional sections below the crown by making a vertical parting from the top of your head to your neck. This hair partitioning technique helps ensure even coloring when applying dye for an optimal result.
- Divide the lower half with horizontal partings.
- Clip each section separately to avoid mixing colors together.
- Use a tint comb or brush, being careful not to damage delicate strands while separating them.
- Ensure full coverage by properly distributing color from roots downwards towards ends of hair.
Dye application requires precision and attention to detail in order to achieve desired results.
Benefits of Sectioning Hair Before Coloring
Sectioning your hair before coloring is an important step for achieving even color distribution, a professional-looking end result, and preventing patchy color. Not only does it make the application process easier, but it also ensures that you can achieve the look you desire with minimal effort.
Even color distribution
To ensure beautiful, vibrant color all over your hair, make sure to comb and evenly distribute the dye throughout each section. Color placement is key for a natural-looking result. Use sectioning techniques to divide different sections of hair before applying the dye.
Utilize DIY coloring basics, such as brushing through each strand after application, for even coverage of color. Achieving an even distribution of color can easily be done with these simple steps. Start by dividing your hair into manageable sections and apply the product from roots then outwards until desired saturation is achieved.
Professional-looking end result
By properly sectioning your hair, you can achieve a professional-looking end result with even color distribution. Divide it into small sections to ensure precise coloring and application of the dye. DIY hair dyeing is easier when following this routine: create partitions from crown to neck, detangle knots before beginning, and clip up the lower parts for easy work on top.
This will help you get an accurate shade that looks like a salon job! Sectioning has lots of benefits – it allows for evenly distributed color while avoiding oversaturation in some areas or patchy patches elsewhere.
Prevents patchy color
By sectioning your hair before coloring, you can ensure a smooth and even finish that prevents patchy color – making it worth the extra effort.
Sectioning benefits include:
- Color consistency throughout each strand of hair
- Patch-free dyeing with precision application
- Pro-level results from this simple yet effective method of hair color application!
Master this technique for perfect coloring every time, starting at the roots and working outwards for an even coverage that won’t leave any patches or missed strands behind!
With these helpful tips in mind, you’ll be able to achieve salon-quality results at home with ease while avoiding costly mistakes that could damage your precious locks!
How to Begin Applying Hair Color
Now it’s time to get started with the fun part – applying your hair color! To ensure even coverage and prevent patchy results, start from the roots of each section.
When working on a particular section, be sure to use your tint comb or brush for precise application techniques.
- Divide up sections of hair so that they can be worked on separately and more easily obtained access too; this way you’ll have better control when dyeing them in small portions.
- Use a generous amount of dye at the base but not enough to make dripping messes as it travels down towards ends.
- Comb through after applying the product in order to evenly distribute the pigment throughout the strands.
It is essential that once finished with one area, move onto the next until the entire head has been completed following the same steps followed before.
Ultimately, what matters most here is proper partitioning prior to starting the process as well as utilizing the correct technique during application.
How to Section Short Hair for Color
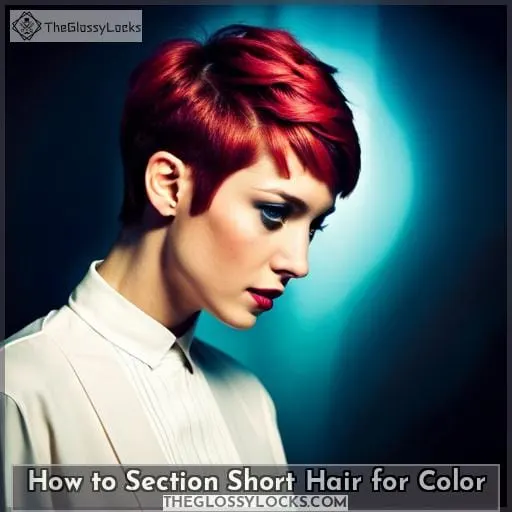
Ready to add some color to your short locks? Let’s start by sectioning them for a professional-looking finish. Sectioning helps ensure even coverage throughout your hair and prevents any streaks or patches of uncolored hair.
- Minimizes the risk of damage: Keeping sections separated allows you to apply dye with precision, which means less product on each strand and less potential harm from overworking it.
- Provides more control over color changes: Being able to work through smaller areas gives you more flexibility in terms of how dramatic the change will be and where those changes occur on the head.
- Makes touch-ups easier in future visits: If you plan on keeping up with regular salon appointments or want an easy way to revisit previous looks, having neatly defined parts makes it easier when returning to previously colored sections down the line.
To begin sectioning short locks at home, divide a horizontal parting from ear-to-ear using clips. Then, make vertical partings that cover all four quadrants (top left/right & bottom right/left). Once each part has been identified, secure them with clips so they will stay out of the way while applying dye.
This also provides better access when getting close to the roots without messing up other strands around them.
Start applying color at the root first, followed by the lengths and ends, working within the previously outlined partitions until finished.
How to Section Hair to Dye Roots
To get the most even color when dyeing your roots, start by creating a horizontal parting from ear to ear with a tint comb or brush and divide it into two sections.
To put this in perspective, about 75% of people who section their hair at home report achieving professional results.
Hair sectioning benefits:
- Allows for precise application of dye on specific areas without accidentally coloring other parts.
Root dyeing techniques:
- Start applying the color from the topmost part of the scalp towards the back for the best coverage.
- Avoid using too much product as that can lead to messy and uneven coverage.
Dyeing without sectioning is possible but requires extra precision while applying the dye, which can be difficult, especially if you’re not experienced enough. You might end up with patchy results due to overuse or underuse of the product in certain areas.
Achieving even color:
- If done correctly, sectioned hair will make sure all strands are colored evenly, resulting in a smooth finish throughout the entire head so you don’t have any missed spots.
DIY hair coloring tips:
- Always use an old shirt while dyeing your hair as dyes tend to stain clothes easily.
- Apply petroleum jelly along the edges before starting so they don’t become stained.
- Always remember that what works best varies from person to person!
FREE How to Dye Your Hair at Home Guide
Receive our free guide and get the professional-looking results you want when you color your hair at home. Hair sectioning is an essential part of achieving even, beautiful color application without patchy spots or streaks.
Our guide will help you understand the best methods for dividing up your hair before dyeing it to ensure a perfect result every time.
- Learn how to properly use tint combs and brushes.
- Find out which tools are necessary for successful DIY coloring.
- Get tips on preventing patchy color from unevenly applied dye.
- Discover techniques that make sure all strands receive adequate saturation.
- Follow step by step instructions for applying hair dye correctly.
Let us show you how to master this skill with ease! With our expert guidance, we can help create stunning looks in no time. No matter what type of look or style you’re trying to achieve, knowing how to divide up sections beforehand will give a much more polished finish than if done haphazardly.
Watch and Learn: How the Professionals Do It
See how the pros do it! Watch a video demonstration from experienced hair stylists who can show you the tricks of sectioning your hair for an even color application. Sectioning offers many benefits such as allowing different colors to be applied on separate sections, creating contrast or highlights, and minimizing damage due to over-processing.
Professional colorists have perfected their techniques so that they’re able to achieve amazing results with short or long hair.
- Create horizontal partings from ear-to-ear using a tint comb.
- Divide the top section into two parts and clip each.
- Make a vertical parting down the crown towards the neck.
- Clip the lower sections for easier work with the topside.
- Comb through the dye evenly at the roots, then the lengths/ends.
Maintaining vibrant color is also important after dyeing. Use products specifically designed for colored locks, avoid frequent washing with lukewarm water, and trim split ends regularly.
Parting Words
Ready to take your hair color game up a notch? Sectioning can be the key to achieving perfect, even color when you dye your hair at home.
Not only that, but sectioning also helps maintain vibrant color longer by ensuring all areas are evenly covered with product. With these tips and techniques in mind, there’s no reason why DIY hair coloring can’t give salon-quality results! So don’t hesitate – follow these steps for perfectly colored locks every time and unlock beautiful new looks without breaking the bank.
Conclusion
You may have heard that for a successful hair-dying experience, you should section your hair. And you’d be right! Sectioning your hair before you begin coloring is an absolute must if you want professional-looking results.
By sectioning your hair, you can ensure that the dye is evenly distributed, resulting in an even color without any patchy areas.
So don’t be fooled into thinking you can skip this step; it’s essential for the perfect hair-dying experience. Whether you have long or short hair, the same technique applies: part your hair down the center, then part from ear to ear and over the crown, and clip into two sections, creating two more sections below the crown.
So what are you waiting for? Get sectioning and achieve a sleek, salon-worthy hair-dyeing job!


