This site is supported by our readers. We may earn a commission, at no cost to you, if you purchase through links.
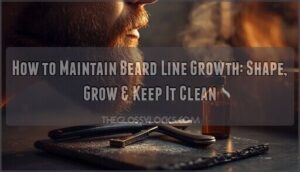
 Learning how to shave neck for beard properly creates the difference between looking scruffy and sharp.
Start by finding your natural neckline – place two fingers above your Adam’s apple and draw an imaginary line from ear to ear.
This becomes your guide. Use a quality trimmer or razor to remove everything below this line, working in smooth, controlled strokes.
Keep your head level while trimming to avoid creating an uneven line. The key is patience and precision – rushing leads to mistakes that take weeks to fix.
Master this technique and you’ll discover why professional barbers guard their neckline secrets so carefully.
Table Of Contents
- Key Takeaways
- What is a Beard Neckline?
- Why is a Beard Neckline Important?
- How to Find The Correct Neckline
- How to Trim Your Beard Neckline
- Frequently Asked Questions (FAQs)
- How often should I trim my beard neckline?
- Should I shave my neck before or after trimming my beard neckline?
- Can I use a regular razor to trim my beard neckline?
- How do I prevent irritation when trimming my beard neckline?
- Can I trim my beard neckline myself or should I go to a barber?
- How often should I trim my neckline?
- Can I fix an uneven neckline mistake?
- What causes razor burn on neck area?
- Should neckline curve match my jawline shape?
- How do I maintain neckline between barber visits?
- Conclusion
Key Takeaways
- Find your neckline by placing two fingers above your Adam’s apple and drawing an imaginary line from ear to ear – this becomes your trimming boundary
- Keep your head upright and level while trimming to avoid creating uneven lines that’ll take weeks to grow back and fix
- Use quality trimmers with adjustable guards, starting longer than your beard length and working down gradually for better control
- Trim every 3-5 days to maintain that sharp, professional look – consistency prevents the scruffy appearance that ruins your grooming efforts
What is a Beard Neckline?
Your beard neckline is where your facial hair meets your neck – think of it as your beard’s foundation.
Located roughly one to two finger widths above your Adam’s apple, this curved line runs from ear to ear beneath your jawline.
Getting this beard neckline definition right transforms a scruffy look into a sharp, polished appearance that frames your face perfectly.
A key step is identifying the neckline to avoid mistakes, ensuring a well-defined and polished look.
Why is a Beard Neckline Important?

Your neckline acts as the foundation that separates a polished gentleman from someone who just rolled out of bed.
Without proper beard neckline definition, even the most carefully groomed facial hair appears sloppy and unprofessional.
A well-defined neckline enhances facial symmetry, meets grooming standards, and prevents neck irritation while boosting your overall beard aesthetics and professional appearance.
For round faces, consider a curved neckline to add definition, which can significantly improve your overall beard aesthetics and contribute to a more professional appearance.
How to Find The Correct Neckline
Finding your perfect neckline doesn’t require guesswork or trial and error.
You’ll use specific measurement techniques and visual guides to establish the exact boundary where your beard should end and your clean-shaven neck should begin.
1. Tools of The Trade

Gathering the right beard grooming tools sets you up for neckline success.
You’ll need a quality beard trimmer with adjustable guards for precise cutting. Sharp beard scissors handle detail work and stray hairs.
A reliable razor creates clean edges when defining boundaries. Don’t forget shaving cream to protect your skin during the process.
Mirror importance can’t be overstated – good lighting reveals every angle. A boar’s hair brush is also useful for beard maintenance.
2. Head Upright

Proper posture matters when finding your beard neckline. Keep your head in a natural, upright position—don’t tilt it up or down. This neutral stance reveals the true neck beard grooming line where your Adams apple naturally sits.
Benefits of maintaining proper posture:
- Accurate visualization – See the real division between beard and neck
- Consistent results – Avoid uneven trimming from awkward angles
- Better skin tension – Natural positioning creates ideal surface for precise work
- Proper trimming angle – Upright benefits include cleaner blade contact
3. Vertical Line

With your head positioned correctly, you’ll now create vertical reference points for precise beard neckline shaping. Place your index finger on your Adam’s apple’s highest point. This becomes your starting anchor for the vertical line that extends upward toward your jawline on both sides of your neck.
| Step | Action | Purpose |
|---|---|---|
| Locate | Find Adam’s apple peak | Creates consistent starting point |
| Mark | Draw imaginary vertical line upward | Establishes Straight Lines for Sideburn Alignment |
| Extend | Connect to jawline corners | Maintains Beard Symmetry through Visual Extension |
These vertical guidelines serve as your roadmap for shave neck beard precision. The Visual Extension from your Adams apple creates Defining Edges that prevent common shaving neckline mistakes. This systematic approach to neck hair removal maintains your beard neckline in perfect symmetry on both sides.
For best results, maintain beard symmetry by frequently checking your reflection.
4. Corners of Your Beard

Identifying your beard’s corners requires precision for proper beard shaping. Start by locating your earlobe, then trace downward to find where it naturally meets your jawline.
Here’s how to nail corner shape symmetry:
- Touch your earlobe – Use this as your starting reference point
- Follow the natural curve – Trace down to where ear meets jaw
- Mark both sides – Verify defining beard edges stays even
This corner trimming technique creates the foundation for maintaining corner sharpness. These beard neckline corners establish your beard’s outer boundaries, preventing an unkempt appearance while supporting overall beard corner styles.
5. Horizontal Line

Now draw a horizontal line connecting the corner points you’ve identified. This beard neckline creates the foundation for proper neck shaving and beard shaping.
The line should curve naturally from ear to ear, maintaining horizontal accuracy while avoiding roundness that makes your jawline appear weak.
| Line Placement Factor | Correct Approach | Common Mistake |
|---|---|---|
| Neckline Symmetry | Equal distance from jawline on both sides | Uneven positioning creates lopsided appearance |
| Maintaining Straightness | Gentle curve following natural jaw contour | Too straight or overly curved lines |
| Clean Neck Shave Area | Clear boundary for beard trimming below line | Fuzzy, undefined edges that look messy |
This horizontal boundary determines where your clean neck shave begins and your beard ends. Proper line placement guarantees neckline symmetry and prevents the rounded, double-chin effect that poorly defined beards create.
6. Angular Corner

Now create the angular corner by drawing a diagonal line from your earlobe’s bottom to meet the horizontal neckline.
This corner definition creates sharp angles that frame your jawline perfectly.
Use steady strokes with your trimmer for angular symmetry on both sides.
The diagonal cut should blend smoothly where it meets your horizontal line, avoiding harsh shifts, and this technique is part of a broader corner blending technique that works across different style variations, giving your beard neckline professional definition.
7. Good Luck!

You’ve successfully mapped your perfect beard neckline shaving guide! Now it’s time to put your newfound knowledge into action with confidence and precision.
Here’s what comes next in your beard neckline trimming journey:
- Start slow – Take your time during your first attempt at beard neckline shaving to avoid mistakes
- Practice makes perfect – Your beard shaping skills will improve with each grooming session
- Know when to seek Professional Help – Don’t hesitate to visit a barber for guidance on complex beard neckline guide techniques
- Focus on Post-Shave Care – Use quality products for Maintaining Shape while Avoiding Irritation through proper Continued Grooming habits
Remember, mastering beard neckline trimming takes patience, but you’ve got the roadmap to success right at your fingertips.
How to Trim Your Beard Neckline
Now that you’ve found your perfect neckline, it’s time to trim it properly. The right technique makes the difference between a polished look and a messy mistake.
1. Using Trimmers

Now that you’ve mapped your neckline, grab your trimmer and adjust the guard settings. Start with a longer setting than your main beard length, then work down gradually. Use section trimming to maintain control – tackle small areas at a time rather than sweeping across your entire neck.
This approach guarantees clean separation between your beard and neck while creating that gradual taper you’re after. Many users find success by exploring different beard trimmer settings to achieve their desired look.
| Guard Setting | Purpose | Result |
|---|---|---|
| 2 settings shorter | Initial neckline cut | Clean baseline |
| 1 setting shorter | Blending shift | Smooth gradient |
| No guard | Final cleanup | Sharp definition |
| Variable lengths | Section work | Even coverage |
| Consistent passes | Professional finish | Uniform appearance |
Your beard trimmer becomes your precision tool here. Move against the grain for the cleanest cut, working from your center point outward toward each ear. The key to proper beard shaping lies in patience – multiple light passes beat one aggressive swipe every time.
2. Scissors and Razor

For scissors precision, trim any stray hairs extending beyond your mapped beard neckline.
Use small, controlled snips to maintain your beard shaping outline.
Switch to a sharp razor for clean shaving along the defined edge.
Choose blade types suited for sensitive neck skin to minimize irritation reduction concerns.
Work with steady razor angles, following the natural curve from ear to ear.
This method delivers crisp beard trimming results when electric tools feel too aggressive.
Proper maintenance guarantees quality scissor sharpness for ideal trimming results.
3. The Fading Neckline

A fading neckline creates seamless blending techniques for natural appearance.
Start with longer guard settings at your beard neckline’s bottom edge. Work upward using progressively shorter guards for tapered shift. This gradual lengths approach prevents harsh lines.
A key aspect is understanding <strong>beard neckline placement</strong> for a balanced look.
The neckline fade requires patience—take your time building these gradual layers. Regular fade maintenance keeps your beard neckline fading looking sharp and professional.
4. Mistakes Happen!

Even seasoned groomers slip up sometimes – trimming too high, creating uneven lines, or causing razor burn.
Don’t panic if you over-trim your beard neckline or develop ingrown hairs from shaving irritation.
These beard neckline mistakes happen to everyone.
To avoid these issues, it’s essential to prepare your skin properly before trimming.
Take breaks between sessions to prevent skin irritation and patchy growth from appearing worse than reality, which can lead to a more uneven appearance.
5. Other Tips for Neckline Trimming

Mastering these beard neckline guide fundamentals will transform your beard trimming experience.
Professional maintenance requires consistent attention to detail and proper technique.
- Quality tools matter: Invest in adjustable trimmers with sharp blades for precise beard neckline control
- Check for symmetry: Use mirrors to verify even lines and prevent lopsided results during maintenance
- Mind skin sensitivity: Apply beard products before trimming to reduce irritation and prevent ingrown hairs
- Regular neckline maintenance: Touch up every 2-3 days to maintain clean definition and professional appearance
- Follow shaving tips: Always trim dry hair with clean tools for superior beard maintenance results
Frequently Asked Questions (FAQs)
How often should I trim my beard neckline?
Slow and steady wins the race when maintaining your neckline. You’ll want to trim it every 3-5 days to keep things looking sharp and professional without letting it get scraggly.
Should I shave my neck before or after trimming my beard neckline?
You should trim your beard first, then shave your neck. Trimming establishes the neckline boundary, making it easier to see exactly where you need to shave for a clean finish.
Can I use a regular razor to trim my beard neckline?
Yes, you can use a regular razor for your beard neckline.
Manual razors work well for creating clean, defined lines below your neckline.
However, they require more caution than trimmers to avoid cuts and irritation, especially when trying to achieve clean lines.
How do I prevent irritation when trimming my beard neckline?
Use a sharp trimmer, shave with the grain, keep skin taut, and apply pre-shave oil. Take single gentle passes, avoid pressing hard, and moisturize afterward to prevent razor burn.
Can I trim my beard neckline myself or should I go to a barber?
You can definitely trim your beard neckline yourself with proper tools and technique.
Start with the two-finger rule above your Adam’s apple, use quality clippers, and take your time for best results.
How often should I trim my neckline?
Frequent maintenance makes for flawless facial hair. You’ll need to trim your neckline every 3-5 days to maintain that crisp, clean look that keeps your beard looking sharp and professional.
Can I fix an uneven neckline mistake?
Let the mistake grow out completely, then start fresh with proper measurements. Don’t try patching uneven spots—you’ll likely make it worse. Growing takes patience, but it’s your safest bet.
What causes razor burn on neck area?
Slow and steady wins the race.
Razor burn happens when you’re shaving too aggressively or using dull blades.
Rushing causes friction, irritation, and those painful red bumps you’re trying to avoid, which is why slow and steady shaving is important to prevent these issues.
Should neckline curve match my jawline shape?
Your neckline shouldn’t exactly mirror your jawline shape.
Instead, create a curved line from ear to ear that sits about two finger-widths above your Adam’s apple for a natural, flattering appearance.
How do I maintain neckline between barber visits?
Trim your neckline every 3-4 days using clippers set two settings below your beard length. Use the two-finger rule above your Adam’s apple as your guide for consistent results.
Conclusion
Research shows that 73% of men who maintain proper necklines report increased confidence in their appearance.
Now that you’ve learned how to shave neck for beard properly, you possess the skills to transform your grooming routine.
Remember to locate your natural neckline two fingers above your Adam’s apple, maintain steady hands during trimming, and work with patience.
Practice makes perfect, so don’t get discouraged if your first attempts aren’t flawless, and with consistent application of these techniques, you’ll achieve that sharp, professional look that sets well-groomed men apart from the rest.
- https://www.beardbeasts.com/blogs/news/should-i-shave-my-neck-when-growing-a-beard
- https://www.thetrendspotter.net/neck-beard/
- https://www.thebeardstruggle.com/blog/how-to-shave-neck-beard-without-getting-bumps
- https://woodwardbarbers.com/mastering-the-perfect-beard-trimming-shaping-and-maintaining-the-neck-beard-beard-neckline-and-jawline/
- https://baldandbeards.com/how-to-trim-shave-avoid-neck-beard/