
This site is supported by our readers. We may earn a commission, at no cost to you, if you purchase through links. This content is for general informational and educational purposes only and is not a substitute for professional medical, dermatological, or nutritional advice.

Your lather looks like sad dish soap bubbles, or maybe a dry clump of paste. Either way, the razor drags and your face pays for it.
The fix usually starts with the shaving bowl. A warm bowl, a damp brush, and a few drops of water at a time turn a stiff puck or a scoop of cream into a glossy lather that holds soft peaks. That cushion lets the blade glide instead of scrape.
Learning how to use a shaving bowl properly takes about two minutes of practice. Here’s the full routine, from warming your tools to the last rinse.
Table Of Contents
Key Takeaways
- Build your lather in a warm bowl with a damp brush, so you control the texture before it ever touches your face.
- Fix dry, pasty lather by adding warm water a few drops at a time, and fix thin, bubbly lather by loading more soap instead of adding water.
- Aim for a glossy, Greek-yogurt texture that holds soft peaks, because that cushion lets the razor glide instead of drag.
- Rinse your brush and bowl right after shaving, then hang the brush upside down to dry so it lasts for years and stays mold-free.
How Do You Use a Shaving Bowl?

You use a shaving bowl as a workshop for your lather. Instead of whipping soap up on your face, you build it in the bowl, where you can control every part of it. That control is what separates a thin, bubbly mess from a creamy, shiny lather.
If you’re shopping for one, this guide to the best shaving bowls covers sturdy stainless steel and travel-friendly collapsible options that keep your lather warm.
A shaving bowl lets you craft your lather deliberately, turning frothy bubbles into a smooth, glossy cushion before it ever touches your skin
The steps to use a shaving bowl are simple. First, get your tools ready. Next, load your brush with soap or cream. Then swirl the brush briskly in the lathering bowl, adding water a few drops at a time, until the lather turns glossy and holds soft peaks. Finally, paint it on your face and shave gently. A properly built lather should have a Greek yogurt texture, dense and glossy, so it cushions the blade and lets it glide without resistance.
Each stage matters, and patience pays off. Once you create lather this way, shaves get easier.
Prepare Your Shaving Bowl, Brush, and Skin

Good lather starts before the soap ever touches the brush, so get your three setups done first.
Start with the bowl. Run hot water over it, then shake out the extra. A warm bowl keeps your lather from cooling off mid-shave, and ceramic or stoneware holds that heat best. If yours has ridges inside, even better, since they help lather build faster.
Next, soak your shaving brush in warm water for a few minutes. Shake off the excess before you use it. Skip this, and you’ll end up with watery lather.
For a step-by-step look at getting your face and tools ready, these wet shaving preparation methods cover everything from brush care to lathering.
Now your face. Wash it with warm water, or shave right after a shower. A warm towel held on your skin for a couple of minutes works great too. Finish with a little pre-shave oil, and let it sit while you work.
Load Your Brush With Soap or Cream

Once your brush is damp and your bowl is ready, it’s time to load your brush. How you do it depends on what you’re using, since soap and cream each work a little differently. Here are the two options, so you can pick the steps that match your setup. A good shaving brush for lather with soft, dense bristles holds water well, which makes building a thick, creamy lather much easier with either soap or cream.
Loading Hard Shaving Soap
Say your soap puck has sat dry for a week, and your brush feels stiff against it. Start there. Wet the bristles, shake out the extra water, and swirl firmly on the surface.
Keep going for 30 to 60 seconds, longer for tougher pucks. You want a thick, creamy paste on the tips. If it bubbles like shampoo, add more soap.
Adding Shaving Cream
Cream is easier than soap, so switch gears a little. Skip the long swirl and start small.
- Scoop a pea-sized dollop into the center of your bowl.
- Load your damp brush with moderate pressure and small circles.
- Check that the tips look packed, not buried.
Hard water? Add a touch more cream. Great start.
Build and Adjust Lather in Your Bowl
Once your brush is loaded, it’s time to build your lather. You’ll swirl it in the bowl until it looks creamy and feels slick. If it isn’t quite right, the two fixes below will get it back on track.
Fixing Thick or Dry Lather
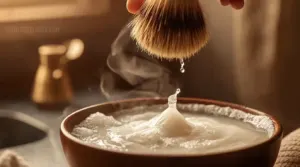
Is your lather clumpy, sticky, and dull? That’s dry lather, and it’s an easy fix. It looks like paste and won’t spread smoothly.
Add warm water a few drops at a time, dripping it in or flicking it from your fingertips. Then work your brush for 10 to 20 seconds. Glossy and slick is your goal.
Fixing Thin or Bubbly Lather

You’ll know your lather is too thin when it looks airy, collapses fast, or leaves big bubbles on top. Don’t add more water. Instead, try these fixes:
- Dip your brush tips in warm water and work it into the lather.
- Swirl in tight circles for 15 to 20 seconds.
- Load more soap if the lather still breaks down.
- Aim for glossy yogurt texture.
Apply The Lather and Shave Gently

Picture a cloud of warm, glossy foam sitting in your bowl, ready to move onto your face. That’s your cue to start.
Dip your brush tips in the lather and sweep it onto damp skin with small, tight circles. Begin at the sideburns, then work toward your chin and neck. Use moderate brush pressure, so the bristles glide but never splay flat. Keep going for 30 to 60 seconds. This softens your whiskers and lifts them upright.
If the lather turns pasty, dip the tips in warm water and keep swirling. Change direction now and then so you don’t miss a spot.
Now shave. Start with the grain and use light strokes. Let the razor’s weight do the work, and rinse the blade often so it stays clear.
Clean, Dry, and Store Your Shaving Tools

Imagine this: you finish a great shave, set the bowl on the counter, and forget it until tomorrow. By morning, dried soap has hardened into a crust. Don’t let that happen. A two-minute routine keeps everything fresh.
Here’s what to do right away:
- Rinse your brush under warm water until the soap runs clear.
- Squeeze the bristles gently, then give the brush a light shake.
- Clean the bowl with warm water and wipe it dry.
Next, hang the brush upside down on a stand. This lets water drain away from the base and helps prevent mold. Make sure everything’s completely dry before you put it away. Store your shaving brush and soap somewhere airy, not damp. Shampoo it monthly, too.
Frequently Asked Questions (FAQs)
Can you use any bowl for shaving?
Yes, almost any bowl will do. A cereal bowl or coffee cup works fine in a pinch. But a ceramic shaving bowl holds heat and has some texture, so your lather builds faster and stays warm.
Can you lather soap directly on your face?
Yes, you can. Face lathering works fine with a loaded brush and small circular motions right on your skin. It’s quicker and needs no bowl, but it’s harder to judge lather consistency before applying.
Which bowl materials hold heat the longest?
Want your lather to stay warm to the last stroke? Go dense. Marble holds heat about three times longer than ceramic, which is itself a strong performer. Stainless steel and timber like teak also do well.
What is the point of a shaving bowl?
A shaving bowl gives you a dedicated space to build thick, creamy lather. You can adjust the water as you go, keep the lather warm, and control your lather texture before it touches your face.
How often should you replace your shaving brush?
Your brush will outlast most of your razors, and probably your patience for them too. A badger hair brush lasts 5 to 10 years, while a synthetic shaving brush often passes Replace it when knots loosen.
Conclusion
Picture your next shave: the bowl is warm, the brush is damp, and the lather sits thick and glossy like whipped cream. The razor glides, and you finish without a single red patch.
That’s what happens once you know how to use a shaving bowl properly. Add water a few drops at a time, and rinse everything when you’re done. Practice builds steady, reliable lather, and good lather builds a calmer morning. Your face agrees.